Category: Guides

  • Benefits of Using Silicone Spatulas for Cooking

    Benefits of Using Silicone Spatulas for Cooking

    I spent twenty years in commercial kitchens where everything was high-speed, high-heat, and absolutely zero nonsense. I’ve seen way too many home cooks walk into a store and buy a twelve-piece set of colorful, flimsy scrapers thinking they’re “stocking up,” only to have half of them melt into a gooey mess the first time they hit a hot pan. It drives me up the wall. Most people treat silicone spatula use like it’s some specialized culinary science, but the truth is much simpler: you don’t need a drawer full of cheap plastic junk; you just need one or two tools that actually respect your cookware and your time.

    I’m not here to sell you on some trendy gadget or a “must-have” kitchen hack you saw on social media. Instead, I’m going to give you the straight truth based on decades of professional service and home organizing. I’ll show you exactly how to select a heavy-duty spatula that won’t snap mid-fold and the most efficient ways to master silicone spatula use for everything from delicate emulsions to scraping every last drop of batter from a bowl. We’re going to focus on buying once and buying right.

    Table of Contents

    The Great Debate Silicone vs Rubber Spatula for Longevity

    The Great Debate Silicone vs Rubber Spatula for Longevity

    I’ve spent enough time in commercial kitchens to know that the wrong tool can ruin a perfectly good pan—and a perfectly good mood. When people ask me about the silicone vs rubber spatula debate, they’re usually looking for the cheapest option. Don’t fall for that. Rubber spatulas were the standard for years, but they have a fatal flaw: they degrade. They crack, they absorb odors, and they can’t handle high heat without warping or melting into a sticky mess.

    If you want tools that actually survive a decade of heavy use, silicone is the clear winner. Because silicone is a much more robust material, it serves as one of the most reliable high temperature cooking tools you can own. You can scrape a hot pan of caramel or fold heavy batter without worrying about the edge fraying. Most importantly, they are completely non-stick cookware safe, meaning you won’t be stripping the coating off your expensive pans just to get every last bit of sauce out of the bowl. Invest in the silicone; your pans (and your wallet) will thank you.

    High Temperature Cooking Tools That Actually Stand the Test

    High Temperature Cooking Tools That Actually Stand the Test

    If you’ve ever watched a cheap rubber spatula curl and melt into a puddle of goo against the side of a hot sauté pan, you know exactly why I’m so particular about this. When I was managing commercial kitchens, we didn’t have the luxury of replacing tools every week. You need high temperature cooking tools that can handle the heat of a heavy skillet without losing their shape or, worse, leaching chemicals into your food. High-quality, food-grade silicone is the only way to go here; it can withstand temperatures that would turn traditional rubber into a mess in seconds.

    Beyond just surviving the heat, you have to consider what you’re actually cooking in. One of the biggest perks of upgrading to a heavy-duty silicone model is that they are strictly non-stick cookware safe. I’ve seen too many people ruin an expensive ceramic or Teflon pan because they were using a stiff, metal-edged tool or a low-grade plastic scraper. A solid silicone spatula gives you that perfect edge for scraping every last bit of sauce from the pan without scratching the surface. It’s about protecting your investment, both in your tools and your pans.

    Five Ways to Stop Treating Your Spatula Like a Disposable Tool

    • Stop using your silicone spatula to scrape the bottom of a dry, scorching hot pan; even the high-heat versions have their limits, and you’ll eventually end up with a shredded edge that’s useless for cleaning.
    • Treat your spatula like a real tool by hand-washing it when you can, rather than tossing it in the dishwasher every single night; the harsh detergents and high-heat cycles are what eventually make the silicone feel gummy and cheap.
    • When you’re mixing heavy doughs or thick batters, don’t rely on a flimsy, thin-head spatula; you need something with a bit of structural integrity so you aren’t fighting the bowl the entire time.
    • Check your edges once a month—I always do this while I’m cleaning up; if you see any deep nicks or peeling, it’s time to retire it before it starts leaving little bits of debris in your food.
    • Use the flat edge for what it was actually designed for: scraping every last drop out of a jar or bowl. If you’re just using it to stir, you’re missing half the utility of the tool.

    The Bottom Line on Your Spatula Selection

    Stop treating all spatulas the same; use high-heat silicone for your pans and save the delicate rubber tools for mixing batter so you aren’t constantly replacing melted junk.

    Look for solid-core silicone rather than hollow handles—if it feels light and flimsy in your hand, it’s going to snap right when you’re trying to scrape a heavy sauce.

    Invest in quality over quantity by buying one or two professional-grade tools that can handle a lifetime of heat, rather than a cheap 12-piece set that ends up in a landfill by next year.

    Stop Treating Your Tools Like Disposable Junk

    “I’ve spent two decades watching people toss out perfectly good kitchen setups because they bought a cheap, flimsy spatula that melted during a simple sauté. If you want a kitchen that actually works, stop buying for the moment and start buying for the decade; a high-heat silicone spatula isn’t a luxury, it’s the baseline for anyone who actually intends to cook.”

    Rosalind Hayter

    Get the Right Tool and Get Out of the Way

    Get the Right Tool and Get Out of the Way.

    At the end of the day, choosing a silicone spatula isn’t about following some fancy culinary trend; it’s about basic kitchen logic. We’ve covered why you need to ditch the old-school rubber tools that warp under heat and why investing in high-quality, food-grade silicone is the only way to ensure your tools can actually handle a hot pan without melting into a puddle of useless plastic. If you pick a solid, heat-resistant model and treat it with a bit of respect, it will become the workhorse of your kitchen for years. Stop overcomplicating your drawer and focus on buying tools that actually perform the way they are supposed to.

    I’ve seen too many people clutter their counters with specialized gadgets that promise the world but fall apart after three washes. My advice is simple: keep your kit lean, keep it high-quality, and focus on your technique rather than your equipment. A good spatula is just one piece of the puzzle, but it’s a piece that makes the whole process smoother. Once you have the right foundation, you can stop fighting your tools and start enjoying the rhythm of cooking. Now, put the notebook away, grab your spatula, and go make something worth eating.

    Frequently Asked Questions

    Can I actually use a silicone spatula for high-heat sautéing without it warping or smelling like burnt chemicals?

    You can, but you have to be smart about it. If you’re using a cheap, generic spatula from a big-box store, you’re going to smell that chemical burn because they use low-grade fillers. I only trust high-quality, 100% food-grade silicone. It’s heat-stable and won’t warp, but don’t treat it like a metal turner. Use it to fold and scrape, not to flip a heavy steak. Respect the tool, and it’ll respect the heat.

    How do I tell the difference between a cheap, filler-heavy silicone tool and one that's actually food-grade and durable?

    Don’t just trust the shiny packaging; you have to use your senses. First, do the “pinch test.” Grab the head of the spatula and squeeze it. If it feels gummy, or if you see tiny white streaks appearing in the material, that’s filler. Real, food-grade silicone should be consistent and spring back immediately. Finally, check the weight. Cheap tools feel suspiciously light and hollow, like they’re mostly air and recycled junk.

    Are silicone spatulas dishwasher safe, or am I going to end up with a sticky, melted mess in my drying rack?

    Here’s the short answer: yes, most quality silicone spatulas are dishwasher safe, but don’t just toss them in and walk away. If you’re using cheap, multi-material tools where the silicone is glued to a plastic handle, that heat can eventually break down the bond, leaving you with a sticky, gooey nightmare. Stick to solid-core silicone or high-grade seamless designs. They’ll handle the high-heat cycle without melting into a mess in your rack.

  • The Importance of Prep Bowls for Mise en Place

    The Importance of Prep Bowls for Mise en Place

    I spent twenty years in commercial kitchens where every second mattered, and if there’s one thing that drives me crazy, it’s seeing people clutter their counters with “smart” gadgets that promise to revolutionize cooking but actually just get in the way. You don’t need a motorized vegetable slicer or a computerized scale to master a recipe; what you actually need is a system. Most people overlook the fundamental prep bowls utility in favor of flashy, expensive nonsense, but in a professional line, those simple bowls are what keep a cook from spiraling into chaos. When you’re mid-service and the pan is smoking, the last thing you want to do is hunt for a stray clove of garlic or a handful of chopped shallots hidden in a pile of clutter.

    I’m not here to sell you on a trendy new kitchen set or some overpriced silicone collection that will crack in six months. My goal is to show you how to build a functional foundation using tools that actually work as hard as you do. I’m going to walk you through exactly how to select a few durable, versatile pieces that will streamline your workflow and stop the countertop madness for good.

    Table of Contents

    Beyond Plastic Why Mise en Place Technique Benefits Every Cook

    Beyond Plastic Why Mise en Place Technique Benefits Every Cook.

    When I was managing large-scale catering events, the difference between a smooth service and a total meltdown wasn’t the skill of the cooks—it was their discipline. We lived by the mise en place technique, which is really just a fancy way of saying “everything in its place.” When you adopt this mindset, you aren’t just tidying up; you are actively improving your culinary workflow efficiency. Instead of standing over a hot pan, frantically chopping an onion while your garlic burns, you have everything measured and ready to go. It turns cooking from a chaotic scramble into a controlled, rhythmic process.

    I see so many people mistake meal prep containers vs prep bowls, thinking they are interchangeable. They aren’t. Those plastic Tupperware tubs are for leftovers in the fridge, not for the heat of the moment. For actual cooking, you need open, accessible vessels. Whether you opt for the durability of stainless steel vs ceramic prep bowls, the goal is the same: having your ingredients visible and reachable. When you stop fighting your ingredients and start respecting the process, you’ll find that the kitchen finally starts working for you.

    Professional Chef Prep Methods for a Seamless Culinary Workflow

    Professional Chef Prep Methods for a Seamless Culinary Workflow

    When I was running commercial kitchens, the chaos didn’t come from the recipes; it came from the lack of order. Professional chef prep methods aren’t about being fancy; they are about controlling the environment before the heat even hits the pan. In a high-volume setting, we don’t “wing it.” We rely on a strict discipline where every diced onion, minced garlic clove, and measured spice sits in its own designated spot. This level of culinary workflow efficiency ensures that you aren’t frantically chopping shallots while your butter is already browning in the skillet.

    To replicate this at home, you need to move away from the idea of “cooking as you go” and embrace a more structured approach. I always tell my clients to stop treating prep like an afterthought. Instead of grabbing random Tupperware, invest in a set of uniform vessels that stay on your counter. Whether you prefer the durability of stainless steel vs ceramic prep bowls, the goal is the same: visual clarity. When your ingredients are laid out clearly, you stop reacting to the stove and start commanding it.

    Five Ways to Stop the Countertop Chaos

    • Ditch the mismatched Tupperware for a uniform set of stainless steel or heavy ceramic bowls; when they stack neatly, you reclaim your cabinet space and your sanity.
    • Use them for more than just ingredients—I keep a small set specifically for holding garlic cloves, ginger scraps, or even small tools like my vegetable peeler to keep them off the messy prep surface.
    • Stop “eyeballing” your seasonings; use small ramekins to pre-measure your spices so you aren’t frantically shaking jars while your garlic is already burning in the pan.
    • Invest in sizes that actually make sense for your workflow, ranging from tiny vessels for salt and pepper to medium bowls for chopped aromatics, rather than buying a massive, useless set of identical sizes.
    • Clean as you go by using your prep bowls as temporary “waste stations” for onion skins and herb stems, keeping your main cutting board clear for actual cooking.

    The Bottom Line on Prep Bowls

    Invest in a set of durable, nesting bowls made of glass or stainless steel rather than cheap plastic that stains and cracks after three months.

    Use prep bowls to master mise en place, which reduces cooking stress and prevents those frantic, mid-recipe scrambles for ingredients.

    Keep your workflow clean by using bowls to contain your mess before it ever hits your cutting board or countertop.

    ## The Real Purpose of a Prep Bowl

    “A prep bowl isn’t just a container; it’s a way to reclaim your headspace. When you stop chasing ingredients mid-sauté and start working with everything already measured and waiting, you stop reacting to your recipe and start actually enjoying the process.”

    Rosalind Hayter

    Getting Your Kitchen Under Control

    Getting Your Kitchen Under Control with prep.

    At the end of the day, prep bowls aren’t just another set of dishes to clutter your cabinets; they are the fundamental building blocks of a disciplined kitchen. We’ve talked about how moving away from flimsy plastic and embracing the mise en place method can transform your cooking from a chaotic scramble into a controlled, professional process. By taking those extra two minutes to measure and portion your ingredients before the heat hits the pan, you eliminate the stress of burnt garlic or missing spices. It’s about investing in your workflow so that the actual act of cooking becomes something you enjoy, rather than a race against the clock.

    My advice is simple: stop overcomplicating your kitchen with expensive gadgets that promise magic but deliver nothing. You don’t need a specialized machine for every single task; you just need a few solid, reliable tools and the habit of using them correctly. Start small, buy quality materials like stainless steel or heavy ceramic that can stand the test of time, and watch how much more peace you find in your culinary routine. A functional kitchen isn’t built on trends—it’s built on smart habits and intentionality. Now, go clear off that counter and get organized.

    Frequently Asked Questions

    I don't have a lot of counter space; how many different sizes of prep bowls do I actually need to get by?

    Don’t let a small countertop convince you that you need a massive set. You really only need three sizes to cover almost any recipe. Grab one large bowl for bulk chopping, a medium one for your main aromatics, and a small one for spices or garnishes. Anything more is just clutter waiting to happen. Stick to stainless steel or heavy ceramic—they stack better, last longer, and won’t take up permanent residence in your cabinets.

    Should I invest in heavy ceramic bowls, or are lightweight stainless steel ones better for a busy workflow?

    If you’re working in a tight space, go with stainless steel. They’re lightweight, stackable, and—most importantly—they won’t shatter if you knock them off a counter during a rush. I’ve seen too many people break expensive ceramic bowls just because they were too bulky to handle quickly. For a high-speed workflow, you want tools that are indestructible and easy to move. Save the heavy ceramics for serving; use steel for the heavy lifting.

    Is there a way to use prep bowls for organization in my pantry or fridge if I'm not actively cooking?

    Absolutely. In my experience, prep bowls aren’t just for the stovetop; they’re secret weapons for containment. I use small stainless steel or glass bowls in the fridge to corral loose items like cherry tomatoes, olives, or those awkward handfuls of berries that usually end up rolling around the crisper drawer. In the pantry, they’re perfect for grouping small packets of spices or tea bags. It keeps things visible and prevents that “bottom-of-the-bin” clutter.

  • Using a Kitchen Timer to Improve Cooking

    Using a Kitchen Timer to Improve Cooking

    I’ve spent twenty years in commercial kitchens where timing wasn’t just a suggestion—it was the difference between a successful banquet and a total disaster. I see people today pouring money into high-tech, touch-screen smart ovens that promise to do everything, yet they still end up with scorched proteins and gummy pasta. They think they need a digital revolution, but they’re completely overlooking the fundamental kitchen timer importance that actually keeps a kitchen running. You don’t need a gadget that connects to your Wi-Fi; you need a tool that actually tells you when to move.

    In this post, I’m stripping away the marketing fluff to talk about why a simple, reliable timer is the most underrated tool in your drawer. I’m going to show you how to stop relying on “vibes” and start building the disciplined habits that professional chefs use every single day. My goal isn’t to sell you more plastic junk, but to help you understand how the right tools can turn your cooking from a stressful guessing game into a predictable craft.

    Table of Contents

    Mastering Culinary Timing Accuracy for Real Results

    Mastering Culinary Timing Accuracy for Real Results

    In my years managing high-volume catering lines, I learned that the difference between a five-star meal and a mediocre one often comes down to mere seconds. Achieving true culinary timing accuracy isn’t about being obsessive; it’s about respect for your ingredients. When you rely on your gut feeling, you’re playing a dangerous game with your dinner. By using a dedicated timer, you move away from guesswork and toward a repeatable process. This is one of those fundamental cooking consistency tips that separates a chaotic kitchen from a professional-grade one.

    The real payoff, however, is in the quality of the plate. We’ve all been there—pulling a piece of salmon out only to realize it’s gone from succulent to chalky in a heartbeat. Preventing overcooked food is much easier when you aren’t constantly hovering over the stove, distracted by prep work or a conversation. Instead of treating a timer like a crutch, treat it as a tool for meal preparation efficiency. It allows you to multitask without the anxiety of losing control, ensuring every component of your meal hits the table at its absolute peak.

    Preventing Overcooked Food With Reliable Tools

    Preventing Overcooked Food With Reliable Tools

    There is nothing quite as disheartening as pulling a beautiful piece of protein out of the oven only to find it’s turned into a dry, unpalatable sponge. I’ve seen it happen in professional catering kitchens, and I’ve seen it happen to home cooks who think they can “just eyeball it.” Relying on your intuition is fine for simmering a sauce, but when you’re dealing with precise heat, you need a fallback. Preventing overcooked food isn’t about being a perfectionist; it’s about respecting the ingredients you worked so hard to prepare.

    A reliable timer acts as your safety net, allowing you to focus on the rest of your meal prep without that nagging anxiety about what’s happening on the stove. When you integrate a dedicated tool into your workflow, you aren’t just following a recipe—you are building cooking consistency tips into your daily routine. Instead of constantly hovering over the oven door, you can step away, prep your vegetables, or set the table, knowing that a mechanical click or a sharp beep will pull you back at exactly the right moment.

    My Rules for Using Timers Without Losing Your Mind

    • Stop relying on your phone. Every time you pick up your smartphone to check a timer, you’re one notification away from a ten-minute distraction. Get a dedicated, physical timer that sits right on your counter where you can actually see it.
    • Use multiple timers for complex meals. If you’re roasting a chicken while simmering a sauce, don’t try to track both in your head. Set one for the main event and another for the delicate stuff; it prevents that frantic “wait, what’s in the oven?” panic.
    • Build the habit of “active timing.” Don’t just set the clock and walk away to watch TV. Set the timer, then use those minutes to prep your next ingredient or clear your cutting board. The timer should dictate your workflow, not just your cooking time.
    • Don’t trust the “eyeball method” for everything. I know, I know—you think you can tell when a steak is medium-rare just by looking. You can’t. Use your tools to build consistency so you can actually replicate a good meal every single time.
    • Always account for “carryover cooking.” A timer tells you when to take the pan off the heat, but it doesn’t account for the heat still working inside the food. Use your timer as a signal to start checking temperatures, not just as a final alarm.

    The Bottom Line: Building a Kitchen That Works for You

    Stop relying on your phone or your memory; a dedicated, physical timer removes the distraction and builds the discipline you need to master timing.

    Invest in quality, simple tools that won’t break after a month of heavy use—reliability is more important than fancy digital displays.

    Use timing as a way to build better cooking habits, ensuring you’re focused on the food rather than constantly guessing if it’s done.

    The Real Cost of Guesswork

    “A kitchen timer isn’t just a gadget to track minutes; it’s the tool that turns frantic guesswork into professional discipline. If you can’t trust your clock, you can’t trust your cooking.”

    Rosalind Hayter

    Stop Guessing and Start Cooking

    Stop Guessing and Start Cooking with timers.

    At the end of the day, a kitchen timer isn’t just another piece of plastic clutter to add to your drawer; it is a tool for discipline. We’ve talked about how precise timing prevents ruined proteins and how a reliable device helps you manage multiple pots without losing your cool. When you stop relying on “vibes” or your internal clock—which, let’s be honest, is usually wrong when things get busy—you remove the anxiety from the cooking process. Investing in a solid, mechanical timer or a high-quality digital one is about more than just minutes and seconds; it is about building the professional habits that separate a chaotic cook from someone who actually enjoys their time at the stove.

    My advice is simple: don’t overcomplicate your setup, but don’t neglect the basics either. You don’t need a smart-fridge that syncs with your calendar to tell you when the bread is done. You just need a tool that works every single time you press the button. Once you make timing a non-negotiable part of your routine, you’ll find that your food tastes better and your kitchen feels much more under control. Trust the tool, trust the process, and stop letting a few minutes of guesswork stand between you and a perfect meal. Your kitchen should be a place of precision and joy, not a source of constant stress.

    Frequently Asked Questions

    Should I stick with a basic mechanical timer or is a digital one actually worth the extra cost?

    Look, I’ve seen enough expensive digital gadgets end up in the junk drawer to know the truth. If you want something that works every single time without needing a software update, stick with a solid mechanical timer. They’re tactile, they don’t rely on batteries, and they don’t fail when things get messy. Unless you absolutely need a countdown for multiple simultaneous tasks, don’t waste your money on a fancy digital screen. Simple is reliable.

    Is it better to use a dedicated kitchen timer rather than just relying on my smartphone?

    Look, I get it—your phone is always in your hand. But if you want a kitchen that actually functions, get a dedicated timer. A smartphone is a distraction machine; one text notification and suddenly you’ve forgotten the roast is in the oven. A standalone timer is a tool, not a toy. It stays in your workspace, it doesn’t ring with a social media alert, and it builds the focused habit a real cook needs.

    How many different timers do I really need to keep on my counter to avoid clutter?

    Look, I’ve seen too many cluttered counters filled with single-use plastic junk. You don’t need a gadget for every task. One reliable, analog kitchen timer is your workhorse—something with a physical dial that you can hear from across the room. If you’re serious about precision, maybe keep one digital probe thermometer for meats. Beyond that? Clear the deck. A clean workspace is just as important as the tools sitting on it.

  • Choosing the Right Skillet for Your Cooking Style

    Choosing the Right Skillet for Your Cooking Style

    I spent twenty years in commercial kitchens where the sound of a heavy pan hitting a burner was the heartbeat of the room, and let me tell you, nothing kills a cook’s spirit faster than a flimsy, overpriced piece of “designer” cookware that warps the first time it hits high heat. I see it all the time now in home kitchens: people dropping hundreds of dollars on trendy, colorful pans that promise the world but die within a year. Most advice regarding skillet selection is buried under layers of marketing fluff and unnecessary complexity, designed to make you feel like you need a chemistry degree just to sear a steak. It’s a scam, and frankly, it’s exhausting.

    I’m not here to sell you on a lifestyle or a flashy gadget you’ll end up hiding in the back of a cluttered cabinet. My goal is to cut through the noise and give you the practical, hard-earned truth about what actually belongs in your kitchen. I’ll show you how to navigate skillet selection based on durability and performance, not pretty packaging. We’re going to focus on the tools that can handle a lifetime of heat and heavy use, so you can stop wasting money and start actually cooking.

    Table of Contents

    Cast Iron vs Stainless Steel Choosing Your Lifetime Companion

    Cast Iron vs Stainless Steel Choosing Your Lifetime Companion

    I’ve spent enough hours in commercial kitchens to know that the “which is better” debate is usually a distraction. The truth is, you don’t need to choose one; you need to know when to reach for each. When I’m searing a thick ribeye or making cornbread, I’m grabbing my seasoned cast iron every single time. It holds heat like a beast, which is vital for that perfect crust, and unlike those cheap pans you see in big-box stores, it doesn’t have a nonstick coating longevity issue because it doesn’t have a coating at all. It’s just iron and oil, and it’ll outlive us both.

    However, if you’re making a delicate pan sauce or boiling something acidic like a tomato reduction, cast iron is your enemy. That’s where stainless steel shines. When comparing cast iron vs stainless steel, you have to look at how they handle heat. Stainless steel offers superior control for precision work, even if the heat conductivity in pans feels a bit more temperamental if you aren’t paying attention. Invest in a high-quality stainless skillet for your sauces, and keep the iron for the heavy lifting.

    Understanding Heat Conductivity in Pans for Better Cooking

    Understanding Heat Conductivity in Pans for Better Cooking

    If you don’t understand how heat moves through your pan, you’re going to end up with a meal that’s burnt on the outside and raw in the middle. This is where most home cooks stumble. You have to realize that heat conductivity in pans isn’t just a science term; it’s the difference between a perfect sear and a smoky mess. When I was managing commercial kitchens, we didn’t just pick pans because they looked pretty; we picked them based on how they responded to the flame.

    Copper and aluminum are the speed demons of the kitchen—they heat up and cool down almost instantly. This is great for delicate sauces where precision is everything. However, if you’re looking for durable cookware for everyday use, you need to understand the trade-off. Heavy materials like cast iron have much lower conductivity, meaning they take longer to get hot, but they hold onto that heat like a grudge. Once that iron is up to temperature, it stays there, providing a steady, even heat that won’t drop the moment you toss in a cold steak. It’s all about matching the tool to the task.

    Five Rules for Buying a Skillet That Won't End Up in a Landfill

    • Check the weight before you commit. A skillet that feels like a toy isn’t going to hold heat properly; you want something with enough heft to sit steady on the burner and distribute temperature evenly.
    • Ignore the “non-stick” marketing hype. Most of those chemical coatings start peeling within six months. If you want a pan that actually lasts, stick to seasoned cast iron or high-quality stainless steel.
    • Look for a flat bottom, not a rounded one. I’ve seen too many cheap pans with slightly bowed bases that wobble on a glass cooktop. If it doesn’t sit flush, you’re losing heat and wasting energy.
    • Mind the handle design. If the handle is too thin, it’ll dig into your palm when you’re trying to flip something heavy. If it’s too wide, it might not fit comfortably in your grip. Test the ergonomics if you can.
    • Don’t buy a massive set when one good pan will do. Most people don’t need a five-piece skillet collection. Pick one heavy-duty 10 or 12-inch pan that can handle everything from a morning omelet to a Sunday sear.

    My Rules for a Kitchen That Actually Works

    Stop chasing trends and start looking at weight; a quality skillet should feel substantial in your hand, not like a cheap piece of stamped tin.

    Match the pan to the task, not the marketing—use stainless steel when you need precision and control, and save the cast iron for the heavy lifting and high heat.

    Prioritize durability over convenience; I’d much rather spend more upfront on a piece of cookware that lasts thirty years than replace a “convenient” non-stick pan every twelve months.

    The Real Cost of a Cheap Pan

    “A skillet isn’t a gadget you swap out when the coating peels; it’s a tool you earn through years of use. If you’re buying a pan that you expect to toss in a year, you aren’t investing in your kitchen—you’re just subsidizing a landfill.”

    Rosalind Hayter

    Making the Right Call

    Making the Right Call with quality skillets.

    At the end of the day, choosing a skillet isn’t about following the latest kitchen trend or buying the most expensive set on the shelf. It’s about understanding how heat moves through your food and matching that to the material that fits your lifestyle. Whether you decide on the rugged, seasoned reliability of cast iron or the precise, responsive control of stainless steel, make sure you are buying for longevity rather than convenience. Don’t get distracted by flashy coatings that will flake off in six months; focus on the weight, the heat distribution, and the build quality. If you invest in tools that can actually handle the heat, you won’t find yourself replacing them every single year.

    Once you have that perfect pan sitting on your stovetop, the real work begins. A great skillet is a partner, not a magic wand, and it only performs as well as the person wielding it. I’ve spent decades in professional kitchens, and I can tell you that the most expensive pan in the world won’t save a cook who lacks patience or technique. Master your heat, learn how your specific tools react to the flame, and treat your gear with respect. If you do that, you aren’t just building a kitchen; you are building a foundation for a lifetime of good meals.

    Frequently Asked Questions

    Do I really need a specialized pan for every type of food, or can one good skillet do it all?

    Look, I see people cluttering their cabinets with single-use gadgets every single day, and it drives me crazy. No, you don’t need a specialized pan for every recipe. If you invest in one high-quality, heavy-bottomed skillet, you can handle about eighty percent of your cooking. A good pan is a workhorse, not a collection of trophies. Buy one that does the job well, and stop letting “specialty” marketing dictate your kitchen layout.

    How much weight should I actually be looking for in a pan before it becomes more of a workout than a tool?

    Look, I’ve seen too many people buy a heavy-duty skillet only to let it gather dust because their wrists can’t handle the lifting. You want heft—it means better heat retention—but it shouldn’t feel like you’re lifting a dumbbell. For a standard 10-inch pan, aim for something between 3 and 5 pounds. If you can’t comfortably maneuver it from the stovetop to the sink, it’s not a tool; it’s a burden.

    Is it worth the extra money to buy a brand-name skillet, or am I just paying for a fancy logo?

    Look, I’ve seen enough “bargain” pans end up in a landfill to know the truth. You aren’t just paying for a logo; you’re paying for the quality of the metal and the precision of the construction. A cheap, thin skillet warps the moment it hits high heat, and once that happens, it’s trash. If a brand name means better heat distribution and a handle that won’t snap off, it’s an investment, not an ego trip.

  • How to Use a Salad Spinner to Dry Greens

    How to Use a Salad Spinner to Dry Greens

    I spent twenty years in commercial kitchens where efficiency wasn’t a suggestion—it was survival. I’ve seen countless home cooks lose their minds over flimsy, $40 plastic contraptions that crack the moment you put any real pressure on them, leaving you with nothing but a puddle of water and a pile of bruised lettuce. Most people think proper salad spinner use is just about spinning some greens, but if you’re using a gadget that feels like it was made for a dollhouse, you’re doing it wrong. You don’t need a high-tech gadget with eighteen different settings; you need a tool that actually does the job without adding more clutter to your cabinets.

    I’m not here to sell you on the latest kitchen trend or some over-engineered piece of junk. My goal is to show you how to select a heavy-duty model that will actually last a decade and, more importantly, how to master salad spinner use so your dressings actually cling to the leaves instead of sliding off into a watery mess. We’re going to focus on the practical mechanics of getting your greens bone-dry and crisp, because a good kitchen is built on right tools and even better habits.

    Table of Contents

    The Proper Way of Cleaning Leafy Greens Properly

    The Proper Way of Cleaning Leafy Greens Properly.

    First, let’s get one thing straight: you cannot just rinse your greens under a tap and call it a day. If you’re finding grit at the bottom of your bowl, you aren’t cleaning leafy greens properly. I always start by filling a large bowl with cold water and submerging the leaves. Give them a gentle swirl with your hands to encourage any hidden sediment to sink to the bottom. This is the most effective method for removing dirt from salad leaves that tend to hide in the tight crevices of radicchio or romaine hearts.

    Once the water runs clear, it’s time to tackle the moisture. This is where most people fail. If you try a salad spinner vs drying greens by hand, you’ll quickly realize that hand-drying is a recipe for bruised, limp lettuce. A good spinner uses centrifugal force to pull the water away without crushing the delicate structure of the leaf. If you’re looking for the best way to wash spinach or delicate spring mixes, the spinner is your best friend for keeping everything crisp and ready for your meal prep containers.

    Removing Dirt From Salad Leaves Without the Mess

    Removing dirt from salad leaves without the mess.

    If you’ve ever sat down to a salad only to find a tiny, gritty speck of sand halfway through your bite, you know how much it ruins the experience. Most people make the mistake of just rinsing their greens under the tap and calling it a day, but that’s not enough. To truly master removing dirt from salad leaves, you need to use a bowl deep enough to allow the leaves to dance. Fill a large basin with cold water, submerge your greens, and give them a gentle swirl. Let them sit for a minute; the heavier grit will sink to the bottom, leaving the clean leaves floating near the top.

    Once the sediment has settled, lift the greens out with your hands rather than pouring the whole bowl out, which just sends your clean leaves back into the dirt. Now comes the part where most people fail: the drying stage. While you can try a salad spinner vs drying greens by hand, the spinner is the only way to ensure you aren’t left with a soggy, unappetizing mess. A quick spin is the most efficient way to get that moisture off so your dressing actually sticks to the leaves instead of pooling at the bottom of the bowl.

    Stop Treating Your Spinner Like an Afterthought: 5 Pro Tips for Better Greens

    • Buy a heavy-duty model with a reliable mechanism. I’ve seen too many flimsy plastic spinners crack under pressure or lose their grip after three months; invest in something with weight and a sturdy base that won’t slide across your counter.
    • Don’t overload the basket. If you pack the greens in too tight, the centrifugal force won’t reach the leaves in the center, leaving you with a soggy mess at the bottom and dry leaves at the top. Work in batches.
    • Spin until you hear the sound change. You’ll know you’re done when the “sloshing” sound turns into a consistent, high-pitched whir. If it sounds heavy, there’s still water clinging to those leaves.
    • Use the spinner as a storage hack. Once your greens are bone-dry, toss them back into the spinner lined with a clean kitchen towel and pop it in the fridge. It keeps the moisture levels regulated so your lettuce doesn’t turn into slime by Tuesday.
    • Clean the mechanism immediately. Dried-on residue or tiny bits of leaf stuck in the gears will eventually cause the spinner to jam. Rinse it out right after use—don’t let it sit in the sink.

    My Rules for a Better Salad

    Invest in a heavy-duty spinner with a stable base; if it slides around your counter every time you pull the cord, it’s just more clutter you don’t need.

    Don’t rush the drying process—any leftover moisture is just a death sentence for your dressing, leaving you with a soggy, sad mess instead of a crisp salad.

    Treat your greens with respect by washing them in cold water and drying them thoroughly before they ever touch a bowl, or you’re just wasting good produce.

    ## The Truth About Your Salad

    “A salad spinner isn’t just another plastic gadget to clutter your drawer; it’s the difference between a crisp, professional-grade salad and a soggy, pathetic mess that ruins your dressing before you even take a bite.”

    Rosalind Hayter

    Stop Overcomplicating Your Greens

    Stop Overcomplicating Your Greens with salad spinners.

    At the end of the day, using a salad spinner isn’t about adding another step to your prep; it’s about doing the job right the first time. We’ve covered how to properly wash your greens to remove grit and how to use the spinner to ensure they are bone-dry before they hit the bowl. Remember, if your leaves are still damp, your dressing will just slide right off and pool at the bottom of the plate, leaving you with a soggy, tasteless mess. Invest in a sturdy, high-quality spinner that doesn’t wobble on your counter, and make the proper drying process a non-negotiable part of your routine. It’s a small habit that makes a massive difference in the final result.

    I know it can feel like just another piece of equipment to clean, but I promise you, once you get into the rhythm of it, it becomes second nature. A kitchen is only as good as the systems you put in place to make your life easier. Don’t let a flimsy piece of plastic or a lazy habit stand between you and a fresh, crisp meal. Focus on the fundamentals of preparation and buy tools that actually serve a purpose. When you respect your ingredients and your process, the food tastes better. It really is that simple.

    Frequently Asked Questions

    Can I use a salad spinner to dry anything other than leafy greens, like herbs or berries?

    Don’t Limit Yourself: Using Your Spinner for More Than Just Lettuce

    How do I clean the spinner itself so it doesn't collect old vinegar or lettuce residue?

    Don’t let that spinner become a breeding ground for old vinegar or slimy lettuce bits. After every use, I pull the basket out of the bowl and give both a quick scrub with warm, soapy water. If you’ve been using a vinaigrette, pay extra attention to the tiny holes in the basket—that’s where the residue hides. Rinse it thoroughly and let it air dry completely before putting it away. No sense in storing a damp, smelly mess.

    Is there a way to dry greens if my spinner is too small for the amount of produce I have?

    If you’re trying to cram a mountain of kale into a tiny spinner, stop. You’ll just bruise the leaves and end up with a wet mess. Instead, use the towel method. Spread your greens out on a clean, lint-free kitchen towel or a large linen tea towel. Gently pat them dry or roll them up loosely to squeeze out the excess moisture. It takes a minute longer, but it’s far more effective than fighting a cramped gadget.

  • Selecting the Right Grater for Different Ingredients

    Selecting the Right Grater for Different Ingredients

    I’ve spent twenty years in commercial kitchens where time is money and a dull tool is a liability, so nothing irritates me more than seeing a kitchen drawer stuffed with cheap, flimsy gadgets. You’ll see them in every big-box store: those colorful, plastic-handled contraptions that promise to do everything from zesting lemons to shredding cheese, yet they all end up in the landfill within six months. Most people think they need a dozen different grater varieties to handle every recipe, but honestly? That’s just expensive clutter that gets in your way when you’re actually trying to cook a real meal.

    I’m not here to sell you on the latest gadget or some high-tech electric nonsense you’ll use exactly once. Instead, I’m going to show you which professional-grade tools are actually worth your hard-earned money and which ones are just marketing hype. I’ll break down the few essential pieces you truly need to handle everything from hard parmesan to delicate citrus, focusing on durability and real-world function. Let’s cut through the noise and build you a kit that actually works.

    Table of Contents

    Stainless Steel Kitchen Tools Worth the Investment

    Stainless Steel Kitchen Tools Worth the Investment

    If you’re going to spend your hard-earned money on anything, make it stainless steel kitchen tools. I’ve seen enough cheap, coated metal peel and flake into food during my years in commercial kitchens to know that durability isn’t a luxury—it’s a necessity. A high-quality stainless steel grater won’t rust, won’t bend under pressure, and won’t end up in a landfill after six months of heavy use.

    When it comes to actual utility, you really only need two reliable pieces. First, a sturdy box grater is your workhorse for the heavy lifting, like handling blocks of cheddar or large carrots. However, if you want to elevate your cooking, you need to understand the difference between a box grater vs microplane. While the box grater is perfect for fine vs coarse shredding of vegetables and cheese, a microplane is indispensable for delicate tasks. I use mine daily for everything from grating fresh ginger to perfecting my citrus zesting techniques. Skip the electric nonsense; a manual, heavy-duty tool gives you the control you need and will likely outlive the house you’re cooking in.

    Manual vs Electric Graters Why Simplicity Wins

    Manual vs Electric Graters Why Simplicity Wins

    I see people dragging bulky, motorized graters out of their pantry once a year, only to let them gather dust because they’re a nightmare to clean. When it comes to the debate of manual vs electric graters, my professional opinion is simple: stick to the manual tools. Electric versions take up precious counter space and often lack the precision you need for delicate tasks. If you want to master professional-level citrus zesting techniques or finely grate a block of aged Parmesan, a motor is just going to create a mess and uneven chunks.

    A high-quality manual setup gives you total control over your texture. Whether you are looking for fine vs coarse shredding for a batch of hash browns or a light dusting of nutmeg, your hands provide the tactile feedback a machine can’t match. I’ve seen too many “time-saving” gadgets end up in the landfill because they were more trouble than they were worth. Buy one solid box grater and a dedicated microplane; they’ll last you decades and won’t require a dedicated electrical outlet just to shave a bit of ginger.

    My Rules for Choosing a Grater You’ll Actually Keep

    • Stop collecting specialized graters for every single ingredient. You don’t need a dedicated tool for nutmeg, one for ginger, and another for garlic. A single, high-quality box grater with varying hole sizes will handle 90% of your needs without cluttering your drawers.
    • Prioritize heavy-duty stainless steel over anything with a plastic handle. In my years managing catering lines, I saw enough cheap, lightweight tools snap under pressure. A heavy handle gives you better leverage and, more importantly, it won’t crack in the dishwasher.
    • Look for a “microplane” style tool for your fine zesting and hard cheeses. While the box grater is your workhorse, a slim, long-blade zester is indispensable for citrus and parmesan. Just make sure it has a sturdy grip; you don’t want your hand slipping mid-zest.
    • Check the “rim” design before you buy. If you’re looking at a box grater, ensure it has a wide, stable base or a non-slip edge. There is nothing more frustrating—or dangerous—than a grater that slides around your cutting board while you’re trying to shred a block of cheddar.
    • Think about cleaning before you think about the price tag. Avoid any grater with overly intricate, decorative patterns in the metal. Those tiny crevices are just magnets for food debris and are a nightmare to scrub clean. Go for smooth, functional surfaces that a brush can easily reach.

    The Bottom Line on Grating

    Invest in one high-quality, heavy-duty stainless steel grater rather than a drawer full of cheap, flimsy alternatives that break after a month.

    Stick to manual tools; electric graters are usually just expensive, hard-to-clean gadgets that take up valuable counter space without earning their keep.

    Focus on versatility by choosing a tool that handles multiple textures, ensuring you aren’t constantly hunting for a new implement every time a recipe changes.

    The Truth About Your Grater Drawer

    I’ve seen too many people clutter their drawers with five different specialty graters that only work for one specific task; honestly, if you invest in one high-quality, heavy-duty box grater, you’ll do more cooking and waste less money.

    Rosalind Hayter

    Stop Overthinking Your Grater

    Stop Overthinking Your Grater with stainless steel.

    At the end of the day, choosing a grater isn’t about finding the one with the most blades or the fanciest brand name; it’s about finding the tool that actually fits your workflow. I’ve seen too many people clutter their drawers with electric gadgets that end up gathering dust because they’re too much of a hassle to clean, or cheap plastic sets that dull after three uses. Stick to the basics: invest in a heavy-duty stainless steel manual grater that can handle everything from hard parmesan to firm vegetables. If you prioritize durability and ease of cleaning over trendy gimmicks, you won’t find yourself replacing your gear every single year.

    My best advice is to remember that a well-run kitchen is built on a foundation of reliable tools and even better habits. You don’t need a massive collection of specialized shredders to be a great cook; you just need a few pieces that you can trust implicitly. When you stop chasing the latest kitchen gadget craze and start focusing on quality over quantity, you’ll find that cooking becomes less of a chore and more of a joy. Buy it once, maintain it well, and let your tools work for you so you can get back to the part that actually matters: making a great meal.

    Frequently Asked Questions

    Is it worth buying a single multi-purpose box grater, or should I invest in individual microplanes for different tasks?

    Look, if you’re tight on space, a solid box grater is your workhorse for cheese and veggies. It’s reliable and handles the heavy lifting. But don’t let that stop you from picking up a high-quality Microplane. A box grater will never give you that fine, snowy zest from a lemon or the delicate grating of hard parmesan. Get the box for volume, but invest in a single Microplane for precision. It’s worth the extra counter space.

    How do I know if a grater is actually high-quality stainless steel versus something that's going to rust after three washes?

    Look for weight and a seamless finish. High-quality stainless steel feels substantial in your hand, not hollow or flimsy. When you run your finger over the surface, it should be smooth, with no visible seams where the metal meets the handle—those gaps are where moisture hides and rust starts. Most importantly, check the stamp. You want to see “18/10” or “304” etched into the metal. If it doesn’t say anything, it’s probably cheap filler.

    Are there specific types of graters I should avoid if I'm trying to keep my kitchen organized and clutter-free?

    If you’re trying to keep your counters clear, stay far away from those multi-piece “box” sets or those flimsy, handheld zesters that come in a five-piece plastic kit. They’re clutter magnets. You’ll use one side once and then let the rest of the pieces drift to the bottom of a junk drawer. Stick to one high-quality microplane and one solid box grater. If it doesn’t earn its spot in your drawer, it doesn’t belong in your kitchen.

  • Different Types of Can Openers for Your Kitchen

    Different Types of Can Openers for Your Kitchen

    I still remember a frantic Saturday night during my catering days, standing in a dim commercial kitchen with a mountain of prep work ahead of me and a cheap, $5 gadget that just wouldn’t cooperate. There is nothing quite as infuriating as a tool that fails right when you’re in the weeds, leaving you to pick at jagged metal edges like you’re working with a dull knife. Most people think they just need a “better brand,” but they’re missing the point entirely. It isn’t about the name on the box; it’s about understanding the actual can opener mechanics that dictate whether a tool glides through a lid or leaves you fighting for your life against a stubborn tin.

    I’m not here to sell you on some high-tech, motorized nonsense that will inevitably end up in a landfill in two years. Instead, I’m going to pull back the curtain on what actually makes a tool work. We are going to look at the leverage, the blade geometry, and the structural integrity you should demand from every piece of gear you buy. My goal is to help you build a kitchen filled with tools that last a lifetime, so you can stop fighting your equipment and get back to the actual joy of cooking.

    Table of Contents

    The Lever Principle in Kitchen Tools You Can Trust

    The Lever Principle in Kitchen Tools You Can Trust

    When I was managing banquet kitchens, I saw way too many cooks struggling with cheap, lightweight openers that required twice the effort for half the result. That’s because they lack a proper application of the lever principle in kitchen tools. A decent opener isn’t just a handle and a blade; it’s a machine designed to multiply your strength. When you use a tool with long, sturdy handles, you’re utilizing mechanical advantage to do the heavy lifting for you. You shouldn’t have to white-knuckle a gadget just to get through a standard tin of tomatoes.

    I always look for a model that features a smooth rotary cutting action rather than one that requires you to “crush” the lid. The best ones use a high-quality cutting wheel mechanism that glides through the metal with minimal resistance. If you feel like you’re fighting the tool, the physics are working against you. I tell my clients to skip the plastic-handled junk and invest in something with enough weight and leverage to make the job feel effortless. Good tools should feel like an extension of your hand, not an obstacle in your way.

    Mastering the Rotary Cutting Action for Clean Results

    Mastering the Rotary Cutting Action for Clean Results

    It isn’t just about the strength you apply; it’s about how that force is translated through the cutting wheel mechanism. When I was managing commercial kitchens, I saw too many cooks struggle with cheap, stamped-metal openers that just tore at the lid, leaving jagged edges that were a nightmare for safety. A proper tool uses a precise rotary cutting action to slice through the tin rather than crushing it. You want a wheel that stays sharp and tracks a smooth, predictable path around the rim.

    The secret to that effortless glide is often found in the gear ratio in manual openers. A well-engineered tool ensures that even a small turn of the handle provides enough torque to drive the blade through the metal without you having to white-knuckle the grip. If you feel like you’re fighting the can, the mechanics are failing you. I always tell my organizing clients: if the rotation feels clunky or uneven, it’s time to toss it. Invest in something that treats the metal with respect, and you’ll save your wrists and your sanity.

    Five Ways to Tell if Your Can Opener is Worth the Counter Space

    • Look for high-carbon steel gears. If the teeth look like they’re made of soft tin, they’ll dull after a dozen cans, and you’ll be left fighting a piece of metal that refuses to bite.
    • Prioritize a smooth-edge cut. A quality mechanical design cuts through the lid rather than tearing it; if you’re getting jagged metal shards falling into your soup, your opener’s alignment is garbage.
    • Check the handle leverage. Give the handles a test squeeze—they should feel sturdy and offer resistance without needing a massive amount of hand strength to engage the gears.
    • Avoid the battery-operated nonsense. Unless you’re running a commercial line with a hundred cans an hour, a manual, gear-driven opener is more reliable, easier to clean, and won’t die on you mid-recipe.
    • Inspect the pivot point. A well-engineered tool has a tight, stable pivot where the arms meet; if there’s too much “wiggle” in the mechanism, you’re going to lose precision and end up with messy edges.

    The Bottom Line on Choosing Your Next Can Opener

    Forget the cheap, lightweight models that bend under pressure; look for weight and mechanical leverage in your hand to ensure the tool does the work, not your wrists.

    Prioritize smooth rotary action over sheer force, as a sharp, well-aligned cutting wheel prevents the jagged, messy edges that lead to wasted food and potential injury.

    Invest in all-metal construction and avoid plastic-heavy designs, because a kitchen tool is only as good as its ability to survive a decade of heavy use.

    ## The Difference Between a Gadget and a Tool

    “If you’re struggling to get through a simple tin of tomatoes, it isn’t your strength failing you—it’s the physics of a poorly designed tool. A real can opener shouldn’t feel like a toy; it should use leverage to do the heavy lifting so your hands don’t have to.”

    Rosalind Hayter

    Stop Settling for Less

    Stop Settling for Less: Reliable Can Opener

    At the end of the day, understanding the mechanics of a can opener isn’t just about trivia; it’s about recognizing the difference between a tool and a toy. We’ve looked at how the lever principle provides the necessary force to puncture metal without straining your wrists, and how a sharp, rotary cutting action prevents that messy, jagged edge that ruins a good meal. When you prioritize a heavy-duty design over a cheap, lightweight imitation, you aren’t just buying a gadget—you are investing in mechanical reliability. You shouldn’t have to fight your equipment just to get to the ingredients you need for dinner.

    My advice is simple: stop cluttering your drawers with plastic junk that breaks the moment things get difficult. Instead, find that one solid, all-metal piece that feels substantial in your hand and treat it like the essential tool it is. A well-made kitchen is built on the foundation of quality over quantity, and that starts with the basics. Buy things that are meant to last, maintain them well, and let them do their job so you can get back to what actually matters: the cooking itself.

    Frequently Asked Questions

    How can I tell if a can opener is made of high-quality steel or if it's just cheap, plated junk that'll rust in a month?

    Don’t just look at the shine; look at the weight. If it feels light and hollow in your hand, it’s likely cheap stamped tin with a thin coating that’ll flake off by next month. Pick up a heavy, solid-feeling model. Check the gears—they should be thick, stainless steel, not flimsy plastic. If the “metal” feels like it might bend under a little pressure, put it back. You want something that feels like a tool, not a toy.

    Is there a real difference in performance between a traditional edge-cutting opener and those newer smooth-edge models?

    Look, there’s a massive difference, and it comes down to how much frustration you’re willing to tolerate. Those smooth-edge models are great for safety because they don’t leave jagged metal on the lid, but they often struggle with thicker tin. Traditional edge-cutters are the workhorses; they slice through the lid like a hot knife through butter. If you want speed and reliability, stick to the traditional ones—just watch your fingers.

    What are the signs that the internal gears are starting to fail before I end up struggling with a stuck lid?

    Listen for a change in the sound. If that smooth, rhythmic whir starts sounding like grinding sand or a heavy, uneven clicking, your gears are stripping. You’ll also notice the resistance; if you find yourself having to force the handle or if it feels “spongy” rather than firm, the teeth aren’t meshing right. Don’t wait until you’re mid-prep with a stuck lid. Once that mechanical feedback changes, it’s time to retire it.

  • How to Choose a Vegetable Peeler

    How to Choose a Vegetable Peeler

    I spent twenty years in commercial kitchens where speed was everything, and I can tell you one thing for certain: nothing kills your momentum faster than a cheap, flimsy tool that skips across the skin of a carrot. I’ve watched well-meaning home cooks spend a fortune on those “multi-functional” gadgets that claim to do everything from julienne to zester, only to end up with a drawer full of plastic junk that breaks the moment you apply any real pressure. Most of the different vegetable peeler styles you see in big-box stores are designed for aesthetic appeal, not for someone who actually needs to prep a meal without losing their patience.

    I’m not here to sell you on the latest trend or a gadget that requires a specialized manual to operate. My goal is to cut through the marketing noise and show you which tools actually earn their keep on a real countertop. I’m going to break down the most effective vegetable peeler styles based on durability and ergonomics, so you can invest in pieces that will last you a lifetime. We’re going to focus on the heavy-duty essentials that make prep work feel like a breeze rather than a chore.

    Table of Contents

    Stainless Steel Peeler Durability Over Trendy Gadgets

    Stainless Steel Peeler Durability Over Trendy Gadgets

    I’ve seen it a thousand times in commercial kitchens: a drawer full of colorful, plastic-handled gadgets that all perform exactly the same way—until they snap. Most people fall into the trap of buying whatever looks cute on a social media feed, but if you want true stainless steel peeler durability, you have to look past the neon colors. Plastic handles might feel comfortable for the first five minutes, but they eventually crack, harbor bacteria in the seams, and lose their grip when your hands are wet.

    When you’re deciding how to choose a vegetable peeler, look for a single piece of solid metal or a heavy-duty construction that doesn’t rely on cheap injection-molded parts. A professional-grade tool shouldn’t feel like a toy; it should have a bit of weight to it. I always tell my clients that investing in one high-quality metal tool is better for your wallet and your sanity than replacing a cheap one every six months. Buy it once, use it for a decade, and stop contributing to the landfill.

    How to Choose a Vegetable Peeler Built for Life

    How to Choose a Vegetable Peeler Built for Life

    When you’re standing at the counter prepping a mountain of carrots or potatoes, the last thing you need is a tool that cramps your hand or feels like a toy. If you want to know how to choose a vegetable peeler that actually survives a decade of use, start by looking at the weight and the grip. I always tell my clients to avoid anything that feels too light; if it’s hollow plastic, it’s going to flex and snap. You want something with a bit of heft that feels like an extension of your hand.

    You also need to decide on the mechanics based on your specific cooking habits. There is a significant difference between swivel and straight peelers when it comes to how they handle different textures. A swivel peeler is my go-to for speed and versatility with most round vegetables, but if you’re doing precision work or working with long, irregular stalks, a straight blade can offer more control. Look for ergonomic peeler designs that feature non-slip handles—not those cheap rubber coatings that degrade over time, but solid, integrated shapes that won’t peel off in your hand.

    Five Rules for Picking a Peeler That Actually Works

    • Stick to the Y-shape for bulk prep. When I was managing catering lines, we didn’t have time for delicate movements; a Y-peeler gives you more leverage and speed when you’re tackling a five-pound bag of carrots.
    • Avoid the “multi-function” trap. If a peeler claims it can also julienne, devein shrimp, and slice garlic, it’s going to do all of those things poorly. Pick a tool that does one job perfectly.
    • Check the blade’s swivel. A good peeler needs a blade that moves smoothly with the contour of the vegetable. If it feels stiff or catches constantly, it’s going to frustrate you and waste your produce.
    • Prioritize a full-body metal construction. I’ve seen too many people buy those colorful plastic-handled ones that eventually crack or harbor bacteria in the seams. A solid stainless steel handle is easier to sanitize and won’t snap under pressure.
    • Test the grip before you buy. It sounds simple, but if the handle feels slippery or too thin, your hand will cramp up during a long prep session. You want something that feels like an extension of your hand, not a toy.

    The Bottom Line on Peeler Selection

    Prioritize heavy-duty stainless steel over plastic; if it feels light and hollow in your hand, it’s going to break right when you need it most.

    Look for a single-piece construction or a solid build that minimizes moving parts to ensure the blade stays sharp and the handle stays attached.

    Focus on ergonomics that suit your grip, but remember that a tool’s longevity and material quality are far more important than a fancy aesthetic.

    The Tool vs. The Trinket

    I’ve seen enough flimsy, colorful plastic peelers end up in the landfill to know that if a tool feels like a toy in your hand, it’s going to fail you mid-prep. Stop chasing the latest kitchen trend and start looking for weight, grip, and a blade that actually holds an edge; a real peeler should feel like an extension of your hand, not a piece of disposable junk.

    Rosalind Hayter

    Stop Collecting, Start Investing

    Stop Collecting, Start Investing in quality tools.

    At the end of the day, choosing a peeler isn’t about finding the one with the most bells and whistles or the prettiest silicone handle. It’s about recognizing that a peeler is a workhorse, not a novelty. Whether you opt for the precision of a Y-peeler for bulk prep or a swivel style for delicate skins, the priority remains the same: material integrity and ergonomic stability. Skip the cheap, lightweight plastic models that feel hollow in your palm and offer zero control. If you invest in a heavy-duty stainless steel tool that feels substantial, you are making a decision to buy it once and use it for decades, rather than contributing to the endless cycle of kitchen drawer clutter.

    My advice is simple: treat your kitchen tools with the respect they deserve, and they will reward you with years of reliable service. There is a specific kind of satisfaction that comes from using a tool that just works—no slipping, no snapping, and no frustration. A well-chosen peeler won’t make you a Michelin-star chef overnight, but it will make the mundane task of prep work feel less like a chore and more like a seamless part of your rhythm. Focus on the fundamentals, master your technique, and remember that a functional kitchen is built on quality, not quantity.

    Frequently Asked Questions

    Is there a real difference between a swivel peeler and a Y-peeler, or is it just about what looks better in a drawer?

    It’s definitely not just about aesthetics, though some people prefer the look of one over the other. It comes down to ergonomics and what you’re prepping. I usually reach for a Y-peeler when I’m tackling large batches of root vegetables like carrots or potatoes; the stability is unmatched. Swivel peelers are great for more delicate, irregular shapes, but they can feel a bit flimsy. Choose the one that fits your hand best.

    Should I be looking for a peeler with a serrated blade for tougher skins like sweet potatoes, or is a standard blade enough?

    If you’re frequently working with sweet potatoes, butternut squash, or even thick-skinned citrus, a serrated blade is a lifesaver. A standard straight blade is great for cucumbers or carrots, but it can struggle to bite into those tougher, waxy skins, leading to uneven peeling and wasted produce. Honestly, if you want to be prepared for anything, keep a sturdy serrated peeler in your drawer. It’s one of those small investments that actually pays off.

    How do I know if a peeler is actually ergonomic, or is that just marketing speak for a comfortable grip?

    It’s a bit of both, honestly. “Ergonomic” is a buzzword, but in a kitchen, it’s the difference between a quick prep session and a hand cramp. Don’t just look at the shape; look at the weight distribution and the texture. If it’s all smooth plastic, your hand will slip when it gets wet. A truly ergonomic tool should feel like an extension of your hand, not something you’re fighting to hold onto.

  • Different Types of Rolling Pins for Baking

    Different Types of Rolling Pins for Baking

    I spent twenty years in commercial kitchens where efficiency wasn’t a suggestion—it was a survival tactic. I’ve watched well-meaning home cooks spend a small fortune on those fancy, silicone-coated gadgets that claim to revolutionize your pastry work, only to have them warp or stick the moment things get serious. Honestly, the market is flooded with useless junk, and the sheer number of rolling pin varieties being pushed on you today is enough to make anyone want to give up on baking entirely. You don’t need a specialized tool for every single type of dough; you just need tools that actually hold up under pressure.

    I’m not here to sell you on a trend or tell you that you need a drawer full of different handles. My goal is to cut through the marketing noise and help you identify the few essential pieces that will actually serve you for decades. I’ll break down the real differences between wood, marble, and steel so you can stop wasting money on disposable kitchen clutter. We’re going to focus on the weight, the grip, and the durability of these tools, ensuring that whatever you choose is an investment, not just another piece of plastic destined for the landfill.

    Table of Contents

    French Rolling Pin vs Tapered Choosing Lasting Baking Tool Materials

    French Rolling Pin vs Tapered Choosing Lasting Baking Tool Materials

    When you’re looking at different baking tool materials, the debate usually settles on whether you want handles or a smooth, continuous surface. I’ve spent enough time in commercial kitchens to know that the classic tapered pin—the kind without any handles—is the gold standard for precision. Because there are no knobs to get in the way, you can feel the dough’s resistance directly through the wood. This tactile feedback is essential for even thickness, especially when you’re working on delicate puff pastry or pie crusts.

    On the other hand, if you struggle with hand fatigue, a traditional rolling pin with handles might seem tempting. However, in my experience, those handles often act as a barrier between you and the dough, making it harder to control the pressure. If you want to master professional flour dusting techniques and achieve that perfectly even sheet, go with the tapered style. It might take a little more practice to get the hang of it, but once you do, you’ll realize that simplicity is the ultimate tool for longevity.

    The Weight of Quality Finding Your Perfect Pastry Companion

    The Weight of Quality Finding Your Perfect Pastry Companion

    When you’re standing at your counter, the first thing you’ll notice isn’t the design—it’s the heft. In my years managing commercial kitchens, I learned that a tool without weight is a tool that lacks control. If you pick up a rolling pin that feels like a hollow piece of plastic, you’re going to spend twice as much energy trying to force it through the dough. I always tell my clients to look for something that feels substantial in the hands; that weight does half the work for you, helping to flatten the dough evenly without you having to lean into it like you’re wrestling a heavy bag.

    It’s also about how that weight interacts with your surface. If you’re working with delicate puff pastry, you don’t want a heavy marble cylinder that might bruise the layers. However, for a sturdy pie crust, a solid wood option is a staple among my bakeware essentials for pastry. To keep things from getting messy, I suggest pairing your choice with a silicone pastry mat. It keeps your workspace clean and helps with non-stick dough rolling, so you aren’t constantly fighting a sticky situation or wasting half your flour just to keep things moving.

    Five Rules for Not Wasting Your Money on Rolling Pins

    • Skip the plastic. I’ve seen enough cheap, lightweight rollers snap under the slightest pressure in a busy kitchen. If you want something that won’t end up in a landfill by next Christmas, stick to solid wood, marble, or stainless steel.
    • Match the pin to the task. You wouldn’t use a sledgehammer to hang a picture, so don’t try to roll out delicate puff pastry with a heavy marble pin. Use the heavy hitters for dense doughs and the lighter, tapered ones for things that need a gentle touch.
    • Check the handles before you buy. Some pins come with built-in handles, which are fine for beginners, but they can actually get in your way once you start working with larger sheets of dough. I prefer a smooth, handle-less cylinder that lets me use my palms for better control.
    • Avoid the “fancy” engraved patterns. I know they look pretty in those lifestyle catalogs, but those deep grooves in the wood trap dough and make a mess of your workspace. A smooth surface is much easier to clean and much more functional.
    • Look for grain consistency. If you’re buying a wooden pin, run your hand over it. If it feels uneven or has tiny cracks, walk away. You want a tight, consistent grain that won’t splinter into your pie crust halfway through rolling.

    My Golden Rules for Rolling Pin Shopping

    Skip the plastic and silicone; stick to solid wood or marble if you want a tool that won’t crack or warp on you in six months.

    Match the pin’s weight to your skill level—heavy marble is great for precision, but a lighter wooden tapered pin gives you better control when you’re working with delicate doughs.

    Don’t buy a specialty gadget just because it looks pretty on a social media feed; if it doesn’t feel balanced in your hands, it’s just more clutter in your kitchen.

    The Truth About Your Tool Kit

    Stop looking for a rolling pin that matches your aesthetic and start looking for one that matches your hand; a tool is only as good as the control it gives you when the flour starts flying.

    Rosalind Hayter

    Choosing the Right Tool for the Job

    Choosing the Right Tool for the Job.

    At the end of the day, picking a rolling pin shouldn’t be about following a trend or buying whatever is on sale at a big-box retailer. Whether you decide on the precision of a tapered French pin or the steady, heavy weight of a traditional marble roller, make sure you are choosing based on how you actually bake. If you’re mostly working with delicate pastry dough, go for something slim and controlled. If you’re tackling heavy biscuit dough or thick crusts, you need that extra heft to do the work for you. My best advice? Prioritize material over aesthetics. A solid piece of wood or stone will handle the heat and the pressure of a busy kitchen, while a cheap, hollow plastic alternative will just end up in a landfill within a year.

    I’ve spent enough time in commercial kitchens to know that the best tools aren’t the flashiest ones; they are the ones that become an extension of your own hands. When you invest in a quality tool, you aren’t just buying a piece of kitchenware—you are investing in the reliability of your craft. Stop worrying about having a drawer full of gadgets and start focusing on owning a few pieces that truly work. Get the right pin, master your technique, and build habits that last as long as your cookware. Happy baking.

    Frequently Asked Questions

    Should I go with a marble rolling pin if I'm working with delicate, temperature-sensitive pastry dough?

    If you’re tackling delicate, temperature-sensitive doughs like puff pastry or pie crust, marble is your best friend. Because marble holds a chill so well, it helps prevent the butter in your dough from melting prematurely while you work. Just a word of caution from someone who’s seen it all: marble is heavy and can be a bit unforgiving. Use it for precision, but don’t expect it to be as nimble as a classic wooden pin.

    Is a heavy wooden pin going to be too difficult to maneuver if I'm working with a smaller, single-handed technique?

    If you’re used to a light, single-handed technique, a heavy wooden pin will feel like a different beast entirely. It’s not necessarily “too difficult,” but it requires a shift in how you use your muscles. You’ll stop relying on quick, flicking wrist movements and start using more steady, downward pressure from your shoulders and arms. Honestly? That’s usually better for evenness. If you want agility, stick to tapered; if you want control, embrace the weight.

    How do I know if a rolling pin is made of solid wood versus a cheap veneer that's going to peel under heat?

    Here’s the trick: take a look at the end grain. If you see a distinct pattern where the wood fibers wrap around the edge, it’s likely solid. If you see a seam or a thin layer that looks suspiciously uniform, you’re looking at a veneer. I always give mine a quick tap; a solid piece has a deep, resonant thud, while a cheap veneer feels hollow and lightweight. Don’t risk it—veneer won’t survive a real kitchen.

  • Choosing Food Storage Containers for Freshness

    Choosing Food Storage Containers for Freshness

    I’ve spent two decades in commercial kitchens and high-pressure catering environments, and if there is one thing I’ve learned, it’s that most people are throwing money down the drain every time they hit the kitchenware aisle. You walk into a big-box store and see endless rows of neon-colored, BPA-free plastic sets that promise to revolutionize your life, but let’s be honest: those flimsy food storage containers are destined for the landfill within six months. I’ve seen it a thousand times—lids that warp in the dishwasher, seals that fail the moment you try to carry soup, and containers that stain so badly you can’t even tell if there’s food inside. It’s not just annoying; it’s a waste of your hard-earned money.

    I’m not here to sell you on a lifestyle brand or a trendy gadget that takes up more space than it saves. My goal is to help you build a system that actually works, using tools that are built to last a lifetime. In this guide, I’m going to cut through the marketing fluff and tell you exactly which materials—from heavy-duty glass to professional-grade stainless steel—are worth your investment. We’re going to focus on function over fashion so you can stop fighting your cabinets and start using a kitchen that finally serves you.

    Table of Contents

    Why You Should Ditch Cheap Bpa Free Plastic Containers

    Why You Should Ditch Cheap Bpa Free Plastic Containers

    I’ve spent enough years in commercial kitchens to know that “cheap” is usually the most expensive way to shop. You see it in every grocery aisle: those colorful, lightweight sets of BPA-free plastic containers that promise to revolutionize your life. They look fine on the shelf, but within three months of heavy use, the lids warp, the corners crack, and they start to retain the scent of whatever garlic sauce you stored in them last week. It’s a cycle of constant replacement that clutters your cabinets and drains your wallet.

    Beyond the waste, there is the issue of actual performance. Plastic is porous. It doesn’t offer the airtight integrity required for serious food preservation techniques, meaning your leftovers wilt or dry out far faster than they should. If you are looking for true stackable kitchen organization, you need something with structural integrity—something that won’t buckle under the weight of a heavy stew. Stop settling for flimsy bins that fail the moment they hit the dishwasher; if a container can’t survive a standard cleaning cycle without turning cloudy and scratched, it’s not a tool, it’s just more trash.

    Invest in Reusable Meal Prep Bins Built for Life

    Invest in Reusable Meal Prep Bins Built for Life

    If you’re serious about meal prepping, you need to stop treating your containers like disposable single-use items. I’ve seen too many people buy a massive set of cheap bins only to have the lids warp or the seals fail after three trips through the dishwasher. When you’re prepping for the week ahead, you need reusable meal prep bins that can handle the heat. I always recommend looking for high-quality glass or heavy-duty stainless steel. They don’t stain from tomato sauce, they don’t retain odors, and most importantly, they don’t leach chemicals into your food when you’re reheating a meal.

    Efficiency in the kitchen is about more than just having a plan; it’s about how you manage your space. I’m a big believer in stackable kitchen organization to keep your fridge from looking like a cluttered mess. When your containers are designed to nest or stack perfectly, you reclaim that valuable shelf real estate. Look for sets that offer consistent sizing. It makes a world of difference when you can see exactly what you have at a glance, preventing that “what’s for dinner?” panic on a Tuesday night.

    Five Rules for a Container Collection That Actually Works

    • Stop buying mismatched sets; stick to one or two high-quality brands so your lids actually fit your bases when you’re in a rush.
    • Prioritize glass for anything involving heat or leftovers, because nothing ruins a meal like the lingering smell of last week’s garlic from a stained plastic bin.
    • Size matters more than you think—don’t use a massive quart-sized container for a single serving of salad just because it was the only thing clean in the cupboard.
    • If it doesn’t have a silicone seal, don’t bother; if you can’t hear that satisfying “pop” when you close it, your food isn’t staying fresh.
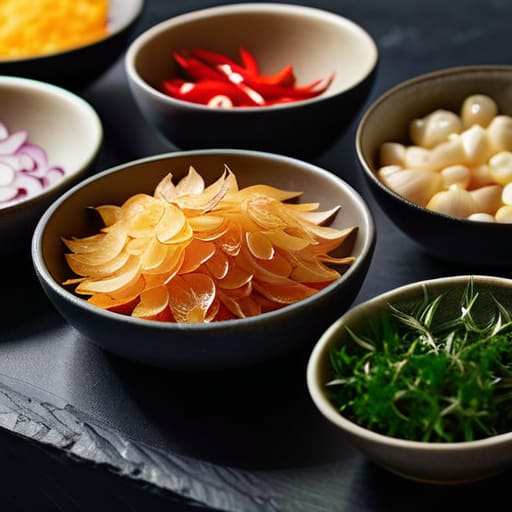
    • Dedicate a specific shelf in your pantry or fridge to your containers so you aren’t playing a game of Tetris every time you try to put groceries away.

    My Golden Rules for a Functional Food Storage System

    Stop buying sets based on how many pieces they have; buy based on how many containers you actually need for your specific meal prep habits.

    Prioritize glass or high-quality stainless steel over plastic to ensure your containers don’t stain, retain smells, or warp after a few trips through the dishwasher.

    Invest in airtight seals that actually work—if air can get in, your food is going to waste, and that’s just throwing money in the trash.

    The Cost of Convenience

    “I’ve seen enough commercial kitchens to know that a cheap, stained plastic tub isn’t a tool—it’s a temporary fix that ends up in a landfill. If you aren’t willing to invest in glass or stainless steel that can withstand a real life, you’re just paying twice for the same mistake.”

    Rosalind Hayter

    Final Thoughts on a Functional Kitchen

    Final Thoughts on a Functional Kitchen.

    At the end of the day, your food storage shouldn’t be a source of constant frustration or a drawer full of mismatched lids that don’t fit anything. We’ve talked about why you need to move away from those flimsy, disposable plastic bins and why investing in high-quality glass or stainless steel is the only way to go if you want a kitchen that actually functions. By choosing containers that are durable, easy to clean, and built to last, you aren’t just organizing your fridge; you are actively reducing waste and saving yourself money in the long run. Stop settling for gear that fails you the moment you try to microwave a meal or toss it in the dishwasher.

    Building a kitchen that works for you is a marathon, not a sprint. It starts with these small, intentional decisions—choosing the right tool for the job and refusing to compromise on quality just because it’s the cheaper option upfront. When you surround yourself with items that have longevity and purpose, your entire approach to cooking and meal prepping changes for the better. You’ll find yourself more organized, more efficient, and much less stressed when it’s time to get dinner on the table. Now, put down the shopping list of gadgets and start focusing on the essentials that will still be in your cabinets ten years from now.

    Frequently Asked Questions

    How do I know if glass containers are actually dishwasher safe or if they'll crack over time?

    Look, I’ve seen enough shattered glass in a sink to know that “dishwasher safe” isn’t always a guarantee. Most high-quality borosilicate glass is built to handle the thermal shock of a dishwasher, but here’s my rule: avoid the extreme temperature swings. Don’t pull a container straight from the freezer and toss it into a steaming hot cycle. That’s how you get cracks. If it’s heavy, clear, and feels substantial, it’ll likely survive.

    Is it worth the extra money to buy a matching set, or can I just mix and match what I already have?

    Look, I’ll be honest: you don’t need a matching set to have a functional kitchen. If you have a drawer full of mismatched lids and containers that actually work, keep using them. However, if you’re starting from scratch, I recommend buying a cohesive set of one specific brand and material—ideally glass. It stops the “lid hunt” from becoming a daily headache and makes stacking in the pantry much more efficient. Efficiency beats aesthetics every time.

    What's the best way to organize these containers in a small pantry so I'm not constantly playing Tetris?

    The secret is to stop thinking about the containers and start thinking about the lids. I always tell my clients: nest your containers by shape and size, but keep the lids in a dedicated, upright bin or a small basket nearby. If you stack them lid-to-container, you’ll never find a match. If your pantry is tight, use narrow, tiered organizers to create vertical space. Stop the Tetris; start grouping by family.