Blog

  • Choosing the Right Stock Pot for Large Meals

    Choosing the Right Stock Pot for Large Meals

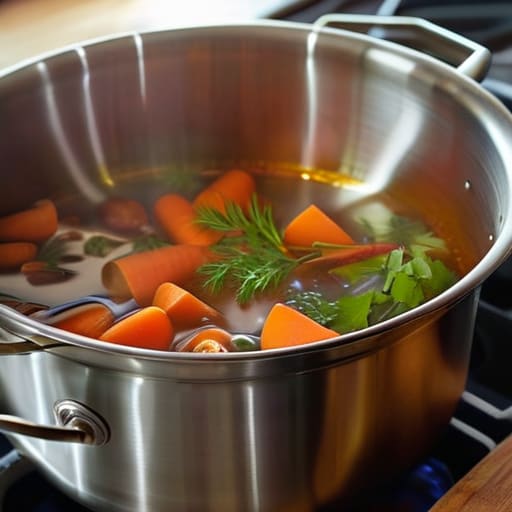
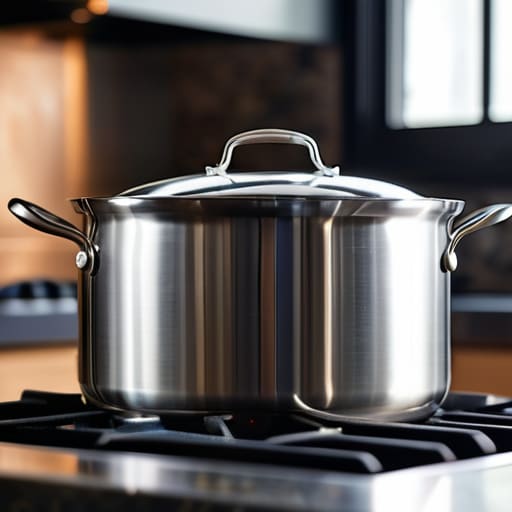
    I still remember the chaos of a Friday night service in my old catering days—the steam hitting the ceiling, the constant clatter of utensils, and that one specific, cheap aluminum pot that decided to warp right in the middle of a forty-quart batch of mirepoix. It was a disaster that cost us time and money, and it’s exactly why I can’t stand seeing people walk into a kitchen supply store and get talked into buying “designer” sets that lack any real heft. Most of the advice you’ll find in a generic stock pot guide is just marketing fluff designed to make you buy more gadgets. You don’t need a twelve-piece collection; you need one solid, dependable vessel that can handle a heavy simmer without losing its shape.

    I’m not here to sell you on shiny trends or overpriced nonsense. My goal is to give you the straight truth based on twenty years of seeing what actually survives a professional kitchen and what ends up in a landfill after six months. I’m going to break down the materials, the weight, and the dimensions that actually matter so you can invest in a piece of equipment that lasts a lifetime.

    Table of Contents

    Aluminum vs Stainless Steel Pots Choosing Quality Over Trends

    I’ve seen too many home cooks get seduced by the shiny, lightweight aluminum sets you see in big-box stores. Don’t fall for it. While aluminum is a decent conductor of heat, it’s far too reactive for the long, slow simmers that make a great stock. If you’re making a tomato-based soup or anything acidic, that aluminum will leach a metallic tang into your food, and frankly, the pot will likely warp under high heat. When you’re looking for the best cookware for large batches, you need something that can stand up to the weight and the time.

    This is where stainless steel earns its keep. I always tell my clients to look for high-quality, multi-clad stainless steel. It’s non-reactive, incredibly durable, and won’t pit or scratch like the cheaper alternatives. The real secret, however, lies in the construction; you want a heavy bottom stock pot that features an aluminum or copper core sandwiched between layers of steel. This gives you the heat distribution of aluminum with the rugged, indestructible nature of steel. It’s an investment, sure, but it’s one that won’t end up in a landfill in two years.

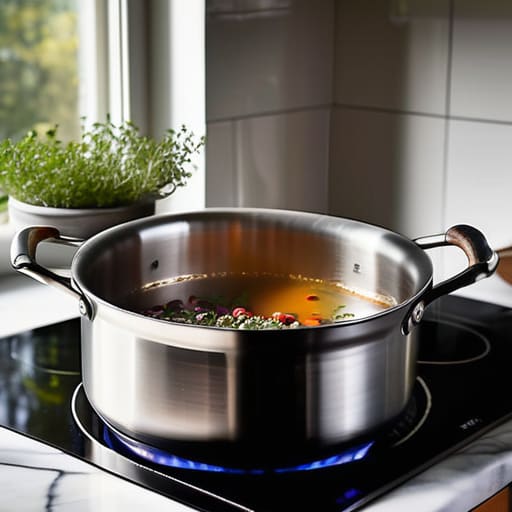
    A Stock Pot Capacity Guide for Meaningful Cooking
    A Stock Pot Capacity Guide for Meaningful Cooking

    When I was managing catering lines, I saw too many home cooks buy a pot that was either too small for their ambitions or so massive it became a storage nightmare. You need to match the size to your actual habits, not your “someday” fantasies. For a standard family of four, an 8-quart pot is usually the sweet spot; it’s large enough to handle a Sunday chili or a decent batch of bone broth without splashing over the sides. If you’re strictly cooking for one or two, a 6-quart model will save you precious cabinet space and make it much easier to manage.

    However, if you’re the type who likes to meal prep on Sundays or you frequently host large holiday dinners, you’ll want to step up to a 12-quart or even a 20-quart vessel. This is truly the best cookware for large batches, allowing you to simmer massive quantities of stock or boil corn on the cob without constant monitoring. Just remember, a larger pot requires more physical effort to move, especially when full. Always consider the weight and maneuverability of the pot before you commit to a massive size.

    Five Rules for Picking a Pot That Won't End Up in a Landfill

    • Look for a heavy, encapsulated base. If the bottom of the pot feels thin or light, it’s going to create hot spots that scorch your broth. You want a thick layer of aluminum or copper sandwiched between layers of stainless steel to distribute heat evenly.
    • Prioritize handles that are riveted, not welded. I’ve seen too many cheap pots where the handle starts to wobble after a few months of heavy use. Rivets are a permanent solution; welds can fail, and a heavy pot full of liquid is no joke when it’s slipping from your grip.
    • Check the lid fit before you buy. A stock pot is useless if the lid doesn’t create a tight seal. You want a heavy lid—ideally stainless steel—that sits flush against the rim to trap steam and moisture, which is the whole point of a slow simmer.
    • Avoid anything with non-stick coatings. I know they’re popular, but once that coating scratches or peels—and it will—the pot is trash. Stick to high-quality stainless steel; it’s durable, easy to clean, and won’t leach anything into your food.
    • Test the weight in the store if you can. A good stock pot is substantial, but it shouldn’t be so heavy that it’s impossible to maneuver from the stove to the sink. It needs to feel like a tool, not a burden.

    The Bottom Line on Your Next Investment

    Stop chasing the latest kitchen gadget craze and focus on material integrity; a heavy-bottomed stainless steel or enameled pot will outlast a dozen cheap aluminum ones.

    Size matters more than you think, so measure your stovetop and your pantry before you buy—don’t end up with a massive pot that’s too heavy to lift or too big for your burners.

    Prioritize durability over aesthetics; if a pot feels flimsy or lightweight in your hands, it’s probably going to warp the first time you try to simmer a serious batch of stock.

    The Truth About Your Next Big Pot

    Stop looking for the “perfect” gadget in a flashy box; look for weight, thickness, and a lid that actually fits. A real stock pot isn’t a trend you follow, it’s a workhorse you rely on for the next twenty years.

    Rosalind Hayter

    Making the Right Investment
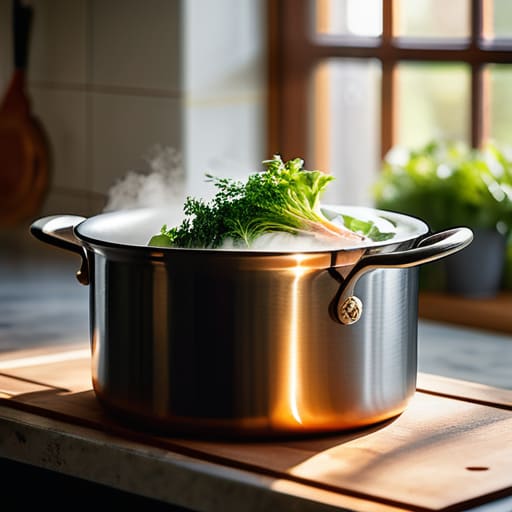
    Making the Right Investment in cookware.

    At the end of the day, picking a stock pot shouldn’t feel like a high-stakes gamble, but it does require a bit of discipline. Remember: skip the lightweight aluminum that’ll scorch your broth, and opt for the heavy-duty stainless steel that can actually hold heat. Don’t get blinded by a flashy brand name or a trendy non-stick coating that will flake off in six months; instead, focus on the weight, the thickness of the base, and a capacity that actually matches how you live. Whether you’re simmering a gallon of bone broth or a batch of seasonal vegetable soup, ensure the pot is built to endure the heat and the constant stirring of a busy kitchen.

    My advice is simple: stop looking for the “perfect” gadget and start looking for the tools that last. A good stock pot isn’t just another piece of clutter in your cabinet; it is the foundation of a kitchen that works for you. When you invest in quality, you aren’t just buying metal and handles—you are buying the ability to feed your family well for decades to come. Put the money you saved by skipping the junk toward better ingredients, and let your cookware be the silent, reliable partner in your culinary journey. Now, grab that notebook, check your measurements, and go get something worth keeping.

    Frequently Asked Questions

    Is it worth the extra money to get an enameled cast iron stock pot instead of standard stainless steel?

    It depends on what you’re actually simmering. If you’re just boiling pasta or making a quick batch of corn chowder, stick with stainless steel; it’s durable and easier to maintain. But if you’re a slow-cooker at heart—talking long-simmered osso buco or acidic tomato sauces—the enameled cast iron is worth every extra cent. It holds heat like a dream and won’t react with your ingredients. Just don’t expect it to be as rugged as steel.

    How do I know if a pot has a heavy enough base to prevent hot spots and scorching?

    Here’s the trick: pick up the pot. If it feels suspiciously light for its size, walk away. A quality stock pot needs mass to distribute heat evenly. When you’re looking at them in the store, check the bottom. You want a thick, encapsulated base—usually where the stainless steel wraps up the sides a bit—rather than just a thin disc glued to the bottom. If it’s bottom-heavy, it’ll handle a simmer without scorching your hard work.

    Can I use my large stock pot for everyday tasks like boiling pasta, or is it strictly for slow-simmered liquids?

    Look, you can absolutely use it for pasta, but don’t make it your only workhorse. A large stock pot is perfect for boiling big batches of noodles because the volume prevents water from boiling over as easily. However, if you’re just making a quick side of spaghetti for two, dragging out that massive heavy-duty pot is a waste of energy and hot water. Save the big guy for the heavy lifting and keep a smaller saucepan handy for the daily grind.
  • Choosing a Food Dehydrator for Herbs and Fruit

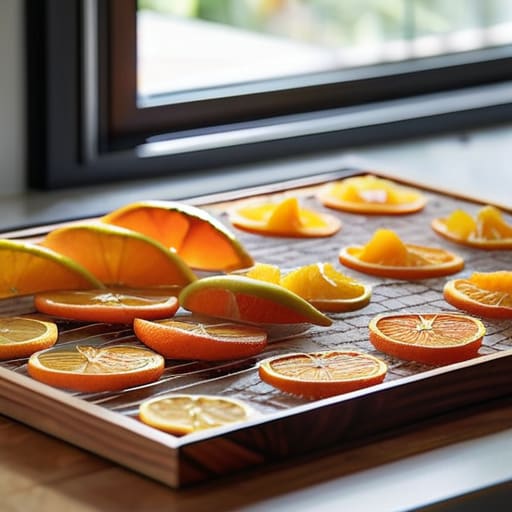
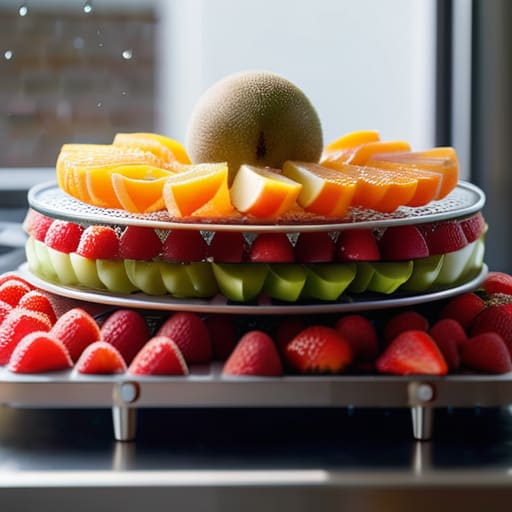
    Choosing a Food Dehydrator for Herbs and Fruit

    I’ve lost count of how many times I’ve walked into a kitchen and seen a $300, high-tech food dehydrator sitting in a cupboard, gathering dust and looking like a piece of sci-fi movie prop. Most of these gadgets are designed by marketing teams to look sleek on a countertop, but they lack the actual muscle required to do the job consistently. You don’t need a machine with a touchscreen and Bluetooth connectivity to preserve your summer harvest; you need a reliable workhorse that moves air efficiently and won’t quit on you halfway through a batch of apple rings.

    I’m not here to sell you on the latest kitchen trend or convince you that you need a digital interface to dry out some herbs. My goal is to help you cut through the noise and find a food dehydrator that actually earns its keep in your pantry. I’ll be sharing exactly what to look for in terms of airflow and build quality, so you can invest in a tool that lasts a lifetime rather than adding to the mountain of plastic junk we’re all tired of managing.

    Prioritize Dehydrator Airflow Efficiency Over Trendy Plastic Trays

    Prioritize Dehydrator Airflow Efficiency Over Trendy Plastic Trays

    When you’re browsing the aisles of a big-box store, it is incredibly easy to get distracted by sleek, lightweight plastic models that look great in a catalog. Don’t fall for it. In my years managing commercial kitchens, I learned that aesthetics don’t cook the food—physics does. Most of those cheap, trendy units rely on weak fans that create “dead zones” in the machine. You’ll end up with some trays that are perfectly crisp and others that are still damp and prone to mold. You need to look specifically for dehydrator airflow efficiency; you want a unit that moves air consistently around every single tray, regardless of where it sits in the stack.

    If the air isn’t moving evenly, you’re essentially gambling with the shelf life of dehydrated food. I’ve seen too many people ruin a whole batch of summer peaches because they bought a budget model that couldn’t maintain a steady stream of heat. When you’re dehydrating fruits and vegetables, consistency is your best friend. A machine with a powerful, rear-mounted fan ensures that every slice gets the same treatment, saving you time and preventing wasted produce. Invest in the airflow, not the plastic casing.

    Mastering Food Preservation Techniques for a Lifetime of Use

    Once you’ve invested in a decent machine, the real work begins with your process. I’ve seen too many people get discouraged because their batches came out rubbery or, worse, moldy. The secret isn’t in a fancy setting; it’s in understanding food preservation techniques like moisture control and consistent heat. If you’re dehydrating fruits and vegetables, you have to be meticulous about slicing them to a uniform thickness. If one slice is thick and the next is paper-thin, you’ll end up with a tray of inconsistent textures that won’t store properly.

    Don’t forget that different items require different environments. For instance, when you’re working with delicate seasonings, finding the best temperature for herb drying is non-negotiable—too much heat and you’ll scorch the essential oils, leaving you with nothing but brown dust. If you take the time to master these small details, the shelf life of dehydrated food increases dramatically. You aren’t just making snacks; you’re building a pantry of high-quality ingredients that will serve you for months.

    Five Rules for Not Wasting Your Time (or Your Food)

    • Stop buying the cheap, lightweight models with thin plastic trays; if the air can’t circulate evenly around every slice, you’re just wasting electricity and ruining your produce.
    • Invest in a unit with a digital timer and temperature control, because guessing when your jerky is done is a fast track to food poisoning or wasted batches.
    • Don’t crowd the trays—I’ve seen people try to pack them tight to “save time,” but all that does is create moisture pockets that lead to mold.
    • Learn to prep your ingredients with consistency; if your apple slices aren’t uniform in thickness, they won’t dry at the same rate, and you’ll end up with a bag of half-dried mush.
    • Treat your dehydrator like a professional tool by cleaning the trays immediately after use, because dried fruit residue is a nightmare to scrub once it hardens.

    The Bottom Line on Building a Better Dehydrator Habit

    Stop chasing the lowest price tag; invest in a machine with consistent airflow and durable trays so you aren’t replacing a piece of plastic junk every two years.

    Focus on the process, not just the appliance—learning how to properly prep and dry your food is what actually prevents waste and saves you money.

    Keep your setup simple and functional, prioritizing tools that integrate into your daily routine rather than gadgets that just take up counter space.

    Making the Right Investment

    At the end of the day, choosing a food dehydrator isn’t about finding the cheapest unit on a clearance rack; it’s about finding a machine that respects your time and your ingredients. I’ve seen too many people buy those flimsy, lightweight plastic models only to realize they spend more time troubleshooting uneven drying than actually preserving food. Remember, you need to prioritize consistent airflow and build a setup that supports your specific workflow. If you invest in a machine with sturdy construction and reliable temperature control, you aren’t just buying an appliance—you are buying back the value of every piece of seasonal produce you buy.

    Don’t let the fear of a complicated new process keep you from starting. Once you get into the rhythm of it, dehydrating becomes a quiet, meditative part of your kitchen life that connects you to the seasons. It’s about building a pantry that actually sustains you and reducing the sheer amount of waste we see in modern households. Stop looking for the “magic” gadget and start focusing on the habit of preservation. Get the right tool, learn the technique, and you’ll find that a well-stocked, home-dried pantry is one of the most rewarding investments you can ever make for your home.

    Frequently Asked Questions

    Is it actually worth spending more on a stainless steel model, or can I get away with a basic countertop version?

    Look, I’ve seen enough cheap plastic units crack or warp after a single season of heavy use to know the truth. If you’re just drying a handful of herbs once a month, a basic countertop model is fine. But if you actually plan on preserving seasonal produce or making jerky, buy the stainless steel. It’s easier to clean, won’t leach chemicals into your food, and—most importantly—it’s built to last a lifetime.

    How much electricity am I really going to see on my utility bill if I run this for a full weekend?

    Look, I get it. You don’t want a “surprise” on your monthly statement. If you run a standard dehydrator for a full 48-hour weekend, you’re likely looking at roughly 2 to 4 kilowatt-hours. At average US rates, that’s pennies—probably less than fifty cents. It’s a minor cost compared to the money you’ll save by not tossing out wilted produce. Just make sure yours isn’t an ancient, inefficient model.

    What’s the best way to clean and store the trays so they don't end up smelling like old herbs for the next six months?

    Don’t just rinse them and call it a day. After a heavy session with garlic or rosemary, give those trays a scrub with warm water and a dash of mild dish soap. If the scent is really clinging, a quick soak in a diluted vinegar solution will strip that lingering aroma right off. Once they’re bone-dry, stack them in a sealed container or a dedicated bin. Never store them loose in a cabinet where they’ll just soak up whatever else is nearby.

  • Choosing a Stockpot for Batch Cooking

    Choosing a Stockpot for Batch Cooking

    I remember standing in a commercial kitchen during a holiday rush, staring at a thin, cheap-looking stockpot that was warping under the heat of a massive batch of beef broth. It was a disaster; the bottom was uneven, the heat distribution was non-existent, and we were essentially wasting expensive ingredients because the vessel couldn’t handle the job. Most people think they need a dozen different specialized pots to be a “real” cook, but that’s just more clutter for your cabinets. In reality, a single, well-constructed stockpot is the backbone of a functional kitchen, yet most people end up buying flimsy, overpriced junk that won’t last through a single winter of soup-making.

    I’m not here to sell you on some trendy, non-stick miracle or a gadget with ten different bells and whistles you’ll never touch. My goal is to help you cut through the marketing noise and find the heavy-duty essentials that actually earn their place on your stove. I’ll show you exactly what to look for in terms of weight, material, and lid fit so you can invest once and cook for a lifetime.

    Prioritizing Stainless Steel Cookware Durability Over Trends

    I see it every time I walk into a client’s kitchen: a graveyard of scratched non-stick coatings and warped aluminum pans that were “on sale” three years ago. People get caught up in the latest colorful ceramic trends, but if you want a tool that survives a decade of heavy-duty use, you need to look at stainless steel cookware durability. Unlike coated pans that flake off into your dinner, high-quality stainless steel can handle high heat and vigorous scrubbing without breaking a sweat. It’s a professional-grade choice that prioritizes longevity over aesthetics.

    When you’re looking for that one reliable piece, don’t settle for something thin that creates hot spots. You want a heavy bottom pot for simmering to ensure your liquids heat evenly and stay at a steady temperature. This kind of consistent heat distribution is what separates a professional kitchen from a cluttered one. If you invest in a solid, multi-clad stainless vessel, you aren’t just buying another gadget; you’re buying a piece of equipment that will be just as functional when you’re decades older.

    Why a Heavy Bottom Pot for Simmering Matters

    If you’ve ever pulled a batch of chili or a vegetable broth off the stove only to find a layer of scorched, bitter bits stuck to the base, you know exactly why I’m so particular about this. Most people think a pot is just a container, but if it’s thin, it’s essentially a heat trap. You need a heavy bottom pot for simmering to act as a buffer. A thick, encapsulated base prevents those localized hot spots that turn a delicate sauce into a ruined mess.

    When you’re working with a slow, steady heat, you aren’t looking for an aggressive boil; you’re looking for consistent, gentle warmth. This is where even heat distribution in cookware becomes the difference between a professional-grade result and a kitchen disaster. I always tell my clients to look for weight. If the pot feels light in your hands, it’s going to fail you when you’re trying to maintain a low temperature for a long-haul stew. Invest in something substantial that holds its temperature steadily, rather than something that reacts wildly to every tiny adjustment of the burner.

    Five Rules for Picking a Pot That Won't Let You Down

    • Check the rim before you buy. If the edge is thin or poorly finished, it’ll be a nightmare to pour liquids without dripping all over your stovetop. Look for a poured or rolled rim that feels substantial in your hand.
    • Don’t ignore the handles. I’ve seen too many people buy a beautiful pot only to realize the handles are riveted on so poorly they become heat conductors. You want sturdy, stay-cool handles that feel secure when you’re lifting ten pounds of boiling broth.
    • Size matters, but don’t overbuy. If you’re a family of four, a massive 20-quart pot is just a heavy, awkward space-taker in your cupboard. Pick a size that fits your actual cooking habits—usually an 8 to 12-quart range is the sweet spot for most home cooks.
    • Test the weight. A good stockpot needs heft to prevent hot spots, but it shouldn’t be so heavy that you’re afraid to move it. If the pot feels like you’re lifting a piece of construction equipment, you’ll end up leaving it in the back of the cabinet.
    • Look for compatible lids. A tight-fitting lid isn’t just a suggestion; it’s a necessity for heat retention and energy efficiency. If the lid wobbles or lets too much steam escape, you’re wasting time and fuel trying to get your liquid to a simmer.

    My Rules for Choosing a Stockpot

    Forget the flashy non-stick coatings that flake off in six months; stick to high-quality stainless steel that can handle decades of scrubbing and heavy use.

    Always check the base—if the bottom feels thin or light, walk away, because a pot without a heavy-duty core will scorch your broth every single time.

    Stop buying sets just to fill a cabinet; buy one single, professional-grade stockpot that actually fits your largest recipe and does the job right.

    The Last Pot You'll Ever Need

    At the end of the day, choosing a stockpot isn’t about finding the prettiest item on a boutique website or following the latest kitchen trend. It’s about recognizing that your tools are the foundation of your cooking. If you prioritize high-quality stainless steel and insist on a heavy, encapsulated base, you are solving problems before they even start. You won’t have to deal with scorched sauces, warped bottoms, or the frustration of a pot that feels like a toy in your hands. Skip the non-stick coatings that flake off after a year and the thin aluminum that burns everything on contact. Invest in a piece that has the heft and durability to handle everything from a delicate chicken stock to a massive batch of chili.

    I’ve seen too many people clutter their cabinets with cheap, disposable cookware that ends up in a landfill within twenty-four months. My advice is simple: buy once, buy well, and then get to cooking. A great stockpot isn’t just a piece of equipment; it’s a silent partner in your kitchen that will serve you for decades. Once you have the right tools, the focus shifts from managing your gear to mastering your craft. Stop worrying about the gadgets and start building the habits that make a meal truly memorable. Your future self—and your kitchen—will thank you.

    Frequently Asked Questions

    How do I tell if a stockpot has a truly heavy, encapsulated base or if it's just a cheap thin layer of aluminum?

    Here’s the trick: don’t just look at it, feel it. Pick the pot up. If it feels unnaturally light for its size, run. A real encapsulated base—where aluminum is sandwiched between layers of stainless steel—should give the pot a noticeable heft. Also, look at the bottom; a quality base will feel like a solid, integrated part of the pot, not a flimsy disc glued on that looks like it might peel off after a few washes.

    Is it worth the extra money to get a stainless steel pot with handles that are riveted on rather than welded?

    Yes, it’s absolutely worth it. In my years managing commercial kitchens, I’ve seen enough loose handles to know that rivets are the only way to go. Welded handles look sleek, sure, but they can fail under the weight of a heavy stew or a massive batch of stock. Rivets provide a mechanical connection that isn’t going anywhere. If you want a pot that survives decades of heavy use, pay the extra few dollars for rivets.

    Can I actually use a heavy-duty stockpot on an induction cooktop, or do I need to check for a specific magnetic base?

    You can absolutely use a heavy-duty stockpot on induction, but don’t just grab the first one you see. Induction works through magnetism, so your pot needs a magnetic base to heat up. The easiest way to check? Grab a simple fridge magnet. If it sticks firmly to the bottom of the pot, you’re good to go. If it won’t stick, that pot is just a heavy paperweight on an induction surface.

  • Why Measuring Spoons Are Necessary for Recipes

    Why Measuring Spoons Are Necessary for Recipes

    I spent two decades in commercial kitchens where precision wasn’t a suggestion—it was the law. I’ve seen enough “designer” kitchen sets to last a lifetime, and frankly, most of them are a waste of space. You don’t need a twenty-piece rose gold kit that looks pretty in a social media photo but bends the moment it hits a heavy scoop of cinnamon. If you’re still relying on those flimsy, lightweight plastic measuring spoons that warp in the dishwasher or crack when you try to level off some flour, you’re doing it wrong. You aren’t just wasting money; you’re sabotaging your recipes before you even turn on the stove.

    I’m not here to sell you on a lifestyle or a trend. My goal is simple: I want to help you build a toolkit that actually works. I’m going to cut through the marketing fluff and tell you exactly what to look for in a set that will survive decades of heavy use. We’re going to talk about weight, material, and why durability matters more than aesthetics. By the time we’re done, you’ll know how to pick a set of tools that stays in your drawer for life, rather than in the landfill.

    Table of Contents

    The Case for Stainless Steel Measuring Sets

    The Case for Stainless Steel Measuring Sets

    I’ve seen far too many home cooks get frustrated by a recipe failing, only to realize their “set” of tools was the culprit. When you’re working with delicate baking ingredients, even a slight deviation in volume can ruin a batch of sourdough or a tray of macarons. This is where baking ingredient accuracy becomes non-negotiable. Plastic sets are notorious for warping under heat or absorbing the odors of whatever you cooked last, which is a nightmare when you’re trying to measure out vanilla extract.

    If you want to do this right, you need to invest in stainless steel measuring sets. Unlike their flimsy counterparts, these won’t bend when you’re packing down brown sugar or crack when you’re scooping heavy flour. They provide a level of durability that is essential for anyone serious about their culinary precision tools. I always tell my clients: buy once, buy well. A heavy-duty steel set is one of those kitchen utensil essentials that you’ll pull out of the drawer every single day for the next thirty years without a single thought about replacing them.

    Achieving Baking Ingredient Accuracy Every Time

    Achieving Baking Ingredient Accuracy Every Time.

    If you’ve ever pulled a tray of sunken, gummy cookies out of the oven, I can almost guarantee it wasn’t your oven temperature that failed you—it was your math. In the world of pastry, there is no room for “eyeballing it.” To achieve true baking ingredient accuracy, you have to treat your recipe like a blueprint. Even a slight deviation in flour or baking powder can ruin the structural integrity of a cake. This is where having a dedicated set of high-quality tools becomes non-negotiable; you aren’t just scooping powder, you are managing chemical reactions.

    I always tell my clients to stop treating their spoons like an afterthought. While most people focus on expensive stand mixers, they overlook the culinary precision tools that actually dictate the outcome. You need a set that allows for level, consistent scoops every single time. Whether you are working with fine spices or heavy leavening agents, your equipment must be rigid enough to hold its shape under pressure. If your tools flex or bend when you level them off with a knife, you are already losing the battle for consistency.

    Five Rules for Measuring Like a Professional

    • Stop nesting them loosely; keep your set in a dedicated container or a magnetic strip so you aren’t digging through a junk drawer every time a recipe calls for a teaspoon of salt.
    • Ditch the “eyeballing” habit for dry ingredients; if the recipe calls for a level tablespoon, actually level it off with the back of a knife to avoid the cumulative errors that ruin a delicate sponge cake.
    • Treat your spoons like real tools by washing them immediately after use, especially if they’ve touched oils or spices, to prevent stubborn buildup in the tiny crevices where the handles meet the bowls.
    • Invest in a set with etched markings rather than printed ones; the ink on cheap sets will rub off within a year of scrubbing, leaving you guessing which spoon is which.
    • Use the “spoon and level” method for flour and sugar instead of packing them down; packing your measuring spoon too tightly is the fastest way to end up with a dry, heavy loaf of bread.

    The Bottom Line on Measuring Spoons

    Stop buying those cheap, colorful plastic sets that warp under heat or crack in the drawer; a single set of heavy-duty stainless steel is the only way to ensure your measurements stay consistent for years.

    Prioritize sets that nest together tightly to save precious cabinet space, but make sure they have enough weight to sit firmly in a bowl without flipping over when you’re scooping flour or sugar.

    Remember that the right tool is useless without the right habit—level off your dry ingredients with a flat edge every single time to avoid the guesswork that ruins a good recipe.

    The Real Cost of Cheap Tools

    I’ve seen enough commercial kitchens go to ruin because someone thought they could save five dollars on a flimsy plastic spoon set; in cooking, precision is everything, and you can’t measure your way to a good meal with tools that warp the moment they hit a little heat.

    Rosalind Hayter

    Final Thoughts on Making the Right Choice

    Final Thoughts on Making the Right Choice

    At the end of the day, choosing the right measuring spoons isn’t about having the prettiest set in your utensil drawer; it’s about reliability. We’ve talked about why you should ditch the flimsy, crack-prone plastic in favor of heavy-duty stainless steel and why precision is the difference between a failed souffle and a masterpiece. Whether you are leveling off flour for a delicate cake or measuring out spices for a hearty stew, your tools shouldn’t be an afterthought. When you invest in a set that won’t bend, warp, or snap, you are essentially removing the guesswork from your cooking process and ensuring that your recipes turn out exactly as intended, every single time.

    My advice is simple: stop treating your kitchen tools like disposable commodities. A good set of measuring spoons is one of those rare items that, if chosen wisely, you will likely still be using twenty years from now. Don’t get distracted by the bells and whistles or the “as seen on TV” gadgets that promise magic but deliver nothing but clutter. Focus on quality over quantity and build a kitchen that supports your skills rather than frustrating them. Get the right tools, develop your habits, and then get to the actual business of cooking something delicious.

    Frequently Asked Questions

    Are there any specific brands of stainless steel sets that don't have those annoying thin edges that catch on flour?

    I know exactly the ones you mean—those razor-thin edges that snag on flour or sugar like a serrated knife. It’s incredibly frustrating when you’re trying to be precise. Look for sets with a “rolled edge” or a slightly rounded rim. I’ve always relied on brands like OXO (their stainless line) or All-Clad; they have enough heft and a smooth, rounded finish that they glide right through even the densest flour without catching.

    How do I know if a set is actually solid stainless steel rather than just cheap metal with a thin coating?

    Here’s the trick: pick up the set. If they feel light as a feather, they’re likely cheap, plated tin or thin aluminum. Real, solid stainless steel has a certain heft to it. Also, look closely at the edges. Cheap sets are often stamped thin and can feel sharp or flimsy. You want something with a substantial rim and a weight that feels balanced in your hand. If it feels like a toy, leave it on the shelf.

    Is it worth getting a set with long handles for deep mixing bowls, or is that just another unnecessary gadget?

    It’s not a gadget; it’s a matter of ergonomics. If you’re working with deep commercial-sized mixing bowls or even just a standard large glass bowl, short handles are a nightmare. You end up scraping your knuckles against the rim just to get a measurement, which is messy and frustrating. Get the long handles. They keep your hands clean and your measurements precise. It’s a small practical difference that makes a huge impact on your workflow.

  • Comparing Countertop Blenders for Daily Use

    Comparing Countertop Blenders for Daily Use

    I’ve spent twenty years in commercial kitchens, and if there is one thing that makes my blood boil, it’s seeing people pour hundreds of dollars into a “smart” countertop blender that’s more computer than kitchen tool. I’ve seen enough high-end gadgets end up in the back of a cluttered pantry, gathering dust because they’re too complicated for a Tuesday morning smoothie or too fragile to actually crush a handful of ice. You don’t need a machine that connects to your Wi-Fi; you need a workhorse that won’t quit when things get heavy.

    I’m not here to sell you on the latest flashy trends or the overpriced plastic junk that the big-box stores want you to believe is “essential.” My goal is to cut through the marketing noise and tell you exactly what is worth your hard-earned money and what is just expensive clutter. I’m going to share what I’ve learned from years of professional catering and home organizing to help you find a machine that is built to last a lifetime. We are looking for durability and function, nothing more and nothing less.

    The Truth About Glass vs Plastic Blender Jars

    The Truth About Glass vs Plastic Blender Jars

    I see this mistake constantly when I’m helping clients reorganize their workspaces: they buy a machine based on the motor, but they completely ignore what the blades are actually spinning in. When you’re weighing the pros and cons of glass vs plastic blender jars, you have to look past the price tag. Plastic is lightweight and won’t shatter if you drop it, which is great for a quick smoothie on the go. However, most plastic is prone to scratching and absorbing odors. After a few months of blending tomato sauce or turmeric, that “clear” jar starts looking cloudy and smelling like last week’s leftovers.

    If you’re someone who loves making heavy batches of pesto or thick smoothies, I always steer you toward glass. It’s non-porous, meaning it won’t hold onto smells, and it won’t craze or scratch over time. The trade-off is the weight and the risk of breakage, but in my experience, durability is worth the extra ounce of effort when you’re cleaning countertop blenders every single day. If you want a tool that stays hygienic and looks clean for years rather than months, go with glass.

    Why High Speed Motor Power Defines Longevity

    When you’re looking at the specs, don’t get distracted by the fancy digital displays or the number of pre-set smoothie buttons. The real heart of the machine is the motor, and frankly, most people underestimate how much high-speed motor power actually matters for the life of your appliance. I’ve seen too many people buy a cheap, low-wattage model only to have it smell like burning rubber the first time they try to tackle a bag of ice. A motor that struggles is a motor that’s dying; if it has to fight every time you make a simple sauce, you aren’t investing in a tool, you’re investing in a future trip to the landfill.

    You want something with enough torque to handle the heavy lifting without breaking a sweat. This is especially true if you’re looking for the best blenders for frozen fruit or tough fibrous greens. A powerful motor doesn’t just get the job done faster; it creates the necessary vortex to pull ingredients down into the blades, preventing that dreaded air pocket. If you buy a machine that can actually handle the resistance of hard ingredients, you won’t be replacing it in eighteen months. Buy once, cry once.

    5 Things to Look for Before You Pull the Trigger

    • Check the blade design. You don’t want something that just spins liquid around; you need blades that actually pull ingredients down into the vortex so you aren’t standing there with a spatula trying to fix a clog.
    • Look for a heavy base. If the machine rattles or walks itself across your counter when you turn it on, the motor is struggling and the build quality is cheap. A heavy, stable machine means it’s built to handle the workload.
    • Don’t ignore the noise level. I know high-speed motors are loud, but there is a difference between a powerful roar and a high-pitched, ear-splitting screech that tells you the gears are grinding.
    • Prioritize easy cleaning. If the blades aren’t removable or the jar has awkward nooks and crannies, it’s going to end up sitting in the back of your pantry gathering dust because you dread the cleanup.
    • Invest in a machine with variable speed control. A simple on/off switch is fine for a milkshake, but if you want to make a smooth puree or a chunky salsa, you need that granular control to get the texture exactly where you want it.

    My Golden Rules for Buying a Blender

    Stop chasing the lowest price tag; a cheap motor will burn out the first time you try to crush a bag of ice, leaving you with nothing but a heavy paperweight.

    Choose your jar material based on how you actually live—glass is tougher and won’t stain, but if you’re prone to dropping things, high-quality BPA-free Tritan is your best bet.

    Look for a machine with enough torque to do the work for you, because if you have to stand there fighting the blades, the blender isn’t doing its job.

    Making the Right Call for Your Kitchen

    At the end of the day, choosing a blender shouldn’t feel like a gamble. We’ve looked at why you need to prioritize a heavy-duty motor that won’t burn out during a simple smoothie run, and why opting for a high-quality glass jar is almost always worth the extra few dollars to avoid that cloudy, scratched-up plastic mess. I’ve seen too many people get caught up in flashy digital displays and “smart” features that end up being nothing more than glorified gimmicks. If you focus on the build quality and the raw power of the machine, you aren’t just buying a kitchen appliance; you are investing in a tool that will actually serve you every single morning.

    Don’t let the marketing fool you into thinking you need every single gadget on the shelf. A kitchen is meant to be a workspace, not a showroom for expensive, disposable junk. When you choose gear that is built to endure, you’re setting yourself up for a lifetime of better cooking and much less frustration. My advice is simple: buy it once, buy it right, and then get to work. A solid blender, paired with good ingredients and a bit of practice, is all you really need to transform your daily routine.

    Frequently Asked Questions

    Is it actually worth paying the premium for a high-speed blender, or can I get away with a cheaper model for basic smoothies?

    Look, if you’re only ever blending a banana and some milk, a cheap model will do the job for a while. But here’s the reality: those low-wattage motors struggle with anything frozen or fibrous. You’ll end up with chunks of ice or kale stuck in your teeth, and you’ll be fighting the machine every single morning. If you want a smooth texture without a struggle, pay the premium. It’s about efficiency and not replacing a broken motor every two years.

    How do I know if a blender is built to last or just another piece of countertop clutter that will break in six months?

    Look at the weight and the connection points. If the base feels light and hollow, it’s plastic junk designed for a landfill. You want something with heft—a heavy-duty motor that doesn’t whine when it hits ice. Check the coupling; if it’s made of flimsy plastic instead of metal, it’ll strip within months. A real tool feels substantial in your hands and stays planted on the counter when it’s running. If it feels cheap, it is.

    Are there specific brands that actually stand behind their machines with repairable parts instead of forcing me to buy a whole new unit?

    Look, if you want a machine that doesn’t end up in a landfill the moment a gasket fails, look toward Vitamix or Blendtec. I’ve seen too many people toss out a perfectly good motor just because a blade assembly got stuck. These brands actually design their machines to be serviced. You can often find replacement parts or even send them in for professional repair. It’s a bit more upfront, but it beats buying a new plastic paperweight every two years.

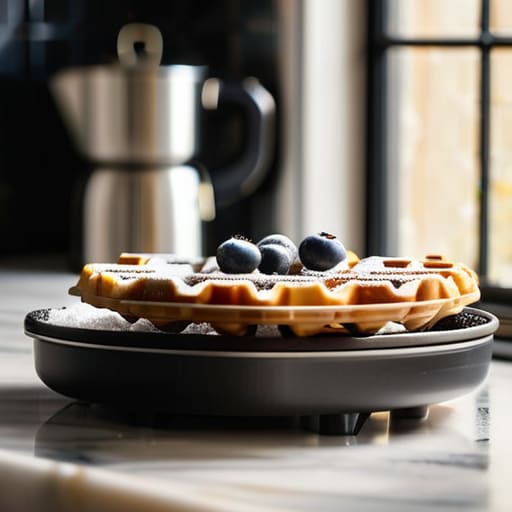
  • Selecting a Waffle Maker for Home Use

    Selecting a Waffle Maker for Home Use

    I’ve spent twenty years in commercial kitchens, and if there is one thing I’ve learned, it’s that most people are being sold a lie when it comes to small appliances. I see them every day in big-box stores: those flimsy, lightweight, gadget-heavy machines that promise “perfect golden waffles” but end up being nothing more than expensive countertop clutter. You buy a cheap, plastic waffle maker, use it three times, and before you know it, the non-stick coating is peeling off like a bad sunburn. It’s a waste of money and a waste of space, and frankly, it’s insulting to anyone who actually wants to cook.

    I’m not here to pitch you on the latest smart-tech nonsense or some neon-colored gadget that requires a specialized app just to make breakfast. My goal is to help you find a tool that actually works for you. I’m going to cut through the marketing fluff and tell you exactly what to look for in a heavy-duty, reliable machine that will still be sitting in your kitchen a decade from now. We’re going to focus on durability and function, because a good breakfast shouldn’t depend on a piece of plastic that’s destined for a landfill.

    Table of Contents

    Essential Electric Waffle Iron Features for Serious Cooks

    Essential Electric Waffle Iron Features for Serious Cooks

    When you’re looking at a wall of shiny appliances, don’t let the marketing fool you. Most of those countertop gadgets are designed to clutter your space and end up in a landfill within two years. If you want something that actually performs, you need to prioritize waffle maker temperature control. Consistency is everything in a kitchen; if the heat fluctuates, you’ll end up with a burnt exterior and a gummy, undercooked center. I’ve seen too many people struggle with uneven cooking simply because they bought a unit that can’t maintain a steady thermal load.

    Beyond heat, look for build quality in the plates. If you’re searching for the best waffle maker for Belgian waffles, you need deep, heavy-duty grids that can handle thick batter without sticking. I always tell my clients to check the coating—avoid the cheap, peeling non-stick stuff. Instead, look for a model that is an easy to clean waffle maker, ideally with plates that are either removable or have a high-quality, durable finish. You want a tool that works hard for you on Sunday morning but doesn’t require a specialized scrubbing brigade to get it ready for next week.

    Finding the Best Waffle Maker for Belgian Waffles

    Finding the Best Waffle Maker for Belgian Waffles

    If you’re after those deep, crispy pockets that define a true Belgian style, you can’t settle for a flat griddle masquerading as a specialty tool. To get that signature height, you need a machine with deep-set molds that allow the steam to escape properly. When I’m scouting for the best waffle maker for belgian waffles, I look specifically for heavy-duty construction and significant depth in the plates. A flimsy, lightweight model will struggle to distribute heat evenly, leaving you with a soggy center and burnt edges—a total waste of good batter.

    Beyond the depth, don’t overlook the importance of heat management. A high-quality unit should offer some level of waffle maker temperature control so you aren’t guessing whether your iron is too hot for a delicate batter. I’ve seen too many people ruin a Sunday morning because their appliance lacks the stability to maintain a consistent sear. If you want that professional, golden-brown crunch every single time, invest in a machine that feels substantial in your hands and holds its heat like a pro.

    • Ditch the non-stick spray for a brush and real butter. Those aerosol cans leave a chemical film on your plates that’s a pain to scrub off, and they actually degrade the coating on your iron over time.
    • Don’t crowd the plates. I’ve seen people try to pour too much batter to save time, but if the batter can’t spread to the edges, you’re left with a dry, doughy center and a mess on the heating element.
    • Invest in a heavy-duty model with thick plates. If the iron feels light and hollow in your hands, it’s going to have hot spots. You want weight; you want even heat distribution so every square is golden brown.
    • Learn the “steam rule” before you flip. Instead of guessing, watch the steam coming out of the sides. When the steam starts to thin out, that’s your signal that the structure is set and it’s safe to open the lid.
    • Clean it while it’s still slightly warm, but never soak it. A damp cloth and a soft brush are all you need. If you let batter bake onto the ridges, you’ll be fighting it for weeks, and you’ll end up ruining the surface.

    My Bottom Line on Waffle Makers

    Stop chasing the cheapest model on the shelf; a heavy, well-constructed iron with consistent heat distribution is the only way to avoid soggy, uneven waffles.

    Prioritize non-stick surfaces that actually feel substantial, and if you can find a model with removable plates, buy it—it makes cleaning much less of a chore.

    Don’t get distracted by bells and whistles like digital timers or specialized shapes; focus on heat control and build quality, because those are the things that actually impact your breakfast.

    The Cost of Convenience

    Most people treat a waffle maker like a seasonal gadget, something to pull out of the cupboard once a year before it ends up in a landfill. If you’re going to give up your precious counter space, make sure it’s for a machine built with enough weight and quality to actually earn its keep every single morning.

    Rosalind Hayter

    Making the Right Call

    Making the Right Call for waffle makers.

    At the end of the day, choosing a waffle maker shouldn’t feel like a gamble. We’ve covered why you need to prioritize heat distribution, heavy-duty plates, and build quality over flashy digital displays that will inevitably fail. Whether you are chasing those deep, crispy pockets of a Belgian style or a classic thin breakfast waffle, the goal remains the same: reliability. Don’t let a sleek design fool you if the heating element is flimsy or the non-stick coating is some cheap, chemical-laden mess that peels after three uses. Focus on the mechanical integrity of the machine, because a tool that doesn’t perform consistently is just more clutter in your cabinets.

    I’ve seen too many people buy a gadget because it looked good in a social media ad, only to have it sit in a kitchen drawer gathering dust six months later. My advice? Buy the iron that feels substantial in your hands and serves a real purpose in your morning routine. A good waffle maker isn’t just an appliance; it’s an investment in your kitchen’s functionality and your family’s breakfast traditions. Stop chasing the trends and start building a kitchen filled with tools that endure. Once you have the right gear, the rest is just about getting into the kitchen and enjoying the process.

    Frequently Asked Questions

    Is it actually worth the extra counter space for a dedicated waffle maker, or should I just stick to a griddle?

    Look, if you’re only making waffles once a month for a special brunch, keep that counter space clear and stick to your griddle. A griddle is versatile; a dedicated waffle maker is a specialist. But, if breakfast is your ritual, get the iron. A good, heavy-duty waffle maker produces that crisp, deep-pocketed texture a flat griddle simply can’t replicate. Don’t buy it for the novelty—buy it if you actually value the result.

    How can I tell if a waffle iron has a high-quality non-stick coating versus one that's going to peel and ruin my food in six months?

    Look, don’t just trust the shiny box. If the coating feels thin or looks like cheap spray-on paint, walk away. I always check the weight; a high-quality non-stick surface usually comes on a heavy, solid plate, not a flimsy piece of tin. If you can see tiny air bubbles or uneven textures in the coating, it’s going to flake into your breakfast by next season. Buy something substantial that feels built to last.

    Can I use my own homemade batter in these machines, or are they designed specifically for those pre-mixed boxed versions?

    Look, if you’re only using boxed mixes, you’re missing half the fun. You can absolutely use your own homemade batter in any decent machine. In fact, that’s how you actually get those crisp, golden edges we’re looking for. Just a word of caution from my years in commercial kitchens: homemade batters can be thicker or more delicate. Watch your heat settings and don’t overfill them—give that batter room to expand so it doesn’t make a mess.

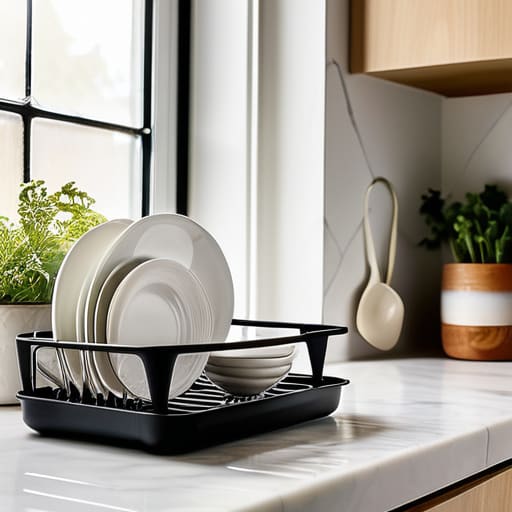
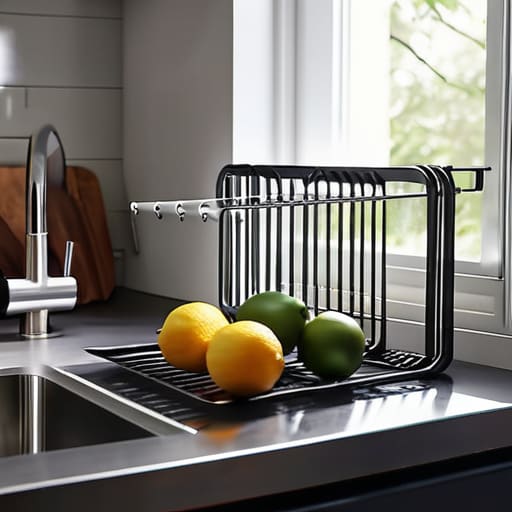
  • Choosing a Dish Drying Rack for Small Spaces

    Choosing a Dish Drying Rack for Small Spaces

    I’ve spent twenty years in commercial kitchens where every square inch of counter space is a battleground, and if there is one thing I’ve learned, it’s that most people are throwing money away on “designer” kitchenware that belongs in a landfill. I’m talking about those flimsy, neon-colored plastic organizers you see in big-box stores—the kind that start wobbling after three weeks and inevitably crack right where the weight of a heavy cast iron skillet hits them. You don’t need a high-tech, multi-tiered gadget with built-in drainboards that clog with lime scale; you need a dish drying rack that actually holds its ground and survives a lifetime of heavy use.

    In this guide, I’m cutting through the marketing fluff to show you what actually works in a real, functioning kitchen. I won’t be recommending anything that looks pretty on a social media feed but fails the durability test in practice. Instead, I’m going to help you identify the materials and layouts that maximize efficiency without cluttering your workspace. We are going to find you a setup that is built to last, so you can stop replacing cheap junk and get back to what matters: actually using your kitchen.

    Table of Contents

    Why a Stainless Steel Dish Drainer Beats Plastic Junk

    Why a Stainless Steel Dish Drainer Beats Plastic Junk

    I’ve seen it a thousand times in both commercial kitchens and client homes: someone buys a cheap, brightly colored plastic rack, and within six months, it’s covered in lime scale, cracked, or sliding around the counter like it’s on ice. Plastic is porous and flimsy; it traps moisture and eventually starts to smell. If you want to stop the cycle of constant replacement, you need to invest in a stainless steel dish drainer. It’s a one-and-done purchase. Metal doesn’t warp under heat, and it won’t degrade when it sits in a puddle of water.

    Beyond just durability, the build quality affects how your kitchen actually functions. A high-quality metal unit provides a stable foundation for your heavier items—think cast iron or stoneware—that would easily buckle a plastic counterpart. When looking at different kitchen sink accessories, pay close attention to the weight and the finish. A solid steel frame stays exactly where you put it, providing a reliable countertop dish organizer that handles the daily heavy lifting without looking like a piece of junk cluttering your workspace.

    The Importance of Smart Drainage Tray Design

    The Importance of Smart Drainage Tray Design.

    A lot of people focus entirely on the rack itself and completely overlook the tray underneath. I’ve seen too many beautiful setups ruined because the water has nowhere to go, leading to that dreaded puddle of stagnant moisture sitting right on your granite or laminate. If you’re looking at drainage tray design, you need to prioritize a slope. A well-engineered tray should direct water straight back into the sink, not let it pool in a shallow basin. If you have to wipe down your counters every ten minutes just to keep them dry, the system has failed you.

    For those of us working with limited real estate, the way a tray integrates with your countertop dish organizer is everything. I always recommend looking for models with a removable, easy-to-clean tray that fits snugly within the footprint of the unit. This is especially vital if you are searching for a drying rack for small kitchens, where every inch of workspace is precious. Don’t settle for a tray that’s difficult to lift out; if you can’t easily clean it, it’s just going to become a breeding ground for grime and mold.

    My Five Rules for Choosing a Rack That Actually Works

    • Measure your footprint before you buy anything. I’ve seen so many people buy a massive, three-tier rack only to realize it takes up half their prep space; if you have a small kitchen, go vertical or stick to a compact, single-level model.
    • Check the weight of the materials. If a rack feels light and hollow in your hand, it’s going to slide around your counter every time you try to set a heavy ceramic plate in it, which is a recipe for broken dishes.
    • Look for removable parts. You want a rack where the utensil holder and the drainage tray can be easily pulled out; if you can’t get it under the faucet to clean it, it’s just going to become a breeding ground for lime scale and grime.
    • Prioritize stability over aesthetics. Don’t get distracted by a “sleek” design that lacks rubberized feet; a good rack needs to grip the countertop so it stays put when you’re loading up heavy cast iron or stoneware.
    • Think about your drying habits. If you mostly hand-wash delicate glassware, you need a rack with dedicated, padded slots to prevent chipping, rather than just a flat wire mesh that offers zero protection.

    The Bottom Line on Choosing Your Rack

    Stop buying cheap plastic racks that warp and crack under the weight of a heavy pot; invest in stainless steel or heavy-duty materials that will actually last you a decade.

    Pay attention to the drainage system—if the tray doesn’t direct water straight into the sink, you’re just inviting mold and lime scale to settle on your countertops.

    Don’t overcomplicate it with gadgets; look for a sturdy, functional design that fits your specific sink area and holds your real-world dishes without wobbling.

    The Cost of Cutting Corners

    “I’ve seen enough flimsy plastic racks collapse under the weight of a single heavy pot to know that if you aren’t buying for durability, you’re just buying more trash for the landfill. A good drying rack isn’t a luxury; it’s the foundation of a workspace that actually functions.”

    Rosalind Hayter

    Final Thoughts on Choosing Wisely

    Final Thoughts on Choosing Wisely: Dish Racks

    At the end of the day, choosing a dish drying rack shouldn’t be a complicated decision, but it is one where people frequently trip up. I’ve seen too many kitchens cluttered with flimsy, colorful plastic models that end up warped, stained, or cracked within a year. Remember, you aren’t just buying a place to set your plates; you are investing in a piece of kitchen infrastructure. Look for that heavy-duty stainless steel construction and a drainage system that actually directs water away from your countertops. If you prioritize material quality and smart design now, you won’t find yourself digging through a junk drawer for a replacement in six months.

    My philosophy has always been simple: build a kitchen that supports your life rather than one that requires constant maintenance. A good, sturdy rack is a small part of your daily routine, but it’s a part that should work silently and efficiently in the background. Don’t let the marketing hype for “space-saving” gadgets distract you from the basics of durability and function. Buy the tool that is built to last, set it on your counter, and get back to what actually matters—making something delicious to eat.

    Frequently Asked Questions

    How much counter space am I actually going to lose by choosing a larger, more heavy-duty rack?

    Look, I’ve seen people shrink their entire kitchen workflow just to save six inches of counter space. You aren’t just losing real estate; you’re losing efficiency. If you buy a massive, heavy-duty rack but end up having to stack bowls precariously because the rack is too small, you’ve actually wasted more space through clutter. Measure your primary prep zone first. If you can afford the footprint, go larger. It’s better to have a dedicated drying station than a pile of wet dishes encroaching on your workspace.

    If I go with stainless steel, what's the best way to prevent those annoying water spots and rust streaks from showing up?

    Look, I’ll be honest: stainless steel isn’t magic. If you let water sit and evaporate on it, you’re going to see spots. The trick is to dry the rack itself with a quick wipe of a microfiber cloth after you’ve cleared your dishes. If you do see streaks, a tiny bit of white vinegar on a cloth will cut right through the mineral buildup without scratching the finish. Just keep it dry, and it’ll last decades.

    Is it worth spending more on a model with a built-in drainage spout, or can I just use a simple drip tray?

    Look, if you have the counter space and the budget, go for the built-in spout. It’s a game changer for keeping your workspace bone-dry. There is nothing more frustrating than a stagnant pool of water sitting under your rack. However, if you’re working with a tight layout, a simple drip tray is perfectly fine—just make sure it’s easy to pull out and clean. Don’t overcomplicate it; just avoid anything that traps moisture.

  • Choosing a Coffee Maker for Your Home

    Choosing a Coffee Maker for Your Home

    I’ve spent two decades in commercial kitchens, and if there is one thing I’ve learned, it’s that most people are being sold a lie when it comes to their morning caffeine fix. You walk into a big-box store and see rows of shiny, high-tech gadgets with touchscreens and built-in milk frothers that promise a “cafe experience” at home. Honestly? Most of those overpriced machines are just expensive plastic clutter waiting to break the moment the warranty expires. You don’t need a computer to brew a decent cup of coffee; you need a reliable coffee maker that focuses on heat stability and durability rather than bells and whistles that will inevitably fail you.

    I’m not here to pitch you on the latest trends or tell you which machine has the prettiest LED display. My goal is to cut through the marketing noise and help you find a setup that actually works for you without breaking your budget or your spirit. I’m going to share the honest, no-nonsense truth about what makes a machine last a lifetime and which “innovations” are just a waste of counter space. Let’s get your kitchen sorted with tools that are built to endure.

    Table of Contents

    Ditch the Single Serve Coffee Makers for Real Substance

    Ditch the Single Serve Coffee Makers for Real Substance

    Ditch the Single Serve Coffee Makers for Real Substance

    I see them in almost every kitchen I organize: those plastic, single-serve pods tucked into a corner, gathering dust or cluttering the counter. Look, I get it. They’re convenient when you’re running out the door, but they are the definition of the “trendy plastic junk” I warn people about. Not only are they a waste of money in the long run, but they also offer zero control over your brew. If you actually want to learn how to improve coffee flavor, you need to move away from pre-packaged, stale grounds trapped in plastic shells.

    If you want a morning caffeine routine that actually feels like a ritual rather than a chore, invest in one of the best drip coffee machines you can find. I’m talking about a machine with enough heft to stay put on your counter and enough precision to maintain a consistent heat. When you control the process, you control the quality. Stop settling for lukewarm, mediocre cups and start building a kitchen around tools that offer real substance and longevity.

    Finding the Best Drip Coffee Machines for Your Kitchen

    Finding the Best Drip Coffee Machines for Your Kitchen.

    If you’re serious about your morning caffeine routine, you need to stop looking at the flashy, touch-screen gadgets and start looking at thermal stability. When I’m scouting for the best drip coffee machines, I’m not looking for bells and whistles; I’m looking for a machine that can actually maintain a consistent heat. If the water temperature fluctuates too much during the cycle, you’re going to end up with a cup that tastes sour or thin. A machine that can hit that sweet spot—usually between 195°F and 205°F—is non-negotiable if you want to actually improve coffee flavor without needing a chemistry degree.

    Don’t get distracted by the endless marketing for “smart” brewers that connect to your Wi-Fi. Those are just more points of failure. Instead, focus on build quality. Look for heavy-duty heating elements and high-quality glass or stainless steel carafes. These are the essential kitchen appliances for coffee lovers who want a reliable cup every single day without having to replace the unit every eighteen months. Invest in a workhorse that prioritizes thermal consistency over digital gimmicks.

    Five Rules for Choosing a Brewer That Won't End Up in a Landfill

    • Prioritize repairability over aesthetics; if a machine uses proprietary plastic parts that can’t be replaced, walk away.
    • Look for metal heating elements rather than cheap plastic ones to ensure your coffee stays hot without that burnt, chemical aftertaste.
    • Avoid anything with a “smart” touchscreen or Wi-Fi connectivity; you don’t need an app to tell you your coffee is ready, and those circuits are just more points of failure.
    • Check the footprint before you buy; I’ve seen too many beautiful kitchens ruined by massive machines that leave zero room for actual food prep.
    • Invest in a machine that works with a reusable filter to save money and reduce the mountain of paper waste we all end up creating.

    My Golden Rules for Your Coffee Setup

    Stop chasing the latest tech-heavy gadget; focus on build quality and ease of cleaning so you actually use it every day.

    Prioritize machines with thermal carafes or high-quality glass over cheap plastic components that leach flavors and break within a year.

    Invest in a solid burr grinder alongside your brewer, because even the best machine can’t fix poorly ground, stale beans.

    ## The Cost of Convenience

    Stop treating your morning coffee like a disposable commodity; if you buy a machine made of cheap plastic that you’ll be tossing in a landfill by next Christmas, you aren’t saving money, you’re just wasting it.

    Rosalind Hayter

    Stop Chasing Trends and Start Brewing Better.

    At the end of the day, choosing a coffee maker isn’t about finding the flashiest gadget on the market or the one with the most buttons. It’s about recognizing that your kitchen deserves tools that serve a purpose without creating unnecessary clutter. We’ve talked about why you should move away from the waste of single-serve pods and why a high-quality drip machine is a far more sustainable and flavorful investment for your daily routine. When you prioritize build quality and ease of cleaning over gimmicks, you aren’t just buying an appliance; you are investing in your morning stability. Stick to the basics that work, and you’ll save yourself a headache—and a lot of money—in the long run.

    I’ve spent years in professional kitchens where we didn’t have time for equipment that failed when we needed it most. I want that same reliability for your home. Don’t let the marketing hype convince you that you need a complex machine to enjoy a decent cup of joe. A simple, well-made brewer paired with good habits is all you really need to master your morning ritual. Buy something that is built to last a lifetime, treat it with respect, and let it become a seamless part of your home. Build a kitchen that works for you, one steady cup at a time.

    Frequently Asked Questions

    How do I know if a high-end coffee machine is actually worth the investment or just fancy branding?

    Look past the polished chrome and the fancy logo. To see if a machine is worth your hard-earned money, check the build quality. Is it mostly plastic, or does it have metal internals and heavy-duty components? I look for thermal stability—does it hold a consistent temperature? If the manufacturer can’t tell you exactly how they manage heat or if the parts are easily replaceable when they eventually wear out, you’re just paying for a brand name.

    Is it better to go with a manual pour-over setup or stick to a reliable automatic drip machine?

    It depends on whether you value the ritual or the routine. If you actually enjoy the process—the precision, the control, and the quiet moment of morning mindfulness—go with a manual pour-over. It’s a setup that lasts decades. But if you’re someone who needs to grab a mug and get out the door without a fuss, stick to a reliable automatic drip. Don’t buy a pour-over just because it looks pretty on a shelf if you’re never going to use it.

    What are the actual signs that my current coffee maker is becoming a waste of space and money?

    If you’re constantly cleaning out calcified gunk from the reservoir or if your coffee tastes like burnt paper, it’s time to let it go. When a machine starts making more noise than usual—grinding or sputtering—it’s struggling to do its one job. But the biggest sign? If you find yourself skipping it because the cleanup is a headache, that machine isn’t a tool anymore; it’s just clutter taking up valuable counter space.

  • Benefits of Using a Dutch Oven

    Benefits of Using a Dutch Oven

    I’ve spent two decades in commercial kitchens, and if there is one thing that makes my blood boil, it’s watching people drop two hundred dollars on a designer-colored dutch oven just because it looks pretty on a social media feed. You don’t need a pastel-pink pot to make a decent stew, and you certainly don’t need a collection of five different versions of the same heavy pot. Most of those high-end brands are just marketing fluff wrapped around decent iron, and I am tired of seeing home cooks fall for the hype when they could be investing that money into better ingredients instead.

    I’m not here to sell you on a lifestyle or a specific brand name. My goal is to cut through the noise and help you identify a dutch oven that actually holds heat, distributes it evenly, and—most importantly—will still be sitting on your stovetop thirty years from now. I’ll tell you exactly what to look for in terms of weight and lid fit, and I’ll show you how to avoid the flimsy junk that ends up in a landfill after six months. Let’s get your kitchen sorted with tools that actually work.

    Table of Contents

    Cast Iron vs Enameled Choosing Your Last Durable Kitchen Essential

    Cast Iron vs Enameled Choosing Your Last Durable Kitchen Essential

    When you’re standing in the cookware aisle, you’re essentially deciding between two different philosophies of cooking. Raw cast iron is the workhorse of the professional kitchen; it’s rugged, incredibly responsive to high heat, and offers unmatched heat retention in cookware. If you don’t mind the occasional maintenance, a plain iron pot is a lifelong companion. You’ll need to learn the art of seasoning cast iron dutch oven surfaces to keep them non-stick, but once that layer is built up, there is nothing quite like it for searing meat or baking bread.

    On the other hand, enameled versions are the polished cousins of the group. They come pre-coated with a glass-like finish, which means you can skip the oiling and go straight to acidic recipes like tomato-based sauces or braises without worrying about damaging the metal. While you lose that deep, seasoned patina, you gain convenience and easy cleanup. If you want the best dutch oven for stews that you can take straight from the stovetop to a beautiful table presentation without a second thought, the enameled route is your winner. Choose based on your patience, not the marketing.

    The Magic of Heat Retention in Cookware

    The Magic of Heat Retention in Cookware.

    If you’ve ever tried to simmer a thick beef stew in a thin, cheap stainless steel pot, you know the frustration of a sauce that keeps breaking or burning because the temperature fluctuates every time you move the lid. That is where the real science of heat retention in cookware comes into play. A heavy-duty vessel acts like a thermal battery; once it gets up to temperature, it stays there. This steady, unwavering heat is exactly what you need for those long, slow braises where patience is the main ingredient.

    When you are deciding between cast iron vs enameled dutch oven options, remember that the goal is thermal stability. A thick-walled pot won’t just cook your food; it will hold onto that energy, ensuring that even when you drop in a cold piece of meat, the temperature doesn’t plummet. This consistency is the secret to achieving that “fall-off-the-bone” texture without having to constantly babysit the stove. It’s not about fancy technology; it’s about mass and physics working together to do the hard labor for you.

    Five Rules for Making Your Dutch Oven Work for You

    • Stop babying your cast iron. If you’re using an enameled model, you can use mild soap, but if you’ve gone with raw cast iron, a little scrub and a light coating of oil is all it needs to stay seasoned and non-stick.
    • Don’t crowd the pot. I see people trying to sear a pound of meat all at once, which just ends up steaming the food in its own juices. Work in batches so you actually get that crust you’re looking for.
    • Respect the heat. You don’t need your burner on high to get a Dutch oven screaming hot; these things hold heat like a brick. Start medium, let it stabilize, and you’ll avoid the dreaded scorched bottom.
    • Use it for more than just stews. I use mine for braising short ribs, baking crusty sourdough, and even deep-frying. If you’re only pulling it out once a month for a chili, you aren’t getting your money’s worth.
    • Check the lid fit before you buy. A heavy, tight-fitting lid is the whole point of a Dutch oven—it traps the moisture and creates that mini-oven environment. If the lid wobbles like a loose tooth, put it back on the shelf.

    The Bottom Line on Your Next Dutch Oven

    Don’t get distracted by flashy colors or non-stick coatings that peel off in six months; choose between raw cast iron for high-heat searing or enameled for easy cleanup, but make sure it’s heavy enough to hold its heat.

    Stop buying “specialty” pots for every single dish and invest in one high-quality, large-capacity Dutch oven that can handle everything from a slow-braised short rib to a batch of homemade sourdough.

    View your cookware as a lifelong investment rather than a disposable gadget; if you buy a piece that is built to last, you’ll save yourself a fortune in replacements over the next few decades.

    The Truth About Your Cookware

    I’ve seen enough commercial kitchens to know that a fancy gadget is just a distraction; if you want a pot that actually earns its place on your stove, get a heavy Dutch oven that can handle a decade of Sunday roasts without flinching.

    Rosalind Hayter

    Making the Right Investment

    Making the Right Investment in Dutch ovens.

    At the end of the day, choosing a Dutch oven isn’t about picking the prettiest color on a showroom shelf; it’s about understanding how you actually cook. Whether you decide to go with the rugged, lifelong reliability of raw cast iron or the easy-to-clean convenience of an enameled model, you are looking for thermal mass and durability. You want a piece of equipment that can handle a heavy sear, hold steady heat for a slow braise, and survive being passed down to the next generation. Don’t let the marketing fluff trick you into buying a lightweight, thin-walled imitation that will warp the moment you turn up the flame. Buy for the long haul, because a real Dutch oven is a workhorse, not a countertop decoration.

    My advice is simple: stop chasing the latest kitchen trends and start building a foundation of tools that actually perform. A well-chosen Dutch oven will eventually become the most familiar object in your kitchen, seasoned by years of Sunday roasts and late-night stews. It’s more than just a pot; it’s a commitment to slowing down and doing things right. When you invest in quality, you aren’t just buying cookware—you’re buying the ability to cook better meals without the constant frustration of subpar gear. Get the right one, treat it with respect, and let it work for you for decades to come.

    Frequently Asked Questions

    Is it actually worth the extra money to go with an enameled model, or can I just stick to raw cast iron?

    Look, if you’re only making heavy stews and braises, raw cast iron is your best friend—it’s cheaper and indestructible. But if you want one pot that handles everything from a delicate tomato sauce to a sourdough loaf without worrying about acidic ingredients stripping your seasoning, pay the premium for enamel. It’s more maintenance-free and easier to clean. If you can afford the jump, enamel gives you more versatility for a single investment.

    How do I know if a Dutch oven is heavy enough to actually hold heat, or if it's just one of those thin, cheap imitations?

    Here’s the litmus test: pick it up. If it feels surprisingly light, like you’re lifting a hollowed-out tin, put it back on the shelf. A real Dutch oven should have some serious heft; that weight is what tells you the walls are thick enough to hold steady heat. If it feels flimsy in your hands, it’ll be flimsy on your stove, and your braises will never turn out right.

    Do I really need to spend time seasoning a new pot, or is that just something people do to make things more complicated than they need to be?

    Look, I get it. You want to cook, not perform a chemistry experiment. But if you bought raw cast iron, skipping the seasoning is a mistake you’ll pay for in ruined meals and rust. It’s not about making things complicated; it’s about building a non-stick surface that actually lasts. If you went with enameled, you can skip the hassle entirely. But for raw iron? Do the work once so the pot works for you forever.

  • Selecting the Best Cutting Board for Your Needs

    Selecting the Best Cutting Board for Your Needs

    I spent twenty years in commercial kitchens where the rhythm of the service depended entirely on the tools in front of you. I can still hear the rhythmic thwack-thwack-thwack of a chef’s knife hitting a heavy maple block, a sound that meant precision and speed. Most people, however, are trying to prep dinner on a thin, flimsy piece of plastic that slides around the counter like a hockey puck. It’s frustrating to watch because a cheap, undersized cutting board isn’t just an annoyance; it’s actively dulling your expensive knives and making your prep work twice as hard as it needs to be.

    I’m not here to sell you on some high-tech, bamboo-composite nonsense that’s going to crack the first time you chop an onion. My goal is to help you cut through the marketing fluff and find a piece of equipment that actually belongs in a working kitchen. I’m going to walk you through exactly what to look for in terms of wood species, thickness, and maintenance so you can invest in something that lasts a lifetime. We’re going to focus on durability and function, because your kitchen should work for you, not the other way around.

    Table of Contents

    The End Grain vs Edge Grain Debate

    The End Grain vs Edge Grain Debate.

    When you’re standing in the kitchenware aisle, you’ll see boards that look identical, but the way those wood fibers are oriented makes a massive difference in how they perform. I always tell my clients to look closely at the grain. With an edge grain board, the wood strips run parallel to the surface. They’re sturdy and usually a bit more affordable, but they tend to show knife marks more quickly. If you aren’t careful, those deep grooves can become a headache for hygiene and food safety because they trap moisture and food particles.

    Now, if you want to do things the professional way, you go with end grain. In an end grain setup, the wood fibers stand vertically, like a bundle of tiny straws. When your knife hits the surface, it slides between the fibers rather than slicing through them. This is the absolute best wood for chopping if you care about your cutlery, because it’s incredibly effective at preventing knife dulling. It’s a heavier, more expensive investment, but it heals itself as you work. If you’re looking for something that will actually last a lifetime, the end grain is worth every penny.

    Selecting the Best Wood for Chopping

    Selecting the Best Wood for Chopping.

    When you’re browsing the aisles, you’ll see a dozen different species of timber, but most of them are just marketing fluff. If you want the best wood for chopping, you need to look at density and grain structure. Maple is my old standby; it’s hard enough to handle heavy prep but forgiving enough to avoid preventing knife dulling prematurely. Walnut is a beautiful, darker alternative that offers a similar level of durability, though it tends to run a bit higher in price.

    I always tell my clients to steer clear of anything too soft, like pine, or anything overly exotic and oily that might leach flavors into your food. You want a tight grain pattern. This is vital for hygiene and food safety, as it prevents liquids from seeping deep into the fibers where bacteria can hide. Stick to closed-grain hardwoods that can handle a bit of seasoning and regular maintenance. If the wood feels lightweight or suspiciously cheap, leave it on the shelf. You’re looking for something with enough heft to stay put on your counter while you work.

    How to Actually Maintain Your Boards (And Not Ruin Them)

    • Stop using dishwashers; if you put a good wood board in a dishwasher, you’re basically asking it to crack and warp within a week. Hand wash with warm, soapy water and dry it immediately.
    • Get yourself a food-grade mineral oil or a beeswax conditioner. Once a month—or whenever the wood starts looking thirsty and dull—rub it in well to keep the moisture out and the wood from splitting.
    • Never, and I mean never, use your cutting board as a serving tray for acidic foods like lemons or vinegar. The acid can seep into the wood grain and strip away the oil you just worked so hard to apply.
    • If you see deep grooves or stains starting to form, don’t toss it. Grab some coarse sandpaper, sand it down smooth, and re-oil it. It’ll feel brand new and be ready for another decade of service.
    • Keep your boards upright when they dry. If you lean them flat against a wall or leave them lying flat on the counter, they can trap moisture underneath and start to warp or grow mold. Give them some airflow.

    My Rules for a Board That Actually Lasts

    Skip the cheap plastic or bamboo nonsense; if you want a board that won’t dull your knives or end up in a landfill by next year, invest in a solid piece of hardwood.

    Don’t get intimidated by the technical terms—just remember that end grain is the professional’s choice for longevity, while edge grain is perfectly fine if you’re on a tighter budget.

    A good board is only as good as your maintenance; keep it oiled and never, ever throw it in the dishwasher unless you want to ruin it permanently.

    The Real Cost of a Cheap Board

    “I’ve seen too many people blow their budget on fancy gadgets while they’re still hacking away at a thin, plastic slab that dulls their knives and wobbles on the counter. A serious kitchen starts with a heavy, reliable board—something that feels solid under your knife and actually stays in your kitchen for twenty years instead of twenty weeks.”

    Rosalind Hayter

    Making the Right Call

    Making the Right Call: Choosing cutting boards.

    At the end of the day, choosing a cutting board isn’t about finding the prettiest thing in a catalog; it’s about finding a tool that won’t fail you when you’re in the middle of a dinner rush. We’ve covered the heavy hitters: you need to decide if the durability of an end-grain board fits your lifestyle, or if a reliable edge-grain option is more practical for your space. Remember to prioritize hardwoods like maple or walnut over those cheap, soft woods that will scar and trap bacteria within weeks. If you invest in a solid, high-quality piece of wood, you aren’t just buying kitchenware—you are investing in the longevity of your knives and the safety of your food.

    My advice? Stop looking for the “perfect” gadget and start looking for the right foundation. A kitchen is only as functional as the tools you rely on every single day, and a good cutting board is the unsung hero of every meal you prep. Treat your board well—oil it regularly and keep it out of the dishwasher—and it will serve you for decades. Don’t let the trends dictate your setup. Build a kitchen that is steady, grounded, and built to last, one honest tool at a time. Now, go grab a bottle of food-grade mineral oil and get to work.

    Frequently Asked Questions

    How often do I actually need to oil these boards to keep them from cracking?

    Look, there’s no magic number, but if the wood looks dull or feels thirsty, it’s time. I usually check mine once a month, but if you’re a heavy cook using it daily, you might need to oil it every two weeks. A good rule of thumb? Drop a little water on the surface. If it soaks in immediately instead of beading up, grab your mineral oil. Don’t wait until you see a crack to start caring.

    Is it safe to use a wooden board for raw meat, or am I just inviting bacteria into my kitchen?

    Look, I get it. The idea of raw chicken juices soaking into a piece of wood sounds like a recipe for food poisoning. But here’s the reality: a well-maintained wood board is actually safer than those flimsy plastic ones. Wood has natural antimicrobial properties that pull bacteria deep into the fibers where they die off. Just don’t get lazy. Scrub it with hot, soapy water and never, ever throw it in the dishwasher.

    Can I put these in the dishwasher, or is that a one-way ticket to ruining them?

    If you put a real wood cutting board in the dishwasher, you’re essentially throwing money down the drain. The high heat and intense water pressure will warp the wood, crack the grain, and strip away every bit of moisture. It’s a one-way ticket to a ruined board. Treat it like a professional tool: hand wash with warm, soapy water, dry it immediately, and give it a little oil once in a while. That’s it.