Blog

  • When a Saucier Beats a Straight Sided Saucepan

    When a Saucier Beats a Straight Sided Saucepan

    I spent twenty years in commercial kitchens where the heat is constant and there is zero room for gear that doesn’t perform. I’ve seen too many home cooks waste a fortune on those flashy, multi-piece “essential” sets, only to realize they’re struggling to reduce a simple béarnaise in a standard saucepan with steep, straight sides. If you’ve ever felt like you’re fighting your cookware just to get a smooth consistency, you don’t need a bigger budget; you just need a proper saucier pan. Stop trying to force a standard pot to do a specialist’s job—it’s a recipe for scorched milk and wasted ingredients.

    I’m not here to sell you on some trendy, non-stick gadget that will peel in six months. My goal is to help you identify a saucier pan built with the weight and curvature that actually matters for heat distribution and whisking. I’ll tell you exactly what to look for in terms of material and construction so you can buy something once and use it for the rest of your life. No hype, no fluff—just the practical truth about what belongs in a working kitchen.

    Saucier Pan vs Saucepan Why Shape Matters
    Saucier Pan vs Saucepan Why Shape Matters

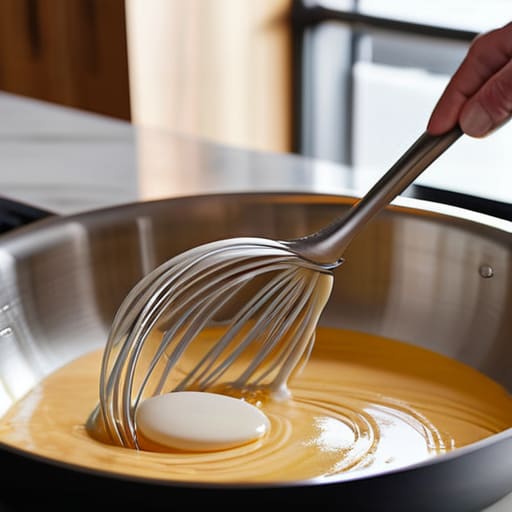
    Most people grab whatever pot is closest to the stove, but if you’re trying to make a delicate reduction or a silky béchamel, a standard saucepan is going to fight you. The main difference in the saucier pan vs saucepan debate comes down to the geometry. A saucepan has straight, vertical sides, which is great for boiling water or making soup, but it’s terrible for whisking. When you’re working on small batch sauce preparation, those vertical walls create “dead zones” where ingredients get trapped and scorched.

    A proper saucier features sloping, curved sides that allow your whisk to reach every single millimeter of the surface. This design isn’t just for show; it’s essential for even heat distribution for sauces and preventing those dreaded burnt bits at the edges. If you’re looking for the best pan for making gravy or a panade, you need that rounded bottom to keep everything moving. I always tell my clients: stop fighting your equipment. If the shape of the pan is working against your technique, you’re just making more work for yourself.

    Professional Chef Cookware Built to Last a Lifetime

    When I was managing high-volume catering lines, I saw too many cooks try to cut corners by using cheap, thin-walled pans that scorched every delicate reduction. If you want to do this right, you need to invest in professional chef cookware that doesn’t flinch when the heat goes up. I’m talking about heavy-gauge construction that provides the kind of even heat distribution for sauces that you just can’t get from a grocery store bargain bin.

    You’ll often hear people debate stainless steel vs nonstick saucier options, and while nonstick has its place for eggs, it won’t survive a decade of heavy use. A high-quality tri-ply stainless steel vessel is my gold standard; it handles the heat, it’s easy to deglaze, and it won’t flake into your food. I’ve spent years restoring old gear, and the pans that actually survive the test of time are the ones built with substance. Don’t settle for a flimsy piece of metal that warps after six months. Buy the heavy stuff once, and you’ll never have to shop for this again.

    Five Ways to Use Your Saucier Without Wasting Your Time

    • Stop using it for boiling pasta. A saucier is designed for reduction and delicate emulsions, not for filling up with gallons of water. Save the deep stockpot for the heavy lifting and keep your saucier for the precision work.
    • Watch your heat levels. Because the curved sides allow for better liquid circulation, you can reduce sauces much faster than in a standard saucepan, but that also means you can burn them if you aren’t paying attention.
    • Use the curves to your advantage when whisking. One of the best things about the rounded bottom is that there are no “dead zones” in the corners where flour or cream can hide and scorch. It makes making a proper roux much easier on your wrists.
    • Pair it with a heavy-duty whisk. If you’re using a professional-grade saucier, don’t use a flimsy, cheap whisk that’s going to bend the moment you hit a thick reduction. Match the tool to the pan.
    • Don’t let it sit in the sink. If you bought a high-quality stainless steel or copper-core saucier, treat it with respect. A quick soak and a gentle scrub will keep that surface smooth for decades, preventing the tiny scratches that make sauces stick.

    The Bottom Line on Choosing a Saucier

    Stop trying to force a standard saucepan to do a specialist’s job; the curved bottom of a saucier is essential for whisking and preventing sauce from getting stuck in the corners.

    Prioritize heavy-duty materials like stainless steel or copper over cheap non-stick coatings that will peel and end up in a landfill within two years.

    Look for a pan with a wide surface area and high sides, which allows for better evaporation and more consistent heat distribution for your reductions.

    Making the Right Investment

    At the end of the day, choosing a saucier isn’t about adding another piece of metal to your cabinet; it’s about recognizing that your techniques deserve better tools. We’ve looked at why the sloped sides are non-negotiable for reducing sauces without splashing, and why you should prioritize heavy-duty stainless steel or copper over those flimsy, non-stick coatings that peel after six months. If you want to stop fighting your cookware and start focusing on the flavor, you need to stop settling for “good enough” pans that can’t handle the heat or the movement required for real cooking. A quality saucier is a workhorse, not a gadget, and it’s one of the few pieces of equipment that will actually make your life easier every single time you step up to the stove.

    I know it can feel overwhelming when you see a million different brands and price points, but I promise you, the “trendy” option is rarely the right one. My advice is simple: buy once, buy well, and buy something that can be passed down. When you invest in a professional-grade saucier, you aren’t just buying a pan; you are investing in your own confidence in the kitchen. Once you master a reduction or a delicate custard in a tool that actually responds to you, you won’t ever want to go back to those shallow, awkward saucepans. Build a kitchen that lasts, one intentional piece at a time.

    Frequently Asked Questions

    Is a saucier pan really worth the extra counter space if I already own a standard saucepan?

    Look, I get it. Counter space is precious, and I hate clutter as much as the next person. But if you’re tired of your sauces breaking or the liquid evaporating before your pasta is even al dente, the saucier is worth the footprint. A standard saucepan is a workhorse, but it can’t compete with those rounded edges for whisking or reducing. If you cook from scratch, it’s not a luxury—it’s a necessity.

    Should I prioritize heavy-bottomed stainless steel or go with something non-stick for my sauces?

    If you want a pan that lasts decades, go with heavy-bottomed stainless steel. It’s the industry standard for a reason: you can sear, deglaze, and reduce without worrying about ruining a coating. Non-stick is fine for a quick egg, but it’s a consumable—it’ll eventually flake and end up in the trash. Invest in stainless steel once, learn to manage your heat, and you’ll never have to buy another saucier again.

    Can I use a saucier pan on an induction cooktop, or do I need to check the base specifically?

    You definitely need to check the base. Induction works through magnetism, so if your saucier is pure copper or aluminum, it won’t even turn on. I always tell people to look for the “induction-ready” symbol on the bottom or test it with a simple magnet—if it sticks to the pan, you’re good to go. Don’t waste money on a beautiful piece of cookware if it can’t actually work on your stove.
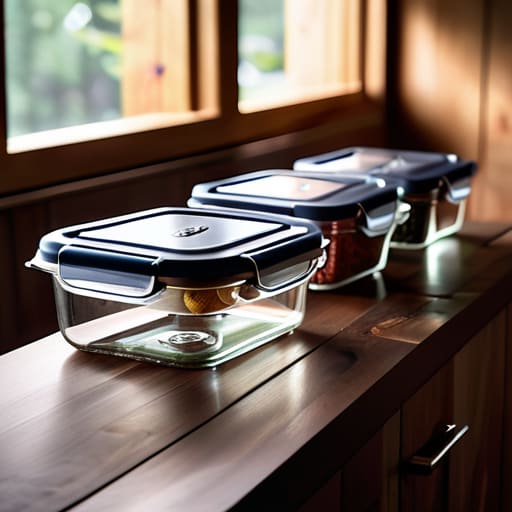
  • The Best Containers for Food Storage

    The Best Containers for Food Storage

    I’ve spent twenty years in commercial kitchens, and if there is one thing I’ve learned, it’s that most people are throwing money down the drain every time they hit the home goods aisle. You walk into a big-box store and see endless rows of brightly colored, mismatched, and overpriced storage containers that promise to “revolutionize” your pantry. Let me tell you a secret from someone who has managed massive catering prep: most of that stuff is absolute junk. You buy a set of flimsy plastic bins, two months later the lids are warped, the seals are gone, and you’re left with a cabinet full of useless clutter that actually makes organizing harder instead of easier.

    I’m not here to sell you on a lifestyle trend or a specific brand of designer glass. My goal is to help you build a kitchen that actually functions by focusing on durability and utility. In this guide, I’m going to cut through the marketing noise and show you exactly which materials and styles are worth your hard-earned money. We are going to talk about investing in pieces that actually last a lifetime, so you can stop playing the guessing game and start enjoying a kitchen that finally works for you.

    Table of Contents

    Why Glass Meal Prep Containers Outlast Plastic Junk

    Why Glass Meal Prep Containers Outlast Plastic Junk

    I’ve spent enough time in commercial kitchens to know that plastic is a losing game. You buy a set of those colorful, lightweight bins, and within six months, they’re stained orange from spaghetti sauce or warped from a trip through the dishwasher. Most people settle for bpa-free plastic containers because they’re cheap and easy, but you end up replacing them every single year. It’s a cycle of waste that costs more in the long run than just buying the right tool once.

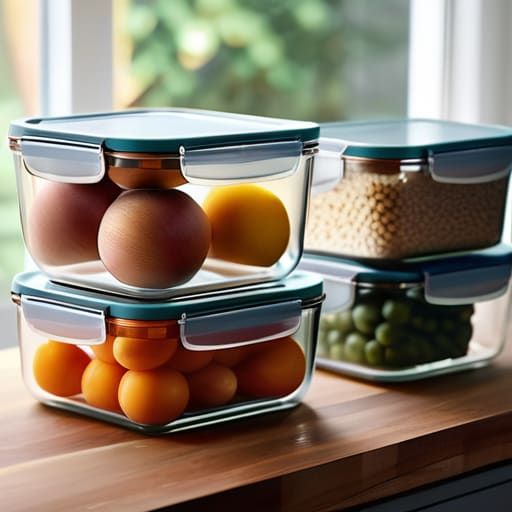
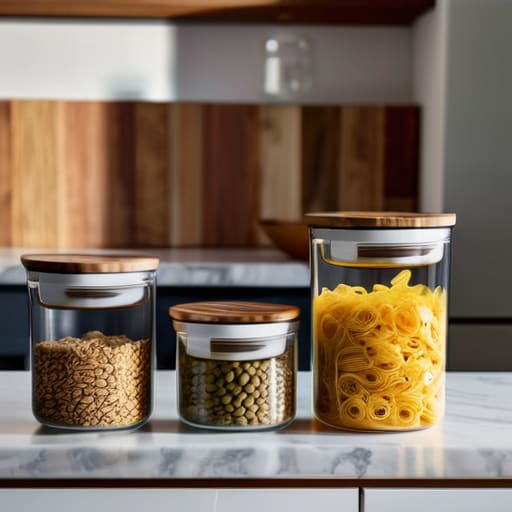
    When you switch to glass meal prep containers, you’re investing in something that doesn’t degrade. Glass doesn’t absorb odors, it won’t leach chemicals into your food when you reheat it, and most importantly, it doesn’t scratch or cloud over time. I always tell my clients that true value lies in durability. A heavy-duty glass set might feel like a bigger upfront cost, but when you realize you won’t be tossing them in the bin every season, the math starts to make sense. They hold their seal, keep your portions intact, and stay clear long after the plastic ones have turned into junk.

    The Truth About Bpa Free Plastic Containers and Longevity

    The Truth About Bpa Free Plastic Containers and Longevity

    I’ve seen it a thousand times in commercial kitchens: a cabinet overflowing with mismatched, stained, and warped plastic. Marketing departments love to throw around the term “BPA-free plastic containers” as if that’s a magic shield for quality. Let’s get one thing straight: just because a container doesn’t contain Bisphenol A doesn’t mean it’s built to survive a year of heavy use. Most of these plastic options are still prone to absorbing odors, staining from tomato sauce, and eventually cracking in the dishwasher. You aren’t buying a solution; you’re buying a temporary fix that will inevitably end up in a landfill.

    If you’re looking for real food freshness longevity, you have to look past the label. Plastic is porous, meaning it breathes in a way that actually accelerates spoilage over time. When I was managing large catering events, we relied on materials that provided a true barrier against air. If you insist on using plastic for lighter tasks, at least look for heavy-duty, high-quality builds, but don’t expect them to match the durability and hygiene of glass. Stop chasing the convenience of cheap disposables and start investing in pieces that won’t fail you mid-week.

    My Rules for Building a Container Collection That Doesn't End Up in a Landfill

    • Stop buying mismatched sets. I’ve seen enough chaotic cabinets to know that if the lids don’t stack perfectly, you’ll end up shoving them into a corner and forgetting they exist. Buy a cohesive system where one lid fits multiple base sizes.
    • Prioritize airtight seals, but check the quality first. A silicone gasket is non-negotiable for keeping leftovers fresh, but make sure it’s removable. If you can’t take the seal out to wash it, it’s going to grow mold, and then you’re just storing bacteria.
    • Size matters more than you think. Most people buy massive containers for small portions, which wastes precious shelf real estate. Match your container size to your typical portion or ingredient amount to maximize every inch of your pantry.
    • Avoid the “specialty” trap. You don’t need a dedicated container for bread, another for berries, and a third for cheese. Find versatile, high-quality vessels that can handle multiple tasks; simplicity is the key to a functional kitchen.
    • Test the “stackability” in your actual space. Before you click ‘buy’ on a bulk pack online, grab your notebook and measure your cabinet height. There is nothing more frustrating than buying a “space-saving” set that is actually too tall for your shelving.

    My Rules for a Sustainable Pantry

    Stop the cycle of buying cheap plastic sets that warp in the dishwasher; buy glass or high-quality stainless steel once, and you’ll never have to shop for containers again.

    Prioritize airtight seals and consistent sizing so your containers actually stack properly in the fridge instead of creating a disorganized mess.

    Match the container to the task—use heavy-duty glass for leftovers and meal prep, but don’t be afraid of lightweight, durable options for dry goods if they actually serve a functional purpose.

    ## The Cost of Cheap Containers

    “I’ve spent enough years in commercial kitchens to know that if you buy a container based on how cheap it is today, you’ll end up paying for it twice—once when it cracks in the dishwasher, and again when you have to replace the entire set next season.”

    Rosalind Hayter

    Making the Right Choice for Your Kitchen

    Making the Right Choice for Your Kitchen.

    At the end of the day, choosing the right storage isn’t about following a trend or buying a massive, matching set just because it looks pretty in a social media photo. It’s about understanding that your containers are tools, not decorations. We’ve looked at why glass is the gold standard for durability and why that “BPA-free” plastic label shouldn’t be a free pass to clutter your cabinets with items that will inevitably warp, stain, or crack. If you want a kitchen that actually functions, you have to prioritize longevity over convenience. Stop buying the cheap, disposable stuff that ends up in a landfill every six months; invest in pieces that can handle the heat, the dishwasher, and the test of time.

    I know it can feel like a lot of effort to step away from the easy, inexpensive options, but I promise you it is worth it. A well-organized kitchen starts with a few high-quality essentials that you can rely on every single morning. When you stop fighting with mismatched lids and stained plastic, you free up mental energy to focus on what actually matters: the food you’re making and the people you’re feeding. Build your kit slowly, buy things that last, and remember that a functional kitchen is built one solid decision at a time.

    Frequently Asked Questions

    Are glass containers too heavy or fragile for me to use if I'm packing lunches for work?

    I get it—the weight is a real consideration when you’re commuting. Yes, glass is heavier, but I’d rather carry an extra pound in my bag than deal with the oily residue and stains that plague plastic. As for fragility, if you invest in tempered borosilicate glass, they’re much tougher than the cheap stuff. Just don’t toss them into a crowded bag without a sleeve. It’s a small trade-off for gear that actually lasts.

    How do I know if the silicone seals on these lids are actually going to stay airtight over time?

    Look for a thick, heavy-duty silicone ring, not those flimsy, paper-thin ones that feel like they’ll snap if you look at them wrong. When you inspect a container, press the lid down; you should feel a firm, consistent resistance. Most importantly, check if the seal is removable. If it’s molded directly into the lid, it’s a nightmare to clean and will eventually breed mold. A removable, high-quality seal is the only way to ensure a true, lasting airtight fit.

    Is it worth spending the extra money on sets that nest together, or should I just buy individual pieces as I need them?

    Look, I’ve seen enough disorganized pantry cabinets to know that space is your most valuable commodity. If you have the budget upfront, buy a nesting set. It’s a one-time investment that prevents the inevitable “mismatched lid” headache and keeps your lower cabinets from becoming a graveyard of loose lids. However, don’t overbuy sizes you won’t use. Buy a solid starter set, then supplement with individual pieces only when a specific need arises.

  • Ways to Maintain and Sharpen Chef Knives

    Ways to Maintain and Sharpen Chef Knives

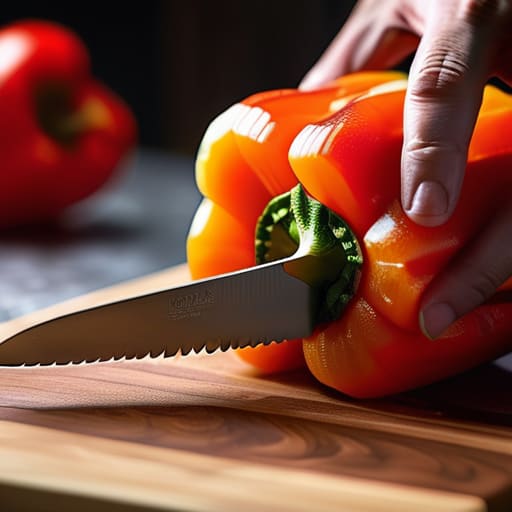
    I remember standing in a high-pressure commercial kitchen during a Saturday night rush, watching a junior cook struggle to slice a single tomato. He was sawing back and forth like he was cutting through wet cardboard, sweating through his apron, all because he was using a blade that had been neglected for months. It wasn’t a lack of skill; it was a lack of respect for the steel. Most people think chef knife maintenance requires a degree in metallurgy or a thousand-dollar electric sharpener, but that’s just more marketing nonsense designed to separate you from your paycheck.

    I’m not here to sell you on expensive gadgets or complicated rituals that eat up your prep time. My goal is to give you the straight talk on how to keep your tools sharp, safe, and ready to work. I’ll show you the few, essential habits that actually matter—the kind I learned from twenty years of heavy-duty catering—so you can stop fighting your equipment and start enjoying the process. We are going to focus on longevity over trends, ensuring your best knife stays your best knife for the rest of your life.

    Table of Contents

    Mastering Edge Retention Techniques for a Lifetime Blade

    Mastering Edge Retention Techniques for a Lifetime Blade

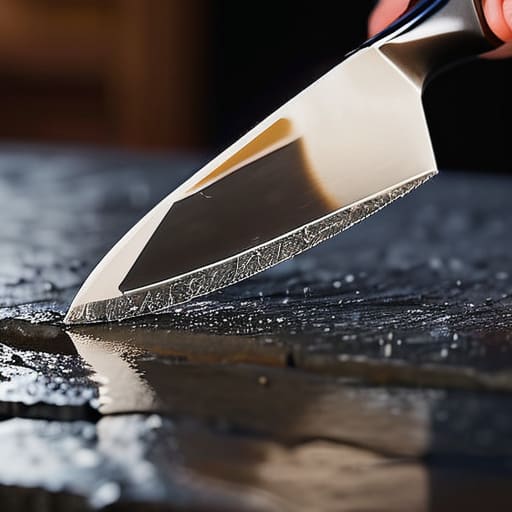
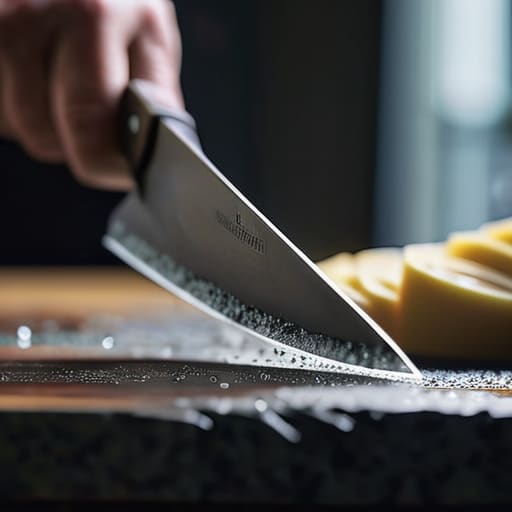
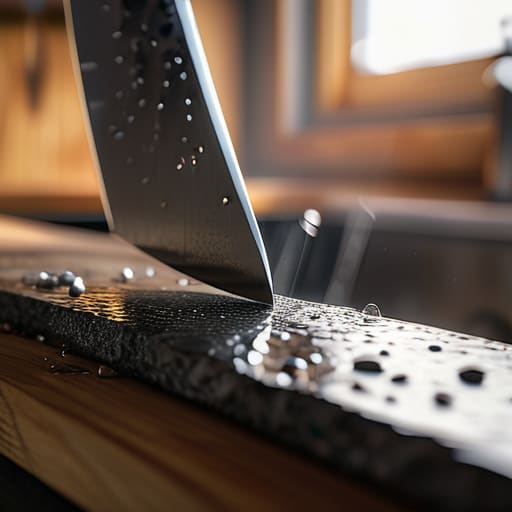
    Most people think sharpening is just about making the metal pointy again, but if you want to actually stop fighting your food, you need to understand edge retention techniques that go beyond the quick swipe of a honing rod. A honing rod is great for realigning the edge after a heavy prep session, but it isn’t a substitute for true sharpening. To keep that edge biting through a tomato skin without slipping, you have to get comfortable with a whetstone. I always tell my clients to invest in a decent whetstone grit guide; start with a coarse stone to reset the bevel, and finish with a fine-grit stone to polish it to a mirror shine.

    Once you’ve mastered the angle, the real work begins in how you treat the steel between uses. You can have the sharpest blade in the world, but if you toss it into a crowded utensil drawer, you’re just asking for a nicked edge. Invest in proper knife storage solutions, like a magnetic strip or a dedicated wooden block, to keep those blades isolated and protected. It’s about discipline—treating your tools with respect so they can work for you for the next thirty years.

    A Whetstone Grit Guide for the Serious Cook

    A Whetstone Grit Guide for the Serious Cook.

    If you’ve decided to stop using those cheap pull-through sharpeners—and I really hope you have—you’re going to need to understand how to actually use a stone. Most people walk into a shop and see a dozen different stones and freeze up. Don’t let the marketing overwhelm you. A decent whetstone grit guide boils down to two main stages: the coarse stone for fixing a damaged edge and the fine stone for refining it. If your blade has a nick or you’ve been hacking away at bone, start low, around 400 grit. If you’re just maintaining knife sharpness during your weekly prep, you can jump straight to a 1000 grit or higher.

    Don’t make the mistake of thinking more grit is always better. If you spend all your time on a high-grit polishing stone without ever doing the heavy lifting on a coarse one, you’re just polishing a dull edge. It’s like trying to wax a car that hasn’t been washed; it won’t do a lick of good. You need to build that edge properly from the ground up. Get the geometry right on the coarse stone, then let the fine stones do the delicate work of smoothing it out.

    Five Rules for Not Ruining Your Best Blade

    • Stop using your dishwasher. I don’t care what the box says; the heat and those harsh detergents will eat away at your steel and ruin your handle. Hand wash with warm water and a little soap, dry it immediately, and move on.
    • Get a real honing rod, not a cheap serrated one. A steel rod isn’t for sharpening—it’s for realigning the edge every time you pull it out of the drawer. If you aren’t honing regularly, you’re working twice as hard for half the results.
    • Respect the cutting board. If you’re hacking away at glass, marble, or even cheap plastic, you’re dulling your edge faster than you can sharpen it. Stick to wood or high-quality end-grain boards; they’re much kinder to your steel.
    • Store them properly. Jamming your knives into a cluttered utensil drawer is a recipe for disaster. Every time your blade clangs against another tool, you’re chipping the edge. Use a magnetic strip or a dedicated knife block to keep them isolated and safe.
    • Learn to feel the edge. Don’t wait until you’re struggling to slice a tomato to realize your knife is dull. If you notice you’re applying extra pressure just to get through a vegetable, it’s time to get back to the whetstone.

    The Bottom Line on Keeping Your Edge

    Stop treating your knives like disposable junk; a sharp blade is a safe blade, and regular honing is the only way to keep that edge from folding under pressure.

    Invest your time in learning the whetstone rhythm rather than buying cheap, electric sharpeners that shave off more metal than they actually fix.

    Respect the steel by storing it properly in a block or on a magnetic strip—never, ever toss your good knives into a crowded utensil drawer.

    ## The Cost of Neglect

    “A dull knife isn’t just a nuisance; it’s a safety hazard and a waste of your time. If you treat your steel like an afterthought, don’t be surprised when it fails you right in the middle of a dinner rush.”

    Rosalind Hayter

    Stop Fighting Your Tools

    Stop Fighting Your Tools with sharp knives.

    At the end of the day, maintaining a chef knife isn’t about some elaborate ritual or owning a dozen expensive gadgets you’ll never touch. It comes down to the fundamentals: choosing the right grit on your whetstone, respecting the edge, and actually taking five minutes to properly hone your blade instead of shoving it into a cluttered drawer. If you follow the techniques we’ve discussed, you aren’t just keeping a piece of steel sharp; you are preventing the frustration of a dull blade that slips, tears, and makes cooking feel like a chore. Invest the time now so you aren’t replacing a cheap, flimsy replacement in six months.

    I’ve spent two decades in professional kitchens and years organizing homes, and if there is one thing I’ve learned, it’s that your tools should be an extension of your hands, not an obstacle in your way. A well-maintained knife is a lifelong companion that grows with you, becoming more reliable with every meal you prep. Don’t let your kitchen become a graveyard for trendy, disposable junk that fails when you need it most. Build the habit, respect the steel, and let your tools work for you. You’ll find that once the maintenance becomes second nature, the actual cooking becomes the best part of your day.

    Frequently Asked Questions

    How often do I actually need to use the whetstone versus just using a honing rod?

    Think of it this way: the honing rod is your daily maintenance, while the whetstone is the actual repair. I use my honing rod every single time I prep—it realigns the edge so it stays straight. But the stone? That’s for when the edge is actually dull or nicked. Don’t go at it with the stone every day; you’ll grind away good steel. Use the rod daily, and save the stones for a deep tune-up every few months.

    Is it really worth investing in a professional sharpening service, or can I handle it all myself?

    Look, if you’ve spent time with a whetstone, you know the drill. If you have the patience and the steady hand, you can certainly handle it yourself. It’s a meditative process once you get the rhythm down. But let’s be honest: if you’re working with a high-end Japanese steel or a particularly tricky geometry, don’t be a hero. Take it to a professional once a year to reset the edge. It’s cheaper than replacing a ruined blade.

    What's the best way to clean my knives without accidentally ruining the edge or the handle?

    Stop throwing your knives in the dishwasher. I’m serious. That high-heat cycle and those aggressive detergents are a death sentence for your steel and will eventually crack your handles. Hand-wash them immediately after use with warm water and a mild soap. Dry them right away with a clean towel—never let them air dry, or you’re asking for rust spots. It takes thirty seconds, but it’s the difference between a tool that lasts decades and one you’ll toss in a year.

  • Using a Digital Meat Thermometer for Perfect Cooking

    Using a Digital Meat Thermometer for Perfect Cooking

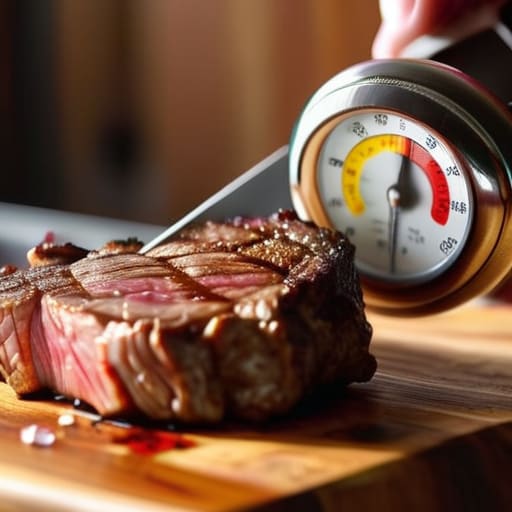
    I spent twenty years in commercial kitchens where “guessing” wasn’t just a mistake—it was a recipe for a massive waste of money and a very angry client. I still see people in grocery aisles today, eyeing those flashy, $200 smart gadgets that promise to sync with their phones and change their lives, when all they really need is a reliable digital meat thermometer that actually works. You don’t need a computer in your kitchen to tell you a roast is done; you just need a tool that cuts through the guesswork and respects the protein. Stop letting the marketing hype convince you that precision requires a subscription fee.

    I’m not here to sell you on the latest kitchen gadget craze or some over-engineered piece of plastic that will end up in a junk drawer by next Christmas. My goal is to help you find a sturdy, honest digital meat thermometer that delivers accurate readings every single time you pull a steak off the heat. I’m going to cut through the noise and show you exactly what to look for so you can buy once and buy right.

    Table of Contents

    Mastering Precision Cooking Tools for Lasting Results

    Mastering Precision Cooking Tools for Lasting Results

    When I was running commercial kitchens, we didn’t have the luxury of “feeling” if a chicken breast was done. We relied on data. If you want to move from being a cook to being a chef in your own home, you have to stop relying on intuition and start using precision cooking tools. It isn’t about being obsessive; it’s about consistency. An accurate food temperature reading is the only way to ensure you aren’t serving something dry and overcooked, or worse, underdone.

    I’ve seen too many people buy those cheap, flimsy models that lose calibration after three uses. If you’re serious about your Sunday roasts or your weekend BBQs, invest in something sturdy. For those of you who love hosting, I highly recommend looking into wireless meat probe technology. It allows you to monitor the heat without constantly opening the oven door and losing all that precious energy. It’s a small investment that pays off every single time you sit down to a meal that is exactly how you intended it to be.

    Achieving an Accurate Food Temperature Reading Every Time

    Achieving an Accurate Food Temperature Reading Every Time

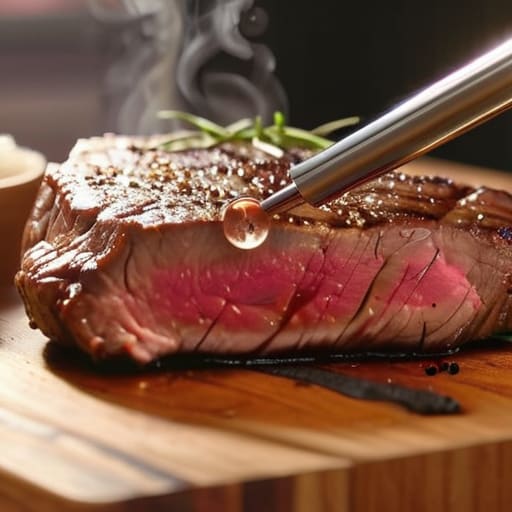
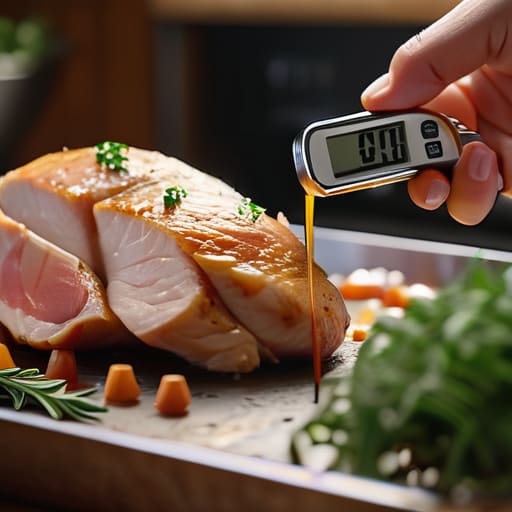
    Getting an accurate food temperature reading isn’t just about being a perfectionist; it’s about consistency and safety. I’ve seen too many home cooks rely on the “finger test” or, even worse, just cutting into a roast to see if it’s pink. That’s a recipe for dry meat or, frankly, a trip to the doctor. To do this right, you need to understand where to place your probe. You aren’t looking for the surface temperature; you need to aim for the thickest part of the protein, avoiding any bone or fat, which can give you a false reading.

    If you’re moving from basic kitchen tools to more serious setups, you might be tempted by wireless meat probe technology. While those are great for hands-off roasting, don’t lose sight of the fundamentals. Whether you are using a simple probe or a high-end device, always cross-reference your results with a reliable internal meat temperature guide to ensure you are actually preventing foodborne illness while keeping your proteins juicy. Precision is a habit, not a luxury.

    Five Rules for Using Your Thermometer Without Making a Mess of Dinner

    • Stop poking everything. You don’t need to stab every single piece of protein to know if the batch is done; find the thickest part of the largest piece and trust the reading.
    • Aim for the center, not the bone. If you’re cooking a roast or a thick steak, aim the probe into the deepest part of the muscle. If you hit the bone, you’re going to get a false reading that’ll leave you with raw meat.
    • Keep it clean or keep it dirty. I’ve seen too many people use the same probe for raw chicken and then a medium-rare steak without a proper wipe-down. Keep a clean cloth nearby and sanitize that probe every single time you switch proteins.
    • Don’t trust the “beep” immediately. When that thermometer alerts you, pull the meat off and let it sit for a few minutes. Carry-over cooking is real, and if you don’t account for it, you’ll end up overcooking your expensive cuts.
    • Treat it like real equipment. These aren’t toys. Don’t toss your thermometer in a cluttered junk drawer where it can get bent or dropped. Store it somewhere safe and dry so the sensors stay calibrated and accurate for years.

    The Bottom Line on Temperature Accuracy

    Stop relying on the “poke and pray” method; a reliable digital thermometer is the only way to guarantee food safety and stop wasting expensive cuts of meat.

    Invest in a tool with a fast, stable read and a durable probe—if it feels like a cheap plastic toy, it won’t survive your kitchen for long.

    Remember that the tool is only as good as your habit; learn to hit your target temperatures consistently so you can cook with confidence every single time.

    ## The Cost of Guesswork

    “I’ve seen too many people ruin a perfectly good piece of protein because they relied on a timer or a ‘feel’ instead of a real reading. A decent digital thermometer isn’t a luxury gadget; it’s the difference between a meal you enjoy and a meal you have to throw in the bin.”

    Rosalind Hayter

    Stop Guessing and Start Cooking

    Stop Guessing and Start Cooking with thermometers.

    At the end of the day, a digital meat thermometer isn’t just another piece of kitchen clutter; it is the bridge between a meal that’s “fine” and a meal that’s perfect. We’ve talked about the importance of choosing a durable model, the necessity of getting your readings right every single time, and why you should stop relying on the “poke and pray” method. Investing in a reliable, high-quality thermometer means you are investing in your confidence at the stove. You aren’t just buying a gadget; you are buying the certainty that your expensive cut of ribeye or your Sunday roast will come out exactly how you intended, every single time you step into the kitchen.
    My advice is simple: don’t let the fear of overcooking or undercooking hold you back from trying new recipes or more ambitious techniques. Once you have the right tools and the right habits, the kitchen stops being a place of stress and starts being a place of pure creativity. Stop wasting money on expensive meat that ends up being too dry to eat, and stop wasting your time second-guessing yourself. Get a tool that lasts, learn the science of the temperature, and then get to work. You’ve got this.

    Frequently Asked Questions

    How do I tell the difference between a cheap grocery store thermometer and one that won't die on me in six months?

    Look at the build quality, not the packaging. Those flimsy grocery store models are usually made of thin, lightweight plastic that cracks the moment you drop it. I look for weight and construction—specifically a stainless steel probe that’s integrated into the body, not just glued on. If it feels hollow or “clicky” when you hold it, walk away. You want something with a solid seal and a display that doesn’t flicker when things get hot.

    Do I really need a probe that stays in the oven, or is a quick instant-read thermometer enough for my cooking style?

    Look, if you’re just searing steaks or checking a chicken breast, a solid instant-read is all you need. It’s fast, efficient, and won’t clutter your drawers. However, if you’ve fallen in love with slow-roasting or brisket, an oven probe is a game-changer. It lets you walk away without hovering. My rule of thumb? Get a high-quality instant-read first. Only invest in a probe if you find yourself constantly checking the oven door.

    How often do I actually need to calibrate these things to make sure they aren't lying to me?

    Look, I don’t want you overthinking this, but you can’t just trust a thermometer blindly forever. If you’re using it daily, check it once a month using the ice water method. If you haven’t cooked in a while, or if a reading feels “off” compared to what you know is right, calibrate it immediately. It takes two minutes, and it’s better than wasting a twenty-dollar ribeye because your tool decided to lie to you.

  • Electric Kettles With Variable Temperature

    Electric Kettles With Variable Temperature

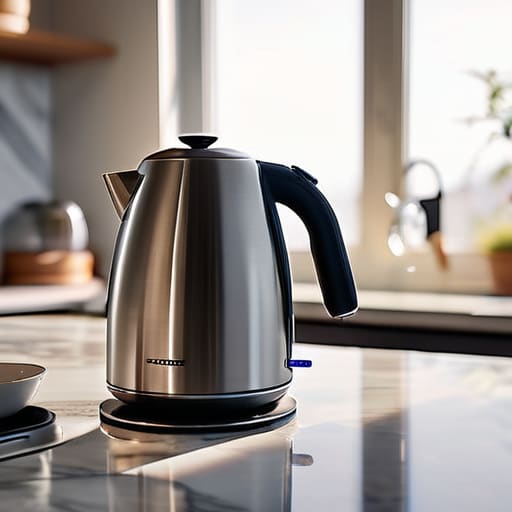
    I’ve spent twenty years in commercial kitchens, and if there is one thing I’ve learned, it’s that most people are being sold a lie when it comes to small appliances. I see them every day in kitchen supply aisles: sleek, over-engineered, plastic-heavy gadgets that promise “smart” features and touchscreens, but will likely die on your counter within eighteen months. You don’t need a Bluetooth-connected electric kettle that tells your phone when the water is boiling; you need a machine that boils water quickly, shuts off reliably, and doesn’t leach chemicals into your morning tea.

    I’m not here to help you find the prettiest gadget on Instagram. My goal is to help you find the workhorse—the kind of tool that earns its place in your kitchen by being built to last. I’m going to strip away the marketing fluff and tell you exactly what to look for in terms of material, heating speed, and durability. We’re going to focus on quality over trends so you can stop wasting money and start investing in gear that actually serves a purpose.

    The Real Cost of Cheapness Stainless Steel vs Glass Kettles

    The Real Cost of Cheapness Stainless Steel vs Glass Kettles

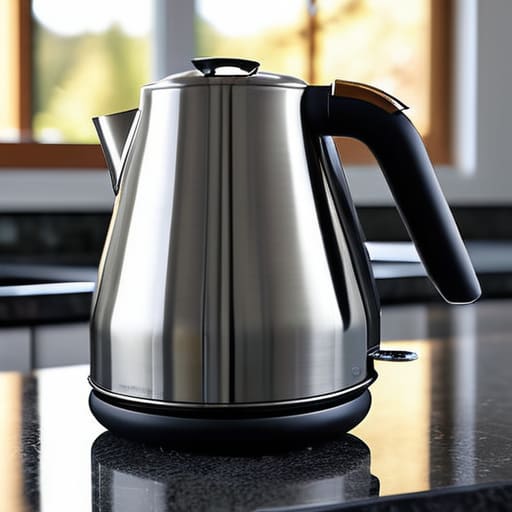
    I’ve seen it a thousand times in professional kitchens and home setups alike: someone buys a cheap, lightweight plastic or thin glass model because it looks pretty on a Pinterest board, only to have it fail within six months. When you’re weighing stainless steel vs glass kettles, you aren’t just choosing an aesthetic; you’re choosing how long that device will actually stay on your counter. Glass can look lovely, especially when you’re watching the bubbles rise, but it’s fragile. One accidental bump against a granite countertop during a busy morning and you’re looking at a costly replacement.

    Stainless steel is the workhorse of the kitchen. It’s durable, holds heat better, and won’t leach any weird flavors into your water. If you’re someone who values precision brewing for tea, you want a vessel that maintains a consistent temperature without the fuss. Beyond the material, I always tell my clients to look for reliable automatic shut-off safety features. A kettle is a tool, not a toy; if it doesn’t cut power the second it hits the mark, it’s not worth the space in your cupboard. Don’t let a “bargain” become a recurring expense.

    Smart Design Why Cordless Kettle Design Matters for Daily Flow

    When I was running large-scale catering events, efficiency wasn’t just a goal; it was a requirement for survival. The same principle applies to your morning routine at home. A poorly thought-out cordless kettle design can turn a simple task into a frustrating obstacle course of tangled wires and awkward maneuvering. You want a base that stays put and a vessel that feels balanced in your hand, even when it’s full. If you’re constantly fighting with a heavy, unbalanced pot just to pour a single cup, you’ve bought the wrong tool.

    I always tell my clients to look for a model that prioritizes ergonomics and ease of movement. A seamless transition from the base to the countertop is vital for maintaining a smooth workflow. Beyond just the physical handling, I look for integrated automatic shut-off safety features that allow me to walk away and focus on prep work without worrying about the unit running dry. A kitchen should support your rhythm, not force you to hover over a countertop waiting for a whistle.

    Five Things to Look for Before You Hit 'Buy'

    • Check the spout design. I’ve seen too many people struggle with “drip kettles” that leave a puddle on the counter every single morning; you want a precision pour that actually goes into the cup.
    • Don’t ignore the weight. A kettle that feels like a flimsy toy will likely be made of cheap materials, so look for something with enough heft to feel sturdy when it’s full of water.
    • Prioritize easy cleaning. If the lid doesn’t open wide enough for you to reach in with a sponge, you’re going to end up with limescale buildup that you can’t scrub away.
    • Look for a physical switch, not a touch sensor. In a busy kitchen, I want a tactile click that tells me the kettle is actually on, rather than a finicky digital screen that fails after six months.
    • Mind the cord length and base. If you’re working in a tight space, you need a base that sits flat and a cord that doesn’t turn your countertop into a tangled mess of wires.

    The Bottom Line on Your Next Kettle

    Stop chasing the aesthetic of glass if you can’t handle the maintenance; a high-grade stainless steel kettle is the workhorse that will actually survive your morning rush.

    Prioritize a cordless base with a stable, weighted feel to prevent spills and ensure the kettle integrates into your workflow rather than cluttering it.

    Look for durability in the small things, like a heavy-duty switch and a seamless spout, because a cheap heating element is a waste of money and kitchen space.

    Making the Right Call for Your Countertop

    At the end of the day, choosing an electric kettle isn’t about finding the prettiest box to sit on your counter; it’s about deciding how much friction you’re willing to tolerate in your morning routine. I’ve seen too many people buy a cheap, plastic model because it was on sale, only to find themselves replacing it six months later when the heating element dies or the lid snaps off. Remember to prioritize material integrity by opting for stainless steel or high-quality glass, and never overlook the importance of a cordless base that actually moves with you. A kettle should be a reliable workhorse, not a piece of disposable tech that ends up in a landfill by next season.

    My advice is simple: stop chasing the trends and start investing in your daily habits. When you buy tools that are built to endure, you aren’t just buying a kitchen gadget; you are reclaiming your time and reducing the mental clutter of constant replacements. A well-chosen kettle becomes part of the rhythm of your home—the steady hum of water boiling while you prepare for the day. Buy it once, use it every single morning, and let it be one less thing you have to worry about. Build a kitchen that serves you, one solid tool at a time.

    Frequently Asked Questions

    How do I know if a stainless steel kettle is actually high-quality or just thin, cheap metal disguised as premium?

    Don’t let a shiny finish fool you. When you’re in the store, pick it up. A high-quality stainless steel kettle should have some heft to it; if it feels like a crushed soda can, put it back. Check the base and the seams—they should be smooth and seamless, not jagged or poorly welded. Most importantly, look for “18/10” stamped on the bottom. That’s the gold standard for durability and corrosion resistance.

    Is it worth spending more on a kettle with precise temperature control, or is that just another unnecessary gadget?

    Look, if you’re just a tea bag and boiling water kind of person, skip the temperature control. You don’t need a gadget for that. But if you actually care about the nuances of a delicate green tea or a pour-over coffee, it’s worth the investment. It’s about precision, not bells and whistles. Buy the control if it changes how you drink; otherwise, don’t clutter your counter with extra buttons you’ll never touch.

    How often should I actually be descaling my kettle to keep it running efficiently without ruining the heating element?

    Don’t wait until your kettle starts making a racket or takes forever to boil. If you have hard water, I recommend a quick descale once a month. If you’re lucky enough to have soft water, you can stretch that to every three months. Just keep an eye on the bottom; once you see that white, chalky buildup, it’s time to clean it. A little vinegar or citric acid keeps the element healthy and prevents it from burning out prematurely.

  • Using a Slotted Spoon in the Kitchen

    Using a Slotted Spoon in the Kitchen

    I’ve spent twenty years in commercial kitchens, and if there is one thing that drives me up the wall, it’s seeing people waste money on those “designer” utensil sets that look pretty in a catalog but fall apart after a month of actual use. I remember one particular catering gig where a junior chef tried to use a flimsy, injection-molded plastic slotted spoon to lift heavy, poached vegetables; the thing snapped right in the middle of service, leaving us with a mess and a ruined rhythm. It’s frustrating because a tool that simple shouldn’t be a gamble. You don’t need a gadget with a built-in thermometer or a silicone handle that feels like cheap sponge; you just need something that actually works when the heat is on.

    I’m not here to sell you on the latest kitchen trends or shiny junk you’ll end up tossing in the bin by next Christmas. Instead, I’m going to give you the straight truth on what makes a high-quality slotted spoon worth your hard-earned money. We’re going to look at weight, material durability, and the specific structural integrity you need to handle everything from delicate greens to heavy proteins. My goal is to help you build a kit of tools that will last you a lifetime.

    Table of Contents

    Choosing Stainless Steel Kitchen Utensils That Never Fail

    Choosing Stainless Steel Kitchen Utensils That Never Fail

    Choosing Stainless Steel Kitchen Utensils That Never Fail

    When I was managing commercial kitchens, we didn’t have the luxury of “cute” gadgets; we needed gear that could survive a double shift without warping or snapping. That’s why I always steer people toward high-quality stainless steel kitchen utensils. Unlike the cheap, thin versions you find in big-box stores, a heavy-duty steel tool won’t bend when you’re lifting food from hot oil or scooping up heavy portions of pasta. You want something with a bit of weight to it—it tells you immediately that the tool is built for utility, not just for show.

    You’ll often hear people debate silicone vs metal slotted spoons, and while silicone is fine for a gentle stir, it simply doesn’t hold up to the rigors of serious cooking. If you are draining boiled vegetables or need to be precise when skimming foam from broth, you need the structural integrity that only metal provides. Don’t settle for anything that feels flimsy in your hand. If you invest in solid steel now, you won’t be digging through your junk drawer for a replacement in six months.

    Silicone vs Metal Slotted Spoons Making the Right Investment

    Silicone vs Metal Slotted Spoons Making the Right Investment

    When you’re standing over a steaming pot, you don’t want to be second-guessing your tools. The debate of silicone vs metal slotted spoons usually comes down to what you’re actually cooking. If you’ve invested in high-quality non-stick pans, a metal tool is a one-way ticket to ruined coatings. In those cases, a heavy-duty, food-grade silicone is your best friend. It’s flexible enough to scrape the bottom of the pan but sturdy enough for draining boiled vegetables without bending like a cheap piece of plastic.

    However, if you’re working with my favorite cast iron or stainless steel, don’t even bother with the silicone. For tasks like lifting food from hot oil or skimming foam from broth, you need the structural integrity that only metal provides. Silicone can sometimes feel “mushy” when you’re trying to grab something substantial, whereas a solid metal tool gives you that tactile confidence. My rule of thumb? Use silicone to protect your delicate surfaces, but rely on metal for the heavy lifting. It’s about choosing the right tool for the specific job, not just buying one version and hoping it works for everything.

    Five Ways to Use Your Slotted Spoon Without Making a Mess

    • Stop using your spoon as a glorified stirrer; its real job is lifting. Use it to rescue delicate items like poached eggs or blanched vegetables from hot water so they don’t sit around getting mushy.
    • Check the weight before you buy. A good slotted spoon should have some heft to it. If it feels like a cheap piece of hollow plastic in your hand, it’s going to bend the moment you try to lift a heavy portion of pasta.
    • Use it for the “drain and serve” maneuver. When you’re making something like a quick sauté or frying dumplings, use the slots to lift the food directly out of the oil or pan juices, leaving the excess liquid behind so your plate doesn’t turn into a soup bowl.
    • Keep an eye on the joint where the handle meets the head. In my years managing commercial kitchens, I’ve seen a thousand cheap spoons snap right at that seam. Look for a seamless design or a reinforced connection if you want it to survive more than a season.
    • Don’t forget the cleaning ritual. If you’re using a metal spoon, make sure you dry it thoroughly right after washing. I’ve seen too many people leave stainless steel sitting in a damp drying rack only to find water spots that take forever to scrub off.

    The Bottom Line on Slotted Spoons

    Stop buying cheap plastic; if you’re working with heat, invest in high-quality stainless steel that won’t melt or warp after a month of heavy use.

    Match your tool to your cookware—use silicone if you’re protective of non-stick surfaces, but stick to metal for the durability and heavy-duty lifting required in cast iron or stainless steel pans.

    Look for weight and balance; a tool that feels flimsy in your hand will only make cooking feel like a chore, so choose something substantial that feels like a professional extension of your hand.

    The Truth About Your Utensil Drawer

    “I’ve spent two decades in commercial kitchens watching people toss out cheap, melted plastic spoons every few months. It’s a waste of money and a waste of space. If you’re going to buy a slotted spoon, buy one that can handle the heat of a heavy pan and the weight of a real meal without bending or snapping.”

    Rosalind Hayter

    Stop Collecting, Start Investing

    Stop Collecting, Start Investing in quality tools.

    At the end of the day, choosing a slotted spoon shouldn’t be a complicated decision, but it is one that matters more than you might think. We’ve covered why you need to ditch the cheap, melting plastics and why a high-quality stainless steel or heavy-duty silicone tool is the only way to go. Whether you are lifting delicate poached eggs or draining pasta from a boiling pot, the tool in your hand needs to feel substantial and reliable. Don’t let yourself be swayed by those colorful, flimsy sets that look great in a catalog but fail the moment they hit a hot pan. Stick to the basics: durability, heat resistance, and a design that actually works with your hand.

    My advice is simple: stop treating your kitchen like a showroom and start treating it like a workspace. You don’t need a drawer full of specialized gadgets that only do one thing; you need a handful of exceptional tools that do everything. When you invest in a solid slotted spoon today, you aren’t just buying a piece of metal or silicone—you are buying the peace of mind that comes with knowing your gear won’t let you down mid-service. Build your kitchen on a foundation of quality, and I promise you’ll spend less time replacing junk and more time actually enjoying the process of cooking.

    Frequently Asked Questions

    How do I know if the stainless steel is high enough quality to not rust after a few washes?

    Look for the “18/10” stamp on the handle. That number tells you exactly what you’re getting: 18% chromium for rust resistance and 10% nickel for that beautiful, lasting shine. If the packaging doesn’t mention a grade, or if it just says “stainless steel” without specifics, walk away. In my twenty years of catering, I’ve seen cheap alloys pit and rust within a month. Don’t gamble with your budget; buy the 18/10.

    Is a large slotted spoon overkill for a small kitchen, or is it better to just have one versatile size?

    Look, I’ve seen too many people clutter their drawers with five different versions of the same thing. In a small kitchen, space is your most valuable ingredient. You don’t need a drawer full of specialty spoons; you need one high-quality, medium-sized stainless steel slotted spoon. Aim for something versatile enough to lift a handful of pasta or a few dumplings without feeling clunky. Buy one good tool that does the job, and keep the rest of that space clear.

    If I choose silicone to protect my non-stick pans, how can I tell if it's sturdy enough to lift heavy items like potatoes or pasta?

    If you’re going the silicone route to save your non-stick coatings, don’t settle for those thin, floppy versions that feel like a toy. Look for “high-heat” silicone with a reinforced internal core—usually stainless steel. When you’re shopping, give it a firm squeeze. If the head bends easily under light pressure, it’ll buckle under a heavy potato. You want something with structural integrity that feels substantial in your hand, not something that wilts the moment things get heavy.

  • Selecting the Best Mixing Bowls for Cooking

    Selecting the Best Mixing Bowls for Cooking

    I’ve spent two decades in commercial kitchens, and if there is one thing that drives me up the wall, it’s seeing people spend fifty dollars on a “designer” set of nesting mixing bowls that are nothing more than colorful, flimsy plastic. I remember a catering gig early in my career where a junior chef tried to whip up a heavy meringue in one of those lightweight, hollow-bottomed bowls; the whole thing slid across the prep table like a hockey puck, and we lost half the batch. It was a mess, but it was a preventable mess. You don’t need a gadget with a silicone base or a trendy pattern to make a decent cake; you just need tools that actually behave when you’re in the middle of a recipe.

    In this guide, I’m going to strip away the marketing fluff and tell you exactly what you should be looking for. I’ll be sharing my no-nonsense criteria for choosing mixing bowls that will actually survive a lifetime of heavy use, from heavy-duty stainless steel to high-quality glass. I’m not here to sell you on a lifestyle; I’m here to help you build a functional kitchen that works as hard as you do.

    Table of Contents

    The Lasting Glass Mixing Bowl Benefits You Need

    The Lasting Glass Mixing Bowl Benefits You Need

    If you ask me, glass is the unsung hero of a functional kitchen. After years of managing commercial prep stations, I learned that you can’t trust materials that hold onto odors or change the flavor of your food. That’s where the real glass mixing bowl benefits come into play. Unlike plastic, which is porous and eventually stains from every tomato sauce you’ve ever made, glass is truly non-reactive kitchenware. You can zest a lemon, mix a heavy marinade, or prep a delicate meringue in the same vessel without worrying about chemical transfers or lingering smells.

    Beyond the hygiene factor, there is a practical weight to glass that I find indispensable. When you’re whisking a heavy batter, you need a bowl that stays put on the counter. Plastic tends to slide and skitter around, which is a recipe for a mess. A solid glass piece provides a stable base that feels substantial under your hands. While some people swear by silicone measuring bowls for their flexibility, I still find myself reaching for glass when I need something that can go from the fridge to the oven without a second thought. It’s about investing in tools that don’t need replacing every two years.

    Why Non Reactive Kitchenware Is a Non Negotiable Investment

    Why Non Reactive Kitchenware Is a Non Negotiable Investment

    If you’ve ever made a marinade with lemon juice or a vinaigrette with vinegar in a cheap, reactive metal bowl, you know exactly what I’m talking about. That metallic, off-flavor isn’t just unpleasant; it’s a sign that the acid is literally eating away at the surface of your equipment. This is why investing in non-reactive kitchenware is a non-negotiable for anyone who actually cares about the flavor of their food. When you use high-quality glass or heavy-duty stainless steel, you aren’t just protecting your tools; you are protecting the integrity of your ingredients.

    In my years managing commercial kitchens, I saw far too many home cooks ruin a perfectly good meal because they used the wrong vessel for acidic prep. You want tools that stay neutral, no matter what you’re tossing in them. While some people swear by silicone measuring bowls for their flexibility, they don’t offer the same structural reliability or chemical neutrality as glass or steel. If you want your kitchen to be a place of precision rather than guesswork, stop settling for materials that change the taste of your hard work.

    Five Rules for Choosing Bowls That Won't End Up in a Landfill

    • Ditch the nesting sets that don’t actually nest. There is nothing more frustrating than a cabinet full of mismatched plastic bowls that won’t stack properly, wasting precious real estate. Look for sets designed with uniform proportions so they tuck away neatly.
    • Prioritize weight and stability. If you’ve ever tried to whisk heavy cream in a lightweight, flimsy bowl that slides across the counter like a hockey puck, you know the struggle. I always look for a bit of heft—either through thick glass or heavy-duty stainless steel—to keep things steady while I work.
    • Check the rim design. If you’re buying stainless steel, make sure the rims are smooth and rounded. Cheaply made bowls often have sharp, crimped edges that make pouring liquids a messy ordeal and can actually nick your hands if you aren’t careful.
    • Avoid the “gadget” trap. You do not need a bowl with a built-in digital scale or a silicone suction base that’s impossible to clean. Stick to simple, high-quality vessels. If the bowl has too many “features,” it’s usually just more plastic for you to scrub later.
    • Size matters more than you think. Most people buy a set of six bowls when they really only need three specific sizes: a small one for whisking eggs, a medium one for prep, and one large, heavy-duty bowl for mixing dough or tossing salads. Don’t let a retailer talk you into a massive set of junk you’ll never touch.

    The Bottom Line on Your Mixing Bowl Investment

    Stop the cycle of replacing cracked plastic; choose glass or stainless steel that can handle heavy use and high heat without warping or staining.

    Prioritize non-reactive materials like tempered glass to ensure your food tastes like the ingredients you used, not the container they sat in.

    Focus on durability and utility over trendy colors or unnecessary features—a bowl’s job is to hold weight and stay steady, nothing more.

    The Real Cost of Cheap Kits

    “I’ve seen too many people clutter their cabinets with sets of five flimsy plastic bowls that warp, stain, and crack within a year. If you aren’t buying bowls that can handle a heavy dough or a hot sauce without losing their shape, you aren’t investing in a kitchen—you’re just managing a landfill.”

    Rosalind Hayter

    Making the Right Choice for Your Kitchen

    Making the Right Choice for Your Kitchen.

    At the end of the day, choosing the right mixing bowls isn’t about having a dozen different sets cluttering your cabinets; it’s about selecting a few pieces that actually perform. Whether you opt for the heavy-duty reliability of stainless steel or the non-reactive, easy-to-clean versatility of tempered glass, remember that quality outweighs quantity every single time. Avoid the temptation to buy those cheap, colorful plastic sets that stain with tomato sauce and warp in the dishwasher. If you invest in materials that can handle the heat and the weight of a heavy dough, you are buying tools, not clutter.

    A well-equipped kitchen is the foundation of a good life, and that starts with the small, fundamental items you touch every single day. When you stop chasing kitchen trends and start focusing on functional durability, you reclaim your space and your sanity. Don’t let your kitchen work against you with flimsy gear that fails when you need it most. Build your collection piece by piece, focus on the essentials, and I promise you’ll find that cooking becomes a lot more enjoyable when you aren’t fighting your equipment. Now, grab that notebook, plan your setup, and let’s get to work.

    Frequently Asked Questions

    Is it worth the extra weight to go with stainless steel over lightweight glass?

    If you’re asking if the weight is worth it, the answer is a resounding yes. Glass is fine for a quick salad, but in a working kitchen, stainless steel is king. It won’t shatter if you drop it on a tile floor, and it’s much easier to stack in a crowded cabinet. That extra weight translates to durability. You aren’t just buying a bowl; you’re buying something that won’t end up in a landfill next year.

    How do I know if a bowl is truly non-reactive or if it’s going to mess with my ingredients?

    Look, it’s simpler than the marketing makes it sound. If you’re working with high-acid ingredients—think lemon juice, vinegar, or even a heavy tomato sauce—and you use a reactive metal like aluminum or unlined copper, you’ll taste it. It leaves a metallic tang in your food. If the bowl is stainless steel or glass, you’re safe. If you aren’t sure, stick to steel. It’s the most reliable way to ensure your flavors stay pure.

    Can I actually stack these different materials together, or am I going to end up with a cluttered, mismatched mess in my cabinets?

    Look, I get it. You don’t want your cabinets looking like a junk drawer exploded. You can absolutely mix materials, but you have to be intentional. I usually nest my stainless steel bowls inside one another to save space, then tuck my glass bowls in a separate stack to avoid breakage. The trick is to buy sets that share similar proportions. If you stick to a few quality materials, it looks like a curated collection, not a mess.

  • Comparing Toaster Ovens and Standard Toasters

    Comparing Toaster Ovens and Standard Toasters

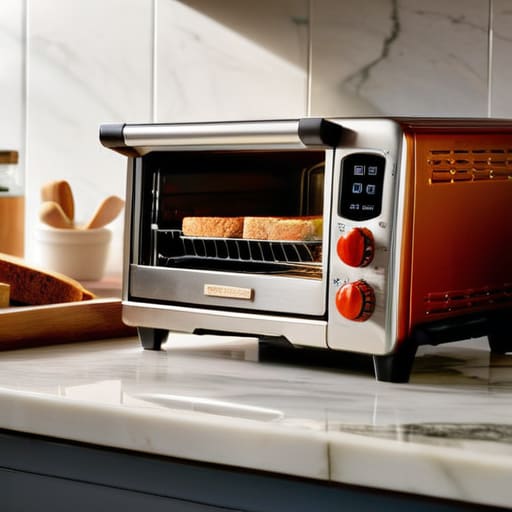
    I spent two decades in commercial kitchens where every piece of equipment had to earn its keep, and if it couldn’t handle a rush, it was gone. So, when I walk into a big-box store and see rows of high-tech, gadget-filled toaster oven models that look more like spaceships than cooking tools, I can’t help but roll my eyes. Most of these machines are nothing more than expensive, plastic-heavy distractions designed to clutter your counter and fail you within eighteen months. You don’t need a digital touchscreen or a built-in Bluetooth connection to crisp up a piece of sourdough or melt some cheese; you just need something that holds heat consistently and won’t fall apart the moment things get busy.

    I’m not here to sell you on the latest shiny trend or help you justify a purchase that’s going to end up in a landfill by next Christmas. My goal is to help you find a reliable workhorse—the kind of appliance that actually functions the way it’s supposed to, day in and day out. I’m going to cut through the marketing fluff and give you the straight truth on what to look for in terms of build quality and heat distribution, so you can invest once and cook well for years to come.

    Table of Contents

    Toaster Oven vs Traditional Oven Choosing the Right Workhorse

    Toaster Oven vs Traditional Oven Choosing the Right Workhorse

    I’ve spent enough time in commercial kitchens to know that size isn’t everything, but efficiency is. When people ask me about the toaster oven vs traditional oven debate, they’re usually trying to decide if they can actually ditch the big beast in the wall. If you’re hosting a Thanksgiving dinner for twelve, you need that full-sized range. Period. But for the Tuesday night scramble—roasting a chicken, melting cheese on a sandwich, or reheating leftovers without turning them into rubber—a high-quality countertop unit is often the smarter, more agile choice.

    For my clients living in studios or those with cramped layouts, finding a compact oven for small apartments isn’t just about saving counter real estate; it’s about thermal efficiency. A massive oven takes a ridiculous amount of energy just to preheat for a single tray of cookies. By using a smaller, more targeted heat source, you’re practicing better kitchen management. If you opt for one of the best countertop convection ovens on the market, you’re getting a tool that mimics a professional oven’s airflow without the massive footprint or the wasted electricity.

    Best Countertop Convection Ovens That Actually Last

    Best Countertop Convection Ovens That Actually Last

    When you’re looking for the best countertop convection ovens, you have to look past the shiny-looking plastic shells and focus on the heating elements and airflow. I’ve seen too many people buy a cheap unit only to have it heat unevenly, leaving one side of their tray burnt and the other raw. If you want something that actually performs, look for models with a heavy-duty stainless steel interior. A solid convection fan is non-negotiable; it’s what transforms a basic heating box into a legitimate culinary tool that can mimic a full-sized range.

    If you are working with limited square footage, a compact oven for small apartments doesn’t have to mean sacrificing power. I always tell my clients to prioritize versatility. Instead of buying a dedicated air fryer and a separate heating unit, find a model with integrated air fry toaster oven features. This saves precious counter real estate without forcing you to compromise on your cooking habits. Look for heavy-duty dials rather than cheap touchscreens if you want something that won’t glitch out after six months of daily use.

    Stop Guessing and Start Cooking: 5 Rules for Using Your Toaster Oven

    • Stop relying on the manufacturer’s temperature settings. Every unit runs a little differently, so grab a cheap oven thermometer to see if your “350 degrees” is actually 325 or 375. It’ll save you from a dozen burnt batches.
    • Size matters more than you think. Don’t just buy the biggest one that fits your counter; make sure you have enough vertical clearance so your roasting pan doesn’t sit too close to the heating elements.
    • Ditch the aluminum foil whenever possible. It can flake off or even catch on the heating elements in smaller units. Invest in a set of high-quality, reusable silicone baking mats instead.
    • Treat your heating elements with respect. If you see crumbs or grease buildup on the coils, clean them immediately. Neglect leads to smoke, smells, and eventually, a piece of equipment that’s more of a fire hazard than a tool.
    • Use the convection setting for everything that needs a crunch. If your model has a fan, use it. It circulates the heat much more efficiently than a standard toaster oven, which is the whole point of having one in the first place.

    The Bottom Line: What to Look for Before You Buy

    Prioritize convection over basic heating elements; if you want even browning and faster results, don’t settle for a model that lacks a reliable fan.

    Ignore the flashy digital displays and “smart” features that will inevitably break; look for heavy-duty build quality and simple controls that can withstand daily use.

    Size matters more than you think—measure your counter space and your largest baking sheet before committing, because a cramped oven is a useless oven.

    Stop Buying Gadgets, Start Buying Tools

    “A toaster oven shouldn’t be another piece of plastic clutter taking up precious counter space; it should be a reliable, heavy-duty workhorse that handles your daily meals so you aren’t heating up your entire house just to melt some cheese or crisp up a piece of salmon.”

    Rosalind Hayter

    Making the Right Investment

    Making the Right Investment in toaster ovens.

    At the end of the day, choosing a toaster oven isn’t about finding the one with the most buttons or the sleekest digital display. It’s about deciding which machine is actually going to earn its place on your counter. We’ve talked about why a convection model is often the better workhorse for daily tasks and why you should prioritize build quality over flashy features. Whether you’re using it to crisp up a piece of sourdough or roast a small batch of vegetables, you need a tool that delivers consistent heat without failing you six months down the road. Don’t let the marketing fool you into buying a gadget that’s essentially glorified plastic; invest in a machine that functions as a reliable extension of your kitchen.

    My advice is simple: stop looking for the “perfect” oven and start looking for the right tool for your habits. A kitchen is a living, breathing space, and it only works if the tools inside it serve your real life, not some idealized version of it you saw on social media. Once you have a solid, heavy-duty oven in place, the rest of the magic comes from how you use it. Buy things that last, maintain them with care, and focus on the cooking itself. A good piece of equipment is a foundation, but your habits are what actually turn a kitchen into a home.

    Frequently Asked Questions

    Is a convection toaster oven actually worth the extra money, or is it just another marketing gimmick?

    It’s not a gimmick, but you need to understand why you’re paying for it. A standard toaster oven just sits there and radiates heat; a convection model uses a fan to circulate that heat around your food. This means more even browning and faster cooking times. If you’re just reheating a slice of pizza, skip it. But if you want to actually roast vegetables or crisp up a chicken thigh, that extra investment is worth every penny.

    How do I keep my countertop from getting trashed by the heat coming off a heavy-duty oven?

    Look, if you’re investing in a heavy-duty machine, you can’t let it ruin your countertops. First, stop pushing it right against the backsplash; you need at least four inches of breathing room for heat dissipation. I always recommend a heat-resistant silicone mat or even a thin piece of tempered glass underneath. It’s a simple barrier that protects your stone or wood from thermal shock and grease splatter. Don’t let a good tool become a liability.

    Can I actually roast a whole chicken in one of these, or am I going to end up with a burnt mess?

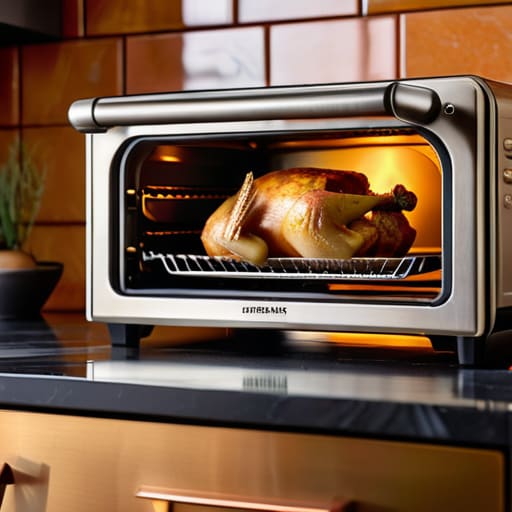
    You absolutely can, but don’t just toss it in and walk away. A decent convection toaster oven has more than enough power to roast a small-to-medium bird, provided you use a heavy-duty roasting pan to catch the drippings. The key is using the convection setting to circulate that heat evenly. Just keep an eye on it; because the heating elements are closer to the food than a standard oven, you’ll want to watch for skin that browns a little too quickly.

  • Maintaining a Wooden Cutting Board

    Maintaining a Wooden Cutting Board

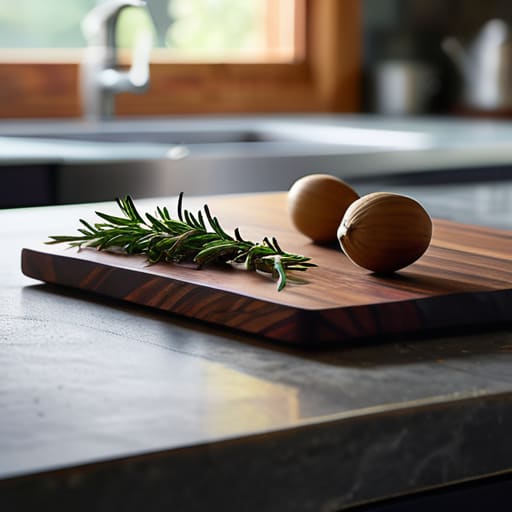
    I remember standing in the middle of a high-volume commercial kitchen during a Saturday night rush, the air thick with steam and the rhythmic thwack-thwack-thwack of knives hitting prep stations. Back then, I saw a lot of cheap, thin boards get tossed into the trash because they’d warped, cracked, or turned into a breeding ground for bacteria. It used to drive me crazy seeing people spend hundreds on “designer” kitchen gadgets while they were still using a flimsy, scarred piece of plastic for their daily prep. If you’re looking for a fancy status symbol, go elsewhere, but if you want a wooden cutting board that actually survives a decade of heavy use, you need to understand how the grain and the wood species actually work.

    I’m not here to sell you on some overpriced, artisanal slab that requires a PhD to maintain. My goal is to give you the straight truth on what makes a tool functional and what’s just marketing fluff. I’ll show you exactly what to look for so you can invest in something that stays on your counter for a lifetime, rather than something that ends up in a landfill by next Christmas.

    Table of Contents

    Finding the Best Wood for Cutting Boards That Last

    Finding the Best Wood for Cutting Boards That Last

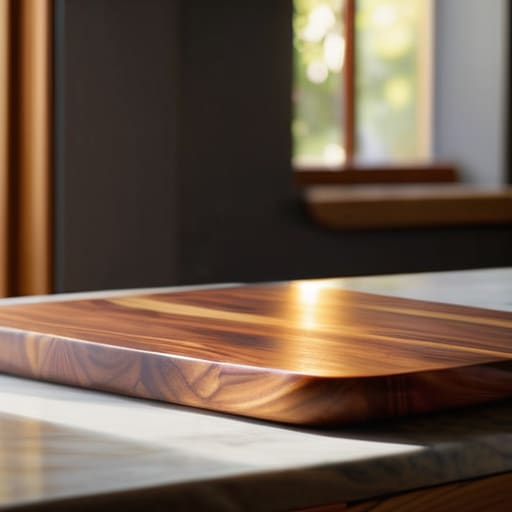
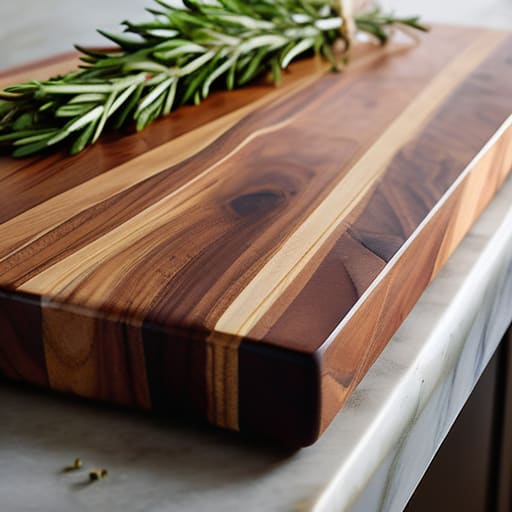
    When you’re browsing the aisles, you’ll see a dozen different types of timber, but not all of them are created equal. If you want something that won’t warp or crack after three months, you need to stick to dense hardwoods. I always tell my clients to look for maple, walnut, or cherry. These are the gold standard for hardwood kitchen accessories because they offer the perfect balance of durability and resilience. Avoid anything soft or porous; you aren’t looking for a decorative piece, you’re looking for a workhorse.

    The real debate usually comes down to end grain vs edge grain construction. If you have the budget, go for end grain. The wood fibers stand vertically, acting like tiny brushes that part when your knife hits them. This is the secret to preventing knife dulling over years of heavy use. If you’re on a tighter budget, an edge grain board is a perfectly fine, practical alternative, provided you treat it right. Regardless of which you choose, remember that a little regular maintenance with food-grade mineral oil is the only way to keep that wood from drying out and splitting.

    Preventing Knife Dulling With Proper Hardwood Kitchen Accessories

    Preventing Knife Dulling With Proper Hardwood Kitchen Accessories

    If you’re still hacking away at those cheap, thin plastic mats, you’re essentially sabotaging your expensive knives every single time you prep a meal. Plastic is too hard and too unforgiving; it creates micro-serrations on your blade that force you to sharpen far more often than necessary. When it comes to preventing knife dulling, the material under your blade is just as important as the steel itself. A proper hardwood surface actually “gives” slightly when the blade strikes, protecting that razor edge.

    This is where the debate of end grain vs edge grain comes into play. In my years managing commercial kitchens, I saw how much of a difference the orientation makes. An end-grain board acts like a bed of tiny bristles; the knife blade slides between the fibers rather than slicing through them. This not only preserves your edge but also keeps the surface looking pristine for years. Pair that with a regular application of mineral oil for wood maintenance, and you’ve got a setup that works for you instead of making you work harder to keep your tools sharp.

    How to Keep Your Board from Turning into a Biohazard

    • Stop putting your wooden boards in the dishwasher. I don’t care what the box says; the heat and the moisture will warp the wood and crack it within a month. Hand wash with warm, soapy water, dry it immediately, and get it back on the counter.
    • Oil it more often than you think you need to. Once the wood starts looking dull or feels thirsty, slather it in food-grade mineral oil. It creates a barrier that keeps moisture and bacteria from seeping into the grain.
    • Never use your cutting board for anything other than food. If you’re using it as a trivet for a hot pot or a base for a heavy decorative candle, you’re asking for deep gouges and heat damage. Keep it dedicated to the knife work.
    • Scrub away the stains, but don’t go overboard with harsh chemicals. If you’ve been chopping beets or turmeric and the board looks a little funky, a paste of baking soda and lemon juice works wonders without stripping the natural oils.
    • Watch for the cracks. As a former catering manager, I’ve seen plenty of boards that look fine until a piece of food gets lodged in a hairline fracture. If you see a deep split, it’s time to retire that board to the scrap pile or use it for something non-food related.

    The Bottom Line on Your Next Board

    Stop buying those cheap, thin plastic boards that warp and harbor bacteria; invest in a thick, solid hardwood piece that can be sanded down and reused for decades.

    Match your wood choice to your knife quality—harder woods like maple are durable, but if you’re using high-end Japanese steel, you need a board that won’t punish your edge.

    Maintenance isn’t optional if you want your gear to last; a quick routine of oiling your board will keep the wood from cracking and prevent it from becoming a disposable piece of junk.

    ## Invest in the Surface, Not the Trend

    “I’ve seen enough cheap, plastic boards end up in the trash to know that if you aren’t willing to invest in a solid piece of hardwood, you’re just paying to dull your knives and clutter your cabinets.”

    Rosalind Hayter

    The Bottom Line

    The Bottom Line: investing in quality boards.

    At the end of the day, choosing a cutting board isn’t about picking the prettiest thing on a boutique website; it’s about selecting a tool that respects your knives and your time. We’ve talked about why the right species of hardwood matters and how a cheap, thin board is nothing more than a recipe for dull blades and frustration. Remember, a high-quality board is an investment in your kitchen’s long-term functionality. If you stick to dense, stable woods and commit to a little bit of routine maintenance, you won’t be shopping for a replacement in six months. Stop chasing the cheap stuff and start building a workspace that actually works for you.

    I know it can feel overwhelming with all the endless options out there, but I promise you, simplicity wins every single time. A kitchen shouldn’t be a showroom for gadgets you’re afraid to touch; it should be a place where you feel grounded and capable. When you invest in a solid, well-maintained wooden board, you’re not just buying kitchenware—you’re establishing a better way of cooking. Treat your tools with respect, keep them seasoned, and they will serve you for decades. Now, put down the plastic, grab a good piece of maple or walnut, and get back to the business of making something delicious.

    Frequently Asked Questions

    How often do I actually need to oil my board to keep it from cracking?

    Look, there’s no magic calendar for this, but here’s the rule of thumb I used in commercial kitchens: if the wood looks thirsty or feels parched to the touch, it’s time. Usually, that’s once a month. If you’re a heavy user, you might need to do it every two weeks. Don’t wait until you see a crack; by then, the damage is done. Keep it oiled, and it’ll stay solid for decades.

    Is it safe to put my wooden board in the dishwasher, or am I just asking for trouble?

    Don’t even think about it. If you put a wooden board in the dishwasher, you’re essentially signing its death warrant. That intense heat and the soaking cycle will warp the wood, cause it to crack, and eventually split wide open. Once that happens, it’s trash. Just hand-wash it with warm, soapy water, dry it immediately, and give it a little oil every now and then. It’s a small effort to keep your gear lasting a lifetime.

    What’s the best way to clean off raw meat juices without ruining the wood?

    Look, I’ve seen too many people try to scrub raw meat juices with harsh chemicals or, worse, toss the board in the dishwasher. Don’t do that. You’ll crack the wood and ruin the finish. Instead, wash it immediately with warm water and a gentle, unscented dish soap. If you’re worried about bacteria, a quick rub with a lemon wedge and coarse salt works wonders. Scrub, rinse, and dry it upright immediately.

  • Using a Turner for Flipping Food in a Pan

    Using a Turner for Flipping Food in a Pan

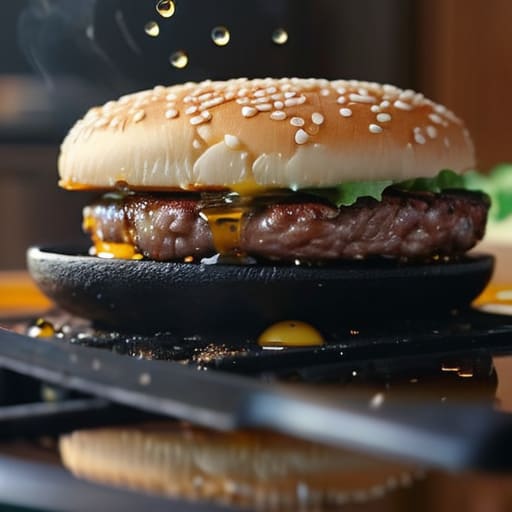
    I’ve spent twenty years in commercial kitchens, and if there is one thing that drives me up the wall, it’s watching people pour money into those “professional-grade” gadget sets that fall apart after a month of heavy use. I remember one particular afternoon in a high-volume catering kitchen where a junior cook tried to flip a heavy smash burger with a flimsy, $5 silicone piece that snapped clean in half, sending grease and meat flying everywhere. It was a mess, and it was avoidable. You don’t need a titanium-plated, gadget-of-the-month tool; you just need a spatula turner that has enough weight to feel substantial and enough rigidity to actually do the job without bending under pressure.

    I’m not here to sell you on the latest kitchen trends or fancy bells and whistles that only serve to clutter your drawers. My goal is to cut through the marketing noise and help you find the workhorse tools that actually deserve a permanent spot in your kitchen. I’m going to show you exactly what to look for in terms of material, edge thickness, and handle stability so you can stop replacing cheap junk and start investing in gear that lasts a lifetime.

    Table of Contents

    Silicone vs Metal Spatulas Choosing Substance Over Trends

    I see people constantly torn between silicone and metal, usually because they’re looking at whatever’s on sale at a big-box store rather than looking at their actual pans. If you’ve invested in a decent non-stick skillet, using a heavy metal turner is a fast track to ruining that coating. In those cases, you need high-quality, heat resistant cooking implements made of food-grade silicone. They glide under eggs or crepes without a scratch, and unlike the cheap, flimsy versions, a professional-grade silicone tool won’t melt or warp the moment things heat up.

    However, don’t go thinking silicone is a magic bullet for everything. If you’re searing a steak or flipping a heavy burger, you need the structural integrity of stainless steel. Metal provides the leverage you need when the food has weight to it. The real trick is knowing when to use a slotted turner vs solid spatula; use the slotted version for draining fat from a fritter, and the solid one for keeping those juices in your meat. Don’t buy a drawer full of both—just buy the right one for the job.

    Finding Heat Resistant Cooking Implements That Wont Melt

    Finding Heat Resistant Cooking Implements That Wont Melt

    There is nothing more frustrating than the smell of burning plastic wafting from your stovetop because you used a cheap tool that wasn’t up to the task. I’ve seen it a thousand times in commercial kitchens: someone grabs a flimsy, low-grade utensil, and within a month, the edge is warped or partially melted. When you are looking for heat resistant cooking implements, you need to look past the bright colors and focus on the material specifications. If you’re working with high-heat searing, you need something that won’t lose its structural integrity the moment the pan gets hot.

    If you are primarily using high-end pans, you have to be smart about your choices. You need non-stick cookware compatible tools that can handle the heat without scratching your investment, but that doesn’t mean they have to be flimsy. I always tell people to look for high-grade, food-safe silicone with a reinforced core. This gives you the flexibility needed for something like the best spatula for delicate fish, while ensuring the tool won’t turn into a puddle of goo halfway through dinner. Don’t settle for “good enough” when it comes to the heat.

    Five Rules for Buying a Turner You Won't Regret

    • Check the weight before you buy. A good turner should have some heft to it; if it feels like a toy in your hand, it’s going to feel like one when you’re trying to lift a heavy portion of lasagna.
    • Look for a seamless design. I’ve seen too many cheap turners where the head is just glued or poorly welded to the handle. Those gaps are breeding grounds for bacteria and grime that you’ll never be able to scrub out.
    • Test the “flex” factor. You need a tool that has enough give to slide under a delicate egg without tearing it, but enough structural integrity that it won’t buckle when you’re flipping a thick steak.
    • Avoid the “set” trap. Don’t buy those twenty-piece gadget kits just because they look pretty in the packaging. Pick one high-quality, professional-grade turner instead of ten pieces of plastic junk that will end up in a landfill by next Christmas.
    • Match the tool to your pans. If you’ve invested in good non-stick or seasoned cast iron, make sure your turner is compatible. Using a metal scraper on a good non-stick pan is the fastest way to turn a functional kitchen into a frustrating one.

    The Bottom Line: What Your Kitchen Actually Needs

    Stop buying sets of ten cheap, mismatched plastic turners; buy one high-quality, heat-resistant tool that you actually enjoy using.

    Match your tool to your pans—use silicone for your non-stick coatings to prevent scratching, but keep a solid metal turner for the heavy-duty work on cast iron.

    Prioritize durability and heat resistance over “gadget” features; if a spatula feels flimsy in your hand or smells like burning plastic, it’s going in the trash.

    The Cost of Cheap Tools

    I’ve seen enough commercial kitchens go to waste because someone bought a cheap, flimsy turner that snapped mid-service; if you’re going to buy a spatula, buy one that has enough weight to feel intentional and enough strength to actually do the job without bending under pressure.

    Rosalind Hayter

    Stop Collecting Gadgets and Start Building a Kitchen

    Stop Collecting Gadgets and Start Building a Kitchen.

    At the end of the day, choosing a spatula turner isn’t about finding the most expensive tool on the shelf; it’s about knowing exactly what you need for the way you actually cook. We’ve covered why you need to ditch the flimsy, meltable plastic and why choosing between metal for durability or high-grade silicone for non-stick surfaces is a strategic decision for your cookware. Don’t get distracted by those “all-in-one” kits that promise the world but fall apart in a month. Stick to the basics: buy for heat resistance, buy for weight, and buy for longevity. If a tool doesn’t have a clear, heavy-duty purpose in your daily routine, leave it on the store shelf.

    My time in commercial kitchens taught me that a professional setup isn’t about having a thousand different gadgets—it’s about having the right tools that you can trust implicitly. When you invest in a solid, well-made turner, you aren’t just buying a piece of kitchenware; you are investing in your own confidence at the stove. Stop treating your kitchen like a showroom for trendy junk and start treating it like a workspace. Build a collection of tools that will outlast the trends and serve you for decades. Once you have the right foundation, the cooking part becomes much more about the food and much less about fighting your equipment.
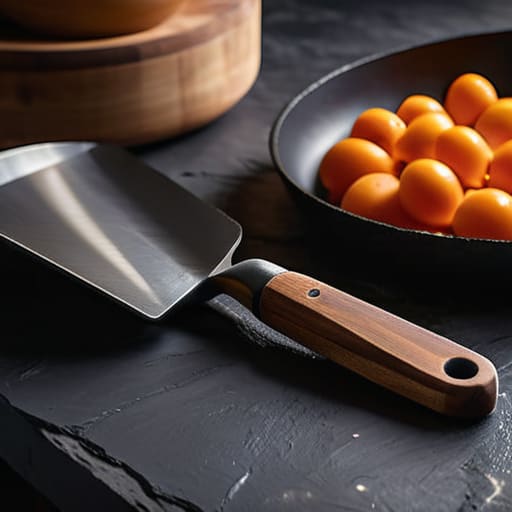
    Frequently Asked Questions

    How do I know if a metal turner is actually high-quality stainless steel or just cheap plating that's going to rust after three washes?

    Don’t just trust the shiny finish. Pick it up; if it feels light and hollow, it’s cheap. A real, high-quality stainless steel turner has some heft to it. Look closely at the construction—you want seamless joints where the head meets the handle. If you see visible seams or a “layered” look, it’s likely plated. Avoid anything that feels flimsy in your hand. If it doesn’t have a solid, weighted presence, put it back.

    Is it worth spending more on a heavy-duty turner if I’m mostly just flipping eggs and pancakes?

    If you’re strictly flipping eggs and pancakes, you don’t need a heavy-duty, industrial-grade turner. That’s just more weight to tire your wrist out. However, don’t mistake “simple” for “cheap.” You still want something with a bit of heft and a solid connection between the head and the handle. Avoid those flimsy, hollow-feeling ones that flex when you try to lift a heavy pancake. Buy a decent, mid-range tool that feels balanced; it’ll last longer than the budget junk.

    Can I use a silicone-tipped turner on my expensive non-stick pans without worrying about it wearing down the coating?

    Yes, you absolutely can. In fact, if you’ve invested in high-quality non-stick cookware, a silicone-tipped turner is your best friend. Metal turners are the enemy of that coating; they’ll scratch and peel it in no time. Just make sure the silicone is high-grade and won’t flop when you’re lifting something heavy. It’s a small price to pay to keep those expensive pans functional for years instead of months.