Blog

  • Why an Electric Kettle Is Useful

    Why an Electric Kettle Is Useful

    I’ve spent two decades in commercial kitchens, and if there is one thing that drives me up the wall, it’s watching people throw money away on “smart” appliances that have more computer chips than actual heating elements. You don’t need a Bluetooth-enabled, touch-screen monstrosity to boil water; you just need something that works every single time you flip the switch. Most people overlook the true electric kettle benefits because they are too busy chasing the latest kitchen gadget trends, only to end up with a piece of plastic junk that breaks in six months. Stop overcomplicating your morning routine with tech you’ll never use and start looking for durability and efficiency.

    I’m not here to sell you on a lifestyle or a fancy brand name. My goal is to cut through the marketing fluff and give you the straight truth about what actually makes a kettle worth its weight in gold. I’ll be sharing my no-nonsense guide to choosing tools that last a lifetime, focusing on the practical advantages that actually save you time and energy. If you want to build a kitchen that functions as hard as you do, let’s get to work.

    Table of Contents

    Mastering Temperature Control for Tea and Beyond

    Mastering Temperature Control for Tea and Beyond

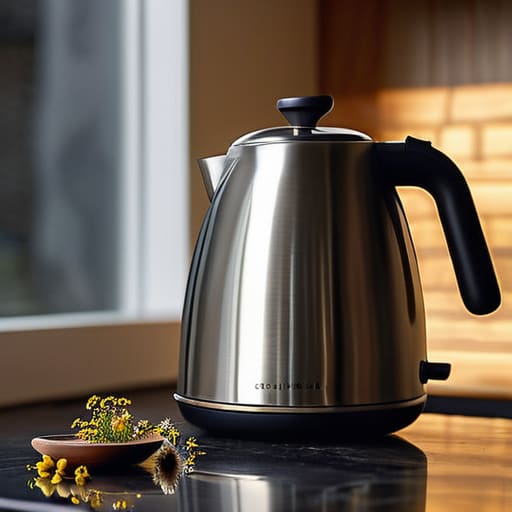
    If you’ve ever scorched a delicate green tea or ended up with a bitter cup of oolong because you used boiling water, you know that heat is everything. Most people think a kettle’s only job is to get water to a rolling boil, but that’s a mistake. If you’re serious about your morning ritual, you need a model with precise temperature control for tea. Being able to set the heat to exactly 175°F for white tea versus 212°F for a robust breakfast blend isn’t a luxury; it’s the difference between a mediocre drink and a perfect one.

    Beyond the tea drinkers, I see the value in this for anyone who cooks. I often use a kettle to jumpstart a large pot of pasta water or to prep a quick bouillon. Using rapid heating technology to get that water moving saves me precious minutes on the stovetop and keeps my energy usage focused. It’s about working smarter, not harder. Just make sure whatever you pick has a reliable automatic shut-off function—I’ve seen too many people walk away from a stove, and a good kettle should be your first line of defense in a functional, safe kitchen.

    Why Rapid Heating Technology Beats the Stovetop Every Time
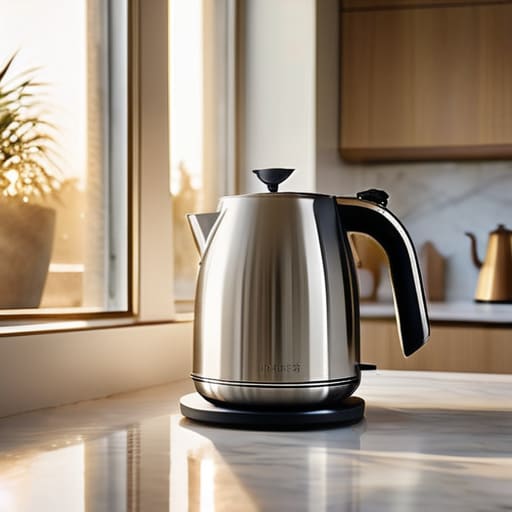
    Why Rapid Heating Technology Beats the Stovetop Every Time

    I’ve spent enough years in commercial kitchens to know that timing is everything, and waiting for a pot of water to boil on a stovetop is a slow drain on your most valuable resource: time. When you use a high-quality model equipped with rapid heating technology, you aren’t just getting hot water faster; you’re reclaiming minutes of your morning. In a direct water heating speed comparison, a dedicated electric unit will almost always outpace a standard burner, especially when you’re just looking to boil a small amount for a single cup.

    Beyond the sheer speed, there is a practical element of efficiency that people often overlook. Modern kettles are designed for energy efficient boiling, focusing the heat directly into the water rather than losing it to the surrounding air or the stovetop surface. I also appreciate the peace of mind that comes with the built-in automatic shut-off function. When I’m busy prepping ingredients or sketching out a new pantry layout in my notebook, I don’t want to worry about a pot boiling dry on the stove. An electric kettle handles the heavy lifting and then simply turns itself off, letting me focus on the cooking itself.

    Five Ways to Make Your Kettle Work Harder (and Smarter)

    • Stop boiling more water than you actually need. If you’re just making a single cup of tea, fill it to the minimum mark. It saves electricity, cuts down on scale buildup, and means you aren’t waiting forever for a massive volume of water to heat up.
    • Invest in a model with a real temperature gauge, not just an “on/off” switch. If you’re serious about coffee or delicate green teas, you need to know you aren’t scorching the leaves with boiling water. Precision is the difference between a good cup and a bitter mess.
    • Keep an eye on your water quality to prevent limescale. If you live in a hard water area, I suggest using filtered water. It keeps the heating element clean, prevents that chalky residue from ruining your flavor, and ultimately makes the appliance last years longer.
    • Use your kettle for more than just tea. I use mine to jumpstart boiling water for pasta or to prep a quick soak for dried beans. It’s much faster than waiting for a pot on the stove, and it gets the heavy lifting out of the way so you can focus on the actual cooking.
    • Don’t buy the cheap, plastic-heavy models that look like they’ll crack in six months. Look for stainless steel or borosilicate glass. You want a base that feels sturdy and a lid that actually stays shut. In my experience, a kitchen is built on tools that don’t need replacing every time you move house.

    The Bottom Line on Choosing Your Kettle

    Stop buying cheap plastic models that feel like toys; invest in a heavy-duty, stainless steel or glass kettle that won’t end up in a landfill in twelve months.

    Precision matters more than you think—if you care about the flavor of your tea or the quality of your pour-over coffee, prioritize a model with accurate temperature settings.

    Speed is a tool, not just a luxury—a high-wattage heating element saves you time and energy, making it a practical upgrade for a functional, efficient kitchen.

    ## Efficiency Over Aesthetics

    “I’ve spent enough time in commercial kitchens to know that speed is nothing without reliability; an electric kettle isn’t just about boiling water faster, it’s about having a dependable tool that respects your time and does exactly what it’s supposed to do every single morning.”

    Rosalind Hayter

    Stop Overcomplicating Your Morning Routine
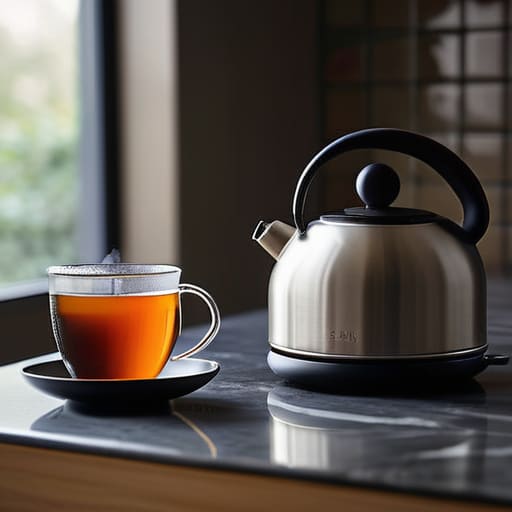
    Stop Overcomplicating Your Morning Routine with kettles.

    At the end of the day, a good electric kettle isn’t just another countertop appliance; it’s a tool that respects your time and your ingredients. We’ve talked about how precision temperature control prevents you from scorching delicate tea leaves and how rapid heating technology saves you from standing around a stovetop waiting for a pot to boil. When you invest in a model that actually works—one with sturdy construction rather than cheap plastic housing—you aren’t just buying a way to boil water. You are investing in consistency and efficiency that makes your daily kitchen rhythm much smoother.

    My advice is simple: don’t let the marketing hype trick you into buying a gadget that will end up in a landfill by next Christmas. Look for something heavy-duty, something that feels substantial in your hand, and something that does its job without a fuss. A well-chosen kettle is one of those rare kitchen staples that stays with you for years, becoming a reliable part of your morning ritual. Build your kitchen around tools that last, and I promise you’ll spend less time troubleshooting broken gear and more time actually enjoying your coffee, your tea, and your home.

    Frequently Asked Questions

    Is it actually worth spending more on a temperature-controlled model, or can I just get a basic one that boils fast?

    Look, if you’re just boiling water for pasta or a quick cup of instant coffee, save your money and get a basic, fast-boiling model. You don’t need bells and whistles for that. But, if you actually care about the nuances of tea—or if you do a lot of pour-over coffee—the temperature control is worth every extra cent. It’s the difference between a scorched, bitter mess and a perfect brew. Invest in the precision if you’re a drinker; skip it if you’re just a cook.

    How do I tell the difference between a cheap, flimsy kettle and one that’s actually built to last?

    Pick it up. If it feels like a hollow plastic toy, put it back. A quality kettle should have some heft to it. Look for brushed stainless steel or heavy-duty borosilicate glass—avoid anything with thin, flimsy plastic seams that look like they’ll crack after six months of heat cycles. Check the base and the cord; they should feel solid, not wiggly. If the lid rattles when you touch it, it’s junk. Buy weight and stability.

    Will using an electric kettle daily significantly spike my electricity bill compared to the stovetop?

    Don’t let the “electric” label scare you off. In my experience, an electric kettle is actually more efficient than the stovetop. When you use a burner, you’re heating up the air around the pot and the metal itself; with a kettle, almost all that energy goes directly into the water. Unless you’re boiling massive pots of water for pasta several times a day, you won’t see a meaningful spike in your bill.
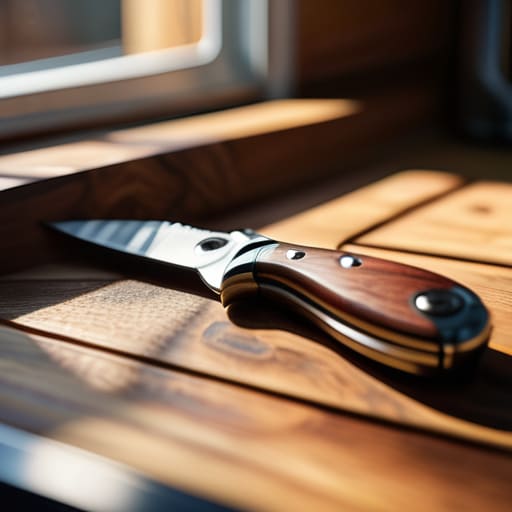
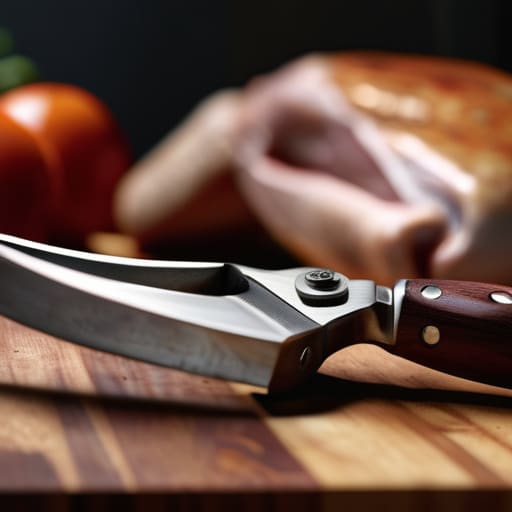
  • Kitchen Shears and the Jobs They Replace

    Kitchen Shears and the Jobs They Replace

    I still remember the chaos of a Saturday night rush in the catering kitchens I used to manage—the frantic pace, the heat, and the absolute nightmare of trying to break down a whole bird with a dull chef’s knife and a prayer. I’ve seen too many home cooks try to mimic that professional workflow using those flimsy, $5 plastic-handled scissors you find in a drugstore bargain bin. Let me tell you something: if your poultry shears can’t bite through a joint without slipping or bending, they aren’t tools; they’re just expensive pieces of landfill waiting to happen. You don’t need a gadget with seventeen different attachments; you need a single, heavy-duty pair of steel blades that actually do the work for you.

    I’m not here to sell you on some flashy, over-engineered kitchen trend that will break before your first roast is even in the oven. Instead, I’m going to show you exactly what to look for in a pair of poultry shears that will last a lifetime. We’re going to talk about blade tension, weight, and why high-quality steel is the only thing worth your hard-earned money. My goal is simple: to help you build a functional kitchen with gear that works as hard as you do.

    Heavy Duty Kitchen Shears Over Trendy Plastic Junk

    Heavy Duty Kitchen Shears Over Trendy Plastic Junk

    I’ve spent enough time in commercial kitchens to see exactly where the “bargain bin” mentality fails you. You’ll walk into any big-box store and see these flimsy, colorful plastic-handled scissors that promise the world but can’t even clip through a sprig of rosemary without slipping. Those are what I call “disposable gadgets,” and they belong in a landfill, not your utensil drawer. When you’re dealing with a whole bird, you don’t need a novelty item; you need stainless steel poultry scissors that have some actual weight to them.

    If the handles feel light and the blades feel thin, walk away. Real heavy duty kitchen shears are built with tension and high-grade steel so they can actually bite into the joints. I always tell my clients that investing an extra ten dollars upfront is better than buying a new pair every six months because the blades went dull or the plastic snapped. Buy once, buy well, and look for something that can handle the grit of safe poultry butchery techniques without wobbling in your hand.

    Mastering Safe Poultry Butchery Techniques With Confidence

    Once you have a decent pair of stainless steel poultry scissors in your hand, the real work begins: actually using them without losing a finger or ruining your dinner. Most people approach a whole bird with a sense of dread, reaching for a chef’s knife and trying to hack through the joints. That’s where mistakes happen. Instead, use your shears to find the natural gaps in the cartilage. By applying steady, downward pressure at the joint, you’ll find the bird separates with almost no effort. It’s about working with the anatomy of the animal, not fighting against it.

    Safety isn’t just about where you place your fingers; it’s about the state of your tools. I tell my clients all the time that dull blades are more dangerous than sharp ones because they require you to use excessive force. If you feel yourself struggling or slipping, stop immediately. Learning basic kitchen scissor maintenance—like ensuring the pivot screw is tight and the blades are clean—is just as important as the butchery itself. When your tools are responsive, you can focus on the task with confidence rather than tension.

    Five Rules for Using Your Shears Without Making a Mess

    • Test the tension before you start. If those blades feel loose or wiggle when you squeeze, put them back in the drawer; you’ll just end up crushing the meat instead of cutting through it.
    • Always cut against the grain of the bone. I’ve seen too many people try to force a blade through a thick joint, and that’s a quick way to nick your tool or, worse, your hand.
    • Keep your station clean with a damp cloth nearby. Poultry is messy, and if you don’t wipe the blades frequently, the protein builds up and makes the handles slippery and dangerous.
    • Use the notch for more than just bones. If your shears have that little integrated bone notch, use it to stabilize the joint—it gives you much better leverage when you’re working through a stubborn wing or thigh.
    • Hand wash and dry them immediately. I don’t care what the box says about being “dishwasher safe”—tossing high-quality steel into a high-heat cycle is the fastest way to dull the edge and ruin the finish.

    The Bottom Line on Choosing Your Shears

    Stop chasing the latest gadget; invest in heavy-duty, stainless steel shears that can handle bone without snapping.

    Efficiency in the kitchen comes from having the right tool for the job, so stop trying to force a chef’s knife to do a pair of shears’ work.

    Prioritize safety and durability over aesthetics—a tool that feels flimsy in your hand will only end up in a landfill.

    Investing in Tools That Actually Work

    At the end of the day, choosing the right poultry shears isn’t about collecting more kitchen clutter; it’s about respecting your ingredients and your time. We’ve talked about why you need to ditch those flimsy plastic models in favor of heavy-duty stainless steel and why mastering your technique is the only way to stay safe at the cutting board. When you stop fighting your food and start using tools designed for the job, the entire process of prepping a meal shifts from a stressful chore to a controlled, efficient task. Don’t settle for gear that fails the moment it hits a joint or a bone; invest in quality that can withstand years of heavy use.

    My philosophy has always been simple: build a kitchen that supports your life rather than one that demands constant maintenance and replacement. A solid pair of shears is one of those rare items that, if chosen wisely, will outlive a dozen trendy gadgets and still be sitting in your utility drawer a decade from now. Stop overthinking the bells and whistles and focus on durability and grip. Once you have the right foundation, you’ll find that good cooking becomes less about the struggle and more about the craft. Build a kit that lasts, and the rest will follow.

    Frequently Asked Questions

    How do I know if the blades are actually high-carbon steel or just cheap stainless that's going to dull after three uses?

    Look, don’t trust the marketing fluff on the box. The easiest way to tell? Check the weight and the edge. High-carbon steel feels substantial in your hand, not hollow like a toy. If you can see a slight, dark patina forming after a few uses, that’s actually a good sign—it’s the steel reacting to the air. Cheap stainless stays shiny and bright right up until the moment it loses its edge entirely.

    Can I use these same shears for cutting herbs or parchment paper, or will I ruin the edge?

    Look, I’ll give it to you straight: use them for the herbs, but keep the parchment paper far away from them. Herbs are fine—they’re soft and won’t do much damage to a good blade. But cutting through parchment or heavy packaging? That’s a quick way to dull your edge or even nick the steel. If you want these shears to last you a lifetime, keep them dedicated to food and bone.

    Are there specific models where the blades actually come apart for cleaning, or am I stuck with food trapped in the hinge?

    That is exactly the kind of question I wish more people asked before they hit “buy.” If the blades don’t separate, you’re basically inviting bacteria to move into that hinge. Look for models specifically labeled as “take-apart” or “detachable.” I personally prefer heavy-duty stainless steel pairs where the two halves unscrew or snap apart. It’s a bit more work upfront, but it’s the only way to ensure you’re actually cleaning the guts out of the tool.

  • Choosing the Right Skillet for Your Cooking Style

    Choosing the Right Skillet for Your Cooking Style

    I spent twenty years in commercial kitchens where the sound of a heavy pan hitting a burner was the heartbeat of the room, and let me tell you, nothing kills a cook’s spirit faster than a flimsy, overpriced piece of “designer” cookware that warps the first time it hits high heat. I see it all the time now in home kitchens: people dropping hundreds of dollars on trendy, colorful pans that promise the world but die within a year. Most advice regarding skillet selection is buried under layers of marketing fluff and unnecessary complexity, designed to make you feel like you need a chemistry degree just to sear a steak. It’s a scam, and frankly, it’s exhausting.

    I’m not here to sell you on a lifestyle or a flashy gadget you’ll end up hiding in the back of a cluttered cabinet. My goal is to cut through the noise and give you the practical, hard-earned truth about what actually belongs in your kitchen. I’ll show you how to navigate skillet selection based on durability and performance, not pretty packaging. We’re going to focus on the tools that can handle a lifetime of heat and heavy use, so you can stop wasting money and start actually cooking.

    Table of Contents

    Cast Iron vs Stainless Steel Choosing Your Lifetime Companion

    Cast Iron vs Stainless Steel Choosing Your Lifetime Companion

    I’ve spent enough hours in commercial kitchens to know that the “which is better” debate is usually a distraction. The truth is, you don’t need to choose one; you need to know when to reach for each. When I’m searing a thick ribeye or making cornbread, I’m grabbing my seasoned cast iron every single time. It holds heat like a beast, which is vital for that perfect crust, and unlike those cheap pans you see in big-box stores, it doesn’t have a nonstick coating longevity issue because it doesn’t have a coating at all. It’s just iron and oil, and it’ll outlive us both.

    However, if you’re making a delicate pan sauce or boiling something acidic like a tomato reduction, cast iron is your enemy. That’s where stainless steel shines. When comparing cast iron vs stainless steel, you have to look at how they handle heat. Stainless steel offers superior control for precision work, even if the heat conductivity in pans feels a bit more temperamental if you aren’t paying attention. Invest in a high-quality stainless skillet for your sauces, and keep the iron for the heavy lifting.

    Understanding Heat Conductivity in Pans for Better Cooking

    Understanding Heat Conductivity in Pans for Better Cooking

    If you don’t understand how heat moves through your pan, you’re going to end up with a meal that’s burnt on the outside and raw in the middle. This is where most home cooks stumble. You have to realize that heat conductivity in pans isn’t just a science term; it’s the difference between a perfect sear and a smoky mess. When I was managing commercial kitchens, we didn’t just pick pans because they looked pretty; we picked them based on how they responded to the flame.

    Copper and aluminum are the speed demons of the kitchen—they heat up and cool down almost instantly. This is great for delicate sauces where precision is everything. However, if you’re looking for durable cookware for everyday use, you need to understand the trade-off. Heavy materials like cast iron have much lower conductivity, meaning they take longer to get hot, but they hold onto that heat like a grudge. Once that iron is up to temperature, it stays there, providing a steady, even heat that won’t drop the moment you toss in a cold steak. It’s all about matching the tool to the task.

    Five Rules for Buying a Skillet That Won't End Up in a Landfill

    • Check the weight before you commit. A skillet that feels like a toy isn’t going to hold heat properly; you want something with enough heft to sit steady on the burner and distribute temperature evenly.
    • Ignore the “non-stick” marketing hype. Most of those chemical coatings start peeling within six months. If you want a pan that actually lasts, stick to seasoned cast iron or high-quality stainless steel.
    • Look for a flat bottom, not a rounded one. I’ve seen too many cheap pans with slightly bowed bases that wobble on a glass cooktop. If it doesn’t sit flush, you’re losing heat and wasting energy.
    • Mind the handle design. If the handle is too thin, it’ll dig into your palm when you’re trying to flip something heavy. If it’s too wide, it might not fit comfortably in your grip. Test the ergonomics if you can.
    • Don’t buy a massive set when one good pan will do. Most people don’t need a five-piece skillet collection. Pick one heavy-duty 10 or 12-inch pan that can handle everything from a morning omelet to a Sunday sear.

    My Rules for a Kitchen That Actually Works

    Stop chasing trends and start looking at weight; a quality skillet should feel substantial in your hand, not like a cheap piece of stamped tin.

    Match the pan to the task, not the marketing—use stainless steel when you need precision and control, and save the cast iron for the heavy lifting and high heat.

    Prioritize durability over convenience; I’d much rather spend more upfront on a piece of cookware that lasts thirty years than replace a “convenient” non-stick pan every twelve months.

    The Real Cost of a Cheap Pan

    “A skillet isn’t a gadget you swap out when the coating peels; it’s a tool you earn through years of use. If you’re buying a pan that you expect to toss in a year, you aren’t investing in your kitchen—you’re just subsidizing a landfill.”

    Rosalind Hayter

    Making the Right Call

    Making the Right Call with quality skillets.

    At the end of the day, choosing a skillet isn’t about following the latest kitchen trend or buying the most expensive set on the shelf. It’s about understanding how heat moves through your food and matching that to the material that fits your lifestyle. Whether you decide on the rugged, seasoned reliability of cast iron or the precise, responsive control of stainless steel, make sure you are buying for longevity rather than convenience. Don’t get distracted by flashy coatings that will flake off in six months; focus on the weight, the heat distribution, and the build quality. If you invest in tools that can actually handle the heat, you won’t find yourself replacing them every single year.

    Once you have that perfect pan sitting on your stovetop, the real work begins. A great skillet is a partner, not a magic wand, and it only performs as well as the person wielding it. I’ve spent decades in professional kitchens, and I can tell you that the most expensive pan in the world won’t save a cook who lacks patience or technique. Master your heat, learn how your specific tools react to the flame, and treat your gear with respect. If you do that, you aren’t just building a kitchen; you are building a foundation for a lifetime of good meals.

    Frequently Asked Questions

    Do I really need a specialized pan for every type of food, or can one good skillet do it all?

    Look, I see people cluttering their cabinets with single-use gadgets every single day, and it drives me crazy. No, you don’t need a specialized pan for every recipe. If you invest in one high-quality, heavy-bottomed skillet, you can handle about eighty percent of your cooking. A good pan is a workhorse, not a collection of trophies. Buy one that does the job well, and stop letting “specialty” marketing dictate your kitchen layout.

    How much weight should I actually be looking for in a pan before it becomes more of a workout than a tool?

    Look, I’ve seen too many people buy a heavy-duty skillet only to let it gather dust because their wrists can’t handle the lifting. You want heft—it means better heat retention—but it shouldn’t feel like you’re lifting a dumbbell. For a standard 10-inch pan, aim for something between 3 and 5 pounds. If you can’t comfortably maneuver it from the stovetop to the sink, it’s not a tool; it’s a burden.

    Is it worth the extra money to buy a brand-name skillet, or am I just paying for a fancy logo?

    Look, I’ve seen enough “bargain” pans end up in a landfill to know the truth. You aren’t just paying for a logo; you’re paying for the quality of the metal and the precision of the construction. A cheap, thin skillet warps the moment it hits high heat, and once that happens, it’s trash. If a brand name means better heat distribution and a handle that won’t snap off, it’s an investment, not an ego trip.

  • How Sous Vide Circulators Hold Temperature

    How Sous Vide Circulators Hold Temperature

    I’ve spent two decades in commercial kitchens watching people throw money at “revolutionary” gadgets that end up gathering dust in a junk drawer. Lately, I’m seeing the same thing happen with the sous vide circulator craze; people treat it like some magical, high-tech requirement for a decent meal, when in reality, most of the hype is just marketing fluff designed to separate you from your paycheck. You don’t need a $500 smart-connected machine that pings your phone every five minutes to cook a steak. You just need a piece of equipment that actually does its job without a learning curve that feels like a college exam.

    I’m not here to sell you on a lifestyle or a trend. My goal is to help you cut through the noise and find a reliable sous vide circulator that is built to last and won’t fail you when you’re hosting a dinner party. I’m going to give you the straight truth on what features actually matter—like temperature stability and build quality—and which ones are just expensive distractions. Let’s focus on getting you the right tool so you can stop worrying about the thermometer and start enjoying the food.

    Mastering Precision Temperature Control for Consistent Results

    Mastering Precision Temperature Control for Consistent Results

    Mastering Precision Temperature Control for Consistent Results

    When I was managing banquet kitchens, the biggest enemy wasn’t a rush of orders; it was temperature fluctuation. If your heat drifts even a few degrees, you’ve lost the edge. That’s why a quality precision immersion circulator is a non-negotiable for anyone serious about this method. You aren’t just heating water; you are creating a stable environment where the heat becomes an extension of the food itself. Unlike a traditional stovetop where you’re constantly fighting to adjust the flame, a reliable thermal immersion heater does the heavy lifting for you, holding that exact degree from start to finish.

    The real magic happens when you stop guessing and start trusting the science. Once you nail your water bath cooking temperature, you realize how much stress you’ve been putting on yourself with traditional methods. You no longer have to hover over a pan or worry about a steak turning gray because the pan was too hot. Instead, you rely on the machine to maintain that steady state, allowing you to focus on your prep work or, frankly, just enjoying a glass of wine while the dinner handles itself.

    The Reliability of a True Thermal Immersion Heater

    When you’re running a professional kitchen, you learn very quickly that “close enough” is just another way of saying “ruined.” In my years managing catering lines, I saw how much time is wasted when equipment fails mid-service. That’s why I don’t care much for the cheap, lightweight plastic models you see in flashy social media ads. You need a thermal immersion heater that feels substantial in your hand and actually stays the course. A real tool should be built to withstand hours of continuous operation without the motor whining or the temperature drifting.

    I always tell my clients to look for a precision immersion circulator that prioritizes stability over bells and whistles. It’s not about having a touchscreen with fifty different presets; it’s about whether that device can maintain a steady water bath cooking temperature for six, twelve, or even twenty-four hours straight. If the heating element is weak, you’re just playing a guessing game with your expensive cuts of meat. Invest in something with enough torque and heating power to handle a large vessel, because a tool that struggles with a standard pot is a tool that will eventually let you down.

    Five Ways to Stop Wasting Time and Money on Your Sous Vide Setup

    • Get a dedicated container that actually holds heat. Don’t just throw your circulator into a random pot on the stove; use a heavy-duty polycarbonate box or even a high-quality insulated cooler. If your water temperature is constantly fluctuating because the room is drafty, you’re fighting a losing battle against physics.
    • Invest in a good vacuum sealer, not a cheap sandwich bag hack. I’ve seen too many people try to use Ziplocs only to have them float or leak halfway through a cook. If you want professional results, you need a reliable seal that won’t fail when the temperature rises.
    • Stop overcomplicating your seasoning. Since the food sits in that bag for a long time, heavy spices can sometimes turn overwhelming or even bitter. Keep it simple—salt, pepper, and maybe a sprig of thyme. Let the precision of the heat do the heavy lifting, not a mountain of dried herbs.
    • Use a weight to keep your bags submerged. There is nothing more frustrating than pulling out a container only to find your expensive steak is floating halfway out of the water. Use a heavy ceramic plate or specialized sous vide weights to ensure every inch of that protein is actually in the bath.
    • Learn the art of the sear. A sous vide produces perfect texture, but it looks gray and unappetizing straight out of the bag. Pat your meat bone-dry with paper towels before hitting a ripping-hot cast iron skillet. If there’s moisture on the surface, you’re steaming the meat instead of searing it, and you’ll lose that crust you worked so hard for.

    My Bottom Line on Investing in Sous Vide

    Don’t chase the cheapest model just to save twenty bucks; if the heating element can’t maintain a steady temperature, you’re just boiling expensive meat in an inconsistent bath.

    Treat a high-quality immersion circulator like a piece of professional equipment, not a seasonal gadget—buy one built with durable materials that can handle daily use without cutting out.

    Precision is the whole point of this method, so prioritize a device with reliable thermal stability so you can stop babysitting the thermometer and actually enjoy your kitchen.

    Stop Collecting Gadgets, Start Building a System

    At the end of the day, a sous vide circulator isn’t just another piece of countertop clutter meant to collect dust once the novelty wears off. It is a tool for precision, a way to bridge the gap between “guessing” and knowing exactly how your food will turn out every single time. We’ve talked about why you need a heater that won’t quit on you mid-service and why temperature stability is the backbone of great cooking. If you invest in a machine that prioritizes thermal reliability over flashy digital screens, you aren’t just buying a gadget; you are investing in a piece of equipment that will serve your kitchen for years to come.

    My advice? Don’t let the high-tech allure of modern cooking overwhelm you. The goal isn’t to own the most expensive kit on the market, but to own the right kit—the kind that works as hard as you do. Once you master the science of water baths and temperature control, you’ll find that the real magic happens when you stop worrying about the mechanics and start focusing on the ingredients. Buy quality, maintain your tools, and trust the process. A well-run kitchen is built on consistency, and with the right immersion circulator, you’re already halfway there.

    Frequently Asked Questions

    Do I really need a dedicated circulator, or can I just get away with a cheap water bath and a thermometer?

    Look, I’ve seen enough amateur cooks struggle with lukewarm water and fluctuating temps to know the truth. You could try the thermometer and a pot method, but you’ll spend your entire dinner hovering over the stove like a nervous parent. It’s inefficient and inconsistent. If you want the precision that makes sous vide worth the effort, get a dedicated circulator. Don’t waste your evening babysitting a pot when a machine can do it perfectly.

    How much space is this thing actually going to take up on my counter when I'm not using it?

    Look, I get it. I don’t want a bulky machine cluttering up my prep space any more than you do. Most immersion circulators are actually quite slim—think of them like a large, heavy-duty whisk. They clip onto the side of your pot, so they don’t take up any actual counter real estate while you’re cooking. When you’re done, they tuck easily into a drawer or a small bin. Just don’t buy one with a massive, permanent control base.

    Is it worth investing in a high-end model, or am I just paying for a brand name when a basic one does the same job?

    Look, I’ve seen enough cheap kitchen gadgets end up in the landfill to know the difference. If you’re just cooking a steak once a month, a basic model is fine. But if you plan on using this every week, buy the high-end version. You aren’t just paying for a logo; you’re paying for better temperature stability, a more durable heating element, and a pump that won’t die after six months of constant use.

  • Why Wooden Spoons Still Outlast the Alternatives

    Why Wooden Spoons Still Outlast the Alternatives

    I still remember the chaos of my first commercial kitchen, standing over a massive stockpot during a Friday night rush, feeling the vibration of a cheap, mass-produced spatula snapping right in my hand. It was a total disaster, and it taught me a lesson I’ve carried for twenty years: your tools shouldn’t be the thing that fails you when the heat is on. People spend hundreds on high-tech silicone sets or fancy gadgets that end up gathering dust in a drawer, yet they overlook the absolute powerhouse of the kitchen: a single, well-crafted wooden mixing spoon. If it’s not heavy enough to feel substantial in your palm and smooth enough to glide through a thick risotto, it’s not worth your counter space.

    I’m not here to sell you on some overpriced, designer utensil that’s just “aesthetic” for your social media feed. My goal is to cut through the marketing noise and help you find the kind of tool that actually earns its keep. I’m going to show you exactly what to look for in a wooden mixing spoon so you can stop buying disposable junk and start investing in pieces that last a lifetime.

    The Secret to Superior Non Stick Cookware Protection

    The Secret to Superior Non Stick Cookware Protection

    If you’ve spent any time investing in high-quality non-stick pans, you know how quickly a cheap metal spatula can ruin a perfectly good surface. I’ve seen too many professional-grade pans rendered useless because someone used the wrong tool. This is where a solid piece of timber becomes your best friend. Using a well-chosen tool provides essential non-stick cookware protection, ensuring you aren’t scratching away that expensive coating every time you scramble an egg.

    But it isn’t just about what you’re stirring; it’s about what you’re using to do it. When I’m looking for the best wood for kitchen utensils, I always steer people toward hardwoods like maple or cherry. These aren’t just for show; they offer much better heat resistance of wood compared to the flimsy bamboo or cheap composites you see in big-box stores. A dense, high-quality grain won’t warp or soften the moment it hits a hot pan. If you treat your tools with a little respect—and a bit of food-grade oil—they’ll protect your cookware and stay in your kitchen for decades.

    Choosing the Best Wood for Kitchen Utensils

    When you’re browsing the kitchen aisle, don’t let the fancy carvings fool you. The grain matters more than the aesthetics. If you want something that won’t warp after three months of heavy use, you need to look for hardwoods. Maple and beech are my go-to’s; they’re dense, tight-grained, and incredibly durable. Because they don’t have large pores, they’re much better at preventing wood cracking and absorbing less moisture from your sauces.

    If you’re looking for the best wood for kitchen utensils, you might encounter bamboo. While it’s a popular choice for those seeking sustainable kitchen tools, keep in mind that bamboo is technically a grass. It’s tough, sure, but it can sometimes feel a bit more brittle than a solid piece of cherry or walnut. Personally, I prefer the weight of a heavy maple spoon when I’m stirring a thick risotto. Just remember: once you pick your wood, you have to respect it. A little regular oiling goes a long way in keeping that grain tight and your tools feeling like new for decades.

    Five Ways to Make Your Spoons Last a Lifetime

    • Forget the dishwasher; it’s the fastest way to crack a good spoon. Hand wash your wood with warm, soapy water and dry it immediately so the moisture doesn’t sit in the grain.
    • Once a month, rub a little food-grade mineral oil into the wood. It keeps the fibers from drying out and prevents that splintery texture that ruins a good stir.
    • Never soak your wooden tools in a sink full of water. If they sit in standing water, they’ll warp, and a warped spoon is just expensive kindling.
    • Check your edges regularly. If you notice deep grooves or cracks where food is getting stuck, it’s time to retire that spoon before it becomes a hygiene issue.
    • Use the right tool for the job. Don’t try to force a small stirring spoon to scrape the bottom of a heavy Dutch oven; use a dedicated spatula for heavy lifting to avoid snapping the handle.

    The Bottom Line on Your Wooden Spoons

    Stop buying cheap, multi-pack sets; one solid, well-made spoon from a hardwood is worth more than a drawer full of flimsy replacements.

    Protect your investment by hand-washing only—tossing your good wood into the dishwasher is the fastest way to ruin it.

    Pay attention to the grain and the weight; if it feels light and hollow in your hand, it’s going to snap right when you’re stirring something heavy.

    The Last Spoon You'll Ever Buy

    At the end of the day, choosing a wooden spoon isn’t about following some fancy culinary trend; it’s about making a practical decision for your pans and your sanity. We’ve covered why you need to ditch the plastic to save your non-stick coatings, and why selecting a dense, tight-grained hardwood like maple or olive is the only way to ensure your tool doesn’t end up in a landfill by next Christmas. When you invest in a piece of wood that is solid, heavy, and well-finished, you aren’t just buying a utensil—you are investing in a tool that handles heat, respects your cookware, and stays in your kitchen for decades.

    My advice? Stop overthinking the gadgets and start focusing on the essentials that actually do the heavy lifting. A kitchen shouldn’t be a showroom for expensive, useless plastic junk; it should be a workspace that feels steady and reliable. When you hold a well-made wooden spoon, you feel that connection to the craft of cooking. Treat your tools with respect, oil them occasionally, and they will serve you faithfully through every meal you ever prepare. Build a kitchen that lasts, one thoughtful choice at a time.

    Frequently Asked Questions

    How do I stop my wooden spoons from absorbing smells like garlic or onion?

    Look, it happens to the best of us. Wood is porous by nature, so it’s going to soak up those heavy aromatics if you aren’t careful. The trick is to never, ever soak them in a sink full of dirty water. Wash them immediately with warm, soapy water and dry them thoroughly by hand. If they already smell like a garlic factory, rub them with a bit of coarse salt and lemon juice to lift the scent.

    Is it actually worth the extra money to buy hand-carved spoons versus the cheap ones from the big-box stores?

    Look, I’ll be blunt: if you’re buying a hand-carved spoon just for the “aesthetic” on Instagram, save your money. But if you’re looking for something that won’t warp or crack after six months of heavy stirring, there’s a massive difference. Big-box spoons are often mass-produced from inferior, thirsty woods. A hand-carved piece is usually denser, better finished, and built to handle real heat. It’s an investment in a tool, not just a decoration.

    How often should I be oiling my spoons to keep them from cracking?

    Don’t wait until you see a crack to take action; by then, the damage is done. I usually give my favorite spoons a good oiling once a month, or whenever the wood starts feeling a bit thirsty or looks dull. If you’re a heavy cook, you might need to do it more often. Just use a food-safe mineral oil—never olive oil, as it goes rancid—and rub it in well. It keeps the grain tight and durable.

  • Choosing a Cheese Grater for Different Textures

    Choosing a Cheese Grater for Different Textures

    I spent twenty years in commercial kitchens, and if there is one thing that drives me up the wall, it’s watching people pour money into those “multi-function” gadget bins. You know the ones—those flimsy, colorful plastic boxes that claim to slice, shred, and zest, but usually just end up jamming or snapping the moment you apply any real pressure. I’ve seen enough of them end up in the landfill to know that a cheap, glorified cheese grater is nothing more than a temporary convenience that eventually becomes a kitchen headache. You don’t need a specialized machine for every single ingredient; you just need a tool that actually works.

    I’m not here to sell you on the latest kitchen trend or a gadget that takes up half your drawer. My goal is to help you strip away the clutter and find the heavy-duty, stainless steel essentials that will still be working perfectly when you’re long retired. I’m going to show you exactly what to look for in a cheese grater so you can stop wasting money on junk and start investing in tools that last a lifetime.

    Table of Contents

    Box Grater vs Rotary Grater Choosing Lasting Durability

    Box Grater vs Rotary Grater Choosing Lasting Durability

    When you’re deciding between a box grater vs rotary grater, you have to look past the shiny packaging and think about how you actually move in your kitchen. In my years managing catering lines, I learned that speed is nothing without reliability. A classic, heavy-duty box grater is the workhorse of the industry. It’s simple, it doesn’t have moving parts to break, and it handles everything from a block of sharp cheddar to a stubborn carrot. If you buy a stainless steel model with a thick frame, it’ll likely outlive your current appliances.

    Rotary graters, on the other hand, are often marketed as these ergonomic kitchen gadgets that save your wrists, but they come with a catch: complexity. They have more gears, more plastic housing, and more crevices where old cheese gets trapped and turns into a nightmare to clean. While they might be fine for a quick sprinkle of parmesan, they aren’t the foundation of a serious kitchen. If you want tools that stand up to daily use without falling apart, stick to the basics. Don’t let a fancy mechanism trick you into buying something that’s destined for the landfill in two years.

    Why Manual Food Prep Tools Beat Disposable Gadgets

    Why Manual Food Prep Tools Beat Disposable Gadgets

    I’ve spent enough time in commercial kitchens to know that the more moving parts a tool has, the faster it’s going to break. We’ve been conditioned to think that “automatic” means “easier,” but in reality, most of those electric gadgets are just expensive landfill fodder waiting to happen. When you rely on manual food prep tools, you aren’t just saving counter space; you’re investing in something that doesn’t require a power cord or a proprietary replacement part. A simple, well-made tool gives you total control over the texture of your food, something a motorized blade will never replicate.

    If you want to elevate your cooking without the clutter, skip the multi-functional plastic machines and invest in a high-quality zester and microplane. These are the workhorses of a real kitchen. They are easy to clean, easy to store, and they don’t have a motor that will burn out after a year of heavy use. Instead of chasing the latest trend, focus on longevity and tactile feedback. When you use a tool that feels solid in your hand, you’ll find yourself actually enjoying the prep work rather than rushing through it just to get the machine cleaned up.

    Five Rules for Choosing a Grater That Won't End Up in the Trash

    • Look for heavy-gauge stainless steel. If the metal feels thin or flimsy in your hand, it’s going to bend the first time you try to tackle a block of aged parmesan. You want something with weight and substance.
    • Check the sharpness of the teeth, not just the count. I’ve seen plenty of “high-capacity” graters that are actually duller than a butter knife; they just tear at the cheese instead of slicing it, which is a massive waste of product.
    • Prioritize easy cleaning. If a grater has too many awkward nooks and crannies where cheese gets stuck and turns into a nightmare to scrub, it’s not a tool—it’s a chore. I always look for smooth welds and simple designs.
    • Avoid anything with plastic handles that feel hollow. In a professional kitchen, we rely on tools that can withstand heat and heavy use. Plastic handles are often the first point of failure, snapping off right when you’re in the middle of prep.
    • Match the tool to your actual habits. If you find yourself grating cheese every single night for pasta, invest in a high-quality box grater. If you only do it for occasional large batches, a rotary grater might suffice, but don’t buy a specialty gadget just because it looks cute in an ad.

    The Bottom Line on Grating

    Stop buying cheap, thin-gauge metal graters that bend under pressure; invest in heavy-duty stainless steel that won’t warp or snap when you’re halfway through a block of parmesan.

    Choose your tool based on volume—use a rotary grater for large batches to save your wrists, but keep a solid box grater on hand for precision and speed.

    Prioritize easy cleanup and material quality over “specialty” features; if it’s hard to wash or made of flimsy plastic, it’s just going to end up at the back of your junk drawer.

    The Truth About Your Prep Tools

    A cheap, flimsy grater is just a future piece of landfill waiting to happen; if you aren’t buying something with enough weight to feel substantial in your hand and enough steel to stay sharp through a thousand shreds, you’re just throwing money away.

    Rosalind Hayter

    Making the Right Call

    Making the Right Call with quality graters.

    At the end of the day, choosing a grater isn’t about finding the flashiest tool in the aisle; it’s about deciding which one won’t end up in a landfill by next Christmas. Whether you decide a sturdy, classic box grater is your workhorse or you opt for the precision of a rotary model, make sure it’s built from solid, heavy-duty materials that can handle a real workload. I’ve seen far too many people buy those cheap, thin-walled versions that bend under the slightest pressure, and quite frankly, it’s a waste of your hard-earned money. Stick to the basics, prioritize build quality over bells and whistles, and you’ll have a tool that serves you faithfully for a decade rather than a month.

    My advice? Stop looking for a magic gadget to do the work for you and start investing in the foundations of a functional kitchen. A good grater is a small thing, but it’s a vital part of the ritual of cooking from scratch. When you have tools you can actually trust in your hands, the prep work stops feeling like a chore and starts feeling like part of the process. Build your kitchen around longevity and purpose, and I promise you’ll find that cooking becomes a lot more grounded and a lot less chaotic. Now, go grab that notebook, check your drawer, and let’s get rid of the junk.

    Frequently Asked Questions

    How do I know if a stainless steel grater is actually high-quality or just cheap metal with a fancy finish?

    Look for weight and tension. A high-quality stainless steel grater should feel substantial in your hand, not like a piece of flimsy tin foil. When you press your thumb against the blades, they shouldn’t flex or bend; they need to be rigid. Also, check the welds where the handle meets the body. If it looks messy or uneven, it’s going to snap. If it’s solid, heavy, and seamless, it’s built to last.

    Is it worth the extra space in my drawer to keep a microplane if I already have a standard box grater?

    Look, I get the drawer space struggle—I’ve organized enough cramped kitchens to know. But yes, it’s worth it. A box grater is your workhorse for blocks of cheddar or carrots, but it’s clumsy for delicate tasks. A microplane is a different beast entirely; it’s for the fine stuff like zest, hard parmesan, or ginger. You aren’t just buying another tool; you’re buying precision. Keep the microplane. It does things your box grater simply can’t.

    What’s the best way to clean a grater without risking my fingers or dulling the blades?

    Listen, I’ve seen too many people scrub a grater with a sponge and end up with a nasty nick on their knuckles. Don’t do that. The trick is to clean it while it’s still wet. Use a stiff-bristled dish brush—not a sponge—to scrub the blades. It gets into the crevices without the risk of slicing you open. If you’re dealing with stubborn cheese, soak it in warm, soapy water first. Just avoid the dishwasher; the heat kills the edge.

  • How to Use a Microplane Grater

    How to Use a Microplane Grater

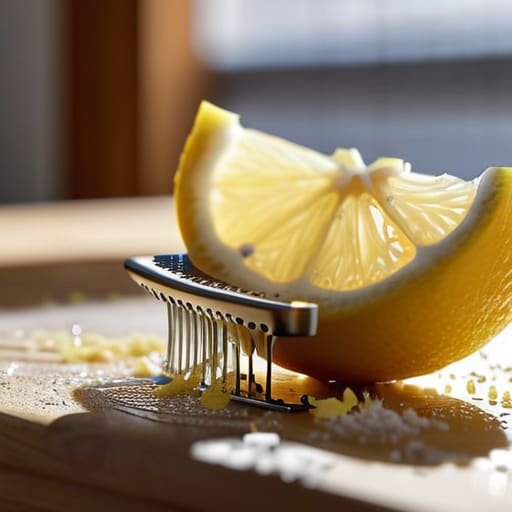
    I remember standing in a commercial kitchen during a Friday night rush, surrounded by the frantic energy of twenty different prep stations, and watching a junior cook struggle with a cheap, boxy grater. He was hacking away at a lemon, bruising the zest and leaving behind a pile of bitter white pith that would have ruined the entire sauce. It was one of those moments where I realized that most people think a microplane is just another expensive gadget for people with too much counter space. They’re wrong. It isn’t a luxury; it is a fundamental tool that separates someone who is actually cooking from someone who is just following a recipe.

    I’m not here to sell you on some flashy, multi-purpose kitchen gadget that will end up in a junk drawer by next Christmas. My goal is to cut through the marketing noise and tell you exactly why a single, high-quality microplane is the only zester you will ever need to own. I’ll show you how to spot the difference between professional-grade steel and the flimsy stuff, and more importantly, I’ll teach you how to use it without losing a fingertip in the process.

    Table of Contents

    Mastering Citrus Zest Techniques Without the Struggle

    Mastering Citrus Zest Techniques Without the Struggle

    Once you have the right tool in your hand, the real work begins. Most people approach zesting with too much pressure, which is a mistake. You aren’t trying to dig into the white pith—that stuff is bitter and will ruin your entire dish. Instead, use light, sweeping motions. Think of it as polishing the fruit rather than scrubbing it. If you master this, you’ll find that your citrus zest techniques become second nature, turning a tedious chore into a quick, effortless part of your prep.

    Don’t stop at lemons and limes, either. I’ve found that this specific type of fine rasp grater is a total workhorse for much more than just fruit. When I’m prepping for a larger meal, I use it as my primary ginger grating tool because it captures every bit of flavor without leaving behind those woody, unappealing fibers. You can even transition straight into hard cheese grating for a fresh dusting of Parmesan over pasta. It’s all about using the right edge for the right texture; once you get the rhythm down, you’ll wonder how you ever managed with those clunky, old-fashioned box graters.

    The Secret to Perfect Hard Cheese Grating Every Time

    The Secret to Perfect Hard Cheese Grating Every Time

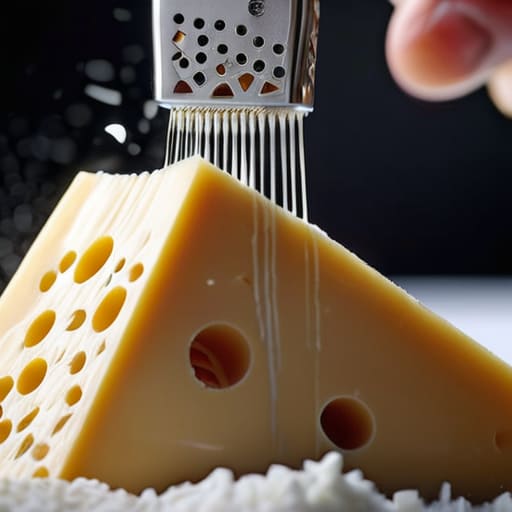
    If you’ve ever tried to shred a block of aged Parmigiano-Reggiano with a standard box grater, you know the frustration. You end up with uneven, chunky shreds that clog the holes, or worse, you find yourself hacking away like you’re woodworking. That’s where the magic of a fine rasp grater comes in. Unlike those clunky metal boxes, a slim, handheld tool allows you to control the pressure and the direction of your stroke. This is the difference between getting a pile of useless crumbs and achieving those delicate, snowy wisps that melt instantly into your pasta.

    When it comes to professional-grade hard cheese grating, temperature is your best friend. I always tell my clients to pull the cheese out of the fridge a few minutes before they start. If the cheese is too cold and hard, you’ll struggle; if it’s too soft, it’ll just mush against the blades. Use long, steady strokes rather than short, frantic ones. Once you master this rhythm, you’ll realize that these professional chef graters aren’t just luxury items—they are essential tools that make your prep work feel less like a chore and more like a craft.

    Five Ways to Actually Use Your Microplane Like a Pro

    • Stop trying to grate everything with a box grater; use the Microplane for fine tasks like ginger, garlic, or nutmeg to avoid the mushy mess you get with a knife.
    • Always grate against the grain of the tool, moving the food from the handle toward the teeth, rather than trying to “saw” it back and forth.
    • Keep a small bowl of ice water nearby if you’re working with heavy aromatics like garlic; it helps keep the fine bits from sticking to the blades and turning into a paste.
    • Don’t let it sit in the sink—those tiny holes are a nightmare to clean once food dries in them, so rinse it under hot water immediately after use.
    • Use it for more than just food; I’ve found a Microplane is the fastest way to shave a bit of chocolate over a dessert or even to lightly zest a piece of soap if you’re in a pinch for a DIY project.

    The Bottom Line on Your Microplane

    Stop buying cheap, flimsy graters that bend under pressure; invest in a high-quality Microplane that will actually hold an edge for years.

    Use the tool for more than just citrus—it’s your best friend for everything from grating fresh ginger to turning hard parmesan into a light, airy dust.

    Prioritize efficiency over gadgetry; a sharp, professional-grade zester saves you time and prevents the frustration of tearing your ingredients instead of shaving them.

    The Truth About Kitchen Gadgets

    Most people think they need a drawer full of specialized graters, but they really just need one high-quality Microplane that actually works. Stop buying plastic junk that dulls after three uses; buy the tool that does the job right the first time and let it stay in your kitchen for the next twenty years.

    Rosalind Hayter

    The Bottom Line on Your Next Kitchen Essential

    The Bottom Line on Your Next Kitchen Essential

    At the end of the day, a Microplane isn’t just another piece of metal cluttering up your utensil drawer; it’s a tool that actually respects your time and your ingredients. Whether you’re finally tackling that block of aged Parmigiano-Reggiano or trying to get every last drop of aromatic zest out of a lemon, having the right blade makes a world of difference. I’ve seen too many people struggle with cheap, box-set graters that tear at the food instead of shaving it, and frankly, it’s a waste of good ingredients. Invest in a high-quality version once, keep it clean, and you’ll find that it becomes one of those few reliable workhorses in your kitchen that you reach for every single day.

    My philosophy has always been simple: stop chasing every passing kitchen gadget and start focusing on the tools that actually improve your craft. A good Microplane is a perfect example of that. It’s inexpensive, it’s durable, and it works. When you stop fighting with subpar equipment, you can finally focus on what actually matters—the flavor, the technique, and the joy of the meal itself. Don’t let a dull tool stand in the way of a great recipe. Buy it once, use it well, and let your cooking do the rest of the talking.

    Frequently Asked Questions

    How do I actually clean all that tiny cheese stuck in the blades without cutting my fingers?

    Don’t go at it with a sponge; you’ll end up with a sliced-up thumb and a mess. The trick is to use a stiff-bristled dish brush or even an old toothbrush. Hold the Microplane under running water—not directly against the blades, but at an angle—and scrub in the direction of the teeth. It’s much safer and gets into those tiny grooves where cheese likes to hide. Let it air dry completely before storing.

    Is it worth spending the extra money on the brand name, or can I just get a cheap knockoff?

    Look, I’ve seen enough cheap, flimsy graters end up in the landfill to know the answer. Save your money on the fancy gadgets, but don’t cheap out on the Microplane itself. A knockoff might look similar, but the blade geometry is everything. Cheap ones dull instantly or, worse, catch your knuckles because the metal is uneven. Buy the real thing once. It’s a small upfront cost to avoid a drawer full of useless junk.

    Can I use a Microplane for things like ginger or garlic, or will it just make a mess?

    You absolutely can, and honestly, it’s a game-changer. I used to use a standard box grater for ginger, but it was a nightmare to clean and a waste of good root. A Microplane glides right through ginger and garlic, turning them into a fine paste that integrates perfectly into dressings or sauces. Just a tip: don’t try to grate a single tiny clove. Slice it into thin coins first to avoid a messy struggle.

  • Using a Roasting Pan for Oven Meals

    Using a Roasting Pan for Oven Meals

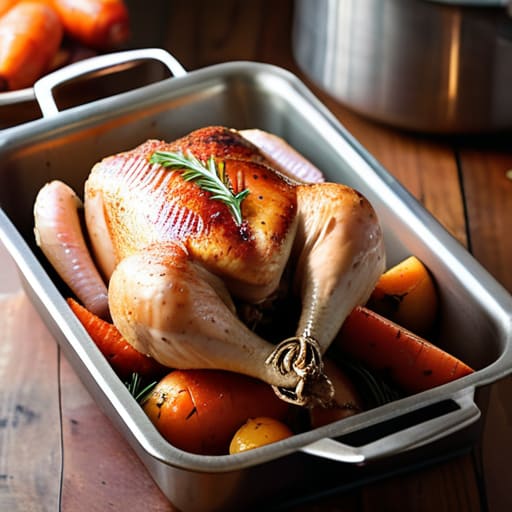
    I still remember a frantic Sunday afternoon in my catering days, staring at a flimsy, thin-walled roasting pan that had just buckled under the weight of a twenty-pound turkey. The juices were everywhere, the heat distribution was a disaster, and I was left scrambling to fix a meal that was supposed to be the centerpiece of a wedding banquet. It was a mess, but it taught me a lesson I’ve never forgotten: a cheap roasting pan isn’t just a waste of money; it’s a liability when you actually need it to perform.

    I’m not here to sell you on some fancy, non-stick gadget with a dozen unnecessary bells and whistles that will end up in a landfill by next Christmas. Instead, I’m going to give you the straight truth about what actually matters—weight, material, and durability. I’ll help you cut through the marketing noise so you can invest in a piece of equipment that is built to last and will actually make your holiday cooking a little more predictable and a lot less stressful.

    Table of Contents

    Why a Stainless Steel Roasting Pan Beats Trendy Junk

    Why a Stainless Steel Roasting Pan Beats Trendy Junk

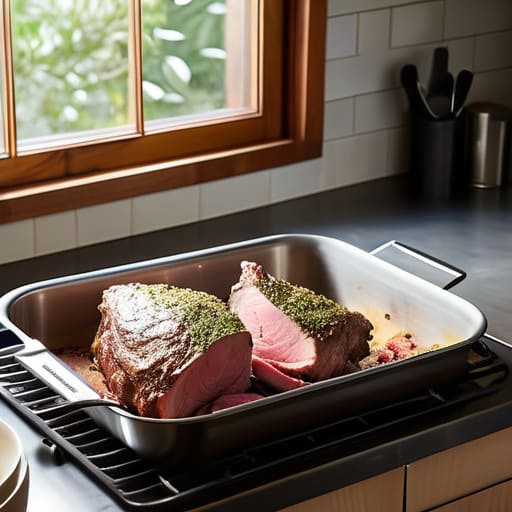
    I’ve seen it a thousand times in commercial kitchens and in clients’ homes: someone buys a cheap, non-stick ovenware set thinking they’re being smart, only to have the coating peel off after six months of high-heat roasting. It’s frustrating and, frankly, a waste of money. If you want something that can actually handle the heat of a heavy bird or a thick cut of beef, you need to look toward a stainless steel roasting pan. Unlike those flimsy, coated pans that warp the moment they hit a hot oven, high-quality steel is built to endure. It won’t leach chemicals into your food, and more importantly, it won’t fail you when you’re halfway through a holiday meal.

    When you invest in heavy duty bakeware, you aren’t just buying a vessel; you’re buying durability. A solid stainless steel piece provides even heat distribution that those trendy, thin-walled alternatives simply can’t match. I always tell people that if you aren’t planning to replace it every two years, you should skip the “convenience” of non-stick and go for the real deal. It might take a little more elbow grease to clean, but that’s a small price to pay for a tool that will actually last a lifetime.

    The Timeless Strength of a Cast Iron Roasting Dish

    The Timeless Strength of a Cast Iron Roasting Dish.

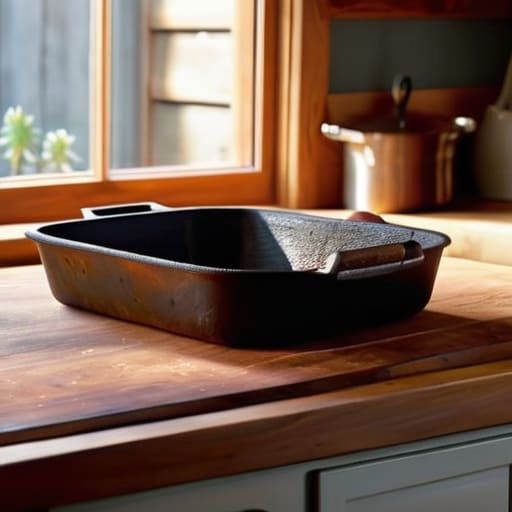
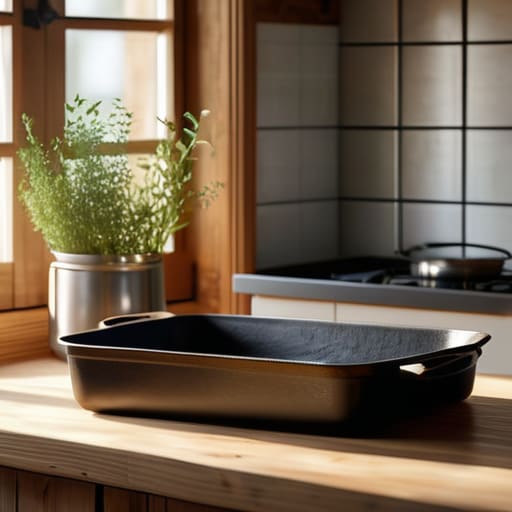
    If you ask me, there is nothing quite like the heft of a seasoned cast iron roasting dish sitting on your counter. I’ve spent years in commercial kitchens where everything was stainless steel for the sake of sanitation, but when I’m back in my own home, I reach for cast iron every single time. It holds heat like nothing else. While a standard stainless steel roasting pan is great for quick tasks, cast iron provides a steady, even temperature that prevents those frustrating hot spots that can ruin a delicate roast.

    The real beauty of this heavy-duty bakeware is its longevity. You aren’t just buying a dish; you’re buying an heirloom. Unlike those flimsy, coated non-stick ovenware options that start peeling after six months of scrubbing, cast iron only gets better with age. It’s part of those essential kitchen roasting essentials that actually deserve a permanent spot in your cabinet. Just make sure you pair it with a sturdy roasting pan with rack setup if you want to ensure proper airflow around your meat. It’s about doing it right the first time.

    Five Things to Look for Before You Open Your Wallet

    • Check the weight before you buy. If a pan feels light in your hand, it’s going to warp the moment it hits a hot oven, and you’ll be left with unevenly cooked meat and a useless piece of metal.
    • Look for a heavy-duty lid. A tight-fitting lid isn’t just a luxury; it traps the steam and juices that keep your roast from turning into a piece of dry leather.
    • Skip the non-stick coatings. They’re a trap. They peel, they scratch, and they won’t survive a lifetime of scrubbing. Stick to stainless steel or cast iron that you can actually maintain.
    • Ensure it has sturdy handles. You don’t want to be playing a high-stakes game of “will this slip?” when you’re pulling a heavy, juice-filled pan out of a 400-degree oven.
    • Match the size to your actual lifestyle. Don’t buy a massive commercial-sized pan just because it’s on sale if you’re only ever cooking for two or four people; it’ll just take up precious cabinet space and be a nightmare to clean.

    The Bottom Line on Your Next Roast

    Stop chasing the latest non-stick coating that’s destined for a landfill in two years; stick to stainless steel or cast iron if you want a pan that survives decades of heavy use.

    Heat retention is everything, so prioritize heavy-duty materials over lightweight, flimsy alternatives if you want even cooking and a proper crust on your meat.

    A good roasting pan is a long-term investment in your kitchen’s efficiency, not a disposable gadget you’ll be replacing every time you host a holiday dinner.

    The Real Cost of Cheap Metal

    “I’ve seen enough flimsy, thin-walled pans warp under heat to last a lifetime. If you’re buying a roasting pan just to get through this holiday season, you’re doing it wrong; buy something with weight and substance that’s actually going to be in your kitchen ten years from now.”

    Rosalind Hayter

    Choosing Tools That Stand the Test of Time

    Choosing Tools That Stand the Test of Time

    At the end of the day, choosing between stainless steel and cast iron isn’t about following a specific trend; it’s about understanding how you actually move in your kitchen. If you need something versatile that can handle the heat and won’t react with acidic marinades, go with the stainless steel. If you want that incredible heat retention for a slow, even roast, you can’t beat the weight of cast iron. Whatever you decide, make sure you are investing in durability rather than convenience. Avoid those thin, non-stick coated pans that promise ease but end up in a landfill after a year of scrubbing. A good roasting pan should be a permanent fixture in your cabinet, not a temporary guest.

    I’ve spent enough years in commercial kitchens to know that the most expensive piece of equipment isn’t always the best—the right one is. A kitchen is more than just a collection of gadgets; it is the engine of your home. When you stop chasing the latest kitchen “must-have” and start focusing on high-quality, foundational tools, you stop fighting your equipment and start enjoying the process of cooking. Buy it once, take care of it, and let it serve you for decades. Build a kitchen that works for you, and the rest will fall into place.

    Frequently Asked Questions

    How do I know if a roasting pan is heavy-duty enough to prevent warping in a high-heat oven?

    Don’t just look at the price tag; look at the weight and the construction. If you pick it up and it feels flimsy or hollow, put it back. You’re looking for a thick, heavy base—ideally with a multi-clad construction if it’s stainless steel. A good rule of thumb? If the bottom feels like it could bend under the weight of a heavy roast, it’s going to warp the second it hits a hot oven.

    Is it actually worth the extra money to get a pan with a built-in rack, or should I just buy a separate one?

    Don’t let a salesperson talk you into a built-in rack just because it looks “complete.” In my experience, built-in racks are a nightmare to clean and often sit awkwardly in the pan, making it harder to baste. I always recommend buying a high-quality, separate heavy-duty rack. It gives you much more flexibility for different sizes of meat and, more importantly, it’s a hell of a lot easier to scrub when you’re done.

    Can I use my stainless steel or cast iron roasting pan for stovetop tasks, or are they strictly oven-only?

    If you’ve invested in quality, you’ve already won half the battle. Your cast iron is a workhorse; you can sear meat directly on the burner before sliding it into the oven. It’s perfect for making a quick pan sauce, too. Your stainless steel is a bit more temperamental. While it handles stovetop heat well, watch your temperature control to avoid scorching. Just stay away from glass or ceramic—those are strictly oven-only territory.

  • Essential Guide to Chef Knives

    Essential Guide to Chef Knives

    I spent twenty years in commercial kitchens where the sound of a dull blade hitting a cutting board was enough to make my skin crawl. I’ve seen countless home cooks walk into high-end stores and get talked into spending five hundred dollars on a flashy, laser-etched set of knives that look great in a magnetic wooden block but perform like absolute garbage. Most of that marketing is just noise designed to separate you from your hard-earned money. If you want to actually master chef knife basics, you need to stop chasing the shiny trends and start looking for balance and steel quality.

    I’m not here to sell you a lifestyle or a twelve-piece collection of specialty blades you’ll only use once a year. My goal is to strip away the nonsense and give you the practical, no-frills truth about what actually matters when you’re prepping a meal. I’ll show you how to identify a tool that will last a lifetime and how to maintain it so it stays sharp enough to shave with. We’re going to focus on the essentials that make cooking feel like a joy rather than a chore.

    Table of Contents

    Carbon Steel vs Stainless Steel Choosing What Lasts

    Carbon Steel vs Stainless Steel Choosing What Lasts

    When you’re standing in the kitchen deciding between carbon steel and stainless steel, you aren’t just picking a metal; you’re picking a lifestyle. Most people I meet want a knife that is “low maintenance,” which is code for “I don’t want to think about it.” That’s where stainless steel shines. It’s incredibly forgiving, resistant to rust, and won’t react if you happen to slice a lemon. If you want a tool that you can toss in the sink (though please, don’t) and forget about, stainless is your best bet.

    However, if you want a tool that feels like an extension of your hand, you have to look at carbon steel vs stainless steel through the lens of performance. Carbon steel holds an edge far longer and sharper than almost anything else, but it requires discipline. You can’t just leave it damp, or it’ll pit and stain before your coffee is even finished. It’s a relationship. If you’re willing to commit to a bit of consistent knife maintenance tips—like drying it immediately and occasionally oiling the blade—carbon steel will reward you with a level of precision that makes prep work feel effortless.

    Understanding Blade Geometry Explained for Better Control

    Understanding Blade Geometry Explained for Better Control

    When you’re looking at a knife, don’t just focus on the brand name or the shiny finish; you need to look at the actual shape of the metal. Blade geometry explained simply means understanding how the steel is ground from the spine down to the edge. A knife with a thin, acute angle is going to feel incredibly sharp and glide through a tomato like butter, but it’s also more delicate. If you’re someone who tends to hack through frozen vegetables or heavy squash, you might want a slightly thicker, more robust grind that can handle a bit of abuse without chipping.

    The way the blade is shaped also dictates how much work your wrist has to do. A well-designed knife should feel like an extension of your arm, which is where ergonomic handle design becomes non-negotiable. If the balance is off—meaning the knife feels too heavy in the blade or too clunky in the handle—you’re going to end up with hand fatigue before you’ve even finished prepping your mirepoix. You want a tool that sits comfortably in your palm, allowing you to focus on your technique rather than fighting the equipment.

    Five Rules to Keep Your Blade from Becoming a Paperweight

    • Stop using your chef knife like a hammer. I’ve seen way too many home cooks try to hack through frozen meat or squash hard squash with the tip of their blade. If you aren’t using a dedicated cleaver or a heavy-duty knife for the tough stuff, you’re just asking for a chipped edge and a ruined tool.
    • Learn the proper grip instead of “the penguin.” Don’t just hold the handle and hope for the best; pinch the base of the blade between your thumb and index finger. This gives you actual control and prevents that wobbling feeling that leads to uneven cuts and accidental nicks.
    • Ditch the electric sharpener. Those little motorized gadgets that grind away metal like a belt sander are a crime against good steel. If you want to keep your edge, stick to a high-quality whetstone or a honing rod. It takes a bit more patience, but it keeps the blade’s integrity intact.
    • Never, under any circumstances, put your knives in the dishwasher. The heat and the harsh detergents will wreck the handle and dull the edge faster than anything else. Hand wash with warm soapy water, dry them immediately with a cloth, and put them away. It’s not much extra work, but it’s the only way to make them last.
    • Respect the storage. Leaving your knife loose in a cluttered junk drawer is a recipe for disaster—both for the blade and your fingers. Use a magnetic strip or a wooden knife block to keep the edges protected and the workspace organized. A kitchen that works is a kitchen that stays safe.

    The Bottom Line on Your Next Knife

    Don’t get distracted by flashy sets; one high-quality, well-balanced chef knife is worth more than a dozen cheap blades that’ll end up in a junk drawer by next year.

    Choose your steel based on your lifestyle—stainless is low-maintenance for busy folks, while carbon steel is for the cook who doesn’t mind a little extra care and a patina.

    Pay attention to how the knife feels in your hand, not just how it looks on the shelf, because if the geometry and balance are off, you’re just fighting the tool instead of prepping your food.

    ## The Truth About Your Tool Kit

    “A chef knife isn’t a status symbol or a piece of decor; it’s a tool, plain and simple. If it doesn’t feel balanced in your hand and doesn’t hold an edge through a whole prep session, it’s just more clutter taking up space in your drawer.”

    Rosalind Hayter

    Making the Right Call

    Making the Right Call with chef knives.

    At the end of the day, picking a chef knife isn’t about finding the most expensive piece in the display case; it’s about understanding what actually fits your workflow. We’ve covered a lot of ground, from the maintenance trade-offs of carbon steel versus the low-fuss reliability of stainless, to how much the blade geometry actually dictates your control over a pile of onions. If you remember nothing else, remember this: don’t let marketing jargon confuse you. You need a tool that feels like an extension of your hand, not a heavy, unbalanced paperweight that you’re afraid to use. Focus on the build quality and the edge, because a knife that holds its shape is worth ten cheap ones that go dull before the prep work is even finished.

    I know it can feel overwhelming when you’re staring at a wall of options, but take your time. My advice? Stop looking for the “perfect” knife and start looking for the right knife for your specific hands and your specific kitchen. Once you find that one solid blade, treat it with respect—keep it sharp, keep it clean, and use it often. A kitchen is only as efficient as the tools you trust, and when you finally find that reliable companion, you’ll realize that good cooking is much easier when you aren’t fighting your equipment every step of the way. Now, get in there and start practicing.

    Frequently Asked Questions

    How often do I actually need to sharpen my blade, and can I do it myself without ruining the edge?

    Don’t wait until you’re hacking at a tomato like it’s a piece of wood. If you feel the blade dragging or notice it’s tearing rather than slicing, it’s time. For most home cooks, a touch-up once a month is plenty. You absolutely can do it yourself—just skip those electric grinders that eat your steel. Grab a simple whetstone. It takes a little practice, but once you learn the angle, you’ll never trust a machine again.

    Is it worth paying for a professional sharpening service, or am I better off buying a honing rod?

    Don’t confuse the two. A honing rod isn’t a sharpener; it just realigns the edge to keep it performing between actual sharpenings. Think of it as maintenance, not a fix. If your knife is truly dull, a rod won’t save it. Save your money on fancy gadgets and take your good blades to a professional once or twice a year. It’s worth every penny to preserve the steel and avoid ruining a decent knife with a cheap home kit.

    How do I know if a knife is too heavy or too light for my specific hand size and cooking style?

    Don’t just look at the weight on a spec sheet; you need to feel it in your hand. Grab the knife and hold it in a natural chopping motion. If your wrist feels strained or you’re fighting to keep the blade steady, it’s too heavy. If it feels like a toy and lacks “presence” when you hit the cutting board, it’s too light. A good knife should feel like an extension of your arm, not a burden you’re lugging around.

  • How to Use a Salad Spinner to Dry Greens

    How to Use a Salad Spinner to Dry Greens

    I spent twenty years in commercial kitchens where efficiency wasn’t a suggestion—it was survival. I’ve seen countless home cooks lose their minds over flimsy, $40 plastic contraptions that crack the moment you put any real pressure on them, leaving you with nothing but a puddle of water and a pile of bruised lettuce. Most people think proper salad spinner use is just about spinning some greens, but if you’re using a gadget that feels like it was made for a dollhouse, you’re doing it wrong. You don’t need a high-tech gadget with eighteen different settings; you need a tool that actually does the job without adding more clutter to your cabinets.

    I’m not here to sell you on the latest kitchen trend or some over-engineered piece of junk. My goal is to show you how to select a heavy-duty model that will actually last a decade and, more importantly, how to master salad spinner use so your dressings actually cling to the leaves instead of sliding off into a watery mess. We’re going to focus on the practical mechanics of getting your greens bone-dry and crisp, because a good kitchen is built on right tools and even better habits.

    Table of Contents

    The Proper Way of Cleaning Leafy Greens Properly

    The Proper Way of Cleaning Leafy Greens Properly.

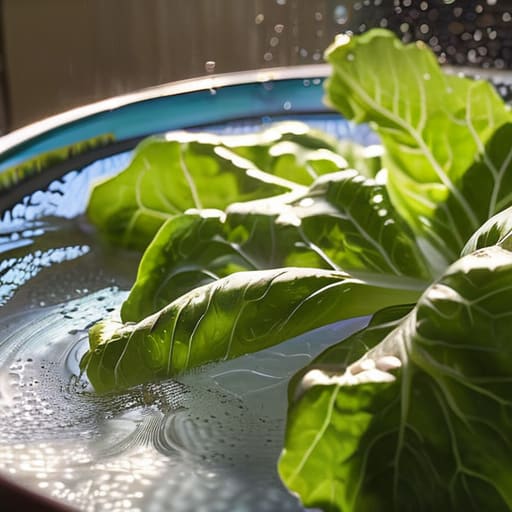
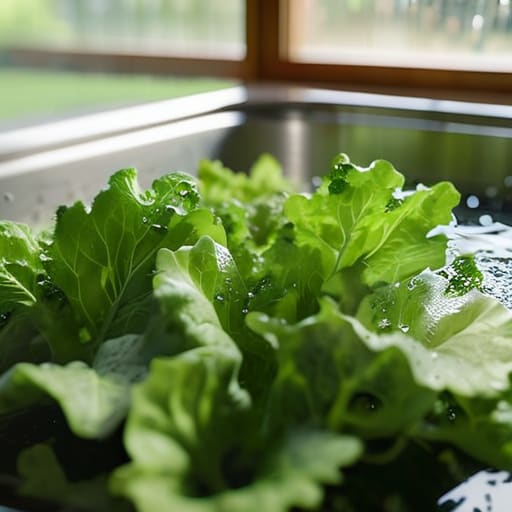
    First, let’s get one thing straight: you cannot just rinse your greens under a tap and call it a day. If you’re finding grit at the bottom of your bowl, you aren’t cleaning leafy greens properly. I always start by filling a large bowl with cold water and submerging the leaves. Give them a gentle swirl with your hands to encourage any hidden sediment to sink to the bottom. This is the most effective method for removing dirt from salad leaves that tend to hide in the tight crevices of radicchio or romaine hearts.

    Once the water runs clear, it’s time to tackle the moisture. This is where most people fail. If you try a salad spinner vs drying greens by hand, you’ll quickly realize that hand-drying is a recipe for bruised, limp lettuce. A good spinner uses centrifugal force to pull the water away without crushing the delicate structure of the leaf. If you’re looking for the best way to wash spinach or delicate spring mixes, the spinner is your best friend for keeping everything crisp and ready for your meal prep containers.

    Removing Dirt From Salad Leaves Without the Mess

    Removing dirt from salad leaves without the mess.

    If you’ve ever sat down to a salad only to find a tiny, gritty speck of sand halfway through your bite, you know how much it ruins the experience. Most people make the mistake of just rinsing their greens under the tap and calling it a day, but that’s not enough. To truly master removing dirt from salad leaves, you need to use a bowl deep enough to allow the leaves to dance. Fill a large basin with cold water, submerge your greens, and give them a gentle swirl. Let them sit for a minute; the heavier grit will sink to the bottom, leaving the clean leaves floating near the top.

    Once the sediment has settled, lift the greens out with your hands rather than pouring the whole bowl out, which just sends your clean leaves back into the dirt. Now comes the part where most people fail: the drying stage. While you can try a salad spinner vs drying greens by hand, the spinner is the only way to ensure you aren’t left with a soggy, unappetizing mess. A quick spin is the most efficient way to get that moisture off so your dressing actually sticks to the leaves instead of pooling at the bottom of the bowl.

    Stop Treating Your Spinner Like an Afterthought: 5 Pro Tips for Better Greens

    • Buy a heavy-duty model with a reliable mechanism. I’ve seen too many flimsy plastic spinners crack under pressure or lose their grip after three months; invest in something with weight and a sturdy base that won’t slide across your counter.
    • Don’t overload the basket. If you pack the greens in too tight, the centrifugal force won’t reach the leaves in the center, leaving you with a soggy mess at the bottom and dry leaves at the top. Work in batches.
    • Spin until you hear the sound change. You’ll know you’re done when the “sloshing” sound turns into a consistent, high-pitched whir. If it sounds heavy, there’s still water clinging to those leaves.
    • Use the spinner as a storage hack. Once your greens are bone-dry, toss them back into the spinner lined with a clean kitchen towel and pop it in the fridge. It keeps the moisture levels regulated so your lettuce doesn’t turn into slime by Tuesday.
    • Clean the mechanism immediately. Dried-on residue or tiny bits of leaf stuck in the gears will eventually cause the spinner to jam. Rinse it out right after use—don’t let it sit in the sink.

    My Rules for a Better Salad

    Invest in a heavy-duty spinner with a stable base; if it slides around your counter every time you pull the cord, it’s just more clutter you don’t need.

    Don’t rush the drying process—any leftover moisture is just a death sentence for your dressing, leaving you with a soggy, sad mess instead of a crisp salad.

    Treat your greens with respect by washing them in cold water and drying them thoroughly before they ever touch a bowl, or you’re just wasting good produce.

    ## The Truth About Your Salad

    “A salad spinner isn’t just another plastic gadget to clutter your drawer; it’s the difference between a crisp, professional-grade salad and a soggy, pathetic mess that ruins your dressing before you even take a bite.”

    Rosalind Hayter

    Stop Overcomplicating Your Greens

    Stop Overcomplicating Your Greens with salad spinners.

    At the end of the day, using a salad spinner isn’t about adding another step to your prep; it’s about doing the job right the first time. We’ve covered how to properly wash your greens to remove grit and how to use the spinner to ensure they are bone-dry before they hit the bowl. Remember, if your leaves are still damp, your dressing will just slide right off and pool at the bottom of the plate, leaving you with a soggy, tasteless mess. Invest in a sturdy, high-quality spinner that doesn’t wobble on your counter, and make the proper drying process a non-negotiable part of your routine. It’s a small habit that makes a massive difference in the final result.

    I know it can feel like just another piece of equipment to clean, but I promise you, once you get into the rhythm of it, it becomes second nature. A kitchen is only as good as the systems you put in place to make your life easier. Don’t let a flimsy piece of plastic or a lazy habit stand between you and a fresh, crisp meal. Focus on the fundamentals of preparation and buy tools that actually serve a purpose. When you respect your ingredients and your process, the food tastes better. It really is that simple.

    Frequently Asked Questions

    Can I use a salad spinner to dry anything other than leafy greens, like herbs or berries?

    Don’t Limit Yourself: Using Your Spinner for More Than Just Lettuce

    How do I clean the spinner itself so it doesn't collect old vinegar or lettuce residue?

    Don’t let that spinner become a breeding ground for old vinegar or slimy lettuce bits. After every use, I pull the basket out of the bowl and give both a quick scrub with warm, soapy water. If you’ve been using a vinaigrette, pay extra attention to the tiny holes in the basket—that’s where the residue hides. Rinse it thoroughly and let it air dry completely before putting it away. No sense in storing a damp, smelly mess.

    Is there a way to dry greens if my spinner is too small for the amount of produce I have?

    If you’re trying to cram a mountain of kale into a tiny spinner, stop. You’ll just bruise the leaves and end up with a wet mess. Instead, use the towel method. Spread your greens out on a clean, lint-free kitchen towel or a large linen tea towel. Gently pat them dry or roll them up loosely to squeeze out the excess moisture. It takes a minute longer, but it’s far more effective than fighting a cramped gadget.