Blog

  • Picking a Casserole Dish That Suits Your Oven

    Picking a Casserole Dish That Suits Your Oven

    I spent twenty years in commercial kitchens, and if there is one thing I’ve learned, it’s that most people are being sold a lie when it comes to kitchenware. I’ve seen countless home cooks clutter their cabinets with “specialty” ceramic vessels that claim to revolutionize dinner, only to watch them crack the first time they hit a hot oven. You don’t need a dozen different shapes and trendy colors; what you actually need is a single, reliable casserole dish that can handle the heat of a real meal without flaking or warping. Stop letting marketing departments convince you that more is better when, in reality, less is almost always more.

    I’m not here to give you a curated list of the most expensive gadgets on the market. Instead, I’m going to pull back the curtain and tell you exactly what to look for in a piece of cookware that will actually last you a lifetime. We’re going to talk about weight, heat distribution, and why you should never settle for cheap non-stick coatings that peel after three months. My goal is simple: to help you build a functional kitchen filled with tools that work as hard as you do.

    The Superiority of Stoneware Baking Dishes
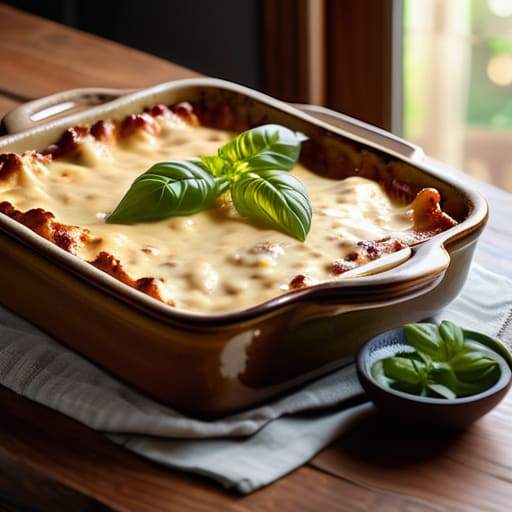
    The Superiority of Stoneware Baking Dishes.

    When I was managing banquet halls, I saw a lot of flimsy glass dishes get tossed into the trash after a few years of heavy use. If you want something that actually holds up, you need to look at stoneware baking dishes. Unlike glass, which can crack if the temperature shifts too quickly, stoneware is dense and incredibly resilient. Its superior heat retention properties mean that once your meal is hot, it stays hot. This is a game-changer when you’re hosting a dinner party and don’t want to be constantly running back to the kitchen to reheat a lasagna that’s gone cold.

    I also love the sheer versatility of these pieces. Because they look intentional and well-made, they excel at oven to table serving. There’s no need to scramble for extra serving bowls when your dish looks beautiful enough to sit right in the center of the table. I always tell my clients to invest in a few pieces of deep dish ovenware; they are the true workhorses for everything from bubbling gratins to slow-simmered stews. If you buy quality stoneware, you aren’t just buying a tool—you’re buying a permanent part of your kitchen.

    Why Non Stick Coating Durability Is a Trap

    I see it all the time in my organizing clients’ homes: a cabinet overflowing with scratched, peeling, and frankly, depressing non-stick pans. People buy them thinking they’re making a smart, easy choice, but they’re actually walking into a cycle of constant replacement. The problem is that non-stick coating durability is a bit of a myth in the long run. Those chemical layers are prone to chipping the moment you use a metal whisk or even a slightly coarse sponge, and once that coating fails, the piece is essentially landfill.

    Instead of chasing that temporary convenience, I always steer people toward high-quality stoneware baking dishes. While you might have to soak a dish for five minutes to get a stubborn bit of cheese off, the trade-off is immense. Stoneware offers incredible heat retention properties that keep your meal warm long after it leaves the oven. You aren’t just buying a vessel; you’re investing in a tool that won’t degrade every two years. Stop settling for disposable kitchenware and start building a collection that actually survives your Sunday dinners.

    My Golden Rules for Choosing and Using a Casserole Dish

    • Size matters more than you think. Don’t just buy a dish because it looks pretty on the shelf; measure your oven and your most frequent recipes first. There is nothing more frustrating than a beautiful stoneware dish that’s two inches too wide to fit comfortably on your rack.
    • Look for even heat distribution. When I was managing commercial kitchens, we never used thin, flimsy glass for long bakes. You want something with enough heft—like heavy ceramic or thick stoneware—to hold onto that heat so your center cooks through without the edges turning into charcoal.
    • Check the handles. It sounds trivial until you’re wearing bulky oven mitts and trying to pull a heavy, bubbling lasagna out of a hot oven. Avoid dishes with tiny, integrated handles that are hard to grip; look for sturdy, well-defined edges or substantial handles that won’t slip.
    • Avoid the “multi-purpose” trap. A dish that claims to go from freezer to oven to table is often a compromise in quality. If you want a dish that truly lasts, buy one specifically designed for high-heat baking. Specialized tools perform better than mediocre generalists every single time.
    • Respect the temperature shock. If you’re using a high-quality stoneware dish, remember it’s a marathon, not a sprint. Never take a scorching hot dish straight from the oven and set it on a cold granite countertop or plunge it into sink water. You’ll crack it, and once that happens, it’s junk.

    The Bottom Line on Choosing Your Next Dish

    Prioritize heavy-duty stoneware or glass over cheap non-stick coatings that will inevitably flake and ruin your food.

    Look for heat retention and even distribution; a dish that holds steady temperature is the difference between a golden crust and a soggy mess.

    Stop chasing kitchen trends and invest in pieces that can handle the oven, the table, and eventually, the dishwasher without falling apart.

    Making the Right Choice for Your Kitchen

    At the end of the day, choosing a casserole dish shouldn’t be about following the latest kitchen trend or buying a set of matching, colorful dishes that look pretty on a shelf but fail in the oven. We’ve covered why you should steer clear of those flimsy non-stick coatings that flake off within a year and why heavy-duty stoneware is the real champion for heat retention and even cooking. If you want a piece of equipment that can handle a heavy lasagna or a slow-roasted gratin without cracking or warping, you have to prioritize material over aesthetics. Invest in something substantial that feels right in your hands and can stand the heat of a busy weeknight meal.

    My advice is simple: stop looking for perfection and start looking for longevity. A kitchen is a workspace, not a showroom, and your tools should reflect that. When you buy a high-quality, durable casserole dish, you aren’t just buying a piece of bakeware; you’re investing in a tool that will become part of your family’s history. I’ve seen enough cheap gadgets end up in landfills to know the difference. Choose the one that will be passed down to the next generation, and I promise you, it will serve you better than any trendy plastic gadget ever could.

    Frequently Asked Questions

    How do I tell if a stoneware dish is actually high-quality or just cheap ceramic that's going to crack the first time it hits a hot oven?

    Pick it up. If it feels light or hollow, put it back. High-quality stoneware should have some serious heft to it; that density is what retains heat evenly. Next, run your finger along the rim and base. You’re looking for a smooth, consistent finish without tiny air bubbles or hairline cracks. If the glaze looks uneven or “pitted,” it’s likely low-fired ceramic that’ll shatter the moment you crank up the oven.

    Can I safely move my heavy-duty casserole dish directly from the oven to the dining table, or will the thermal shock cause it to shatter?

    The short answer is yes, provided you’ve bought a quality piece of stoneware or tempered glass. A real workhorse is designed for that exact transition. However, don’t get reckless. Avoid placing a scorching hot dish onto a cold marble countertop or a damp wooden surface; that sudden temperature drop is what causes thermal shock. Use a thick trivet or a folded kitchen towel to bridge the gap. Treat the dish with respect, and it’ll serve you for decades.

    Is it worth the extra money to buy a dish with a lid, or am I just paying for more clutter in my cabinets?

    If you’re a meal-prepper or someone who loves leftovers, a lid is a non-negotiable. It turns a baking dish into a storage container, saving you from the “plastic container shuffle” in your fridge. However, if you only cook for immediate consumption, skip it. Don’t pay the premium for a lid just to have another piece of heavy ceramic taking up space in your cabinets. Buy it for the utility, not the novelty.
  • Pros and Cons of Using a Garlic Press

    Pros and Cons of Using a Garlic Press

    I spent twenty years in commercial kitchens where every second counted, and if there is one thing I learned, it’s that most kitchen gadgets are just expensive landfill in waiting. I’ve watched countless home cooks get excited about some flashy, multi-piece set, only to have a flimsy, $10 garlic press snap right in their hands the first time they try to crush a particularly stubborn clove. It’s infuriating. You don’t need a gadget with a built-in herb stripper or a rotating handle that promises the moon; you need a tool that actually does its job without turning into a pile of broken plastic by next Tuesday.

    I’m not here to sell you on the latest trends or the prettiest designs in the catalog. My goal is to cut through the marketing fluff and tell you exactly what to look for so you can buy a tool that lasts a lifetime. I’ll show you how to spot real construction, which metals actually hold up under pressure, and why sometimes, the simplest design is the most efficient one. Let’s get your kitchen working for you, not against you.

    Table of Contents

    Why Heavy Duty Kitchen Tools Outperform Trendy Plastic Junk

    Why Heavy Duty Kitchen Tools Outperform Trendy Plastic Junk

    I’ve seen it a hundred times: someone walks into a big-box store, sees a bright, colorful gadget for five dollars, and thinks they’ve found a bargain. But in my twenty years managing commercial kitchens, I learned that “cheap” is actually the most expensive way to shop. Those flimsy, injection-molded plastic tools are designed to fail. They flex under pressure, the handles snap right at the hinge, and they end up in a landfill before you’ve even mastered a basic recipe. When you invest in heavy duty kitchen tools, you aren’t just buying a gadget; you’re buying the peace of mind that comes with reliability.

    When it comes to the debate of a garlic press vs knife, the real winner is the tool that doesn’t make your life harder. A high-quality, all-metal device provides the leverage needed to crush cloves without you having to fight the mechanism. I always tell my clients to look for stainless steel kitchen utensils because they handle the repetitive stress of daily cooking without warping. If you buy something substantial, you won’t be hunting for a replacement every six months. Stick to the heavy hitters, and your kitchen will actually start working for you.

    Finding the Best Garlic Mincer for Home Cooks

    Finding the Best Garlic Mincer for Home Cooks.

    When you’re looking for the best garlic mincer for home cooks, you need to look past the flashy packaging and focus on the mechanics. I’ve seen too many people buy those lightweight, polished versions that look great on a shelf but feel like toys in your hand. If you want something that actually lasts, look for solid construction and a design that doesn’t leave half the clove stuck in the mechanism. You want a tool that provides enough leverage so you aren’t straining your wrist every time you prep a meal.

    Another thing people overlook is the cleanup. There is nothing more frustrating than finishing a recipe only to realize you’ve spent ten minutes picking bits of garlic out of tiny crevices. I always tell my clients to prioritize an easy to clean garlic crusher—ideally one where the basket can be popped out or is smooth enough to rinse clean under a high-pressure tap. If you’re choosing between a garlic press vs knife, remember that the press is about efficiency and consistency; just make sure the tool you choose is built to handle the job without becoming a cleaning nightmare.

    Five Rules for Choosing a Press That Won't End Up in the Trash

    • Look for a single-piece construction. If you see seams where plastic meets metal, walk away. Those are the weak points where the lever will snap the first time you try to crush a particularly stubborn clove.
    • Check the hopper design. You want a wide enough opening to fit a whole clove without you having to perform surgery on it first. If you’re fighting the tool just to load it, you’ve already lost the battle.
    • Prioritize easy cleaning over “fancy” features. I’ve seen enough commercial kitchens to know that if a gadget takes ten minutes to scrub, it’s going to sit in the back of your drawer gathering dust. Aim for something that can be rinsed out quickly under a tap.
    • Test the ergonomics before you buy. Don’t just look at it; feel how the handles sit in your hand. If the grip feels thin or awkward, your hand is going to cramp halfway through prep work, and that’s a recipe for frustration.
    • Invest in stainless steel. It sounds basic, but it’s non-negotiable. It won’t rust in your dishwasher, and it won’t leach any weird metallic taste into your garlic, which is the whole point of using it in the first place.

    The Bottom Line on Buying Garlic Presses

    Stop chasing the lowest price tag; a cheap, plastic press is just expensive trash that ends up in a landfill when the handle snaps.

    Look for weight and material—if it feels flimsy in your hand, it’s going to fail you the moment you try to crush a clove of garlic.

    Invest in a tool that’s easy to clean, because if it’s a chore to wash, you’ll eventually stop using it and go back to cutting garlic with a knife.

    <h2>The Cost of Cheap Convenience</h2>

    “I’ve seen enough flimsy, $5 plastic presses snap under the slightest pressure to know that you aren’t actually saving money when you buy cheap; you’re just paying for the privilege of replacing it three times before the year is out.”

    Rosalind Hayter

    Stop Settling for Less

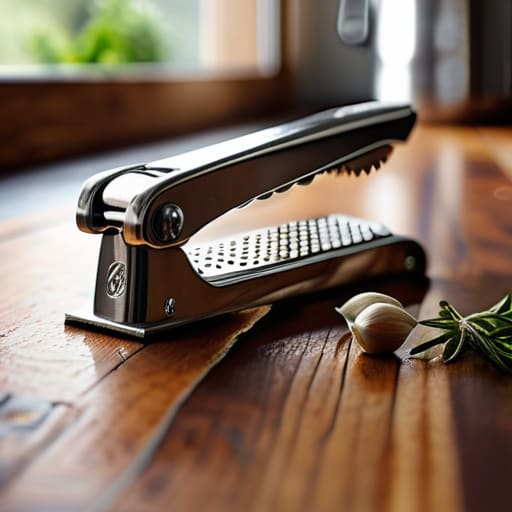
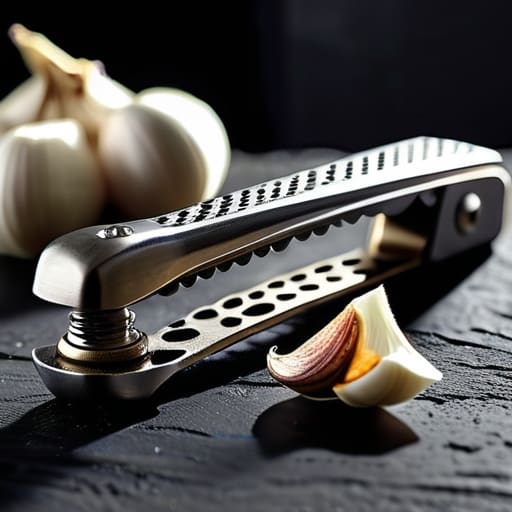
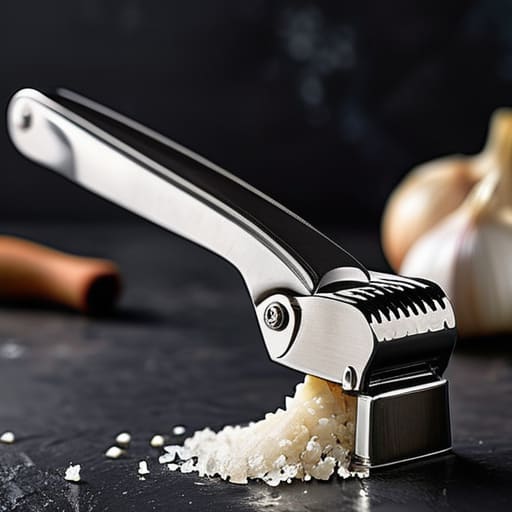
    Stop Settling for Less: Heavy-duty garlic press.

    At the end of the day, choosing a garlic press isn’t about adding another piece of clutter to your drawer; it’s about deciding how much frustration you’re willing to tolerate every time you cook. We’ve covered why you need to steer clear of those flimsy, single-use plastic gadgets and why investing in a heavy-duty, stainless steel model is the only way to go. Remember, you’re looking for something with substantial weight and a design that actually clears the chamber so you aren’t scraping bits of garlic out with a toothpick. If it feels cheap in your hand now, it’s going to break in your kitchen later. Buy it once, buy it right, and stop wasting your time fighting with tools that weren’t built to last.

    I know it can feel overwhelming when you see a hundred different options on a screen, but try to look past the marketing fluff. A functional kitchen isn’t built on a collection of “as seen on TV” gimmicks; it’s built on a foundation of reliable, hardworking essentials. When you finally settle on a press that feels solid and performs perfectly, you’ll realize that good cooking starts with respect for your process and your tools. Don’t let a mediocre piece of equipment get in the way of a great meal. Get the right gear, sharpen your habits, and then get back to the part that actually matters: making something delicious.

    Frequently Asked Questions

    Is it actually worth the extra money to buy a stainless steel press over a cheaper one?

    Look, I’ve seen enough cheap, zinc-alloy presses snap under pressure in a commercial kitchen to know the truth. If you buy the bargain-bin version, you’re paying for something you’ll toss in the trash in six months. It’s frustrating and wasteful. Yes, a solid stainless steel press costs more upfront, but it won’t bend, it won’t rust, and it’ll actually clear the cloves without a fight. Buy it once, buy it right.

    How do I clean a heavy-duty press without spending twenty minutes scrubbing every tiny crevice?

    Look, I don’t have time to spend twenty minutes picking garlic out of tiny metal holes, and neither do you. The trick is to never let it dry. As soon as you’re done pressing, give it a quick rinse under hot water. If it’s being stubborn, soak it in a bowl of warm, soapy water for five minutes. That loosens everything up so a quick scrub with a stiff brush does the job.

    Can I use a garlic press for other things, like ginger, or will I just ruin the mechanism?

    You can certainly use a garlic press for ginger, but don’t expect it to be a breeze. Ginger is much denser and more fibrous than garlic; if you try to force it through a small, delicate mechanism, you’re asking for a snapped lever or a jammed hopper. If you’ve invested in a heavy-duty stainless steel press, go for it—just be prepared to scrub the tiny holes afterward. If it’s a cheap one, stick to a microplane.

  • Bread Machines and What They Do Well

    Bread Machines and What They Do Well

    I’ve spent twenty years in commercial kitchens watching people throw money at “smart” appliances that end up collecting dust in the back of a pantry. Most of the marketing around the modern bread machine is pure nonsense, promising you artisanal, sourdough-quality loaves with nothing more than the push of a button and a handful of cheap ingredients. Let’s be honest: if you buy one of those flimsy, plastic-heavy models just because it was on sale, you aren’t investing in a kitchen tool; you’re investing in future clutter.

    I’m not here to sell you on a lifestyle trend or a gadget that will break the moment the heating element fails. Instead, I’m going to give you the straight truth about what actually makes a machine worth its counter space. I’ll help you distinguish between the high-quality workhorses that can handle a heavy dough and the overpriced junk that’s designed to fail. We are going to focus on durability, ease of cleaning, and—most importantly—whether that machine is actually going to help you build a better kitchen habit or just take up room.

    Mastering Automatic Bread Maker Features Without the Gimmicks

    Mastering Automatic Bread Maker Features Without the Gimmicks

    When you unbox a new machine, the control panel usually looks like a cockpit of a jet. Most manufacturers will try to sell you on a dozen different programs, but let’s be real: half of those buttons are just there to make the machine look more expensive. If you want to avoid frustration, start by mastering the bread machine dough cycles. Most of the time, you don’t need a “multigrain” or “sweet” setting; you just need to understand how the machine handles the basic rise and knead. Once you know how the machine moves, you can stop guessing and start controlling the outcome.

    I also see people struggle with the same issues over and over, usually because they ignore the basics of yeast activation in bread makers. If your loaf comes out like a brick, it’s rarely a mechanical failure—it’s usually a temperature or timing issue. Don’t get distracted by the flashy digital displays; focus on the fundamentals of how your ingredients interact with the heat. If you master the standard settings first, you won’t find yourself constantly stuck in a cycle of homemade bread troubleshooting every single morning.

    Finding the Best Bread Machine Settings for Beginners

    When you first unbox your machine, the control panel can look like a cockpit, but don’t let the buttons intimidate you. For your first few loaves, I suggest sticking to the basic “Basic” or “White Bread” setting. These are designed to be foolproof. Most people fail because they try to jump straight into complex sourdough or whole grain programs before they understand how their specific machine handles yeast activation in bread makers. Start simple to get a feel for how the temperature and timing interact.

    Once you’ve mastered a standard loaf, you can start experimenting with different bread machine dough cycles if you want to make pizza crusts or rolls. However, my professional advice is to keep a close eye on the texture during that initial mixing phase. If the dough looks like a dry, shaggy mess or a thick paste, you’ll need to adjust your liquid-to-flour ratio. This is where most homemade bread troubleshooting begins. Don’t get frustrated; it’s just a matter of fine-tuning your measurements until the machine does exactly what you want it to do.

    Five Hard Truths for Making Bread Without the Headache

    • Stop using measuring cups for your flour. If you want consistent loaves, buy a digital scale. A “cup” of flour can weigh wildly different amounts depending on how tightly you pack it, and that’s the fastest way to end up with a brick instead of a loaf.
    • Temperature matters more than the machine tells you. If your kitchen is freezing, your dough won’t rise properly; if it’s sweltering, it’ll over-proof. Use lukewarm water—not hot, not cold—to give the yeast a fighting chance.
    • Don’t go overboard with the fancy additives. Most machines come with booklets full of “add-in” ideas, but keep it simple: flour, water, salt, yeast, and a little fat. You can add seeds or raisins later, but learn the basic rhythm of a plain loaf first.
    • Watch your salt levels. It’s easy to think more salt equals more flavor, but salt actually regulates the yeast. Too little and your bread will rise uncontrollably and then collapse; too much and it won’t rise at all. Stick to the recipe.
    • Clean your machine properly after every single use. Don’t just wipe the outside and call it a day. Flour and sugar buildup in the corners of the pan can go rancid or attract pests, and a clean machine is the only way to ensure your next loaf doesn’t taste like yesterday’s leftovers.

    My Golden Rules for Bread Machine Success

    Don’t get distracted by fancy digital displays or “smart” features; focus on finding a machine with a heavy-duty motor and a sturdy heating element that can handle daily use.

    Quality ingredients beat complex settings every single time—use real butter and good flour rather than trying to fix a poor recipe with more buttons.

    Treat your machine like a professional tool by cleaning the pan thoroughly after every single use to prevent old dough from ruining your next loaf.

    Stop Overthinking and Start Baking

    At the end of the day, a bread machine shouldn’t be another source of clutter on your countertop or a guilty purchase sitting idle in a cupboard. We’ve covered how to navigate those confusing digital menus and how to pick settings that actually produce a decent loaf without requiring a degree in culinary science. Remember, the goal isn’t to find the most expensive machine with twenty different preset buttons; it’s about finding a reliable, sturdy workhorse that handles the heavy lifting so you don’t have to. If you focus on the quality of the machine and master the basics of your specific model, you’ll save yourself a lot of frustration and wasted ingredients in the long run.

    I’ve seen too many people get intimidated by the idea of “real” cooking, but bread making is one of the most rewarding habits you can bring into your home. There is something deeply grounding about the smell of fresh yeast hitting the air while you’re busy with other things. Don’t let the fear of a failed loaf keep you from trying. Even if your first few attempts are a bit dense or miss the mark, keep at it. Once you find your rhythm, you’ll realize that true kitchen efficiency isn’t about having every gadget on the market—it’s about having the right tools and the confidence to use them.

    Frequently Asked Questions

    Do I really need a machine with twenty different settings, or can I get away with a basic model?

    Look, if you aren’t planning on becoming a professional baker, you don’t need a machine with twenty different buttons. Most of those “specialty” settings are just marketing fluff designed to make you spend more. If you can master a basic model that handles a standard rise and bake cycle, you’re golden. Focus on a machine with a sturdy heating element and a reliable paddle, rather than a digital dashboard full of gimmicks you’ll never touch.

    How do I know if a bread machine is built with quality components or if it's just another piece of plastic junk that'll end up in a landfill?

    Look for weight and build. If the machine feels light and hollow, it’s mostly cheap plastic that’ll rattle itself to pieces. You want something with heft. Check the bread pan; it should be heavy-duty aluminum or stainless steel, not thin, flimsy tin. Avoid machines with excessive, non-removable plastic parts that make cleaning a nightmare. If the heating element feels flimsy or the buttons feel mushy, walk away. Buy for durability, not for a shiny box.

    Is it actually worth the counter space, or am I better off just learning to bake in a standard oven?

    Look, I’m a minimalist at heart, so I get the hesitation. If you enjoy the ritual of kneading and don’t mind the floury mess, stick to your oven. But if you want consistent, crusty loaves on a busy Tuesday without thinking about it, a machine is a game-changer. Just don’t buy a bulky, cheap one. Get a solid, compact model that earns its spot on your counter by actually working.

  • Selecting the Best Kitchen Towels for Cleaning

    Selecting the Best Kitchen Towels for Cleaning

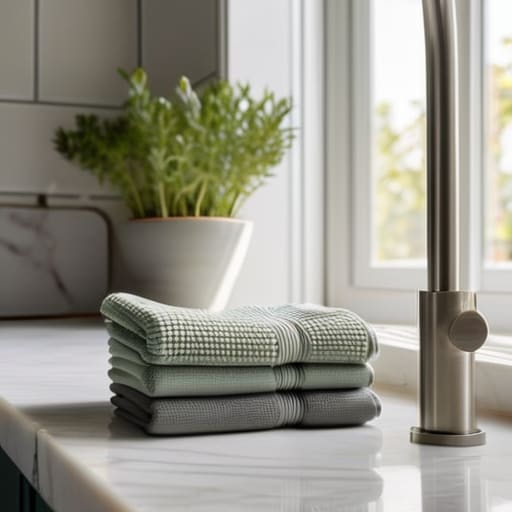
    I’ve spent twenty years in commercial kitchens and high-pressure catering environments, and if there is one thing I’ve learned, it’s that most people are completely overthinking their linen drawer. You don’t need a dozen different, overpriced “designer” sets to keep a functional workspace; in fact, half of what you see in those big-box home stores is just expensive clutter masquerading as utility. I’ve seen too many home cooks struggle with thin, decorative rags that can’t even absorb a spilled drop of water, let alone handle a heavy cast iron skillet. When you start looking at the actual variety of kitchen towel types available, you realize that most of them are designed for aesthetics rather than actual labor.

    I’m not here to sell you on a trendy color palette or a subscription box of flimsy cotton scraps. My goal is to strip away the marketing fluff and give you the hard truth about what actually works when you’re mid-prep or cleaning up a heavy mess. I’m going to break down the specific fabrics and weaves that deserve a permanent spot in your kitchen, ensuring you spend your money on tools that actually last a lifetime.

    Table of Contents

    The Unmatched Flour Sack Towel Benefits for Real Cooks

    The Unmatched Flour Sack Towel Benefits for Real Cooks

    If you ask my old sous-chefs what the one indispensable item in a professional kitchen is, they won’t point to a fancy gadget; they’ll point to the stack of flour sack towels. I swear by them because they do exactly what they are supposed to do without any unnecessary fluff. Unlike those thick, plush bath towels people mistakenly use to dry dishes, flour sacks are thin, lightweight, and incredibly durable. Their biggest advantage is that they are essentially lint-free cleaning solutions for your most delicate items. When you’re drying wine glasses or polished silverware, you don’t want a stray thread ruining the shine, and these towels simply don’t leave a trace.

    Beyond just drying, I find them to be the most versatile tool for general kitchen cleaning cloth materials. They are highly absorbent dish drying cloths that can handle a spill on the counter just as easily as they can dry a heavy cast iron skillet. Because they are plain-weave cotton, they stand up to heavy scrubbing and frequent, high-heat laundering without falling apart. If you want to stop cycling through cheap, disposable rags, start with a dozen high-quality flour sacks.

    Why Absorbent Dish Drying Cloths Save You Time

    Why Absorbent Dish Drying Cloths Save You Time

    If you’ve ever spent twenty minutes chasing water droplets around a countertop with a soggy, useless rag, you know exactly why I’m such a stickler for the right gear. Most people grab whatever cheap microfiber or thin cotton rag is lying around, but that’s a recipe for a wet mess and a lot of wasted effort. When you switch to dedicated absorbent dish drying cloths, you aren’t just buying a piece of fabric; you’re buying back your time. A high-quality cloth pulls moisture away from the surface instantly rather than just pushing it around in circles.

    I always tell my clients that the secret to a quick post-dinner cleanup is choosing the best fabric for glassware and delicate surfaces. You want something that soaks up the water but leaves nothing behind. If you use a low-grade material, you’ll end up with streaks on your wine glasses and a damp counter that stays wet for an hour. Invest in materials that actually hold their structure and capacity, and you’ll find that the “chore” of drying up after a meal becomes a quick, efficient task rather than a tedious slog.

    My Golden Rules for a Practical Linen Rotation

    • Stop using your “good” decorative towels for actual work; keep those for guests and use heavy-duty cotton or linen for the heavy lifting so you aren’t constantly worrying about stains.
    • Ditch the microfiber entirely; it’s a glorified dust magnet that just pushes grease around your counters instead of actually lifting it.
    • Always check the weave before you buy—if you can see light through the fabric easily, it’s going to fall apart after three trips through a hot wash.
    • Match the towel to the task, meaning you need a dedicated set of thin flour sacks for drying glassware and a separate pile of thicker terry cloth for wiping up spills.
    • Invest in a rotation, not a collection; buy ten high-quality towels that you actually use rather than a massive pack of cheap, flimsy ones that end up in the rag bin within a month.

    My Golden Rules for Kitchen Linens

    Stop buying cheap, decorative sets that look pretty but can’t actually dry a single dish; prioritize heavy-duty cotton and linen that can handle a real workload.

    Match the tool to the task—use flour sacks for drying delicate glassware and heavy-duty cloths for heavy-duty drying—so you aren’t fighting your equipment mid-cleanup.

    Invest in quality over quantity, because one set of durable, washable linens will save you more money and kitchen clutter than a mountain of disposable paper rolls.

    ## Stop Buying Disposable Junk

    “If you’re still reaching for paper towels every time you spill a splash of water, you aren’t just wasting money—you’re cluttering your workflow. A real kitchen runs on textiles that can take a beating, get washed a hundred times, and still do the job without falling apart at the seams.”

    Rosalind Hayter

    Stop Overthinking Your Linens

    Stop Overthinking Your Linens for kitchen efficiency.

    At the end of the day, you don’t need a drawer full of mismatched, colorful rags that lose their absorbency after two washes. Whether you decide to lean heavily into the versatility of flour sack towels for drying delicate glassware or invest in dedicated, heavy-duty cloths for your drying rack, the goal remains the same: efficiency. Stop buying those cheap, synthetic blends that just push water around the counter. Instead, focus on building a small, reliable rotation of high-quality natural fibers that can actually handle the heat and grime of a working kitchen. If a towel can’t do its job without leaving lint behind or smelling musty by noon, it doesn’t belong in your home.

    I know it’s easy to get distracted by the pretty patterns and seasonal collections at big-box retailers, but I’m asking you to resist the urge. A kitchen is a workspace, not a showroom. When you choose tools—even something as simple as a linen towel—that are built to endure, you’re making a choice to simplify your life. Invest in the basics that work, take care of them, and let them become the workhorses of your daily routine. Once you stop worrying about replacing flimsy junk every few months, you’ll find you have much more energy to focus on what really matters: the food you’re creating.

    Frequently Asked Questions

    How do I know if a towel is actually high-quality cotton or just a cheap synthetic blend in disguise?

    Don’t let the fancy packaging fool you; most “cotton” blends are just polyester masquerading as quality. Here’s my rule of thumb: perform the squeeze test. Grab a handful of the fabric and squeeze hard. Real, high-quality cotton feels substantial and slightly heavy, whereas synthetic blends feel springy or “slick” in your hands. Also, look at the weave. If it feels unnaturally smooth or has a plastic-like sheen under the light, put it back on the shelf.

    Is it worth the extra money to buy specialized towels for different tasks, or can I just use one type for everything?

    Look, if you’re trying to save money by using one “do-it-all” rag, you’re actually just wasting time and replacing towels more often. I’ve seen it a thousand times in commercial kitchens. A heavy linen towel is great for drying hands, but it’ll leave streaks on your glassware. Use a specialized flour sack for drying dishes and a thicker weave for heavy scrubbing. It’s not about being fancy; it’s about having the right tool for the job.

    How often should I actually be replacing my linen and flour sack towels before they lose their effectiveness?

    Look, I don’t believe in throwing things away just because they look a little tired. If a flour sack towel is still absorbing well and doesn’t smell like a damp basement, keep using it. However, once you notice permanent grease stains that won’t budge or if the fibers feel thin and scratchy, it’s time to retire them. For heavy use, I’d swap them out every few months, but let them work until they truly fail.

  • Best Types of Cloths for Kitchen Cleaning

    Best Types of Cloths for Kitchen Cleaning

    I spent twenty years in commercial kitchens where the chaos never stops, and if there is one thing I learned, it’s that the grocery store aisles are lying to you. You walk in and see those neon-colored, multi-pack sets of “miracle” cleaning cloths that promise to do everything from polishing granite to scrubbing burnt grease, but they usually end up being nothing more than glorified, expensive paper towels. I’ve watched too many people throw money down the drain on disposable junk that falls apart after a single heavy-duty wipe. In a real working kitchen, you don’t need a gimmick; you need something that can actually handle the grit without shredding the moment things get serious.

    I’m not here to sell you on a trendy new brand or a complicated cleaning system that requires a manual to understand. My goal is to strip away the marketing fluff and tell you exactly which materials are worth your hard-earned money and which ones are just clutter in disguise. I’m going to show you how to build a small, professional-grade kit of cleaning cloths that will last you for years, not weeks. We’re going to focus on durability, function, and the kind of tools that actually make your kitchen work for you.

    Table of Contents

    Why Reusable Kitchen Wipes Outlast Every Paper Towel

    Why Reusable Kitchen Wipes Outlast Every Paper Towel

    I’ve spent two decades in commercial kitchens where a roll of paper towels was nothing more than a glorified, expensive way to move dirt around. In a high-volume environment, you learn quickly that those flimsy sheets are a trap; they tear the second they hit a heavy spill and leave behind nothing but frustrating white shreds. When you switch to reusable kitchen wipes, you aren’t just saving money—you’re actually getting a deeper clean. A real cloth has the weight and the structure to lift grime rather than just smearing it across your countertops.

    The real difference lies in the construction. I always tell my clients to look for absorbent microfiber textures that can handle a heavy soak without falling apart. Unlike paper, which loses its integrity the moment it gets wet, a quality rag stays intact through hundreds of wash cycles. You want something that feels substantial in your hand and can handle the grit of a stovetop. If you invest in a few high-quality, surface safe wiping cloths now, you’ll stop the endless cycle of buying disposable junk and finally start treating your kitchen surfaces with the respect they deserve.

    A Cleaning Cloth Material Guide for Lasting Quality

    A Cleaning Cloth Material Guide for Lasting Quality

    When you’re looking at a wall of options in a store, it’s easy to get overwhelmed by the sheer variety of fabrics. But if you want to avoid that constant cycle of buying and tossing, you need to understand this cleaning cloth material guide from a practical standpoint. I’ve seen too many people grab a cheap pack of multi-purpose wipes only to realize they leave streaks all over the granite or leave bits of fuzz in the sink.

    If you’re working on delicate surfaces, like polished stone or stainless steel, you want to prioritize lint free cleaning solutions and fabrics that won’t scratch. High-quality cotton is a classic for a reason; it’s tough and handles heavy-duty scrubbing well. However, if you’re looking for something that picks up moisture instantly, I usually recommend looking for specific absorbent microfiber textures. They grab the grime rather than just pushing it around the counter. Just make sure you aren’t buying the cheap, thin stuff that loses its grip after two washes. Invest in the heavy-duty weaves that feel substantial in your hand—they’ll actually do the work for you.

    How to Actually Manage Your Cloths Without Losing Your Mind

    • Stop hoarding a mountain of rags; pick three or four high-quality cloths and learn to rotate them through a proper laundry cycle.
    • Dedicate specific colors to specific tasks—use blue for counters and white for dishes—so you aren’t accidentally spreading grease where it doesn’t belong.
    • Never, under any circumstances, let a damp cloth sit in a heap on the counter; it’s just an invitation for bacteria and a sour smell.
    • Invest in a small, dedicated drying rack or a heavy-duty clip to hang your cloths up immediately after use so they actually dry out.
    • Treat your cloths like real tools by washing them in hot water with minimal detergent; you want them clean, not coated in a film of scented chemicals.

    The No-Nonsense Summary

    Stop buying into the convenience trap of disposables; a handful of high-quality, reusable cloths will save you money and reduce clutter in your cabinets.

    Match your cloth to the job—use heavy-duty cotton for spills and soft microfiber for polished surfaces—rather than trying to make one mediocre rag do everything.

    Treat your cloths like your cookware; wash them properly and replace them only when they actually fail, not because a trend told you to.

    The Real Cost of Convenience

    A roll of paper towels is just a way of paying a premium to throw money in the trash every single morning; if you want a kitchen that actually functions, start investing in textiles that can handle a scrub and survive a wash.

    Rosalind Hayter

    Stop Overthinking and Start Investing

    Stop Overthinking and Start Investing in quality.

    At the end of the day, choosing the right cleaning cloth isn’t about finding some magic fabric that does the work for you; it’s about choosing durability over convenience. We’ve looked at why ditching the paper towel habit saves you money in the long run and how selecting the right material—whether it’s a heavy-duty cotton for scrubbing or a tight-weave microfiber for polishing—makes all the difference in your daily workflow. Don’t fall into the trap of buying those cheap, multi-colored packs of flimsy wipes that fall apart after a single wash. Instead, focus on quality over quantity and build a small, reliable collection of textiles that actually work as hard as you do.

    My time in commercial kitchens taught me that a well-run space relies on the tools you can trust when things get messy. A kitchen shouldn’t be a source of constant clutter or a graveyard for disposable waste. When you invest in real, lasting cloths, you aren’t just cleaning a countertop; you are building a foundation of better habits and a more sustainable home. Stop chasing the latest kitchen trends and start focusing on the basics that stand the test of time. Build a kitchen that works for you, and remember that true efficiency is found in simplicity.

    Frequently Asked Questions

    How often do I actually need to wash these cloths to keep my kitchen from smelling like old food?

    If you’re waiting until the cloth smells like a damp basement, you’ve waited too long. In a professional kitchen, we don’t let bacteria settle in. For a home cook, I recommend a fresh cloth every single day. If you’ve been cleaning up raw chicken juice or heavy grease, swap it out immediately. Toss them in a hot laundry cycle regularly; it’s much cheaper than replacing a kitchen that reeks of old food.

    Are there specific types of cloths I should avoid if I'm worried about scratching my countertop or my good cookware?

    If you’re protecting high-end surfaces or seasoned cast iron, stay far away from anything with a coarse, abrasive texture. Avoid those heavy-duty scouring pads or cloths with stiff, synthetic scrubbing fibers; they’re fine for a greasy stovetop, but they’ll ruin a polished stone countertop or strip the seasoning right off your favorite skillet. Stick to tight-weave microfiber or soft cotton. If it feels scratchy in your hand, it’s going to be scratchy on your counters.

    How do I stop these cloths from getting that sour, damp smell after a few days of use?

    That sour smell is just bacteria throwing a party in the damp fibers. To stop it, you have to stop letting them sit in a heap on the counter. After use, rinse them thoroughly with hot water—no food scraps left behind—and wring them out tight. Most importantly, hang them to dry in a well-ventilated spot. If they’ve already gone funky, toss them in a hot wash with a splash of white vinegar.

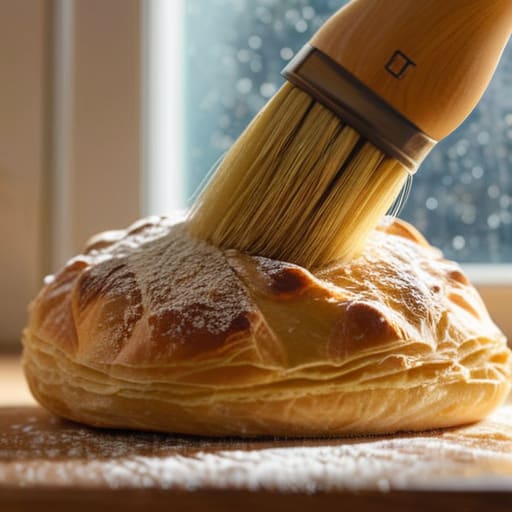
  • Using a Pastry Brush for Baking

    Using a Pastry Brush for Baking

    I spent twenty years in commercial kitchens where efficiency wasn’t just a goal; it was a survival tactic. I’ve seen countless home cooks pull out those cheap, flimsy silicone versions of a pastry brush thinking they’re being “modern,” only to watch those bristles bend, smear, or—worse—leave behind those tiny, unappetizing little clumps of melted plastic on a perfectly good brioche. It drives me up the wall. You don’t need a gadget with eighteen different specialized heads or a rotating handle; you need a tool that actually holds its shape when you’re glazing a heavy egg wash or brushing melted butter over a tray of biscuits.

    In this guide, I’m cutting through the marketing noise to tell you exactly what you need to look for in a real, working tool. I’m not here to sell you on the latest kitchen trend; I’m here to help you build a kit that actually lasts a lifetime. We’re going to talk about natural bristles versus synthetic, why handle weight matters, and how to pick the one tool that will serve you for the next thirty years. No fluff, no expensive nonsense—just straightforward advice from someone who has seen it all.

    Table of Contents

    Natural Bristle vs Silicone Brushes Making the Right Investment

    Natural Bristle vs Silicone Brushes Making the Right Investment

    I’ve seen too many people walk into a kitchen supply store and grab the first colorful silicone tool they see because it looks “modern.” Let me save you the frustration: silicone is fine for a quick smear of oil, but it’s a poor choice for serious work. When you are applying egg wash to pastry, you need something that can hold a decent amount of liquid and distribute it evenly without leaving those annoying, streaky clumps. Silicone is too stiff; it just pushes the liquid around rather than letting it soak into the nooks and crannies of your dough.

    If you want to do things right, you need to understand the real difference between natural bristle vs silicone brushes. A high-quality natural bristle tool—think boar hair or even high-grade synthetic fibers designed to mimic it—acts like a sponge. It holds the glaze, allows for precise culinary glazing techniques, and gives you that professional, golden finish every time. Yes, they require a bit more care when it comes to cleaning, but that’s a small price to pay for a tool that actually performs. Buy the bristles, skip the plastic, and do it once.

    Baking Essentials for Beginners Why Quality Matters Early on

    Baking Essentials for Beginners Why Quality Matters Early on

    When you’re first starting out, the temptation to grab a cheap, multi-pack set of assorted tools from a big-box store is massive. I get it; you want to save your money for the heavy-duty stuff like Dutch ovens or stand mixers. But here is the truth: starting with subpar tools is a recipe for frustration. If you are struggling with applying egg wash to pastry and your tool keeps leaving uneven streaks or clumps of liquid, you’ll start to think you are the problem. You aren’t. The tool is the problem.

    Investing in quality baking essentials for beginners means you are building a foundation of muscle memory and confidence. When you use a tool that responds exactly how you expect it to, you spend less time fighting your equipment and more time actually learning the craft. It’s about precision. Whether you are practicing delicate culinary glazing techniques or just trying to get a consistent golden sheen on a loaf of bread, having a reliable implement makes the difference between a professional finish and a messy amateur attempt. Don’t let a five-dollar piece of junk sabotage your progress.

    Five Rules for Using Your Brush Without Making a Mess

    • Stop soaking your brush in a sink full of water; it ruins the bristles and makes them shed. Instead, keep a small ramekin of your wash liquid nearby so you can dip, use, and rinse immediately.
    • If you’re using a natural bristle brush, never leave it sitting face-down on a damp counter. It’ll trap moisture and start smelling like a wet dog within a week. Always stand it upright or lay it on a clean towel.
    • Don’t go overboard with the egg wash. I’ve seen too many people drown a pastry in liquid, which results in a soggy bottom instead of a golden crust. A light, even coating is all you need to get that professional sheen.
    • When you’re working with melted butter or oil, don’t dip the brush directly into the main pan. Use a small separate bowl to avoid cross-contaminating your entire batch of ingredients with whatever bits of flour or dough are stuck in the bristles.
    • Treat your brush like any other professional tool: clean it while the residue is still wet. Once that sugar or egg wash dries and hardens into a crust, you’re going to spend twenty minutes scrubbing instead of actually cooking.

    The Bottom Line on Your Brush

    Ditch the cheap silicone imitations that just slide across your dough; invest in a high-quality natural bristle brush that actually holds liquid and does its job.

    Focus on durability over trends—a single, well-made tool that you can clean and maintain for a decade is better than a drawer full of plastic junk that ends up in a landfill.

    Remember that the right tool is only as good as your technique; buy the gear that supports good habits, not just things that look pretty on a countertop.

    The Cost of Cutting Corners

    I’ve seen enough flimsy silicone brushes melt into a batch of glaze to last a lifetime; if you want a tool that actually holds its shape and does the job, buy natural bristles and stop treating your kitchen tools like they’re disposable.

    Rosalind Hayter

    Final Thoughts Before You Head to the Kitchen

    Final Thoughts Before You Head to the Kitchen

    At the end of the day, choosing a pastry brush isn’t about finding the cheapest option in the baking aisle; it’s about choosing a tool that won’t fail you mid-recipe. We’ve talked about why those flimsy silicone versions often fall short when you need precision, and why investing in a high-quality natural bristle brush is the smartest move for your long-term kitchen setup. Stop settling for tools that end up in the landfill after six months of use. If you prioritize durability and function over a low price tag, you’re already ahead of most home cooks. A good brush should feel like an extension of your hand, helping you glaze, coat, and finish your work with professional consistency.

    My advice is simple: build your kitchen one reliable tool at a time. You don’t need a drawer full of specialized gadgets that serve only one purpose and collect dust. Instead, focus on mastering the basics with equipment that can actually withstand the heat of a real kitchen. When you stop chasing trends and start investing in quality craftsmanship, you’ll find that cooking becomes less about managing your gear and more about enjoying the process. Now, put down the plastic, pick up something that lasts, and get to work.

    Frequently Asked Questions

    How do I actually clean a natural bristle brush without ruining the bristles?

    Don’t just toss it in the dishwasher; that’s the quickest way to ruin the handle and splay the bristles. After you’re done, rinse it under warm water and use a tiny bit of mild dish soap to work through the base. Use your fingers to ensure no glaze or butter is trapped deep in the ferrule. Pat it dry with a towel and let it air dry upright—never leave it soaking in a sink.

    Can I use a natural bristle brush for savory tasks like glazing meat, or is it strictly for baking?

    Absolutely. Don’t let the name fool you—a natural bristle brush isn’t just for dusting flour or glazing tarts. I use mine constantly for savory work, like brushing garlic butter over a roast or applying a marinade to ribs. They handle oils and juices much better than those cheap silicone versions, which tend to just slide around. As long as you give it a proper wash and dry it well, it’s a versatile workhorse for any meal.

    Is it worth getting a brush with a wooden handle, or does that just make it harder to sanitize?

    It’s a fair question, and one I hear often. Honestly, go with the wood. A high-quality, tightly grained wooden handle is incredibly sturdy and won’t snap in your hand like those cheap plastic ones. As for sanitizing, just don’t go soaking it in the sink. Hand wash it, dry it immediately, and it’ll last you decades. If you treat it like a real tool rather than a disposable gadget, it’s worth every penny.

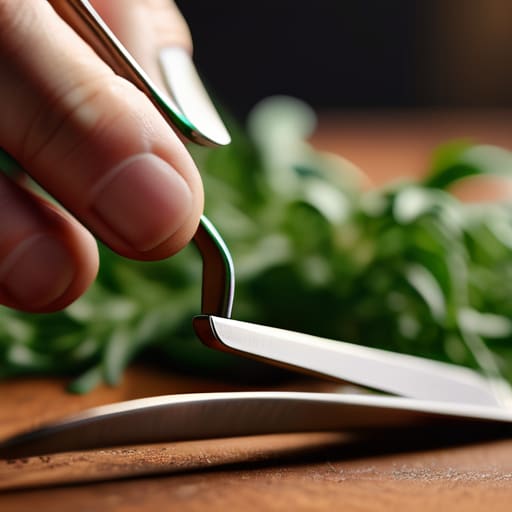
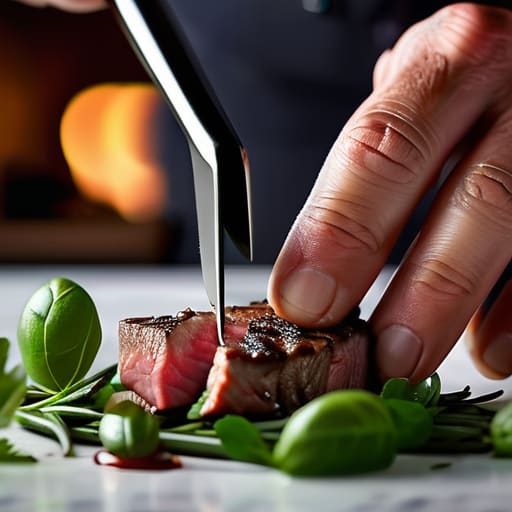
  • Using Kitchen Tweezers for Food Plating

    Using Kitchen Tweezers for Food Plating

    I spent two decades in commercial kitchens where every second counted and every tool had a specific, unyielding purpose. I’ve seen way too many home cooks get swept up in the “professional chef” hype, spending a fortune on those flimsy, decorative sets that snap the moment they touch a piece of protein. Let me tell you something: if your kitchen tweezers feel like they belong in a craft store rather than a prep station, they are a waste of your hard-earned money. You don’t need a twenty-piece gadget set; you need one reliable pair that offers real tension and doesn’t slip when you’re trying to plate something delicate.

    I’m not here to sell you on the latest culinary trend or convince you that you need specialized tools for every single ingredient. My goal is to help you cut through the noise and identify the heavy-duty essentials that actually earn their spot in your drawer. I’ll be sharing exactly what to look for in terms of weight, grip, and material so you can invest in tools that last a lifetime. We’re going to focus on function over flash, ensuring your kitchen remains a workspace that serves you, not a museum for expensive junk.

    Table of Contents

    Investing in Stainless Steel Culinary Tweezers That Last

    Investing in stainless steel culinary tweezers that last.

    When you’re looking at the sheer amount of cheap, flimsy metal cluttering the aisles of big-box stores, it’s easy to get frustrated. Most of those flimsy, spring-loaded options are destined for the landfill within six months. If you want to do this right, you need to look for high-grade stainless steel culinary tweezers that feel substantial in your hand. I always tell my clients: if it feels like a toy, it’s going to perform like one. You want a tool with a consistent tension and a weight that tells you it won’t bend the first time you try to move a delicate piece of protein or a sprig of herbs.

    Investing in quality isn’t just about vanity; it’s about reliability. When you move into more advanced culinary plating techniques, you need tools that won’t slip or lose their grip mid-motion. A heavy-duty pair of professional chef plating tools becomes an extension of your hand rather than a distraction. Don’t settle for coated plastics that chip or cheap alloys that rust after three trips through the dishwasher. Buy the steel that can withstand a lifetime of heat and moisture, and you’ll never have to go shopping for these again.

    The Truth About Precision Kitchen Utensils vs Trendy Junk

    The Truth About Precision Kitchen Utensils vs Trendy Junk

    I’ve seen it a hundred times: a home cook gets excited about a new recipe, heads to a big-box store, and comes home with a drawer full of silicone-coated, lightweight gadgets that feel like toys. These “all-in-one” kits are designed to look good in a social media video, but they lack the structural integrity required for real work. When you’re trying to execute delicate culinary plating techniques, the last thing you need is a tool that flexes or slips the moment it touches a piece of protein.

    The reality is that most of these trendy items are destined for a landfill within a year. If you want to elevate your home cooking, you have to stop buying for the aesthetic and start buying for the function. Real precision kitchen utensils aren’t flashy; they are heavy, balanced, and built to be used every single day. I’d rather have one pair of high-quality, professional-grade tools than a dozen plastic sets that break the first time you try to use them for something as precise as microgreen placement. Stick to the basics that work, and leave the junk on the shelf.

    Five Rules for Choosing Tweezers That Won't End Up in the Trash

    • Prioritize weight and tension. If the tweezers feel flimsy or “springy” in a cheap way, you’ll find yourself fighting them every time you try to plate a delicate herb or a piece of seared protein. You want a tool that feels like an extension of your hand, not a piece of bent wire.
    • Check the tip geometry. Some tweezers have blunt, rounded ends that are fine for general use, but if you’re serious about presentation, look for fine-tapered points. You need that precision to place a single microgreen without crushing it into oblivion.
    • Stick to high-grade stainless steel. I’ve seen too many people buy cheap, coated versions that start peeling in the dishwasher. If it isn’t solid stainless, it isn’t worth the drawer space. It needs to withstand heat and heavy washing without losing its grip.
    • Look for a textured grip. A smooth, polished handle might look pretty in a catalog, but once your hands get a bit slick from cooking, you’ll regret it. A subtle, etched, or matte finish ensures you won’t drop your tool mid-plating.
    • Size matters for your workflow. Don’t just buy the longest pair you can find. A standard 6-to-9-inch range is usually the sweet spot; anything longer becomes unwieldy for fine detail, and anything shorter lacks the reach you need for deeper pans.

    The Bottom Line on Precision Tools

    Skip the flimsy, coated versions; if you aren’t buying high-grade stainless steel, you’re just buying more future landfill.

    Tweezers aren’t a luxury—they are a functional necessity for anyone tired of wrestling with oversized tongs when they need actual control.

    Focus on the weight and the tension in the grip; a tool that feels balanced in your hand is one that will actually become part of your cooking rhythm.

    Precision is a Habit, Not a Gimmick

    “I’ve seen enough professional kitchens to know that you don’t need a drawer full of specialized gadgets; you just need the right tool to do the job once, correctly. A solid pair of tweezers isn’t about being ‘fancy’—it’s about having the control to treat your ingredients with the respect they deserve.”

    Rosalind Hayter

    Making the Right Call for Your Kitchen

    Making the Right Call for Your Kitchen.

    At the end of the day, choosing the right kitchen tweezers comes down to one simple principle: utility over novelty. We’ve talked about why you should skip the cheap, flimsy plastic sets that snap the first time you try to plate a delicate garnish, and why investing in high-grade stainless steel is the only way to go. A good pair of tweezers shouldn’t feel like a toy; they should feel like an extension of your own hand. When you prioritize weight, tension, and durability, you aren’t just buying another drawer filler—you are investing in a tool that will serve you for decades without ever needing a replacement.
    My advice is to stop looking at your kitchen as a collection of gadgets and start seeing it as a workspace. Every item you bring into your home should earn its keep through reliability and purpose. When you stop chasing every passing culinary trend and start focusing on the foundational essentials, you’ll find that cooking becomes less about managing clutter and more about the joy of the craft itself. Buy once, buy well, and let your tools work as hard as you do. That is how you build a kitchen that actually works for you.

    Frequently Asked Questions

    Are these actually necessary for home cooks, or are they just for professional plating?

    Look, I get it. When you see a chef using tweezers to place a single microgreen, it looks like theater. But here’s the reality: they aren’t just for plating. If you’ve ever tried to flip a delicate piece of seared salmon or retrieve a stray peppercorn from a pan without splashing hot oil on yourself, you’ll realize they’re actually about control. They’re a practical tool for precision, not just a prop for a fancy dinner.

    How do I know if the tension in the tweezers is right for my hand?

    Don’t just grab the first pair you see because they look sleek. To test the tension, hold them in your dominant hand and squeeze. If you have to fight against them just to close the tips, they’re too stiff and will fatigue your hand mid-service. If they feel limp or “springy” without any resistance, you’ll lose control of delicate herbs or plating. You want a firm, consistent snap that feels like an extension of your fingers.

    Can I toss these in the dishwasher, or will the finish ruin?

    Look, I’ve seen enough cheap plating tools end up pitted and dull to know the answer. If you’ve invested in high-quality, solid stainless steel, they can technically handle the dishwasher, but I wouldn’t recommend it. The harsh detergents and high heat are brutal on the finish over time. If you want them to stay precise and looking sharp for the next decade, hand wash them with warm, soapy water and dry them immediately.

  • Best Practices for Nonstick Pans

    Best Practices for Nonstick Pans

    I spent two decades managing commercial kitchens where we didn’t have the luxury of time to scrub burnt-on eggs off a cheap surface, but I’ve also seen enough “professional grade” junk to know when we’re being lied to. Most people think buying a high-end nonstick pan is a one-time investment, but if you’re following the trends, you’re actually just on a subscription service for more plastic-coated scrap metal. I’m tired of seeing people throw away a perfectly good kitchen setup every eighteen months because they bought into the hype of a flimsy coating that starts peeling the moment it hits a medium flame.

    I’m not here to sell you on some flashy, celebrity-endorsed gadget that will end up in a landfill by next Christmas. Instead, I’m going to give you the straight truth about what actually works, what stays slippery, and which brands are worth your hard-earned money. We’re going to look at the mechanics of how these pans actually perform under pressure so you can finally buy it once and use it for years. Let’s get your kitchen working for you, not against you.

    Table of Contents

    Ptfe vs Ceramic Coating Choosing Quality Over Trends

    When you walk into a kitchen supply store, you’ll see marketing everywhere pushing ceramic as the “healthy” miracle solution. It’s a trend, plain and simple. In my experience, the debate of PTFE vs ceramic coating usually comes down to how you actually cook. PTFE (the traditional Teflon) is incredibly reliable for a smooth release, especially if you’re looking for the best nonstick pan for eggs or delicate fish. However, it has its limits when it comes to heat.

    Ceramic coatings are often touted for being eco-friendly, but they tend to lose their “nonstick” magic much faster than traditional coatings. Once that ceramic layer gets micro-cracks from thermal shock, you’re left with food sticking to the surface, and there is no fixing it. If you want to extend the life of either option, you have to respect safe cooking temperatures. Never blast these pans on high heat; it destroys the coating and ruins the surface. Whether you go with PTFE or ceramic, treat them with care, use silicone utensils, and stop treating your cookware like it’s indestructible.

    Nonstick Pan Durability Tips for a Lifetime of Use

    Nonstick Pan Durability Tips for a Lifetime of Use

    If you want to stop throwing money down the drain, you have to treat your cookware with a bit of respect. The biggest mistake I see people making—and I’ve seen it in both home kitchens and professional setups—is treating a nonstick surface like a piece of stainless steel. You cannot use metal utensils here. One wrong move with a sharp spatula and you’ve already compromised the integrity of the coating. Stick to silicone or wood; it’s a small trade-off for significantly extending the life of your investment.

    Heat management is the other silent killer. People love to crank the burner to high to speed things up, but that’s a recipe for disaster. High heat can degrade the surface and release fumes, so you need to stay mindful of safe cooking temperatures. Medium or low heat is almost always enough for delicate tasks like making an omelet. When it comes to maintenance, forget the abrasive sponges. If you’re wondering how to clean nonstick cookware without ruining it, the answer is simple: warm water, a soft sponge, and a little mild soap. Avoid the dishwasher at all costs—that’s just a fast track to a ruined pan.

    Five Rules for Keeping Your Nonstick From Failing You

    • Ditch the metal utensils immediately. I’ve seen too many people ruin a perfectly good pan in a single week by using a metal spatula; stick to silicone or wood to keep that coating intact.
    • Stop cranking the heat to high. Nonstick is meant for low to medium heat, and if you overheat it, you’re essentially baking the coating onto the metal or causing it to degrade faster than it should.
    • Never, under any circumstances, put your nonstick pans in the dishwasher. Those harsh detergents are designed to strip grime, but they’ll strip your pan’s coating right along with it.
    • Hand wash with care. Use a soft sponge and mild soap—no abrasive scouring pads. If you treat a pan like it’s made of sandpaper, it’s going to act like it.
    • Watch your storage habits. Don’t just toss your pans into a cluttered cabinet where they bang against each other. If you have to stack them, put a paper towel or a felt protector between them to prevent scratches.

    The Bottom Line on Nonstick

    Stop chasing the latest ceramic trends if you want performance; a high-quality PTFE coating is still the gold standard for actual nonstick capability, provided you treat it with respect.

    Your tools are only as good as your habits, so ditch the metal utensils and the high-heat searing if you want to avoid ruining the surface in a month.

    View a nonstick pan as a specialized tool for eggs and delicate fish, not a workhorse for everything—save the heavy lifting for your cast iron or stainless steel.

    The Truth About Nonstick

    A nonstick pan isn’t a lifetime investment like a cast iron skillet—it’s a tool with an expiration date. Stop treating it like a permanent fixture in your kitchen and start treating it like a consumable; once that coating loses its grip, don’t try to fix it, just replace it with something better.

    Rosalind Hayter

    Making the Right Choice for Your Kitchen

    Making the Right Choice for Your Kitchen

    At the end of the day, picking a nonstick pan isn’t about finding the flashiest item on a social media ad; it’s about understanding what you actually need for your daily routine. We’ve talked about why you should look past the hype of ceramic coatings if you want true longevity, and why investing in quality matters more than saving a few dollars upfront. Remember, if you treat your pans with respect—avoiding metal utensils and skipping the dishwasher—you won’t find yourself back in the store every six months replacing a peeling mess. Focus on durability and smart maintenance, and your kitchen will be much better for it.

    I’ve spent enough years in commercial kitchens to know that a tool is only as good as the person using it. You can buy the most expensive pan on the market, but if you don’t have the right habits, it’s just more clutter in your cabinets. My advice is to keep it simple: buy one or two reliable pieces that you know will hold up, and then focus on the cooking itself. A well-maintained pan is a quiet partner in your kitchen, staying out of your way and letting you do what matters most—making a great meal for the people you love. Stop chasing the trends and start building a kitchen that lasts.

    Frequently Asked Questions

    Is it actually safe to use nonstick pans if the coating gets scratched or starts to flake?

    Here’s the short answer: if you see flakes or deep scratches, it’s time to retire that pan. Once the coating is compromised, you’re no longer just cooking; you’re potentially ingesting bits of PTFE or ceramic. I’ve seen too many people try to “nurse” a damaged pan to save a few dollars, but it isn’t worth the risk to your health. If the surface isn’t smooth and intact, toss it and invest in something better.

    Can I use metal utensils with a nonstick pan, or am I asking for trouble?

    If you’re using metal utensils, you’re asking for trouble. Period. I’ve seen too many people ruin a perfectly good pan in a single week by scraping it with a stainless steel spatula. Those tiny scratches compromise the coating, and once that happens, your food starts sticking and the pan becomes junk. Stick to silicone, wood, or nylon. It’s a small habit change, but it’ll save you a lot of money in the long run.

    How often should I realistically be replacing my nonstick pans before they lose their effectiveness?

    Look, I’m going to be blunt: if you’re using cheap, thin pans, you’ll be back at the store every twelve months. It’s a cycle of waste I hate seeing. If you invest in a high-quality, heavy-duty nonstick, you should realistically get three to five years out of it. But don’t wait for it to peel. The moment you see scratches or notice eggs starting to cling to the surface, it’s time to let it go.

  • Choosing a Potato Masher for Different Textures

    Choosing a Potato Masher for Different Textures

    I’ve spent twenty years in commercial kitchens, and if there is one thing that drives me up the wall, it’s seeing people spend thirty dollars on a “specialized” electric gadget when a simple, heavy-duty potato masher would do the job better. I remember one particular catering gig where a junior prep cook tried to use a flimsy, hollow-handled plastic tool to tackle a fifty-pound batch of Yukon Golds. Watching that cheap piece of junk bend and snap under the pressure was pure heartbreak. It wasn’t just a waste of money; it was a waste of time, and it left the texture of the mash looking more like a lumpy disaster than a professional side dish.

    I’m not here to sell you on the latest kitchen trend or some overpriced gadget that will end up in a landfill by next Christmas. My goal is to help you cut through the noise and find the one tool that actually works for you. I’m going to show you exactly what to look for in a sturdy, reliable potato masher—from weight and material to the specific design that ensures a smooth finish every single time. We are going to focus on tools that last a lifetime, so you can stop fighting your food and start enjoying your kitchen.

    Table of Contents

    Why a Heavy Duty Kitchen Masher Outlasts Trendy Plastic

    Why a Heavy Duty Kitchen Masher Outlasts Trendy Plastic

    I’ve seen it a hundred times in commercial kitchens and in clients’ homes: someone buys a cheap, colorful plastic gadget thinking it’s a shortcut, only to have the handle snap or the edges dull within a month. Plastic is porous, it stains, and most importantly, it lacks the weight needed to actually move through dense starches. When you’re working through a big batch of Yukon Golds, you need something that uses gravity and leverage to do the work. A heavy duty kitchen masher made of solid metal doesn’t just resist breaking; it provides the resistance necessary to achieve a consistent texture without your wrist screaming in protest.

    If you’re debating between a manual food masher vs ricer, remember that a ricer is a specialty tool for delicate textures, while a sturdy metal masher is your daily workhorse. I always tell people to invest in a high-quality stainless steel potato masher because it’s virtually indestructible and dishwasher safe. You aren’t just buying a tool; you’re buying the ability to prep food for years without having to hunt through a junk drawer for a replacement. Stop settling for flimsy disposables and buy something that actually stays in your kitchen.

    Choosing a Stainless Steel Potato Masher for a Lifetime

    Choosing a Stainless Steel Potato Masher for a Lifetime

    When you’re looking for something that won’t snap the first time you hit a stubborn lump of Yukon Gold, you need to look at the construction. I always tell my clients to skip the lightweight, hollow-handled versions. Instead, look for a solid stainless steel potato masher with a heavy-gauge head. You want weight in your hand; that heft does half the work for you. Check the connection point where the handle meets the mashing surface—if it looks thin or flimsy, walk away. A high-quality tool should feel like a single, sturdy unit that can withstand years of daily use without bending.

    Don’t get distracted by overly complex designs either. While some people debate the manual food masher vs ricer debate, a well-built stainless steel tool is much more versatile for everyday cooking. I prefer a simple, flat-bottomed design with reinforced edges because it’s easier to clean and won’t trap food in unnecessary crevices. If you find one with an ergonomic handle that fits your grip comfortably, you’ve found a winner. It’s about finding that sweet spot between durability and ease of use so you aren’t left with a drawer full of broken junk.

    Five Rules for Picking a Masher That Actually Works

    • Look for weight, not just size. A masher that feels too light in your hand is going to be a struggle when you’re working through a big batch of starchy potatoes. You want something with enough heft to do the crushing for you.
    • Check the connection point. I’ve seen too many people buy a heavy metal head attached to a flimsy handle by a thin piece of wire. If that joint isn’t solid, it’ll snap the first time you hit a stubborn chunk of potato.
    • Avoid anything with unnecessary “features.” You don’t need a masher with built-in measuring lines or fancy ergonomic grips made of cheap silicone. A simple, solid construction is always more reliable and much easier to clean.
    • Match the tool to your texture goals. If you like chunky, rustic mash, go for a traditional zig-zag wire pattern. If you want something smoother for a puree, look for a flat, solid plate style. Don’t buy one tool expecting it to do two different jobs perfectly.
    • Test the “cleaning factor” before you buy. In my catering days, we didn’t have time for gadgets with deep crevices or intricate designs that trap food. If it’s a pain to scrub in the sink, it’s going to end up at the bottom of your junk drawer.

    The Bottom Line on Your Next Masher

    Stop wasting money on plastic gadgets that snap the moment they hit a real potato; invest in heavy-duty stainless steel or metal that can handle the pressure.

    Look for a solid, ergonomic build—if it feels flimsy in your hand now, it’s going to fail you in the middle of a dinner service.

    Focus on durability and simplicity over “specialty” features; a single, well-made tool will serve you better than a drawer full of single-use junk.

    ## The Truth About Your Tools

    “I’ve seen enough flimsy plastic gadgets snap under the pressure of a simple batch of Yukon Golds to know that if a tool can’t handle a bit of resistance, it has no business in a serious kitchen. Buy the heavy-duty steel once, and you’ll never have to replace it again.”

    Rosalind Hayter

    Stop Settling for Less

    Stop Settling for Less: Durable Stainless Masher

    At the end of the day, choosing a masher isn’t about finding the prettiest item in the kitchen catalog; it’s about recognizing that your tools should be an extension of your hands. We’ve covered why you need to ditch those flimsy, snap-prone plastic versions and why investing in a solid stainless steel model is the only way to go if you want something that actually survives a heavy workload. A quality tool doesn’t just make the job easier; it removes the frustration that comes with subpar equipment. When you buy for durability and weight, you stop replacing the same cheap gadget every six months and start building a kitchen that actually functions.

    I’ve spent enough time in commercial kitchens to know that the best cooks aren’t the ones with the most expensive gadgets, but the ones with the most reliable ones. Don’t let a mediocre tool turn a simple side dish into a chore. Take a moment to look at your drawer and ask yourself if those tools are working for you or against you. My advice? Buy it once, buy it right, and make it last. Once you have the right gear in your hand, you can finally stop worrying about the equipment and get back to what really matters: the food and the people you’re feeding.

    Frequently Asked Questions

    Should I go with a traditional wire loop style or one of those solid metal zig-zag mashers?

    Look, I’ve seen both in commercial kitchens, and the choice depends on what you’re actually making. If you want smooth, velvety mashed potatoes for a formal dinner, go with the wire loop. It’s gentler. But if you’re doing heavy lifting—like mashing beans, chickpeas, or thick root vegetables—get the solid metal zig-zag. It’s a workhorse. Don’t get fancy; just pick the one that matches how you actually cook.

    Is it worth spending more on a heavy stainless steel model if I only use it for occasional mashed potatoes?

    Look, I hear this all the time. You think because you aren’t making mashed potatoes every night, you don’t need the “professional” version. But here’s the reality: if you buy a cheap, thin piece of metal, it’ll bend or snap the first time you hit a stubborn chunk of potato. You’ll end up throwing it in the trash and buying another one. Buy the heavy stainless steel once. It’ll sit in your drawer for years, but when you need it, it’ll actually work.

    How do I know if a masher is actually dishwasher safe or if the handle is going to snap after a few months of heavy use?

    Look, don’t trust the “dishwasher safe” label on a box; it’s often a marketing lie. If the handle is plastic or has any glued-on components, the heat will eventually warp it or snap it right off. I always tell my clients: if you want it to last, go for solid stainless steel or heavy-duty nylon with a reinforced core. If it feels light or hollow in your hand, it’s going to break. Period.

  • Cooking Tough Cuts in a Pressure Cooker

    Cooking Tough Cuts in a Pressure Cooker

    I still remember the chaos of a commercial kitchen during a Friday night rush—the steam, the shouting, and the constant battle against the clock. Back then, I saw too many chefs rely on expensive, finicky electric multi-cookers that would inevitably die right when you needed them most. If you want to actually master your time in the kitchen without buying into the latest tech craze, you need to stop looking at the shiny plastic gadgets and start looking at a heavy-duty stovetop pressure cooker. It’s a tool that doesn’t need a software update or a Wi-Fi connection; it just needs a flame and a bit of respect.

    I’m not here to sell you on some “miracle” kitchen trend or a gadget that will end up in a landfill by next Christmas. My goal is to give you the straight truth about what makes a piece of equipment worth its weight in gold. I’ll show you exactly what to look for in a reliable model, how to maintain it so it lasts for decades, and why this old-school method is still the smartest investment you can make for a functional, no-nonsense kitchen.

    Stovetop vs Electric Pressure Cooker Choosing Real Durability

    Stovetop vs Electric Pressure Cooker Choosing Real Durability

    I see people getting seduced by those flashy electric multicookers every single week. They look convenient on a countertop, but if you ask me, they’re often just glorified, single-use plastic boxes that will end up in a landfill in three years. When you’re weighing the stovetop vs electric pressure cooker debate, you have to look past the “set it and forget it” marketing. A traditional stovetop model is built from heavy-duty metal designed to withstand decades of heat, whereas an electric unit relies on complex circuit boards that are prone to failure.

    The real advantage of the stovetop version is the control it gives you. You can feel the heat and hear the rhythm of the pot, which makes maintaining pressure seal much more intuitive once you get the hang of it. While electric models might claim to save time, a solid stovetop pot excels at reducing cooking times for tough meats without the risk of a digital sensor glitching halfway through a roast. If you want a tool that functions as a permanent fixture in your kitchen rather than a disposable appliance, stick to the classics.

    Mastering Cooking Times for Tough Meats and Better Flavor

    If you’ve spent any time in a commercial kitchen, you know that time is the one ingredient you can’t cheat. When you’re working with chuck roast or lamb shanks, the goal isn’t just to soften the fibers; it’s to transform them. The beauty of using a manual unit is the direct control you have over the heat. Unlike some automated gadgets, you can feel the rhythm of the pot. I’ve found that cooking times for tough meats can vary wildly depending on the cut, but generally, an extra ten minutes under high pressure is the difference between “chewy” and “melt-in-your-mouth.”

    Don’t rush the process once the timer hits zero. If you try to force a quick release on a heavy stew, you risk uneven textures. I always recommend a natural pressure release for tougher proteins. This allows the temperature to drop gradually, which helps the meat retain its juices rather than seizing up. It’s a simple habit, but it’s the secret to getting that deep, rich flavor that makes a meal feel like it was worth the wait.

    Five Rules for Keeping Your Pressure Cooker Working for Decades

    • Stop ignoring the gasket. That rubber ring is the most important part of the unit, and if it gets cracked, brittle, or stained with old food odors, it’s useless. Check it every single time you cook, and replace it the moment it loses its bounce.
    • Don’t overstuff the pot. I see people trying to cram too many beans or thick stews into the vessel, thinking they’re saving time. If you go past the maximum fill line, you risk clogging the steam vent, and that’s a recipe for a massive, dangerous mess.
    • Learn the art of the natural release. For tough cuts of meat or legumes, don’t just yank that valve open the second the timer goes off. Let the pressure drop on its own. It keeps the meat tender and prevents the liquid from spraying out like a geyser.
    • Inspect your sealing ring and vent pipe like a pro. After every use, take a minute to make sure there isn’t a tiny bit of food debris stuck in the steam vent. Even a single grain of rice can prevent a proper seal, and you’ll spend the whole time wondering why your pot isn’t building pressure.
    • Invest in a heavy-duty model with a thick base. If you’re buying a cheap, thin-walled cooker, it’s going to have hot spots that scorch your food. You want something with enough heft to distribute heat evenly, just like the professional gear I used to run in commercial kitchens.

    The Bottom Line on Your Next Pressure Cooker

    Stop chasing the electric trend if you want longevity; a heavy-duty stovetop model is a professional-grade tool that won’t quit on you after a few years of sensor failures.

    Don’t let the speed fool you into rushing the process; use that extra pressure to break down tough, inexpensive cuts of meat that actually develop deep flavor.

    Invest once in high-quality stainless steel or heavy cast, and skip the cheap, non-stick coatings that flake off and end up in your food.

    The Bottom Line on Pressure Cooking

    At the end of the day, choosing a stovetop pressure cooker isn’t about following a kitchen trend; it’s about investing in a piece of equipment that actually earns its keep. We’ve talked about why you should skip the electric multicookers if you want something that will outlast a decade, and how mastering your timing can turn a tough, expensive cut of meat into something restaurant-quality in a fraction of the time. Don’t let the learning curve intimidate you. Once you understand how the steam works and how to manage your heat, you’ll realize that this is one of the few tools in your kitchen that truly works for you, rather than adding more clutter to your cabinets.

    My advice is simple: stop looking for the “smart” gadget with a digital screen and start looking for heavy-duty construction and reliable seals. A good stovetop cooker is a lifelong companion that rewards patience and proper technique. It’s about moving away from the cycle of buying cheap, disposable plastic and moving toward a kitchen built on substance and skill. Buy it once, take care of it, and use it to feed your family well. When you get the tools right, the cooking becomes second nature, and that is where the real joy of a functional kitchen begins.

    Frequently Asked Questions

    How do I know if my stove can actually handle a pressure cooker without causing safety issues?

    Before you go buying a heavy-duty pot, check your heat source. If you’re on gas, you’re golden—just make sure the flame doesn’t lick up the sides of the pot, or you’ll scorch your handles. If you’re on electric, ensure your burner is powerful enough to bring that liquid to pressure quickly. Most importantly, if you have an induction cooktop, don’t waste your money unless your pressure cooker is specifically rated for magnetic induction.

    Is it worth the extra effort to hand-wash these instead of just tossing them in the dishwasher?

    Look, I get the temptation to just toss them in the dishwasher and call it a day—I’ve been there after a long shift. But if you want these to last, skip the machine. The harsh detergents and high heat are absolute killers for the seals and the metal finish. Take the five minutes to hand-wash them with warm, soapy water. It’s a small price to pay to avoid buying another one in two years.

    What are the actual signs that my pressure cooker's sealing ring is worn out and needs replacing?

    If you notice steam escaping from the sides of the lid instead of just the vent, that’s your first red flag. It’s not just annoying; it’s a sign you’re losing pressure and wasting time. Also, take a close look at the ring itself. If it feels tacky, looks cracked, or has lost its springy bounce, toss it. Don’t try to stretch it back into shape—just buy a fresh one and move on.