Category: Cookware

  • Choosing a Soup Ladle for Serving

    Choosing a Soup Ladle for Serving

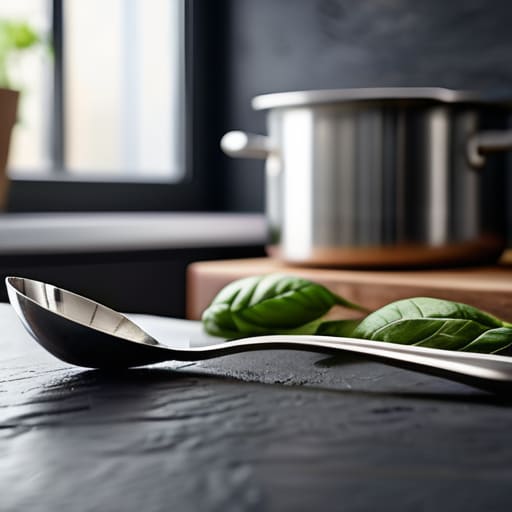
    I remember standing in the middle of a commercial kitchen during a rush for a three-hundred-person wedding, staring in disbelief as a junior prep cook tried to serve a heavy beef consommé with a thin, stamped-metal soup ladle that was already starting to bend under the weight. It was a cheap, flimsy thing that looked more like a piece of bent silverware than a professional tool, and it was a disaster waiting to happen. That moment stayed with me because it perfectly illustrates how most people approach their kitchen gear: they buy for the look or the price tag, completely ignoring the actual physics of cooking.

    I’m not here to sell you on some designer, silicone-coated gadget that’ll end up in a landfill by next Christmas. My goal is to cut through the marketing noise and help you find a soup ladle that actually has some heft and integrity. I’m going to show you exactly what to look for in terms of weight, handle balance, and material durability so you can stop replacing the same cheap tools every year. We’re going to focus on buying it once and buying it right.

    Table of Contents

    A Kitchenware Material Guide for Lifetime Durability
    A Kitchenware Material Guide for Lifetime Durability

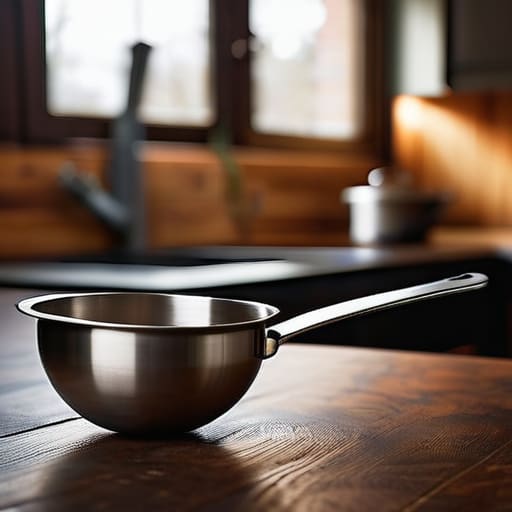
    When you’re looking at a shelf full of options, don’t let the shiny packaging fool you. Most of what you see in big-box stores is designed to end up in a landfill within two years. If you want to build a kitchen that actually functions, you need to understand this basic kitchenware material guide before you open your wallet. I always tell my clients to look for solid construction over aesthetic fluff.

    For most daily tasks, you can’t beat high-quality stainless steel. It’s non-reactive, meaning it won’t leach a metallic tang into your broth, and it can handle the heat of a commercial-grade burner without warping. If you’re dealing with heavy stews or thick chowders, you’ll want to look into different stainless steel ladle types—specifically those with a weighted head. A flimsy, thin-gauge metal tool is a nightmare when you’re trying to scoop from the bottom of a deep stockpot.

    I also tend to steer people away from anything with cheap, glued-on plastic handles. Those are a safety hazard waiting to happen. Instead, look for a seamless transition from handle to bowl or a heavy-duty silicone grip. An ergonomic ladle design isn’t just a luxury; it’s what prevents your wrist from cramping when you’re prepping a massive batch of soup for the week. Buy the heavy stuff once, and you’ll never have to shop for this again.

    Navigating Essential Stainless Steel Ladle Types.

    When you’re looking at different stainless steel ladle types, don’t get distracted by the fancy engravings or the ones that look like they belong in a museum. In a working kitchen, function beats form every single time. If you’re frequently prepping big batches of chili or stock, you need to look for the best ladle for large pots—specifically one with a deep, wide bowl. A shallow bowl is a recipe for spills and frustration, especially when you’re trying to move liquid from a heavy stockpot to a serving tureen.

    You also need to pay attention to the handle. I’ve seen far too many people buy a beautiful piece of steel only to realize it’s a nightmare to hold. Look for an ergonomic ladle design that feels balanced in your hand; if the weight is all in the bowl, your wrist is going to ache after a few minutes of heavy lifting. A solid, weighted handle gives you the leverage you need without the constant fear of the tool slipping. It’s about finding that sweet spot between a tool that feels substantial and one that actually moves with you.

    Five Rules for Choosing a Ladle That Won't End Up in a Junk Drawer

    • Check the weight and balance before you buy. If a ladle feels top-heavy or flimsy in your hand, it’s going to be a pain to use when you’re trying to serve a heavy batch of beef stew. You want something that feels like an extension of your arm, not a piece of cheap cutlery.
    • Look for a deep bowl, not a shallow one. I’ve seen too many people buy “designer” ladles that are basically just oversized spoons. If you can’t get a decent volume in a single scoop, you’re just going to be standing at the stove longer than you need to.
    • Prioritize a seamless construction. Avoid anything where the handle is just glued or poorly riveted to the bowl. Those little crevices are magnets for bacteria and food particles, and eventually, the handle will wiggle loose. A solid, single-piece design is much easier to keep clean.
    • Pay attention to the handle length. I’ve made the mistake of buying a “compact” ladle for a small kitchen, only to realize it’s too short to reach the bottom of a deep stockpot without my knuckles getting scalded. Make sure it’s long enough to keep your hands well away from the steam.
    • Skip the silicone-coated nonsense. While they might be “non-scratch,” they tend to peel and flake after a few months of heavy use. Stick to high-quality stainless steel; it’s easier to sanitize, it won’t degrade in a dishwasher, and it’ll still be in your drawer twenty years from now.

    The Bottom Line on Choosing Your Next Ladle

    Forget the cheap plastic or thin aluminum; if you want a tool that survives a decade of heavy stews and thick chowders, stick to high-quality stainless steel.

    Match the ladle to the task—use a deep, rounded bowl for liquids and a flatter design if you’re frequently serving thicker, chunkier soups.

    Look for a solid, ergonomic handle that feels balanced in your hand; if it feels flimsy or awkward in the store, it’s going to be a nuisance in your kitchen every single day.

    The True Test of a Ladle

    I’ve seen too many people treat a ladle like an afterthought, picking up some lightweight, hollow thing just because it was cheap. But if you’re scooping a heavy beef stew or a thick lentil soup, you need a tool that has some actual weight to it—something that won’t bend or snap when the work gets heavy.

    Rosalind Hayter

    Making the Right Choice for Your Kitchen
    Making the Right Choice for Your Kitchen.

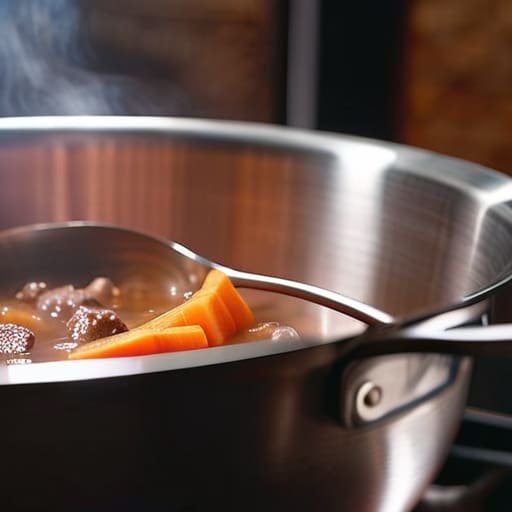
    At the end of the day, choosing a soup ladle isn’t about finding the prettiest item on a retail shelf; it’s about matching the tool to your actual cooking habits. We’ve covered why you should steer clear of flimsy plastics and instead invest in heavy-duty stainless steel or high-quality silicone that can handle the heat of a commercial-grade stockpot. Whether you need a deep-well ladle for a thick beef stew or a more shallow design for delicate broths, remember that weight and balance matter. If a tool feels awkward or cheap in your hand during the first five minutes of testing, it’s going to be a nuisance for the next five years. Buy for durability, not for a trend.

    I’ve spent decades in professional kitchens seeing exactly how much damage a poorly made tool can do to a person’s workflow and their patience. My advice is simple: stop treating your kitchen like a showroom and start treating it like a workshop. When you invest in a single, solid ladle that feels right, you aren’t just buying a piece of metal; you are investing in your own efficiency. A well-organized, functional kitchen is built one reliable tool at a time. Pick something that will still be sitting in your utensil crock long after the latest kitchen gadget craze has faded into obscurity.

    Frequently Asked Questions

    How do I know if the handle is actually sturdy enough to handle a heavy pot of stew without bending?

    Look, don’t just trust the shiny finish. Grab the ladle and give the handle a firm, intentional bend—not enough to snap it, but enough to feel for any give. If it feels springy or “bouncy,” put it back on the shelf. You want a handle that feels like an extension of your arm, not a piece of wire. Ideally, look for a solid, seamless connection where the handle meets the bowl; any visible welds or joints are potential failure points.

    Is it worth spending more on a professional-grade ladle, or will a standard one from a big-box store do the job?

    Look, I’ve seen enough big-box ladles snap at the seam right when you’re serving a heavy batch of chili to know the difference. If you’re just scooping tea, a cheap one is fine. But for daily cooking? Spend the extra money on a professional-grade piece. A heavy-duty, single-piece construction won’t wobble or break, and it’ll actually feel balanced in your hand. It’s not about the brand; it’s about buying it once.

    Will a stainless steel ladle scratch my non-stick pots, or should I stick to silicone?

    If you’re using non-stick pans, yes, a stainless steel ladle will absolutely ruin that coating. One wrong move and you’ve got scratches that trap food and kill the pan’s performance. If your primary cookware is non-stick, stick to high-heat silicone. However, if you’re serious about buying gear that lasts a lifetime, I’d suggest investing in stainless steel or cast iron pots. They’re indestructible, and you won’t have to baby your tools.
  • How a Sauté Pan Differs From a Frying Pan

    How a Sauté Pan Differs From a Frying Pan

    I spent two decades in commercial kitchens where the heat is high and there is zero room for error, and if there’s one thing I learned, it’s that most people are being sold a lie. You walk into a high-end kitchen store and see these $200 “designer” sets, but half of them are nothing more than glorified non-stick pans that will peel and warp before your first anniversary. I’ve seen enough flimsy, overpriced junk to last a lifetime. When it comes to a real sauté pan, you don’t need a fancy brand name or a dozen useless gadgets; you need something with enough weight to hold a steady temperature and enough soul to handle a heavy sear without flinching.

    I’m not here to sell you on the latest kitchen trend or convince you that you need a specialized pan for every single ingredient in your pantry. My goal is to help you cut through the marketing noise and find the one reliable workhorse that actually earns its spot on your stovetop. I’m going to show you exactly what to look for in terms of construction and heat distribution so you can stop wasting money and start investing in tools that actually work as hard as you do.

    Saut Pan vs Frying Pan Differences You Cant Ignore

    Saut Pan vs Frying Pan Differences You Cant Ignore

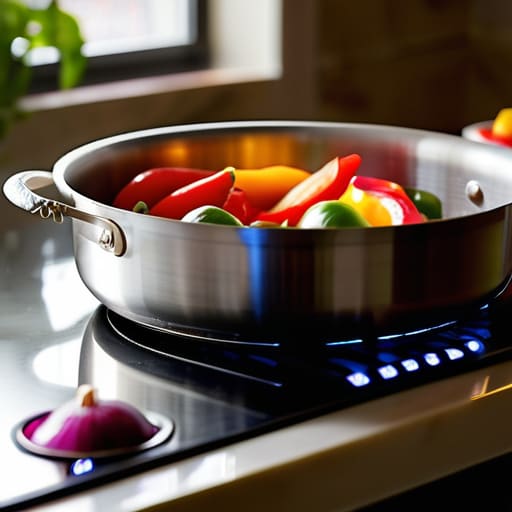
    I see this mistake constantly when I’m helping clients organize their cabinets: they have a drawer full of shallow skillets and wonder why their sauces always break or their meat never sears properly. The biggest sauté pan vs frying pan differences come down to the walls. A standard frying pan has sloped sides, which is great for flipping an omelet, but it’s useless if you want to build a pan sauce or simmer something gently. A proper sauté pan has straight, vertical sides, which keeps your liquids contained and helps trap heat.

    When you’re looking for longevity, you want to prioritize even heat distribution cookware over something thin and cheap. Because of those high walls, a heavy-duty pan allows you to transition from searing a chicken breast to adding a splash of wine and letting it reduce without splashing hot grease all over your stovetop. If you invest in a high-quality piece with a heavy bottom, you aren’t just buying a vessel; you’re buying a tool that handles heat transitions like a professional.

    Stainless Steel vs Nonstick Saut Pan Choosing Longevity

    If you ask me, the debate between stainless steel vs nonstick sauté pan options is where most home cooks make their biggest mistake. They go for the nonstick because it’s easy, but they forget that those coatings are essentially disposable. Once that surface starts peeling or sticking, that pan is headed straight for the landfill. I’ve spent enough time in commercial kitchens to know that if you want something that survives a decade of heavy use, you need to invest in high-quality stainless steel.

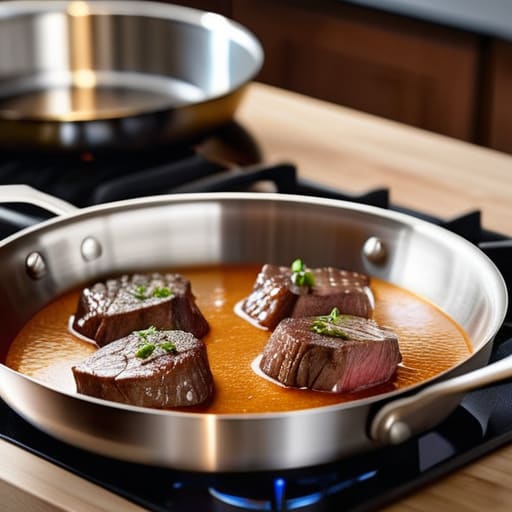
    Stainless steel is my go-to for building a functional kitchen because it handles high heat and allows for that beautiful fond to develop on the bottom. That little bit of browned residue is gold—it’s the foundation of a great pan sauce. While nonstick might be fine for a quick morning omelet, it lacks the durability required for serious cooking. If you want even heat distribution cookware that won’t fail you mid-service, stick to a heavy-duty stainless option. It takes a little more practice to master the temperature, but the longevity and performance are worth every bit of the learning curve.

    Five Rules for Making Your Sauté Pan Work as Hard as You Do

    • Stop overcrowding the pan. I’ve seen so many home cooks try to dump a pound of chicken into a shallow pan all at once; you aren’t braising, you’re steaming. Cook in batches so the temperature stays high and you actually get that golden-brown sear you’re looking for.
    • Check the weight before you reach for your wallet. A flimsy, lightweight pan is going to warp the moment it hits a high flame. You want something with a heavy, even bottom—preferably stainless steel or cast iron—that distributes heat steadily so you don’t end up with hot spots.
    • Respect the “fond.” That little bit of browned, stuck-on goodness at the bottom of the pan after you cook your meat isn’t a mess to be scrubbed away immediately; it’s liquid gold. Deglaze the pan with a splash of wine, stock, or even water to turn those bits into a real sauce.
    • Don’t be afraid of high heat, but learn your limits. If you see the oil starting to smoke heavily, back off. You want a steady shimmer, not a kitchen fire. Mastering the temperature of your pan is more important than any expensive gadget you’ll find in a department store.
    • Invest in a lid that actually fits. One of the biggest mistakes I see in disorganized kitchens is people buying beautiful pans but neglecting the lid. If you want to transition from a sear to a gentle simmer, you need a tight-fitting lid to trap that moisture and heat.

    The Bottom Line on Your Next Sauté Pan

    Stop chasing every new gadget; if you’re going to invest in one piece of cookware, make it a heavy-duty sauté pan that can handle everything from a quick sear to a slow braise.

    Choose your material based on how you actually cook—stainless steel for longevity and high-heat searing, or nonstick only if you prioritize easy cleanup over lifelong durability.

    Prioritize weight and build quality over aesthetics; a pan that’s too light will warp under heat, and a warped pan is just expensive scrap metal.

    Making the Right Choice for Your Kitchen

    At the end of the day, choosing a sauté pan isn’t about following the latest kitchen trend or buying a ten-piece set that promises to do everything. It’s about understanding your actual cooking habits. If you find yourself constantly deglazing pans for pan sauces or needing that high, even sidewall to prevent splashes, a quality sauté pan is a non-negotiable tool. Whether you decide on the indestructible nature of stainless steel or the ease of a well-maintained nonstick, remember that longevity is the ultimate metric of value. Don’t get distracted by flashy handles or unnecessary coatings; focus on the weight, the heat distribution, and the fact that this piece will actually survive a decade of nightly dinners.

    I’ve spent enough time in commercial kitchens to know that the most expensive gear doesn’t make a better chef—the right habits do. A good sauté pan is just a vehicle for your skill, but it deserves to be a reliable one. Stop looking for the “perfect” pan and start looking for the one that works with you. When you invest in tools built to last, you aren’t just cleaning out your cabinets; you’re building a foundation for a kitchen that serves you. Buy it once, treat it well, and let the cooking do the rest.

    Frequently Asked Questions

    Is it worth the extra money to get a heavy-bottomed pan, or will a cheaper one do the job just as well?

    Look, I’ve seen enough cheap, thin pans warp into useless bowls of metal to know the answer. If you buy a lightweight, budget pan, you’re paying for a headache. A heavy bottom isn’t a luxury; it’s the difference between even heat and hot spots that scorch your garlic. Spend the extra money upfront for weight and density. It’s an investment in consistent cooking, not just a piece of cookware.

    How do I know if my sauté pan is actually high-quality or just another piece of overpriced junk?

    Pick it up. If it feels light or hollow, put it back on the shelf. A real sauté pan needs weight—that density is what holds heat steady when you drop in a cold piece of protein. Check the rivets; they should be flush and rock-solid, not wobbly. Finally, look at the base. If it’s thin or uneven, it’ll warp the moment things get hot. Don’t pay for a brand name; pay for the heft.

    Can I use a sauté pan for everything, or am I still going to need a separate skillet for certain types of cooking?

    Look, if you’re trying to slim down your cabinets, a good sauté pan can do about 80% of the heavy lifting. It’s a workhorse for braising and pan sauces. But don’t get cocky. You still need a lightweight skillet for things like quick eggs or delicate fish where you need high heat and a bit more maneuverability. A sauté pan is a marathon runner; sometimes you just need a sprinter.

  • Choosing the Right Baking Dish

    Choosing the Right Baking Dish

    I’ve spent twenty years in commercial kitchens watching people throw money down the drain on “specialty” cookware that ends up in a landfill by next Christmas. Most of those colorful, thin-walled sets you see in big-box stores are nothing more than expensive clutter; they heat unevenly, crack under stress, and frankly, they’re a joke. If you’re looking for a high-tech, gadget-heavy solution to your lasagna problem, you’re in the wrong place. A real, reliable baking dish doesn’t need a fancy brand name or a silicone lid—it just needs proper thermal mass to get the job done right every single time.

    I’m not here to sell you on trends or tell you that you need a different pan for every single recipe. My goal is to cut through the noise and help you build a collection of tools that actually work as hard as you do. I’m going to show you exactly which materials—from heavy-duty ceramic to seasoned cast iron—are worth your hard-earned money and which ones are just plastic junk in disguise. Let’s get your kitchen organized with pieces that will last a lifetime.

    Table of Contents

    The Great Debate Glass vs Ceramic Bakeware

    The Great Debate Glass vs Ceramic Bakeware

    I’ve spent enough hours in commercial kitchens to know that your choice of material changes everything about how your food actually behaves. When people ask me about glass vs ceramic bakeware, they usually want to know which one looks better on a dinner table. That’s fine, but I care about how the heat moves. Glass is predictable; it’s great for seeing if your lasagna is bubbling, but it has a major flaw: it holds onto heat for a long time. If you pull a glass dish out of the oven, your food keeps cooking for several minutes on the counter.

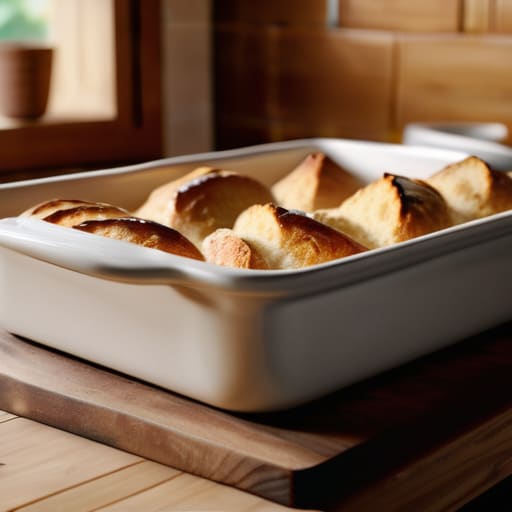
    Ceramic, on the other hand, is a different beast entirely. It’s much heavier and offers superior heat distribution in baking, which is vital when you’re trying to get an even rise on a savory bread pudding or a thick casserole. Because ceramic is more porous than glass, it tends to absorb and radiate heat more steadily. However, you have to be careful with temperature shocks. I always tell my clients that if you’re going to invest in high-end ceramic, you need to follow proper kitchenware maintenance tips—never take a hot dish straight from the oven to a cold marble countertop, or you’ll be buying a replacement by dessert.

    Why Heat Distribution in Baking Defines Your Results

    Why Heat Distribution in Baking Defines Your Results

    Look, I’ve seen too many home cooks pull a lasagna out of the oven only to find the edges are scorched while the center is still lukewarm. It’s frustrating, and frankly, it’s usually a tool problem, not a recipe problem. When we talk about heat distribution in baking, we aren’t just talking about getting things hot; we’re talking about how that heat moves through the walls of your vessel. If your material can’t manage that flow, you’re going to end up with unevenly cooked meals every single time.

    This is exactly why I’m so picky about the best materials for casserole dishes. Heavy-duty ceramic or thick stoneware acts as a thermal battery. It absorbs the heat from your oven and releases it slowly and steadily. This prevents those sudden temperature spikes that ruin delicate gratins. On the flip side, if you’re using thin, cheap alternatives, the heat hits the food too fast. You want a piece of oven safe cookware that holds its temperature long enough to cook the food through, rather than just burning the surface.

    My Rules for Choosing a Dish That Won't Let You Down

    • Stop buying sets of twelve matching dishes. You really only need two or three high-quality, heavy-duty pieces in different sizes. Most of those massive 20-piece sets are just filler, and you’ll end up with a cupboard full of flimsy junk you never touch.
    • Check the weight before you buy. If a ceramic dish feels light as a feather in the store, it’s going to be a nightmare in your oven. You want something with some heft; mass equals heat retention, and heat retention is what prevents your lasagna from being lukewarm in the middle.
    • Look for straight sides, not sloped. If you’re making something like a gratin or a layered casserole, those sloped edges from “decorative” dishes make it impossible to get clean portions. Straight sides mean even cooking and much easier serving.
    • Avoid anything with delicate handles or overly intricate patterns. I’ve seen too many people ruin a beautiful meal because their fancy dish was too awkward to grab with oven mitts. If you can’t maneuver it safely, it doesn’t belong in your kitchen.
    • Match the dish to the task, not the trend. If you’re doing a quick weeknight bake, a standard ceramic dish is fine. But if you’re looking for that perfect, crispy crust on a bread pudding, skip the glass and reach for something that can handle high, sustained heat without shattering.

    The Bottom Line on Your Bakeware

    Stop chasing the cheap glass sets that crack the moment they hit a hot oven; invest in heavy-duty ceramic or stoneware that holds heat steady and actually lasts.

    Remember that heat distribution is everything—if your dish has thin walls, you’re going to end up with burnt edges and a raw center every single time.

    Buy for utility, not for the aesthetic; a dish that’s easy to clean and goes straight from the oven to the table is worth far more than a trendy piece of junk you’re afraid to use.

    ## The Cost of Cheap Bakeware

    “I’ve seen too many people buy a dozen flimsy, mismatched glass dishes only to have them crack under heat stress six months later; do yourself a favor and buy one heavy-duty ceramic piece that actually holds its temperature, because a kitchen built on disposable tools is just a recipe for frustration.”

    Rosalind Hayter

    Stop Collecting, Start Cooking

    Stop Collecting, Start Cooking with quality bakeware.

    At the end of the day, choosing a baking dish isn’t about having a cabinet full of mismatched, colorful containers that serve no real purpose. It’s about understanding that material matters. Whether you opt for the even, steady heat of a heavy ceramic dish or the classic reliability of glass, you need to prioritize thermal mass and durability. Don’t get distracted by the flashy, thin-walled sets sold in big-box stores; they’ll warp or crack the moment you put them to real work. Stick to the basics: find a few high-quality pieces that distribute heat predictably and build a foundation that won’t fail you mid-recipe.

    My advice is simple: stop chasing the trends and start investing in your craft. A kitchen shouldn’t be a graveyard for “as seen on TV” gadgets that end up in a landfill after six months. Instead, aim for a collection of tools that feel substantial in your hands and improve with every use. When you own gear that actually works, you stop worrying about the equipment and start focusing on the food. Cook with intention, use what you have, and buy things that are meant to be passed down, not tossed out. That is how you build a kitchen that truly serves you.

    Frequently Asked Questions

    Is it actually worth the extra weight and cost to switch from my current glass dishes to heavy-duty ceramic?

    Look, I’ve seen enough flimsy glass shatter in a hot oven to know the frustration. If you’re cooking for a crowd or making something that needs a steady, even heat—like a lasagna that actually holds its temperature—then yes, it is worth it. You’re paying for thermal mass, not just weight. Stop buying disposables and invest in heavy-duty ceramic. It’s a one-time cost for a tool that won’t quit on you.

    How do I know if a baking dish is truly oven-safe or just cheap material that's going to crack under high heat?

    Look, don’t just trust the label on the bottom and hope for the best. If you’re looking at a dish in a store, check the weight. If it feels light and hollow, it’s likely thin, cheap material that’ll succumb to thermal shock the second you take it from the counter to a hot oven. I always look for heavy-duty ceramic or thick-walled stoneware. If it feels substantial in your hands, it’s built to handle the heat.

    Can I use the same ceramic dishes for both oven baking and serving at the table, or will they look too messy?

    You absolutely can, and honestly, you should. In my years managing catering lines, we never wasted time transferring food to different vessels if we didn’t have to. If you choose a high-quality, heavy-duty ceramic dish with a clean silhouette, it looks intentional and elegant on the table. Just avoid anything with chipped edges or baked-on stains. A sturdy, well-maintained dish makes the transition from oven to table seamless and effortless.

  • Getting Good Sear Marks on a Griddle Pan

    Getting Good Sear Marks on a Griddle Pan

    I spent twenty years in commercial kitchens, and if there is one thing that still makes my blood boil, it’s seeing people pour money into those thin, lightweight “professional” griddle pans that warp the second they hit a hot burner. I remember one particular catering gig where we tried to use a cheap, stamped-metal griddle for a rush of breakfast orders; the heat distribution was so uneven that half the hash browns were burnt to a crisp while the other half were still steaming in the middle. It was a complete waste of ingredients and a total embarrassment. You don’t need a gadget with ten different bells and whistles; you need a piece of equipment that actually holds its temperature.

    I’m not here to sell you on some trendy, overpriced kitchenware that will end up in a landfill by next Christmas. Instead, I’m going to tell you exactly what to look for in a griddle pan that can actually stand the heat of daily use. We’re going to focus on weight, material, and longevity—the things that actually matter when you’re standing over a hot stove. I’ll help you skip the junk and invest in a tool that will serve you for decades.

    The Cast Iron Griddle Benefits You Wont Find in Plastic

    The Cast Iron Griddle Benefits You Wont Find in Plastic

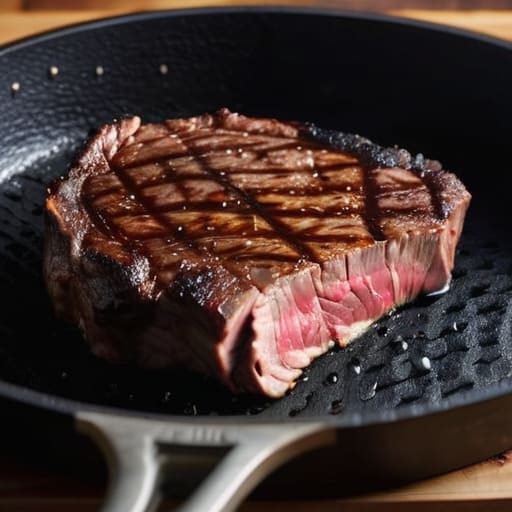
    I’ve spent enough years in commercial kitchens to know that most people treat their cookware like it’s disposable. They buy a cheap, Teflon-coated pan, use it until the coating flakes off into their breakfast, and then toss it in the bin. That is a waste of money and a waste of space. When you switch to cast iron, you aren’t just buying a tool; you’re investing in a piece of equipment that actually gets better with age. One of the primary cast iron griddle benefits is its incredible thermal mass. Unlike thin, plastic-handled pans that lose heat the second a cold piece of meat hits the surface, a heavy cast iron slab stays hot. This is the secret to achieving perfect grill marks every single time without the food sticking or steaming in its own juices.

    If you’re debating between a standard griddle pan vs frying pan, remember that the goal here is heat retention and surface texture. High-heat cooking surfaces like cast iron allow you to sear proteins with the intensity of an outdoor grill, right on your stovetop. You don’t need fancy gadgets to master indoor grilling techniques; you just need a surface that can handle the temperature. Stop settling for flimsy alternatives that fail when things get serious.

    Griddle Pan vs Frying Pan Choosing Tools That Endure

    I see people make this mistake all the time: they try to force a standard skillet to do a job it wasn’t built for. A frying pan is your workhorse for eggs, sautéing vegetables, or searing a delicate piece of fish where you need control over the surface area. But if you’re trying to mimic a backyard barbecue, a flat frying pan just won’t cut it. You need the ridges of a proper tool to facilitate indoor grilling techniques without turning your meal into a soggy, steamed mess.

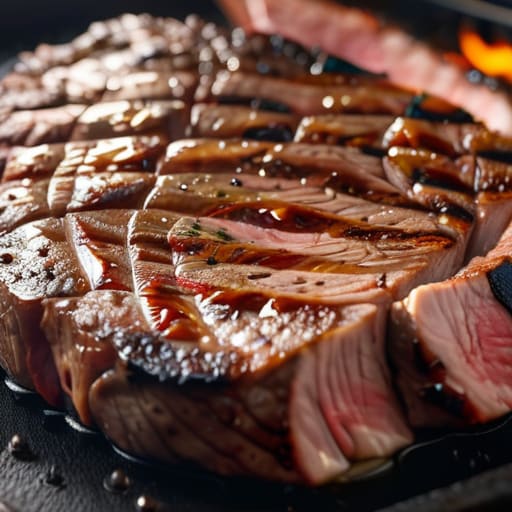
    The real difference in the griddle pan vs frying pan debate comes down to heat distribution and texture. A frying pan is designed for contact, while a griddle is about those distinct, charred lines. When you’re achieving perfect grill marks on a steak or a thick slice of halloumi, those raised ridges allow fat to drain away from the food. This prevents the meat from boiling in its own juices, ensuring you get that smoky, crusty finish we all want, even when you’re stuck inside on a rainy Tuesday.

    Five Rules for Getting the Most Out of Your Griddle

    • Stop using aerosol cooking sprays; they leave a sticky, gummy residue on your griddle that’s a nightmare to scrub off. Stick to a high-smoke point oil or a little bit of solid fat.
    • Let the pan get properly hot before you even think about dropping food on it. If you don’t wait for that heat to build up, you’ll end up steaming your food in its own juices instead of getting those beautiful sear marks.
    • Don’t crowd the surface. I see people try to cook six burgers at once in a small pan, and all they get is a gray, sad mess. Cook in batches so the temperature stays steady and the food actually browns.
    • Learn the art of the “dry clean.” For most daily use, skip the heavy soap and just use hot water and a stiff brush. If you’re using cast iron, make sure you dry it immediately on the stovetop to prevent any rust from setting in.
    • Invest in a sturdy metal spatula. If you’re using a heavy-duty griddle, a flimsy plastic turner is going to snap or melt the moment things get serious. You need something with some weight behind it to flip properly.

    My Rules for Buying a Griddle That Actually Works

    Stop chasing the “non-stick” label on cheap pans; look for heavy-duty materials like cast iron or high-grade carbon steel that can handle high heat and last for decades.

    Check the weight and the ridges—a real griddle needs enough mass to hold steady heat and deep enough grooves to let the fat drain away from your food.

    Don’t buy a specialty gadget if you don’t have the space; ensure the pan fits your most-used stovetop burner and actually serves a purpose beyond one single recipe.

    Investing in Your Kitchen's Future

    At the end of the day, choosing a griddle pan isn’t about following a culinary trend or filling up a cupboard with shiny new gadgets. It’s about recognizing the difference between a tool that performs and a tool that merely occupies space. We’ve looked at why you should ditch the flimsy, disposable non-stick options in favor of something with real heft, and why understanding the distinction between a standard frying pan and a dedicated griddle is essential for your workflow. If you invest in a heavy-duty, high-quality piece—ideally something like cast iron that actually improves with age—you aren’t just buying cookware; you are eliminating future waste and ensuring your kitchen remains functional for decades to come.

    My advice is simple: stop looking for the cheapest option and start looking for the last option. A kitchen should be a place of reliability, not a graveyard for cracked plastic and peeling coatings. When you choose tools that are built to endure, you free up your mental energy to focus on what actually matters—the food, the flavors, and the people you’re feeding. Build your kitchen on a foundation of quality over quantity, and I promise you won’t find yourself constantly hunting for replacements. Now, go grab that notebook, sketch out your setup, and start building a kitchen that actually works for you.

    Frequently Asked Questions

    Do I really need a dedicated griddle pan if I already have a heavy-duty cast iron skillet?

    Look, I’ll give it to you straight: you don’t need one, but you’ll probably want one. A heavy skillet is a workhorse, but it’s round. If you’re trying to sear four salmon fillets or a stack of pancakes at once, you’re going to run out of real estate fast. A rectangular griddle pan maximizes your surface area and lets you cook more efficiently without crowding the pan—which, as any pro knows, just leads to steaming instead of searing.

    How do I stop my food from sticking to the ridges if I'm not using a non-stick coating?

    Look, if you’re ditching the non-stick coatings, you have to respect the heat. The biggest mistake people make is trying to flip food too early. You need to wait for that natural sear to happen; once the food releases itself from the ridges, it’s ready. Use a high-smoke point oil—like avocado or grapeseed—and make sure your pan is preheated properly. If you’re using cast iron, a well-seasoned surface is your best friend.

    Is it worth the extra effort to season a cast iron griddle, or should I just buy one that's pre-seasoned?

    Look, if you’re looking for a quick fix, buy the pre-seasoned one. It’ll get you cooking immediately. But if you want to do it right, take the extra twenty minutes to season it yourself. A factory coating is often just a thin layer of oil that won’t stand up to real use. Building that base layer manually ensures the pan is truly ready for your kitchen, not just ready for the store shelf.

  • Using a Wok on a Domestic Hob

    Using a Wok on a Domestic Hob

    I’ve spent twenty years in commercial kitchens, and if there is one thing that makes my blood boil, it’s seeing people drop eighty dollars on a “designer” non-stick wok that’s destined for a landfill in six months. You see them in every big-box store—flimsy, coated in chemicals, and marketed as some kind of miracle tool. It’s a scam. A real wok shouldn’t be a delicate piece of kitchen jewelry you’re afraid to scratch; it should be a workhorse that handles high heat and gets better every single time you use it.

    I’m not here to sell you on some trendy gadget or a complicated multi-step seasoning ritual that takes all night. My goal is to cut through the marketing noise and tell you exactly what you need to know about choosing a piece of carbon steel or cast iron that will actually last a lifetime. I’ll show you how to pick the right shape for your stove and how to maintain it without the headache, so you can stop wasting money on junk and start cooking like you mean it.

    Cast Iron vs Carbon Steel Wok Choosing Your Last Pan

    Cast Iron vs Carbon Steel Wok Choosing Your Last Pan

    When people ask me for advice, they usually want to know the truth about cast iron vs carbon steel wok performance. Here’s the reality: if you want a heavy, heat-retaining beast that feels like an anchor, go with cast iron. It’s indestructible and holds steady temperatures, which is great for beginners. However, it’s also cumbersome. You’ll find yourself fighting the weight every time you try to toss your ingredients.

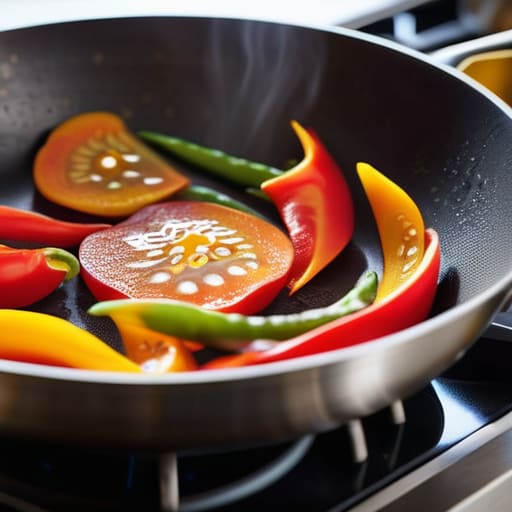
    If you actually want to master wok cooking techniques, carbon steel is the professional choice. It’s lighter, responds instantly to temperature changes, and allows for that rhythmic tossing that makes stir-frying fun. Most importantly, carbon steel is the key to achieving true wok hei flavor—that elusive, smoky “breath of the wok” that you just can’t replicate in a heavy, sluggish pan. While you do need to learn how to season a wok properly to prevent rust, the payoff is a tool that becomes more non-stick and more seasoned with every single meal you cook. Don’t overthink it; just pick the one that fits your wrist and your ambition.

    Mastering How to Season a Wok for Decades of Use

    If you want a pan that lasts a lifetime, you have to respect the seasoning process. Most people get intimidated by how to season a wok, thinking it’s some complex ritual, but it’s really just about patience and heat. I tell my clients the same thing: you aren’t just coating the metal; you are building a protective, non-stick layer through polymerization. Start with a clean surface, apply a thin, even layer of a high-smoke-point oil, and let it smoke off completely over high heat. If you leave too much oil, you’ll end up with a sticky, gummy mess that’s a nightmare to work with.

    Once you have that initial base, the real magic happens during regular use. When you are practicing your wok cooking techniques, the tiny amounts of oil and juices from your ingredients contribute to that dark, slick patina we all crave. This isn’t just for aesthetics; a well-seasoned surface is what allows you to achieve that elusive wok hei flavor—that smoky, charred essence that defines great stir-fry. Just remember: never soak your pan in the sink. A quick rinse and a light wipe with oil is all it needs to stay ready for the next meal.

    Five Hard-Won Rules for Wok Success

    • Stop using soap like it’s 1995; a little hot water and a stiff brush are all you need to protect that seasoning you worked so hard to build.
    • Dry your wok immediately on the stovetop over medium heat; if you let water air-dry in the pan, you’re just inviting rust to move in.
    • Master the “breath of the wok” by getting your oil shimmering hot before the food hits the metal—if you aren’t seeing a bit of smoke, you aren’t cooking, you’re just steaming.
    • Don’t crowd the pan with too much cold protein at once, or you’ll kill the temperature and end up with a soggy, grey mess instead of that beautiful sear.
    • Learn to use the sides of the pan, not just the bottom; a real wok is a three-dimensional tool, and you’re wasting half your cooking surface if you only stay in the center.

    The Bottom Line on Your Wok

    Stop hunting for the perfect non-stick coating; whether you choose cast iron or carbon steel, the real secret to a great pan is the seasoning you build yourself over time.

    Don’t let the “professional” labels fool you—buy a tool that fits your actual stove and your actual cooking habits, not one that looks pretty in a social media photo.

    Treat your wok like an investment, not a disposable gadget; if you skip the harsh soaps and avoid the temptation of cheap, thin metals, this is the last pan you’ll ever need to buy.

    The Long Game in Your Kitchen

    At the end of the day, picking a wok isn’t about following a culinary trend or buying the most expensive piece of gear on the shelf. It’s about understanding the difference between a tool that performs and a gadget that just takes up space. Whether you decide on the heavy-duty reliability of cast iron or the responsive, lightweight agility of carbon steel, remember that your choice dictates your workflow. Once you have that pan in your hands, the real work begins with consistent seasoning and proper care. Don’t let a little rust or a sticking egg scare you off; that’s just part of the process of building a tool that is truly yours.

    I’ve spent two decades watching people cycle through cheap, non-stick pans that end up in a landfill within a year. It’s a waste of money and a waste of energy. When you invest in a real wok, you aren’t just buying cookware; you are investing in a lifetime of meals. There is a profound, quiet satisfaction in using a pan that has been seasoned by years of your own cooking, a tool that has become an extension of your hands. Stop looking for the “perfect” shortcut and start building the right habits. Buy it once, treat it with respect, and let it last.

    Frequently Asked Questions

    Do I really need a high-BTU gas burner, or can I get decent results on a standard electric stove?

    Look, I’ll be honest: if you’re cooking stir-fry on a standard electric stove, you’re fighting an uphill battle. You lack that instant, intense heat needed to sear meat and wilt greens without turning them into mush. If you can swing it, get a high-BTU gas burner or even a portable butane stove. It’s a game-changer. But if you’re stuck with electric, just work in smaller batches to keep the pan hot.

    How do I know if my wok is actually seasoned properly or if I'm just looking at a layer of burnt food?

    It’s a common mistake, and honestly, a messy one. If your wok feels gritty or you see flaky, black bits coming off in your food, that’s burnt residue, not seasoning. Real seasoning should feel smooth—almost like a dark, polished patina. It’s a slick, non-stick layer bonded to the metal. If it looks uneven or smells like scorched oil, grab a stiff brush and get back to work. You want a patina, not a crust.

    Can I use my carbon steel wok for acidic foods like tomato sauces, or will it ruin the finish?

    The short answer is: yes, you can, but don’t make it a habit. If you’re simmering a heavy tomato sauce for an hour, that acid is going to eat away at your seasoning and leave your food tasting metallic. For a quick stir-fry with a splash of vinegar or a squeeze of lime, you’re fine. Just keep the long, acidic braises for your stainless steel or enameled pots. Protect that patina; it’s earned.

  • Using a Kitchen Scale for Accurate Baking

    Using a Kitchen Scale for Accurate Baking

    I remember standing in the middle of a frantic commercial kitchen during a wedding banquet, watching a junior prep cook try to eyeball a massive bag of flour. He was using a set of cheap, flickering digital scales that lost accuracy every time a heavy pot bumped the counter. That’s when it hit me: you can have the finest ingredients in the world, but if your kitchen scales are lying to you, your entire recipe is a gamble. Most people think they need a high-tech, Bluetooth-connected gadget that syncs to their phone just to bake a loaf of bread, but that is nothing more than expensive, unnecessary clutter that will end up in a junk drawer by next Christmas.

    I’m not here to sell you on the latest kitchen trends or shiny plastic nonsense. My goal is to help you find the heavy-duty, reliable tools that actually belong on a working countertop. I’m going to cut through the marketing hype and show you exactly what to look for in a scale that will last a lifetime. We’re going to focus on durability, ease of cleaning, and precision that doesn’t quit when things get busy.

    Table of Contents

    The Truth About Accurate Ingredient Measurement

    The Truth About Accurate Ingredient Measurement.

    I’ve spent more years than I care to admit watching home cooks struggle with recipes that just don’t turn out right. Usually, the culprit isn’t a lack of talent; it’s the measuring cups. If you’ve ever packed flour into a cup too tightly, you’ve likely added twenty percent more than the recipe intended. That’s why accurate ingredient measurement isn’t just a fancy culinary trick—it’s the difference between a perfect loaf of bread and a dense, heavy brick.

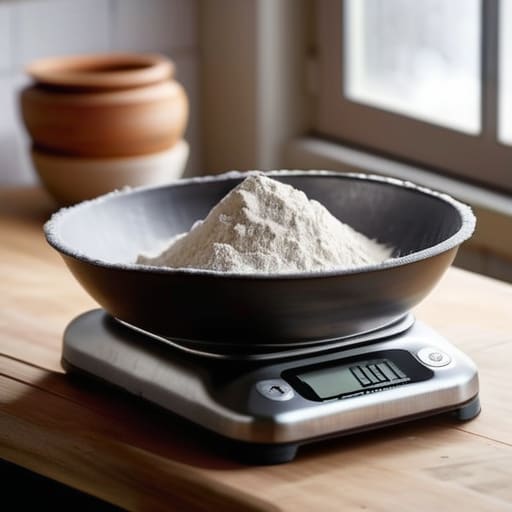
    When you move away from volume and start using weight, the guesswork disappears. You stop worrying about a messy gram vs ounce conversion because the numbers on the screen tell the whole truth. I always tell my clients to look for a reliable tare function explained simply: it allows you to zero out your bowl so you’re only weighing the food, not the stoneware. It keeps your workspace clean and your math simple. If you want to master consistency, stop relying on those “scoop and level” methods and start trusting the weight.

    Choosing High Precision Culinary Tools That Last

    Choosing High Precision Culinary Tools That Last

    When you’re looking for high precision culinary tools, don’t get distracted by fancy touchscreens or Bluetooth connectivity. Most of that is just marketing fluff designed to separate you from your hard-earned money. I’ve seen too many people buy a sleek, expensive gadget only to realize it can’t handle a heavy Dutch oven or a large bowl of flour without the sensor failing. You want something with a solid, stable base and a clear display that you can actually read when your hands are covered in dough.

    Look for a model that makes gram vs ounce conversion seamless with a single button press. If you’re serious about consistent results, you need a device that handles the tare function explained simply: you zero out the weight of your bowl so you’re only measuring the ingredients themselves. This is non-negotiable for anyone trying to master baking or maintain strict food portion control. Skip the flimsy plastic models that feel like toys; invest in a heavy-duty electronic kitchen weighing device that feels like it belongs in a professional workstation. If it doesn’t feel substantial in your hand, it probably won’t last the decade.

    5 Rules for Using Your Scale Without Losing Your Mind

    • Stop using volume measurements for dry goods. A cup of flour can weigh anywhere from 120 to 160 grams depending on how hard you pack it, and that’s exactly how you end up with a dry, dense loaf of bread. Switch to grams and stop the guesswork.
    • Get a scale with a “tare” function that actually works. You should be able to place your bowl on the platform, hit zero, and add ingredients one by one without ever needing to wash a measuring cup mid-recipe. If your scale can’t do this reliably, toss it.
    • Watch your capacity limits. I see people trying to weigh a five-pound bag of sugar on a delicate pastry scale meant for small increments. You’ll burn out the sensor in a week. Know your scale’s maximum weight before you start loading it up.
    • Check your battery situation before you start a big project. There is nothing more frustrating than being halfway through a batch of dough and having your scale flicker out because you used cheap, generic batteries. I always keep a fresh pack of high-quality alkalines in my kitchen drawer.
    • Give your scale a flat, stable home. If you try to weigh something on a pile of dish towels or a wobbly countertop, your numbers are going to be nonsense. Find a dedicated, level spot for your gear so you can trust the reading every single time.

    The Bottom Line on Scaling Up Your Kitchen

    Stop wasting money on those cheap, battery-operated plastic scales that lose their calibration after three uses; buy a heavy-duty model once and you’ll never have to shop for one again.

    Precision isn’t just for professional pastry chefs; if you want your sourdough to rise or your sauces to thicken correctly every single time, you have to stop eyeballing measurements.

    Look for a scale with a high capacity and a quick tare function, because a tool that’s a pain to use is a tool that’s going to end up buried in the back of your junk drawer.

    ## Precision Over Guesswork

    “I’ve seen too many home cooks ruin a perfectly good batch of dough because they were eyeballing measurements with a cheap, flimsy scale. If you want your recipes to be repeatable and your kitchen to be efficient, stop treating your ingredients like suggestions and start treating them like science.”

    Rosalind Hayter

    Stop Overthinking and Start Weighing

    Stop Overthinking and Start Weighing ingredients.

    At the end of the day, choosing a kitchen scale isn’t about finding the most expensive gadget on the shelf; it’s about finding the one that actually works when you’re in the middle of a rush. We’ve talked about why precision matters, why you need to ditch those flimsy plastic models, and how to pick a heavy-duty tool that can handle a real kitchen environment. Remember, a scale is only as good as its consistency. If you can’t trust the number on the display, you’re just playing a guessing game with your ingredients. Invest in a piece that offers reliability and durability, because the last thing you need is a piece of equipment that fails you right when you’re halfway through a delicate bake.

    I know it might feel like extra work to weigh everything out instead of just grabbing a measuring cup and calling it a day, but that’s where the magic happens. When you master the habit of precision, you stop fighting your recipes and start actually understanding them. Cooking should be a source of steady, grounded joy, not a series of frustrating mistakes caused by “eyeballing” a handful of flour. Build your kitchen with intentionality and purpose, and I promise you, the results will speak for themselves. Put down the measuring spoons, pick up a real scale, and get back to the business of good cooking.

    Frequently Asked Questions

    Do I really need a scale for basic cooking, or is a set of measuring cups enough for most recipes?

    Look, if you’re just making a casual batch of pancakes on a Sunday morning, cups are fine. But if you want to actually master baking or stop wasting expensive ingredients, you need a scale. Measuring flour by volume is a gamble; one person packs it tight, another scoops it loosely, and suddenly your cake is a brick. If you want consistency instead of guesswork, stop relying on cups and start weighing your ingredients.

    Should I be looking for a scale that measures in grams, or is ounces and pounds fine for my needs?

    Look, if you’re serious about consistency, get a scale that does grams. I’ve seen too many home cooks struggle with the math of ounces and fractions, especially when they’re trying to scale a recipe up or down. Grams are precise, they’re easy to read, and they eliminate the guesswork. If a scale doesn’t have a dedicated gram setting, leave it on the shelf. You want accuracy, not a math headache mid-prep.

    How do I tell if a scale is actually accurate versus just being a cheap piece of plastic that's going to drift over time?

    Here’s the trick: perform a “drift test.” Set your scale on a flat surface, tare it to zero, and weigh something consistent—like a nickel or a single heavy coin—five times in a row. If the numbers jump around or don’t return to the exact same weight, put it back on the shelf. Cheap sensors lose their calibration almost immediately. A real tool should give you the same reading every single time.

  • When a Saucier Beats a Straight Sided Saucepan

    When a Saucier Beats a Straight Sided Saucepan

    I spent twenty years in commercial kitchens where the heat is constant and there is zero room for gear that doesn’t perform. I’ve seen too many home cooks waste a fortune on those flashy, multi-piece “essential” sets, only to realize they’re struggling to reduce a simple béarnaise in a standard saucepan with steep, straight sides. If you’ve ever felt like you’re fighting your cookware just to get a smooth consistency, you don’t need a bigger budget; you just need a proper saucier pan. Stop trying to force a standard pot to do a specialist’s job—it’s a recipe for scorched milk and wasted ingredients.

    I’m not here to sell you on some trendy, non-stick gadget that will peel in six months. My goal is to help you identify a saucier pan built with the weight and curvature that actually matters for heat distribution and whisking. I’ll tell you exactly what to look for in terms of material and construction so you can buy something once and use it for the rest of your life. No hype, no fluff—just the practical truth about what belongs in a working kitchen.

    Saucier Pan vs Saucepan Why Shape Matters

    Saucier Pan vs Saucepan Why Shape Matters

    Most people grab whatever pot is closest to the stove, but if you’re trying to make a delicate reduction or a silky béchamel, a standard saucepan is going to fight you. The main difference in the saucier pan vs saucepan debate comes down to the geometry. A saucepan has straight, vertical sides, which is great for boiling water or making soup, but it’s terrible for whisking. When you’re working on small batch sauce preparation, those vertical walls create “dead zones” where ingredients get trapped and scorched.

    A proper saucier features sloping, curved sides that allow your whisk to reach every single millimeter of the surface. This design isn’t just for show; it’s essential for even heat distribution for sauces and preventing those dreaded burnt bits at the edges. If you’re looking for the best pan for making gravy or a panade, you need that rounded bottom to keep everything moving. I always tell my clients: stop fighting your equipment. If the shape of the pan is working against your technique, you’re just making more work for yourself.

    Professional Chef Cookware Built to Last a Lifetime

    When I was managing high-volume catering lines, I saw too many cooks try to cut corners by using cheap, thin-walled pans that scorched every delicate reduction. If you want to do this right, you need to invest in professional chef cookware that doesn’t flinch when the heat goes up. I’m talking about heavy-gauge construction that provides the kind of even heat distribution for sauces that you just can’t get from a grocery store bargain bin.

    You’ll often hear people debate stainless steel vs nonstick saucier options, and while nonstick has its place for eggs, it won’t survive a decade of heavy use. A high-quality tri-ply stainless steel vessel is my gold standard; it handles the heat, it’s easy to deglaze, and it won’t flake into your food. I’ve spent years restoring old gear, and the pans that actually survive the test of time are the ones built with substance. Don’t settle for a flimsy piece of metal that warps after six months. Buy the heavy stuff once, and you’ll never have to shop for this again.

    Five Ways to Use Your Saucier Without Wasting Your Time

    • Stop using it for boiling pasta. A saucier is designed for reduction and delicate emulsions, not for filling up with gallons of water. Save the deep stockpot for the heavy lifting and keep your saucier for the precision work.
    • Watch your heat levels. Because the curved sides allow for better liquid circulation, you can reduce sauces much faster than in a standard saucepan, but that also means you can burn them if you aren’t paying attention.
    • Use the curves to your advantage when whisking. One of the best things about the rounded bottom is that there are no “dead zones” in the corners where flour or cream can hide and scorch. It makes making a proper roux much easier on your wrists.
    • Pair it with a heavy-duty whisk. If you’re using a professional-grade saucier, don’t use a flimsy, cheap whisk that’s going to bend the moment you hit a thick reduction. Match the tool to the pan.
    • Don’t let it sit in the sink. If you bought a high-quality stainless steel or copper-core saucier, treat it with respect. A quick soak and a gentle scrub will keep that surface smooth for decades, preventing the tiny scratches that make sauces stick.

    The Bottom Line on Choosing a Saucier

    Stop trying to force a standard saucepan to do a specialist’s job; the curved bottom of a saucier is essential for whisking and preventing sauce from getting stuck in the corners.

    Prioritize heavy-duty materials like stainless steel or copper over cheap non-stick coatings that will peel and end up in a landfill within two years.

    Look for a pan with a wide surface area and high sides, which allows for better evaporation and more consistent heat distribution for your reductions.

    Making the Right Investment

    At the end of the day, choosing a saucier isn’t about adding another piece of metal to your cabinet; it’s about recognizing that your techniques deserve better tools. We’ve looked at why the sloped sides are non-negotiable for reducing sauces without splashing, and why you should prioritize heavy-duty stainless steel or copper over those flimsy, non-stick coatings that peel after six months. If you want to stop fighting your cookware and start focusing on the flavor, you need to stop settling for “good enough” pans that can’t handle the heat or the movement required for real cooking. A quality saucier is a workhorse, not a gadget, and it’s one of the few pieces of equipment that will actually make your life easier every single time you step up to the stove.

    I know it can feel overwhelming when you see a million different brands and price points, but I promise you, the “trendy” option is rarely the right one. My advice is simple: buy once, buy well, and buy something that can be passed down. When you invest in a professional-grade saucier, you aren’t just buying a pan; you are investing in your own confidence in the kitchen. Once you master a reduction or a delicate custard in a tool that actually responds to you, you won’t ever want to go back to those shallow, awkward saucepans. Build a kitchen that lasts, one intentional piece at a time.

    Frequently Asked Questions

    Is a saucier pan really worth the extra counter space if I already own a standard saucepan?

    Look, I get it. Counter space is precious, and I hate clutter as much as the next person. But if you’re tired of your sauces breaking or the liquid evaporating before your pasta is even al dente, the saucier is worth the footprint. A standard saucepan is a workhorse, but it can’t compete with those rounded edges for whisking or reducing. If you cook from scratch, it’s not a luxury—it’s a necessity.

    Should I prioritize heavy-bottomed stainless steel or go with something non-stick for my sauces?

    If you want a pan that lasts decades, go with heavy-bottomed stainless steel. It’s the industry standard for a reason: you can sear, deglaze, and reduce without worrying about ruining a coating. Non-stick is fine for a quick egg, but it’s a consumable—it’ll eventually flake and end up in the trash. Invest in stainless steel once, learn to manage your heat, and you’ll never have to buy another saucier again.

    Can I use a saucier pan on an induction cooktop, or do I need to check the base specifically?

    You definitely need to check the base. Induction works through magnetism, so if your saucier is pure copper or aluminum, it won’t even turn on. I always tell people to look for the “induction-ready” symbol on the bottom or test it with a simple magnet—if it sticks to the pan, you’re good to go. Don’t waste money on a beautiful piece of cookware if it can’t actually work on your stove.

  • Using a Slotted Spoon in the Kitchen

    Using a Slotted Spoon in the Kitchen

    I’ve spent twenty years in commercial kitchens, and if there is one thing that drives me up the wall, it’s seeing people waste money on those “designer” utensil sets that look pretty in a catalog but fall apart after a month of actual use. I remember one particular catering gig where a junior chef tried to use a flimsy, injection-molded plastic slotted spoon to lift heavy, poached vegetables; the thing snapped right in the middle of service, leaving us with a mess and a ruined rhythm. It’s frustrating because a tool that simple shouldn’t be a gamble. You don’t need a gadget with a built-in thermometer or a silicone handle that feels like cheap sponge; you just need something that actually works when the heat is on.

    I’m not here to sell you on the latest kitchen trends or shiny junk you’ll end up tossing in the bin by next Christmas. Instead, I’m going to give you the straight truth on what makes a high-quality slotted spoon worth your hard-earned money. We’re going to look at weight, material durability, and the specific structural integrity you need to handle everything from delicate greens to heavy proteins. My goal is to help you build a kit of tools that will last you a lifetime.

    Table of Contents

    Choosing Stainless Steel Kitchen Utensils That Never Fail

    Choosing Stainless Steel Kitchen Utensils That Never Fail

    Choosing Stainless Steel Kitchen Utensils That Never Fail

    When I was managing commercial kitchens, we didn’t have the luxury of “cute” gadgets; we needed gear that could survive a double shift without warping or snapping. That’s why I always steer people toward high-quality stainless steel kitchen utensils. Unlike the cheap, thin versions you find in big-box stores, a heavy-duty steel tool won’t bend when you’re lifting food from hot oil or scooping up heavy portions of pasta. You want something with a bit of weight to it—it tells you immediately that the tool is built for utility, not just for show.

    You’ll often hear people debate silicone vs metal slotted spoons, and while silicone is fine for a gentle stir, it simply doesn’t hold up to the rigors of serious cooking. If you are draining boiled vegetables or need to be precise when skimming foam from broth, you need the structural integrity that only metal provides. Don’t settle for anything that feels flimsy in your hand. If you invest in solid steel now, you won’t be digging through your junk drawer for a replacement in six months.

    Silicone vs Metal Slotted Spoons Making the Right Investment

    Silicone vs Metal Slotted Spoons Making the Right Investment

    When you’re standing over a steaming pot, you don’t want to be second-guessing your tools. The debate of silicone vs metal slotted spoons usually comes down to what you’re actually cooking. If you’ve invested in high-quality non-stick pans, a metal tool is a one-way ticket to ruined coatings. In those cases, a heavy-duty, food-grade silicone is your best friend. It’s flexible enough to scrape the bottom of the pan but sturdy enough for draining boiled vegetables without bending like a cheap piece of plastic.

    However, if you’re working with my favorite cast iron or stainless steel, don’t even bother with the silicone. For tasks like lifting food from hot oil or skimming foam from broth, you need the structural integrity that only metal provides. Silicone can sometimes feel “mushy” when you’re trying to grab something substantial, whereas a solid metal tool gives you that tactile confidence. My rule of thumb? Use silicone to protect your delicate surfaces, but rely on metal for the heavy lifting. It’s about choosing the right tool for the specific job, not just buying one version and hoping it works for everything.

    Five Ways to Use Your Slotted Spoon Without Making a Mess

    • Stop using your spoon as a glorified stirrer; its real job is lifting. Use it to rescue delicate items like poached eggs or blanched vegetables from hot water so they don’t sit around getting mushy.
    • Check the weight before you buy. A good slotted spoon should have some heft to it. If it feels like a cheap piece of hollow plastic in your hand, it’s going to bend the moment you try to lift a heavy portion of pasta.
    • Use it for the “drain and serve” maneuver. When you’re making something like a quick sauté or frying dumplings, use the slots to lift the food directly out of the oil or pan juices, leaving the excess liquid behind so your plate doesn’t turn into a soup bowl.
    • Keep an eye on the joint where the handle meets the head. In my years managing commercial kitchens, I’ve seen a thousand cheap spoons snap right at that seam. Look for a seamless design or a reinforced connection if you want it to survive more than a season.
    • Don’t forget the cleaning ritual. If you’re using a metal spoon, make sure you dry it thoroughly right after washing. I’ve seen too many people leave stainless steel sitting in a damp drying rack only to find water spots that take forever to scrub off.

    The Bottom Line on Slotted Spoons

    Stop buying cheap plastic; if you’re working with heat, invest in high-quality stainless steel that won’t melt or warp after a month of heavy use.

    Match your tool to your cookware—use silicone if you’re protective of non-stick surfaces, but stick to metal for the durability and heavy-duty lifting required in cast iron or stainless steel pans.

    Look for weight and balance; a tool that feels flimsy in your hand will only make cooking feel like a chore, so choose something substantial that feels like a professional extension of your hand.

    The Truth About Your Utensil Drawer

    “I’ve spent two decades in commercial kitchens watching people toss out cheap, melted plastic spoons every few months. It’s a waste of money and a waste of space. If you’re going to buy a slotted spoon, buy one that can handle the heat of a heavy pan and the weight of a real meal without bending or snapping.”

    Rosalind Hayter

    Stop Collecting, Start Investing

    Stop Collecting, Start Investing in quality tools.

    At the end of the day, choosing a slotted spoon shouldn’t be a complicated decision, but it is one that matters more than you might think. We’ve covered why you need to ditch the cheap, melting plastics and why a high-quality stainless steel or heavy-duty silicone tool is the only way to go. Whether you are lifting delicate poached eggs or draining pasta from a boiling pot, the tool in your hand needs to feel substantial and reliable. Don’t let yourself be swayed by those colorful, flimsy sets that look great in a catalog but fail the moment they hit a hot pan. Stick to the basics: durability, heat resistance, and a design that actually works with your hand.

    My advice is simple: stop treating your kitchen like a showroom and start treating it like a workspace. You don’t need a drawer full of specialized gadgets that only do one thing; you need a handful of exceptional tools that do everything. When you invest in a solid slotted spoon today, you aren’t just buying a piece of metal or silicone—you are buying the peace of mind that comes with knowing your gear won’t let you down mid-service. Build your kitchen on a foundation of quality, and I promise you’ll spend less time replacing junk and more time actually enjoying the process of cooking.

    Frequently Asked Questions

    How do I know if the stainless steel is high enough quality to not rust after a few washes?

    Look for the “18/10” stamp on the handle. That number tells you exactly what you’re getting: 18% chromium for rust resistance and 10% nickel for that beautiful, lasting shine. If the packaging doesn’t mention a grade, or if it just says “stainless steel” without specifics, walk away. In my twenty years of catering, I’ve seen cheap alloys pit and rust within a month. Don’t gamble with your budget; buy the 18/10.

    Is a large slotted spoon overkill for a small kitchen, or is it better to just have one versatile size?

    Look, I’ve seen too many people clutter their drawers with five different versions of the same thing. In a small kitchen, space is your most valuable ingredient. You don’t need a drawer full of specialty spoons; you need one high-quality, medium-sized stainless steel slotted spoon. Aim for something versatile enough to lift a handful of pasta or a few dumplings without feeling clunky. Buy one good tool that does the job, and keep the rest of that space clear.

    If I choose silicone to protect my non-stick pans, how can I tell if it's sturdy enough to lift heavy items like potatoes or pasta?

    If you’re going the silicone route to save your non-stick coatings, don’t settle for those thin, floppy versions that feel like a toy. Look for “high-heat” silicone with a reinforced internal core—usually stainless steel. When you’re shopping, give it a firm squeeze. If the head bends easily under light pressure, it’ll buckle under a heavy potato. You want something with structural integrity that feels substantial in your hand, not something that wilts the moment things get heavy.

  • Choosing a Stockpot for Batch Cooking

    Choosing a Stockpot for Batch Cooking

    I remember standing in a commercial kitchen during a holiday rush, staring at a thin, cheap-looking stockpot that was warping under the heat of a massive batch of beef broth. It was a disaster; the bottom was uneven, the heat distribution was non-existent, and we were essentially wasting expensive ingredients because the vessel couldn’t handle the job. Most people think they need a dozen different specialized pots to be a “real” cook, but that’s just more clutter for your cabinets. In reality, a single, well-constructed stockpot is the backbone of a functional kitchen, yet most people end up buying flimsy, overpriced junk that won’t last through a single winter of soup-making.

    I’m not here to sell you on some trendy, non-stick miracle or a gadget with ten different bells and whistles you’ll never touch. My goal is to help you cut through the marketing noise and find the heavy-duty essentials that actually earn their place on your stove. I’ll show you exactly what to look for in terms of weight, material, and lid fit so you can invest once and cook for a lifetime.

    Prioritizing Stainless Steel Cookware Durability Over Trends

    I see it every time I walk into a client’s kitchen: a graveyard of scratched non-stick coatings and warped aluminum pans that were “on sale” three years ago. People get caught up in the latest colorful ceramic trends, but if you want a tool that survives a decade of heavy-duty use, you need to look at stainless steel cookware durability. Unlike coated pans that flake off into your dinner, high-quality stainless steel can handle high heat and vigorous scrubbing without breaking a sweat. It’s a professional-grade choice that prioritizes longevity over aesthetics.

    When you’re looking for that one reliable piece, don’t settle for something thin that creates hot spots. You want a heavy bottom pot for simmering to ensure your liquids heat evenly and stay at a steady temperature. This kind of consistent heat distribution is what separates a professional kitchen from a cluttered one. If you invest in a solid, multi-clad stainless vessel, you aren’t just buying another gadget; you’re buying a piece of equipment that will be just as functional when you’re decades older.

    Why a Heavy Bottom Pot for Simmering Matters

    If you’ve ever pulled a batch of chili or a vegetable broth off the stove only to find a layer of scorched, bitter bits stuck to the base, you know exactly why I’m so particular about this. Most people think a pot is just a container, but if it’s thin, it’s essentially a heat trap. You need a heavy bottom pot for simmering to act as a buffer. A thick, encapsulated base prevents those localized hot spots that turn a delicate sauce into a ruined mess.

    When you’re working with a slow, steady heat, you aren’t looking for an aggressive boil; you’re looking for consistent, gentle warmth. This is where even heat distribution in cookware becomes the difference between a professional-grade result and a kitchen disaster. I always tell my clients to look for weight. If the pot feels light in your hands, it’s going to fail you when you’re trying to maintain a low temperature for a long-haul stew. Invest in something substantial that holds its temperature steadily, rather than something that reacts wildly to every tiny adjustment of the burner.

    Five Rules for Picking a Pot That Won't Let You Down

    • Check the rim before you buy. If the edge is thin or poorly finished, it’ll be a nightmare to pour liquids without dripping all over your stovetop. Look for a poured or rolled rim that feels substantial in your hand.
    • Don’t ignore the handles. I’ve seen too many people buy a beautiful pot only to realize the handles are riveted on so poorly they become heat conductors. You want sturdy, stay-cool handles that feel secure when you’re lifting ten pounds of boiling broth.
    • Size matters, but don’t overbuy. If you’re a family of four, a massive 20-quart pot is just a heavy, awkward space-taker in your cupboard. Pick a size that fits your actual cooking habits—usually an 8 to 12-quart range is the sweet spot for most home cooks.
    • Test the weight. A good stockpot needs heft to prevent hot spots, but it shouldn’t be so heavy that you’re afraid to move it. If the pot feels like you’re lifting a piece of construction equipment, you’ll end up leaving it in the back of the cabinet.
    • Look for compatible lids. A tight-fitting lid isn’t just a suggestion; it’s a necessity for heat retention and energy efficiency. If the lid wobbles or lets too much steam escape, you’re wasting time and fuel trying to get your liquid to a simmer.

    My Rules for Choosing a Stockpot

    Forget the flashy non-stick coatings that flake off in six months; stick to high-quality stainless steel that can handle decades of scrubbing and heavy use.

    Always check the base—if the bottom feels thin or light, walk away, because a pot without a heavy-duty core will scorch your broth every single time.

    Stop buying sets just to fill a cabinet; buy one single, professional-grade stockpot that actually fits your largest recipe and does the job right.

    The Last Pot You'll Ever Need

    At the end of the day, choosing a stockpot isn’t about finding the prettiest item on a boutique website or following the latest kitchen trend. It’s about recognizing that your tools are the foundation of your cooking. If you prioritize high-quality stainless steel and insist on a heavy, encapsulated base, you are solving problems before they even start. You won’t have to deal with scorched sauces, warped bottoms, or the frustration of a pot that feels like a toy in your hands. Skip the non-stick coatings that flake off after a year and the thin aluminum that burns everything on contact. Invest in a piece that has the heft and durability to handle everything from a delicate chicken stock to a massive batch of chili.

    I’ve seen too many people clutter their cabinets with cheap, disposable cookware that ends up in a landfill within twenty-four months. My advice is simple: buy once, buy well, and then get to cooking. A great stockpot isn’t just a piece of equipment; it’s a silent partner in your kitchen that will serve you for decades. Once you have the right tools, the focus shifts from managing your gear to mastering your craft. Stop worrying about the gadgets and start building the habits that make a meal truly memorable. Your future self—and your kitchen—will thank you.

    Frequently Asked Questions

    How do I tell if a stockpot has a truly heavy, encapsulated base or if it's just a cheap thin layer of aluminum?

    Here’s the trick: don’t just look at it, feel it. Pick the pot up. If it feels unnaturally light for its size, run. A real encapsulated base—where aluminum is sandwiched between layers of stainless steel—should give the pot a noticeable heft. Also, look at the bottom; a quality base will feel like a solid, integrated part of the pot, not a flimsy disc glued on that looks like it might peel off after a few washes.

    Is it worth the extra money to get a stainless steel pot with handles that are riveted on rather than welded?

    Yes, it’s absolutely worth it. In my years managing commercial kitchens, I’ve seen enough loose handles to know that rivets are the only way to go. Welded handles look sleek, sure, but they can fail under the weight of a heavy stew or a massive batch of stock. Rivets provide a mechanical connection that isn’t going anywhere. If you want a pot that survives decades of heavy use, pay the extra few dollars for rivets.

    Can I actually use a heavy-duty stockpot on an induction cooktop, or do I need to check for a specific magnetic base?

    You can absolutely use a heavy-duty stockpot on induction, but don’t just grab the first one you see. Induction works through magnetism, so your pot needs a magnetic base to heat up. The easiest way to check? Grab a simple fridge magnet. If it sticks firmly to the bottom of the pot, you’re good to go. If it won’t stick, that pot is just a heavy paperweight on an induction surface.

  • Why Measuring Spoons Are Necessary for Recipes

    Why Measuring Spoons Are Necessary for Recipes

    I spent two decades in commercial kitchens where precision wasn’t a suggestion—it was the law. I’ve seen enough “designer” kitchen sets to last a lifetime, and frankly, most of them are a waste of space. You don’t need a twenty-piece rose gold kit that looks pretty in a social media photo but bends the moment it hits a heavy scoop of cinnamon. If you’re still relying on those flimsy, lightweight plastic measuring spoons that warp in the dishwasher or crack when you try to level off some flour, you’re doing it wrong. You aren’t just wasting money; you’re sabotaging your recipes before you even turn on the stove.

    I’m not here to sell you on a lifestyle or a trend. My goal is simple: I want to help you build a toolkit that actually works. I’m going to cut through the marketing fluff and tell you exactly what to look for in a set that will survive decades of heavy use. We’re going to talk about weight, material, and why durability matters more than aesthetics. By the time we’re done, you’ll know how to pick a set of tools that stays in your drawer for life, rather than in the landfill.

    Table of Contents

    The Case for Stainless Steel Measuring Sets

    The Case for Stainless Steel Measuring Sets

    I’ve seen far too many home cooks get frustrated by a recipe failing, only to realize their “set” of tools was the culprit. When you’re working with delicate baking ingredients, even a slight deviation in volume can ruin a batch of sourdough or a tray of macarons. This is where baking ingredient accuracy becomes non-negotiable. Plastic sets are notorious for warping under heat or absorbing the odors of whatever you cooked last, which is a nightmare when you’re trying to measure out vanilla extract.

    If you want to do this right, you need to invest in stainless steel measuring sets. Unlike their flimsy counterparts, these won’t bend when you’re packing down brown sugar or crack when you’re scooping heavy flour. They provide a level of durability that is essential for anyone serious about their culinary precision tools. I always tell my clients: buy once, buy well. A heavy-duty steel set is one of those kitchen utensil essentials that you’ll pull out of the drawer every single day for the next thirty years without a single thought about replacing them.

    Achieving Baking Ingredient Accuracy Every Time

    Achieving Baking Ingredient Accuracy Every Time.

    If you’ve ever pulled a tray of sunken, gummy cookies out of the oven, I can almost guarantee it wasn’t your oven temperature that failed you—it was your math. In the world of pastry, there is no room for “eyeballing it.” To achieve true baking ingredient accuracy, you have to treat your recipe like a blueprint. Even a slight deviation in flour or baking powder can ruin the structural integrity of a cake. This is where having a dedicated set of high-quality tools becomes non-negotiable; you aren’t just scooping powder, you are managing chemical reactions.

    I always tell my clients to stop treating their spoons like an afterthought. While most people focus on expensive stand mixers, they overlook the culinary precision tools that actually dictate the outcome. You need a set that allows for level, consistent scoops every single time. Whether you are working with fine spices or heavy leavening agents, your equipment must be rigid enough to hold its shape under pressure. If your tools flex or bend when you level them off with a knife, you are already losing the battle for consistency.

    Five Rules for Measuring Like a Professional

    • Stop nesting them loosely; keep your set in a dedicated container or a magnetic strip so you aren’t digging through a junk drawer every time a recipe calls for a teaspoon of salt.
    • Ditch the “eyeballing” habit for dry ingredients; if the recipe calls for a level tablespoon, actually level it off with the back of a knife to avoid the cumulative errors that ruin a delicate sponge cake.
    • Treat your spoons like real tools by washing them immediately after use, especially if they’ve touched oils or spices, to prevent stubborn buildup in the tiny crevices where the handles meet the bowls.
    • Invest in a set with etched markings rather than printed ones; the ink on cheap sets will rub off within a year of scrubbing, leaving you guessing which spoon is which.
    • Use the “spoon and level” method for flour and sugar instead of packing them down; packing your measuring spoon too tightly is the fastest way to end up with a dry, heavy loaf of bread.

    The Bottom Line on Measuring Spoons

    Stop buying those cheap, colorful plastic sets that warp under heat or crack in the drawer; a single set of heavy-duty stainless steel is the only way to ensure your measurements stay consistent for years.

    Prioritize sets that nest together tightly to save precious cabinet space, but make sure they have enough weight to sit firmly in a bowl without flipping over when you’re scooping flour or sugar.

    Remember that the right tool is useless without the right habit—level off your dry ingredients with a flat edge every single time to avoid the guesswork that ruins a good recipe.

    The Real Cost of Cheap Tools

    I’ve seen enough commercial kitchens go to ruin because someone thought they could save five dollars on a flimsy plastic spoon set; in cooking, precision is everything, and you can’t measure your way to a good meal with tools that warp the moment they hit a little heat.

    Rosalind Hayter

    Final Thoughts on Making the Right Choice

    Final Thoughts on Making the Right Choice

    At the end of the day, choosing the right measuring spoons isn’t about having the prettiest set in your utensil drawer; it’s about reliability. We’ve talked about why you should ditch the flimsy, crack-prone plastic in favor of heavy-duty stainless steel and why precision is the difference between a failed souffle and a masterpiece. Whether you are leveling off flour for a delicate cake or measuring out spices for a hearty stew, your tools shouldn’t be an afterthought. When you invest in a set that won’t bend, warp, or snap, you are essentially removing the guesswork from your cooking process and ensuring that your recipes turn out exactly as intended, every single time.

    My advice is simple: stop treating your kitchen tools like disposable commodities. A good set of measuring spoons is one of those rare items that, if chosen wisely, you will likely still be using twenty years from now. Don’t get distracted by the bells and whistles or the “as seen on TV” gadgets that promise magic but deliver nothing but clutter. Focus on quality over quantity and build a kitchen that supports your skills rather than frustrating them. Get the right tools, develop your habits, and then get to the actual business of cooking something delicious.

    Frequently Asked Questions

    Are there any specific brands of stainless steel sets that don't have those annoying thin edges that catch on flour?

    I know exactly the ones you mean—those razor-thin edges that snag on flour or sugar like a serrated knife. It’s incredibly frustrating when you’re trying to be precise. Look for sets with a “rolled edge” or a slightly rounded rim. I’ve always relied on brands like OXO (their stainless line) or All-Clad; they have enough heft and a smooth, rounded finish that they glide right through even the densest flour without catching.

    How do I know if a set is actually solid stainless steel rather than just cheap metal with a thin coating?

    Here’s the trick: pick up the set. If they feel light as a feather, they’re likely cheap, plated tin or thin aluminum. Real, solid stainless steel has a certain heft to it. Also, look closely at the edges. Cheap sets are often stamped thin and can feel sharp or flimsy. You want something with a substantial rim and a weight that feels balanced in your hand. If it feels like a toy, leave it on the shelf.

    Is it worth getting a set with long handles for deep mixing bowls, or is that just another unnecessary gadget?

    It’s not a gadget; it’s a matter of ergonomics. If you’re working with deep commercial-sized mixing bowls or even just a standard large glass bowl, short handles are a nightmare. You end up scraping your knuckles against the rim just to get a measurement, which is messy and frustrating. Get the long handles. They keep your hands clean and your measurements precise. It’s a small practical difference that makes a huge impact on your workflow.