Category: Cookware

  • Using a Slotted Turner for Greasy Foods

    Using a Slotted Turner for Greasy Foods

    I remember standing in the middle of a high-volume commercial kitchen during a Saturday night rush, watching a junior prep cook struggle with a cheap, thin piece of stamped metal that bent the second it hit a heavy burger patty. He was trying to drain grease using a flimsy tool, and all he ended up doing was splashing hot oil everywhere and making a mess of the line. It was a perfect example of why you can’t cut corners on the basics; a mediocre slotted turner isn’t just a nuisance, it’s a safety hazard and a frustration you don’t need when things are heating up.

    I’m not here to sell you on some high-tech, silicone-coated gadget that will melt the first time it touches a hot pan. My goal is to help you cut through the marketing noise and find the heavy-duty, reliable tools that actually earn their spot in your drawer. I’ll show you exactly what to look for in a slotted turner so you can stop wasting money on disposable junk and start investing in gear that works as hard as you do.

    Table of Contents

    Stainless Steel Kitchen Utensils Built to Last a Lifetime

    Stainless Steel Kitchen Utensils Built to Last a Lifetime

    When I was managing commercial kitchens, I saw a graveyard of melted plastic and snapped nylon handles every single month. It was a massive waste of money. If you want to break that cycle, you need to invest in stainless steel kitchen utensils that can handle the heat without flinching. Unlike the flimsy, lightweight versions you find in big-box stores, a high-quality steel turner has a bit of heft to it. That weight isn’t just for show; it gives you the leverage you need when you’re flipping a heavy piece of protein or scraping the bottom of a pan.

    The real beauty of steel is its durability, but you have to be smart about what you pair it with. If you’re working with your favorite seasoned cast iron or a high-end ceramic coating, you’ll want a non-stick pan friendly turner made of silicone or wood instead. However, for your stainless steel or carbon steel pans, a metal tool is king. It allows you to get right into the edges of the pan to prevent sticking. Just make sure you’re choosing heat resistant kitchen tools with solid construction so you aren’t constantly replacing them every time a holiday rush hits your home kitchen.

    The Essential Difference Between Slotted vs Solid Turner

    The Essential Difference Between Slotted vs Solid Turner.

    I see people get tripped up by this all the time, thinking they need a drawer full of every possible spatula. In reality, the choice between a slotted vs solid turner comes down to how you actually handle heat and moisture. A solid turner is your workhorse for anything that needs structural integrity—think heavy burgers, thick pancakes, or flipping a delicate piece of fish where you don’t want the juices escaping prematurely. It’s the heavy lifter that stays put when things get serious.

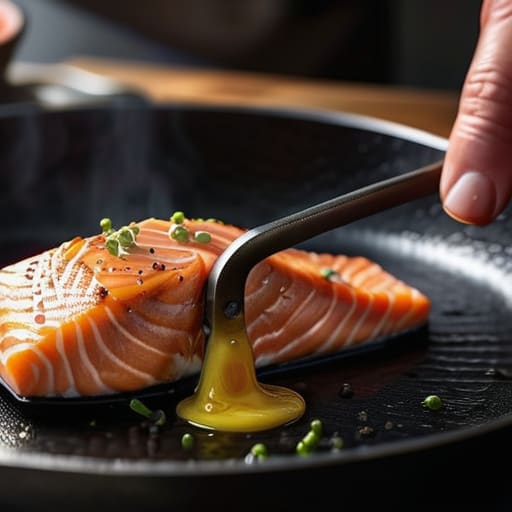
    On the flip side, you need drainage cooking tools if you want to avoid a greasy mess. If you’re frying something in oil or cooking vegetables that release moisture, a slotted version is indispensable. It lets the excess fat or liquid slip right back into the pan, ensuring your food stays crisp rather than soggy. I always tell my clients that if you’re looking for the best spatula for frying, you should probably have one of each. Just make sure that if you’re using metal, you’re pairing it with heavy-duty pans, or opt for a high-quality silicone version if you’re protecting a delicate non-stick surface.

    Five Rules for Choosing a Turner That Won't End Up in the Trash

    • Check the weight before you buy. If a turner feels like a toy in your hand, it’s going to fail you when you’re trying to flip a heavy piece of salmon or a thick burger. You want something with enough heft to feel substantial, but not so heavy that it tires your wrist out during a long prep session.
    • Look for a seamless design. I’ve seen too many cheap tools where the metal meets a wooden or plastic handle with a visible gap. That gap is a breeding ground for bacteria and old grease. Stick to solid stainless steel or high-quality, single-piece construction to keep things sanitary and easy to clean.
    • Test the “slip” factor. A good slotted turner should have edges that are thin enough to slide under a delicate egg without tearing it, but sturdy enough not to bend under pressure. If the edge looks blunt and thick, it’s going to struggle with anything more nuanced than a frozen patty.
    • Avoid the “set” trap. Don’t let a salesperson convince you that you need a twelve-piece utensil set. Most of those sets are filled with mediocre, thin-gauge metal that will warp the first time it hits a hot pan. Buy one high-quality slotted turner instead of twelve pieces of junk.
    • Mind the slot size. If you’re doing a lot of frying, you want slots that are wide enough to let oil drain away quickly, but not so large that your food falls through the gaps. It’s a balancing act, but a well-proportioned turner makes all the difference when you’re trying to keep things crisp rather than greasy.

    My Golden Rules for Choosing a Turner

    Skip the cheap plastic; invest in a heavy-duty stainless steel slotted turner that won’t melt or snap when you’re flipping something heavy.

    Match the tool to the task—use a slotted turner for anything involving grease or liquid to keep your plate clean, and save the solid turner for things that need to stay intact.

    Look for weight and balance; a tool that feels flimsy in your hand will only make cooking feel like a chore rather than a process.

    ## The Real Test of a Good Tool

    “I’ve seen enough flimsy, melted plastic spatulas end up in the trash to know that a good slotted turner isn’t a luxury—it’s a necessity. If it can’t handle the heat of a heavy pan or lift a piece of protein without bending, it doesn’t belong in your drawer.”

    Rosalind Hayter

    Choosing Quality Over Clutter

    Choosing Quality Over Clutter with utensils.

    At the end of the day, choosing the right slotted turner isn’t about having a drawer full of gadgets; it’s about having the right tool for the job. We’ve covered why you need to ditch those flimsy, melting plastic versions in favor of heavy-duty stainless steel, and why understanding the distinction between a solid turner and a slotted one will save you so much frustration at the stove. Whether you are draining fat from a seared burger or lifting a delicate piece of fish out of a pan, the tool should feel like an extension of your hand, not a piece of junk you’re afraid will snap. Investing in a high-quality, professional-grade utensil means you stop replacing the same cheap item every six months and start building a kitchen that actually functions.

    I know it can be tempting to scroll through those endless “kitchen must-have” lists online, but please, resist the urge to buy into the hype. A well-run kitchen isn’t built on trends; it is built on intentionality and durability. When you buy things that are meant to last a lifetime, you aren’t just saving money in the long run—you are creating a space where you can actually focus on the joy of cooking rather than the annoyance of broken tools. Pick up something solid, use it every single day, and make it work for you.

    Frequently Asked Questions

    Should I worry about a stainless steel slotted turner scratching my non-stick pans?

    Yes, you absolutely should. If you’re using a stainless steel turner on a non-stick pan, you’re essentially sandpapering your coating away. Once that layer is gouged, your pan is trash. I always tell my clients: match your tools to your surfaces. If you love your non-stick pans, stick to high-heat silicone or wood. Save the heavy-duty stainless steel for your cast iron or stainless steel cookware where it belongs.

    How do I know if the handle is securely attached or if it's going to snap when I'm flipping something heavy?

    That’s the exact kind of question that saves you from a kitchen disaster. When you’re testing a turner, look for a single-piece construction—where the metal head and handle are one continuous piece of steel. If there’s a joint or a rivet, give it a firm tug. If it feels even slightly springy or loose, walk away. You want something solid that won’t snap the second you try to flip a heavy ribeye.

    Is it worth getting a heavy-duty metal turner if I mostly cook in a small apartment with limited drawer space?

    Listen, I’ve organized tiny galley kitchens where every inch of drawer space feels like a battlefield. Here’s the truth: don’t let “limited space” trick you into buying a drawer full of cheap, flimsy tools. One heavy-duty metal turner is better than three plastic ones that will eventually melt or snap. It takes up the same amount of room but does the work of three. Buy one good tool, skip the rest, and save your space.

  • Different Types of Spatulas for Baking

    Different Types of Spatulas for Baking

    I remember standing in the middle of a high-volume catering kitchen during a Saturday night rush, watching a junior prep cook struggle with a cheap, cracked piece of silicone that was literally melting into a batch of heavy cream. It was a small thing, but that flimsy mixing spatula was a total failure, and it nearly ruined an entire tray of dessert. It’s the same nonsense I see in home kitchens every single day—people buying those colorful, multi-piece sets from big-box stores that feel like toys and break before the first month is over. You don’t need a drawer full of cheap plastic; you need tools that can actually handle the heat.

    I’m not here to sell you on some trendy, gadget-of-the-month nonsense or tell you that you need a specialized tool for every single ingredient. Instead, I’m going to show you how to pick a mixing spatula that is built to last a lifetime. We’re going to talk about materials, weight, and edge strength so you can stop throwing money down the drain. My goal is simple: I want to help you build a kitchen that actually works for you.

    Table of Contents

    Why Food Grade Silicone Tools Outlast the Trends

    I’ve seen it a thousand times in commercial kitchens: a drawer full of cheap, cracked plastic tools that end up in the landfill within six months. It’s a waste of money and a waste of space. When you invest in food grade silicone tools, you aren’t just buying another gadget; you’re buying durability. Unlike those flimsy nylon versions that warp or melt the second they hit a hot pan, a high-quality heat resistant silicone spatula can handle the rigors of a busy kitchen without losing its shape or shedding microplastics into your food.

    Beyond just surviving the heat, these tools are built for performance. If you’re serious about your baking, you need items that actually work with your ingredients rather than against them. I always tell my clients that a good non-stick bowl scraper is one of those baking utensil essentials that makes or breaks your workflow. It’s about efficiency and precision—getting every last bit of batter out of the bowl so nothing goes to waste. Stop chasing the latest kitchen trends and start building a kit that actually holds up to real cooking.

    The Truth About a Heat Resistant Silicone Spatula

    The Truth About a Heat Resistant Silicone Spatula

    Here is the truth: most people buy a cheap spatula because it’s easy, but they end up replacing it every six months when the head snaps off or the edge starts fraying. If you want to stop that cycle, you need to invest in a high-quality heat resistant silicone spatula. I’ve seen enough commercial kitchens to know that the difference between a professional setup and a disorganized mess is the quality of the tools. A real silicone tool shouldn’t just be “good enough”; it needs to be sturdy enough to handle high heat without leaching chemicals or warping into a useless shape.

    When you’re working through baking utensil essentials, look for something with a solid core. A flimsy, hollow tool is a waste of drawer space. I prefer a tool that doubles as a reliable non-stick bowl scraper, allowing you to get every last bit of batter out of the bowl without fighting the surface. Whether you are folding delicate egg whites or scraping a heavy dough, the flexibility should be intentional, not a sign of cheap manufacturing. Get one that feels substantial in your hand, and you won’t have to go shopping for another one for a decade.

    Five Rules for Choosing a Spatula That Won't Quit on You

    • Look for a seamless design. If there is a seam where the head meets the handle, that’s just a place for old batter and bacteria to hide. I always look for a single, continuous piece of silicone; it’s easier to clean and won’t snap off mid-fold.
    • Test the “flex” factor. You want something with enough give to scrape every last drop out of a bowl, but enough structure that you aren’t fighting it when you’re trying to fold heavy dough. If it feels like a wet noodle, put it back.
    • Check the heat rating on the packaging. Don’t just take a salesperson’s word for it. I need to know exactly how many degrees that silicone can handle before it starts to degrade. If you’re working with hot sauces or tempering chocolate, you can’t afford to guess.
    • Avoid the “set” mentality. You don’t need a 12-piece collection of colorful spatulas in every shade of the rainbow. Pick two or three high-quality, neutral-colored tools that do the job well. Most of those cheap, multi-piece sets are just more clutter for your drawer.
    • Prioritize a heavy-duty handle. A flimsy, hollow handle makes the tool feel unbalanced and cheap. I prefer a solid core or a weighted handle that feels substantial in my hand; it gives you much better control when you’re working through thick mixtures.

    The Bottom Line on Your Spatula

    Stop chasing cheap plastic replacements; invest in a single, high-quality food-grade silicone tool that won’t melt or harbor bacteria.

    Check the heat rating before you buy—if it can’t handle your hottest pan, it’s just more clutter for your drawer.

    Look for seamless designs to avoid the trap of food getting stuck in cracks, because a tool that’s hard to clean is a tool you won’t use.

    The Cost of Cheap Tools

    I’ve seen enough commercial kitchens to know that a cheap, flimsy spatula isn’t a way to save money—it’s just a recurring expense. If you’re tired of replacing a melted piece of plastic every three months, stop looking for a bargain and start looking for a tool that can actually handle the heat.

    Rosalind Hayter

    Stop Buying, Start Investing

    Stop Buying, Start Investing in quality spatulas.

    At the end of the day, choosing the right mixing spatula isn’t about finding the prettiest color in a social media ad; it’s about understanding the physics of your kitchen. We’ve covered why you need to ditch those flimsy, cheap plastic versions that warp under heat and why high-quality, food-grade silicone is the only way to go if you want a tool that actually works. A spatula should be an extension of your hand, capable of scraping every last bit of batter from a bowl without melting or snapping. When you invest in a solid, heat-resistant piece, you aren’t just buying a kitchen utensil—you are eliminating a recurring expense and a constant source of frustration.

    I know it feels easier to just grab the five-dollar pack from the big-box store, but your kitchen deserves better than disposable junk. My goal has always been to help you build a space that functions with precision, and that starts with the small, fundamental tools you use every single day. Stop chasing the trends and start building a collection of gear that can stand the test of time. Once you have the right tools in your drawer, you can finally stop worrying about your equipment and get back to the joy of actually cooking.

    Frequently Asked Questions

    How can I tell if a silicone spatula is actually high-quality or just cheap, dyed-down plastic?

    Don’t let a pretty color fool you. When you pick up a spatula, check the weight and the “give.” High-quality silicone feels substantial and dense, not hollow or flimsy. Give the head a firm squeeze; it should snap back instantly without any permanent deformation. Most importantly, look at the handle. If it’s a single, seamless piece of silicone from tip to base, you’re in good shape. If there’s a plastic joint where they meet, it’s just another piece of junk waiting to snap.

    Is it worth getting a spatula with a solid core, or is a flexible one better for scraping bowls?

    If you’re only buying one, go with a solid core. In my years managing commercial kitchens, I learned that a flimsy, all-silicone spatula is useless for heavy lifting or stirring thick batters; it just flops around. You need that internal support for durability and strength. However, if you’re serious about scraping every last drop of batter from a bowl, a flexible edge is key. Ideally, find a hybrid: a solid core for stability with a tapered, flexible head.

    Can I actually put these silicone tools in the dishwasher, or will the heat ruin them over time?

    You can, but don’t get lazy about it. Most high-quality, food-grade silicone is dishwasher safe, but the intense, concentrated heat of a drying cycle is what eventually does the damage—not the water. If you want your tools to stay flexible and avoid that weird, tacky feeling, I’d suggest hand-washing them. It takes thirty seconds, and it ensures you aren’t replacing a perfectly good spatula every two years just because of a machine cycle.

  • How to Use a Serrated Bread Knife

    How to Use a Serrated Bread Knife

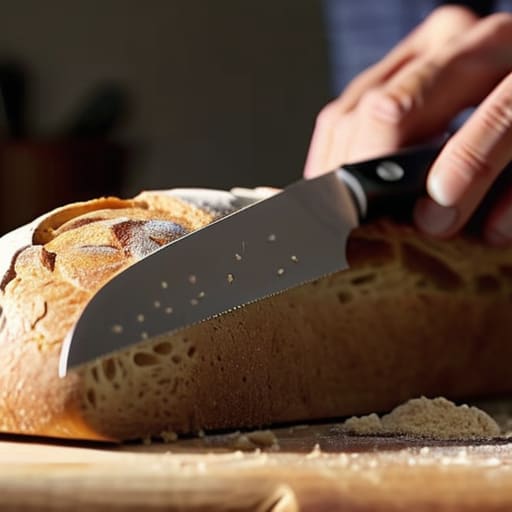
    I spent twenty years in commercial kitchens where efficiency wasn’t a luxury—it was a requirement. I’ve seen countless home cooks spend fifty dollars on a flashy, serrated gadget that looks beautiful in a catalog but performs like a butter knife the moment it hits a sourdough crust. Most of these “designer” options are just expensive junk masquerading as professional gear. If you are still struggling to slice through a simple baguette without crushing the airy center into a sad, dense pancake, you don’t need a fancy set of twenty knives; you just need a properly forged bread knife that actually has some weight behind it.

    I’m not here to sell you on the latest kitchen trend or convince you that a gold-plated blade will make you a better baker. My goal is to cut through the marketing noise and help you find a tool that will last a lifetime. I’m going to show you exactly what to look for in terms of blade length, handle grip, and steel quality so you can stop wasting money on replacements every six months. Let’s get your kitchen working for you, starting with the one tool you actually need.

    Table of Contents

    Why Precision Bread Slicing Matters for Your Sourdough

    Why Precision Bread Slicing Matters for Your Sourdough

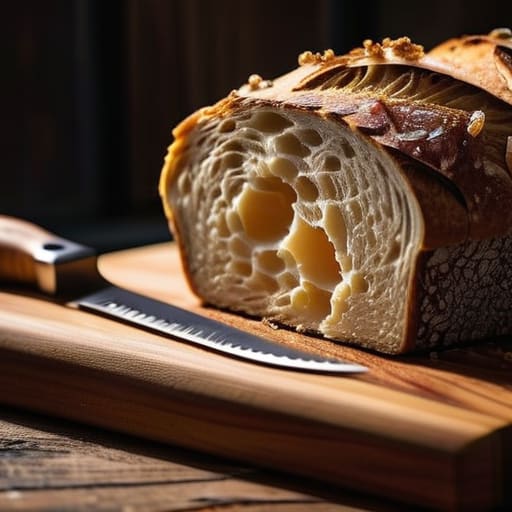
    There is nothing quite as heartbreaking as spending three days nurturing a sourdough starter, only to watch your hard work collapse into a mangled, squashed mess the moment you try to slice it. When you’re slicing sourdough bread, you aren’t just cutting through dough; you are navigating a structural masterpiece with a delicate, airy crumb and a stubborn, caramelized crust. If your blade is dull or lacks the right teeth, you end up crushing those beautiful air pockets instead of separating them.

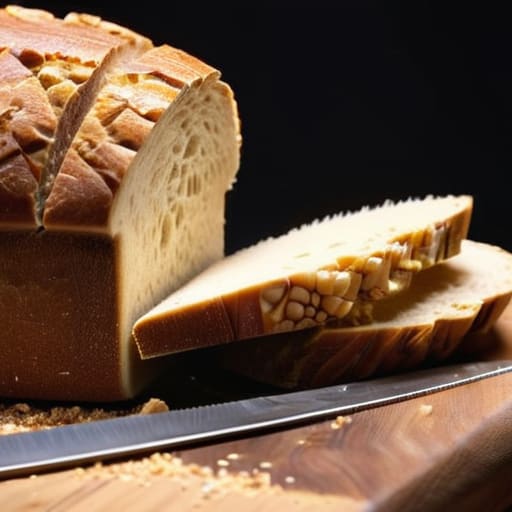
    To get that clean, professional cross-section, you need precision bread slicing that respects the loaf’s integrity. A proper tool allows the teeth to saw through the hard exterior without applying downward pressure that ruins the interior texture. I’ve seen too many home bakers try to use a standard chef’s knife for this, only to end up with a dense, gummy slab. If you want to honor the fermentation process, you have to use the best knife for crusty loaves—one that bites into the crust and glides through the center without a fight.

    The Truth About Stainless Steel Cutlery and Lasting Value

    The Truth About Stainless Steel Cutlery and Lasting Value

    I’ve seen too many people walk into a kitchen supply store and get lured in by those flashy, colorful sets that look great in a catalog but feel like toys in your hand. Most of that cheap, stamped metal won’t hold an edge for more than a month of regular use. If you’re serious about your kitchen, you need to invest in high-quality stainless steel cutlery that actually has some weight to it. I always tell my clients: if it feels flimsy in your palm, it’s going to fail you when you’re trying to get through a dense, artisanal boule.

    When you opt for forged steel, you aren’t just buying a tool; you’re buying decades of reliability. A decent blade is an investment in your sanity. Instead of constantly fighting a dull edge, a quality tool makes slicing sourdough bread feel effortless rather than a workout. You also have to consider long-term upkeep. While some people fear maintenance, proper serrated edge maintenance is actually quite straightforward if you have a tool worth caring for. Don’t settle for disposable junk that ends up in a landfill by next Christmas.

    Five Rules for Choosing a Knife That Actually Works

    • Ignore the serrated “scalloped” blades that look like tiny saw teeth; they tend to tear the soft crumb of a good loaf. Look for a traditional straight-serrated edge that bites into the crust without shredding the inside.
    • Weight matters more than you think. A knife that feels like a feather in your hand will bounce off a hard sourdough crust. You want something with enough heft to let the blade do the work so you aren’t straining your wrist.
    • Check the bolster and the tang. If the blade isn’t full-tang—meaning the metal runs all the way through the handle—it’s going to feel wobbly and cheap. A solid, continuous piece of steel is what you want for balance and longevity.
    • Avoid the “set” trap. Don’t buy a 20-piece knife block just because it’s on sale at a big-box store. Most of those knives are filler. Spend that same money on one high-quality, forged bread knife instead.
    • Test the grip before you commit. In a kitchen, things get messy. If the handle is smooth plastic that turns into a slip-hazard the second your hands get a little flour or moisture on them, put it back on the shelf.

    The Bottom Line on Your Next Blade

    Stop buying those cheap, serrated sets that lose their edge after three loaves; invest in a single, high-quality forged blade that actually bites into the crust.

    A good bread knife isn’t a luxury—it’s a tool that prevents you from crushing your hard work into a pile of crumbs.

    Prioritize weight and handle stability over flashy designs; if the knife feels unbalanced in your hand, it’s going to be a chore to use, no matter how sharp it claims to be.

    The Cost of a Cheap Blade

    “I’ve seen too many people spend forty dollars on a beautiful, artisanal loaf only to crush it into a mess with a dull, serrated blade that belongs in a junk drawer. A real bread knife isn’t a luxury; it’s the difference between enjoying your hard work and wasting it.”

    Rosalind Hayter

    Investing in Your Kitchen Habits

    Investing in Your Kitchen Habits: bread knife.

    At the end of the day, choosing the right bread knife isn’t about collecting more silverware; it’s about respecting the effort you put into your baking. We’ve talked about why a serrated edge is non-negotiable for a crusty sourdough and why you should steer clear of those flimsy, stamped-metal sets that lose their teeth after three months. If you invest in a high-quality, forged blade, you aren’t just buying a tool—you are investing in your daily workflow. A proper knife prevents the crushed crumb and wasted loaves that come from fighting your equipment, ensuring that your hard work in the kitchen actually shows up on the plate.

    My advice is simple: stop chasing the latest kitchen gadget trends and start focusing on foundational quality. A single, well-made bread knife that you maintain properly will outlast a dozen cheap replacements and serve you for decades. When you stop worrying about whether your tools are going to fail you, you can finally focus on what actually matters: the smell of fresh bread and the joy of sharing a meal. Build a kitchen that supports your craft, buy things that actually last, and let the tools do the heavy lifting so you can get back to the cooking.

    Frequently Asked Questions

    How often do I actually need to sharpen a serrated blade compared to my chef's knife?

    Look, I get the confusion, but they require different approaches. You’ll find yourself honing your chef’s knife much more frequently—think every few weeks if you’re a daily cook—to maintain that razor edge. A serrated bread knife is a different beast. Because those teeth are designed to saw through tough crusts, they hold their “edge” longer. Don’t go hacking at it with a whetstone; just use a honing rod occasionally and keep it clean.

    Is there really a difference between a cheap serrated knife from a big-box store and a forged one, or is it just marketing?

    It’s not marketing; it’s physics. A big-box serrated knife is usually stamped from a thin sheet of metal. They’re light, flimsy, and the teeth dull almost immediately because the steel lacks density. A forged knife has weight and a continuous grain. When you saw through a crust, that extra heft does the work for you, rather than you wrestling the blade. One is a disposable tool; the other is an investment.

    Should I be looking for a long blade for sandwich slicing, or is a shorter one better for crusty artisan loaves?

    Don’t get caught in the middle with a knife that’s too short. If you’re slicing through those hard, artisan crusts, you need length. A longer blade—at least 9 or 10 inches—allows you to use a smooth, sawing motion without putting downward pressure that crushes your beautiful crumb. A short blade is fine for a quick snack, but for real loaves, go long. It gives you the leverage and reach you need to slice clean every single time.

  • Using an Offset Spatula for Decorating

    Using an Offset Spatula for Decorating

    I still remember a frantic Saturday night during my years managing high-volume catering, where I watched a junior cook try to frost a tiered cake using a cheap, straight-edged turner. It was a disaster; the frosting tore, the edges looked like a mountain range, and he ended up wasting half the batch. He was trying to make do with whatever was in the drawer instead of using a proper offset spatula, and that’s a mistake I see home cooks making every single day. People think they need a twenty-piece silicone set to be “professional,” but you don’t need a gadget for every minor task—you just need the right tool that actually works the way it was designed to.

    I’m not here to sell you on some overpriced, trendy kitchen gadget that will end up in a junk drawer by next Christmas. My goal is to cut through the noise and help you identify a solid, well-balanced offset spatula that will feel like an extension of your own hand. I’ll show you exactly what to look for in terms of metal quality and handle grip so you can buy once and buy right.

    Table of Contents

    Ditch the Plastic Real Stainless Steel Spatula Benefits

    Ditch the Plastic Real Stainless Steel Spatula Benefits

    I’ve seen it a thousand times in commercial kitchens: a cook reaches for a cheap, flimsy plastic tool right when they need precision, only to have it bend or snap mid-task. When you’re working with delicate batters or smoothing out a layer of buttercream, you need something that holds its shape. This is where the stainless steel spatula benefits really shine. Unlike plastic, which can warp under heat or lose its edge, a solid metal tool provides the structural integrity required for serious work.

    If you are just starting out with bakery tools for beginners, it’s tempting to grab a multi-pack of colorful silicone scrapers. Don’t fall for it. While silicone has its place for scraping bowls, it lacks the rigidity needed for a smooth icing application. A metal tool allows you to exert just the right amount of pressure to level a cake without the blade flexing unpredictably. If you want to master professional pastry decorating equipment, you have to stop fighting your tools and start using ones that actually respond to your hand.

    Essential Bakery Tools for Beginners Who Value Quality

    Essential Bakery Tools for Beginners Who Value Quality.

    If you’re just starting out, don’t fall into the trap of buying a twenty-piece “starter kit” from a big-box store. Most of those sets are just filler. When I’m looking at bakery tools for beginners, I tell people to focus on the foundation. You need a few reliable pieces that won’t bend or warp when you’re halfway through a batch of buttercream. A decent bench scraper and a heavy-duty whisk are non-negotiable, but the real magic happens when you have tools that allow for precision rather than just “getting it done.”

    When it comes to finishing a cake, the difference between a messy job and a professional look comes down to your choice of gear. This is where the debate of silicone vs metal spatula actually matters. While silicone is great for scraping every last bit of batter out of a bowl, you cannot achieve a smooth icing application with it. For leveling layers or smoothing out sides, you need the rigidity of metal. Investing in a few high-quality pieces now means you won’t be fighting your equipment when you’re trying to master advanced cake frosting techniques.

    How to Pick a Spatula That Won't Let You Down

    • Check the bend before you buy. You want a tool with enough “give” to follow the curve of a cake, but enough structural integrity that it doesn’t flop like a wet noodle when you’re spreading heavy buttercream.
    • Feel the weight in your hand. If it feels like a toy, it’s going to act like one. A professional-grade offset spatula should have a balanced weight that makes the tool feel like an extension of your arm, not a piece of scrap metal you’re struggling to control.
    • Avoid the “one size fits all” trap. I’ve seen too many people try to frost a whole layer cake with a tiny 4-inch spatula; it’s a recipe for frustration and uneven edges. Get a medium one for general work and a larger one for smoothing big surfaces.
    • Inspect the handle attachment. If the metal blade is just glued or weakly crimped to a plastic handle, it’s going to snap or wobble within a month. Look for a seamless transition or a solid rivet construction that can handle daily use.
    • Test the edge smoothness. Run your thumb (carefully!) along the edge of the blade. If it feels jagged or uneven, it’s going to leave streaks in your frosting or icing. A quality tool should be smooth as glass right off the shelf.

    The Bottom Line on Buying Better

    Stop buying cheap plastic scrapers that snap when you actually need them; invest in a solid, weighted offset spatula that feels like a real tool in your hand.

    Focus on material over trends—stainless steel is the only way to go if you want a tool that survives a lifetime of heavy dough and hot pans.

    A good spatula is about more than just spreading frosting; it’s about precision and control, so don’t settle for anything that feels flimsy or awkward.

    The Tool That Makes or Breaks Your Finish

    “I’ve seen too many home bakers ruin a perfectly good cake because they were fighting against a flimsy, bending spatula; if your tool doesn’t have the weight and the rigid edge to hold its own against thick frosting, you aren’t decorating—you’re just struggling.”

    Rosalind Hayter

    The Bottom Line on Your Next Spatula

    The Bottom Line on Your Next Spatula.

    At the end of the day, choosing an offset spatula isn’t about collecting more kitchen clutter; it’s about investing in a tool that actually does its job. We’ve covered why you need to steer clear of those flimsy, meltable plastic versions and why a heavy-duty stainless steel model is the only way to go if you want something that survives a decade of frosting cakes and spreading dough. Remember, the right tool should feel like an extension of your hand, not a piece of junk you have to fight against every time you reach for it. Focus on durability and weight, and you’ll find that a single, high-quality spatula can replace a drawer full of mediocre substitutes.

    I know it can feel overwhelming when you see a thousand different gadgets on every social media feed, but I’m telling you: simplicity wins every single time. You don’t need a specialized spatula for every niche task if you have one reliable, well-made tool that handles the heavy lifting. My advice? Buy it once, buy it right, and then get back to the actual joy of cooking. A functional kitchen isn’t built on trends; it’s built on the steady habits and the reliable gear that helps you create something delicious without the frustration.

    Frequently Asked Questions

    How do I know if I need a small offset spatula for delicate work or a larger one for spreading frosting on a whole cake?

    Think about your actual workflow, not just what looks pretty on a shelf. If you’re mostly smoothing out buttercream on a tiered cake or spreading thick batter in a pan, go for the 8-to-10-inch model; you need that leverage. But if you’re doing fine detail work, like smoothing a single cupcake or leveling out small batches of frosting, a 4-inch spatula is your best friend. Don’t buy both unless you actually bake every weekend.

    Is there a real difference between a flexible blade and a stiff one when I'm working with heavy batters?

    There’s a massive difference, and choosing the wrong one is a recipe for frustration. For heavy batters—think thick cookie dough or dense pound cake—you want a stiffer blade. A flimsy, flexible one will just buckle and bend under the weight, leaving you fighting the bowl. You need that resistance to actually move the mass. Save the highly flexible blades for smoothing delicate frosting or spreading thin layers of jam; they have their place, but they won’t win a fight with heavy dough.

    Can I actually use a stainless steel offset spatula for regular cooking, or is it strictly for baking?

    Look, I’ve seen too many people treat their baking tools like they belong in a separate universe. Can you use a stainless steel offset spatula for regular cooking? Absolutely. I use mine constantly for flipping delicate fish fillets or sliding a piece of seared halloumi onto a plate without it breaking. It’s all about the leverage and the thin, flexible edge. Just don’t go trying to scrape a heavy-bottomed skillet with it; keep it for the delicate stuff.

  • How to Use a Steamer Basket

    How to Use a Steamer Basket

    I spent two decades in commercial kitchens where efficiency wasn’t a suggestion—it was survival. I’ve watched countless home cooks waste money on those flimsy, colorful silicone contraptions that melt the moment they hit high heat or warp so badly they won’t even sit level in a pot. It drives me up the wall. You don’t need a high-tech, multi-piece gadget set to cook vegetables properly; what you actually need is a single, reliable steam basket made of real stainless steel. If it isn’t heavy enough to feel substantial in your hand, it’s probably just expensive plastic junk destined for a landfill.

    I’m not here to sell you on a lifestyle trend or a kitchen gadget that promises to change your life. My goal is to give you the straight truth based on years of professional catering and home organizing. I’m going to show you exactly what to look for in a quality piece of equipment so you can stop wasting money on disposables. We’re going to focus on durability, ease of cleaning, and tools that actually earn their spot in your cabinets.

    Table of Contents

    Why a Stainless Steel Steamer Insert Outlasts the Trends

    I’ve seen it a thousand times in professional kitchens and in clients’ homes: someone buys a colorful, flimsy silicone gadget thinking it’s the latest “must-have” tool, only to have it warp or smell like burnt chemicals six months later. I’m not a fan of the disposable culture that’s taken over our cooking spaces. When you invest in a high-quality stainless steel steamer insert, you aren’t just buying a piece of metal; you’re buying a tool that will be just as functional twenty years from now as it is today. It won’t crack, it won’t stain, and it won’t leach anything into your food.

    Beyond the sheer durability, there is a practical side to why I always steer people toward metal. While some people argue about silicone steaming basket benefits like flexibility, metal offers a level of heat distribution and stability that silicone simply can’t match. If you are looking for the best steamer for dumplings or simply trying to master the art of steaming vegetables for nutrition, you need something that can handle constant, high-heat use without degrading. A solid steel insert is a one-time purchase that actually respects your budget and your health.

    Deciding Between Durability and Silicone Steaming Basket Benefits

    Deciding Between Durability and Silicone Steaming Basket Benefits

    Now, I know what you’re thinking. You’ve seen those colorful, floppy silicone versions in every big-box store, and they look incredibly convenient. There are certainly silicone steaming basket benefits to consider, mainly that they’re easy to squeeze into a pot and won’t scratch your expensive cookware. If you’re someone who only cooks once a month and wants something that takes up zero headspace in your cabinet, they might tempt you.

    However, from my years managing high-volume kitchens, I’ve learned that convenience often comes at the cost of longevity. Silicone tends to degrade, trap odors, or even warp if you aren’t careful with heat levels. If you are serious about preserving nutrients through steaming, you want a tool that provides consistent, even heat distribution. A heavy-duty stainless steel insert won’t warp or leach anything into your food, ensuring that your vegetables stay crisp and vibrant every single time. I always tell my clients: if you want a tool that survives a decade of heavy use rather than a season of convenience, stick to the metal.

    How to Actually Use Your Steamer Without Making a Mess

    • Stop overcrowding the basket. I see people try to pile vegetables halfway up the sides, which just results in uneven cooking and mushy bottoms. Give your food space to breathe so the steam can circulate properly.
    • Always use a tight-fitting lid. If your lid is loose or doesn’t seal well, you’re just wasting energy and losing all that precious heat. If you don’t have a matching lid, find a heavy plate or a piece of foil to trap the steam.
    • Don’t forget to season your basket if it’s metal. If you’re using a stainless steel insert, give it a quick scrub and a thorough dry after every use to prevent water spots and keep it looking professional.
    • Time your ingredients. You can’t throw broccoli and delicate fish in at the same time and expect success. Start with the dense root vegetables and add the greens or proteins later so everything finishes at the exact same moment.
    • Use the leftover water. Don’t just dump the steaming liquid down the drain once you’re done. That water is infused with the nutrients and essence of whatever you just cooked; use it as a base for a quick soup or a simple pan sauce.

    The Bottom Line on Steaming Gear

    Stop wasting money on cheap silicone or plastic inserts that warp and degrade; invest in a heavy-duty stainless steel basket that can handle daily use for years.

    Choose your material based on your actual cooking habits—stainless steel for longevity and heat distribution, or silicone if you absolutely need the flexibility for tight spaces.

    A good steamer is about more than just a gadget; it’s about building a reliable, efficient system in your kitchen that makes healthy cooking a habit rather than a chore.

    The Real Cost of Convenience

    “I’ve seen enough flimsy, colorful silicone gadgets end up in the landfill to know that if a steamer can’t handle a decade of heavy use, it’s not a tool—it’s just more clutter. Buy the stainless steel; it’s the only way to ensure you’re cooking with gear that actually works as hard as you do.”

    Rosalind Hayter

    Making the Right Choice for Your Kitchen

    Making the Right Choice for Your Kitchen.

    At the end of the day, choosing a steam basket isn’t about picking the prettiest thing on the shelf; it’s about deciding how much time you want to spend replacing broken gear. If you want something that can handle high heat and heavy use without warping or smelling like old vegetables, a solid stainless steel insert is the only way to go. Silicone has its place for quick, light tasks, but it’s ultimately a compromise on longevity. I’ve seen enough commercial kitchens to know that investing in quality materials upfront saves you a massive headache—and a lot of wasted money—down the road.

    My advice? Stop looking for the “perfect” gadget and start looking for the tool that actually fits your cooking habits. A kitchen is a living, breathing space, and it should be filled with items that serve a purpose and stand the test of time. Don’t let the marketing hype convince you that you need a dozen different specialized steaming accessories. Pick one reliable, high-quality basket, learn how to use it well, and focus on the food you’re creating. Good cooking is about the hands and the habits, not the clutter in your cabinets.

    Frequently Asked Questions

    How do I know if a stainless steel basket will actually fit my existing pots and pans?

    Don’t just eyeball it; that’s how you end up with a piece of metal sitting uselessly in a drawer. Grab your measuring tape and check the inside diameter of your widest pot. You want a basket that sits securely on the rim without jamming against the sides. If you’re between sizes, go slightly smaller. A little wiggle room is better than a basket that won’t settle in properly.

    Is it worth spending the extra money on a heavy-duty steamer, or is a cheap one just as good?

    Look, I’ve seen enough cheap, flimsy baskets warp and melt in commercial kitchens to know the truth. If you buy the bargain-bin version, you’re just paying for something you’ll have to replace in six months. It’s a waste of money. Invest in a heavy-duty stainless steel model once. It sits stable, handles high heat without a fuss, and honestly, it’s much easier to clean. Buy it once, buy it right, and stop the cycle of waste.

    How often should I be deep-cleaning my steamer to prevent mineral buildup and odors?

    Don’t let it sit too long. I’d say aim for a thorough deep-clean once a week, especially if you’re using hard water. If you notice those white, chalky mineral spots forming, it’s time to act. A quick soak in white vinegar will dissolve that buildup without you needing to scrub your hands raw. If it starts smelling a bit off, you’ve waited too long. Keep it clean, keep it fresh.

  • How to Use a Tea Infuser for Loose Leaves

    How to Use a Tea Infuser for Loose Leaves

    I’ve spent two decades in commercial kitchens and high-pressure catering environments, and if there is one thing I’ve learned, it’s that most kitchen gadgets are just expensive landfill in waiting. I am so tired of seeing people drop twenty dollars on a “designer” silicone tea infuser that’s really just a glorified piece of plastic destined to stain and warp within a month. You don’t need a specialized gadget with five different moving parts and a fancy box; you need something that actually works without leaving a pile of fine tea dust at the bottom of your cup.

    I’m not here to sell you on the latest trendy kitchen aesthetic or some over-engineered contraption you’ll lose in your junk drawer by next Tuesday. My goal is to cut through the marketing noise and show you exactly what to look for in a tool that will last a lifetime. I’m going to break down the only materials worth your money and how to pick a design that makes your morning ritual simple rather than a chore. Let’s get your kitchen sorted with the right tools, not just more clutter.

    Table of Contents

    Why a Fine Mesh Tea Filter Changes Everything

    Why a Fine Mesh Tea Filter Changes Everything

    Look, I’ve spent enough time in commercial kitchens to know that the smallest tools often make the biggest difference in the final product. When you’re using those cheap, oversized baskets, you’re usually left with a cup full of “tea dust” and grit that ruins the texture. Switching to a fine mesh tea filter is a total game-changer because it actually does its job. It captures the tiny particles that larger holes let slip through, leaving you with a clean, sediment-free cup every single time.

    Beyond just the clarity of the brew, there are real stainless steel tea strainer benefits to consider from a practical standpoint. Unlike those flimsy silicone or plastic gadgets that leach flavors or crack after a few months, a high-quality metal mesh is built to endure. It doesn’t hold onto old scents, and it’s incredibly easy to maintain. If you’re just starting out, don’t overcomplicate your setup with a dozen different gadgets; just get one solid, reliable mesh strainer that won’t fail you when the water is hot. It’s about efficiency and longevity, not clutter.

    The Stainless Steel Tea Strainer Benefits You Deserve

    The Stainless Steel Tea Strainer Benefits You Deserve

    Look, I’ve seen enough cheap, single-use plastic gadgets end up in landfills to last a lifetime. When you’re looking for the best way to brew loose leaf tea, you need to stop thinking about novelty and start thinking about durability. A high-quality stainless steel strainer isn’t just a luxury; it’s a fundamental piece of equipment that won’t leach weird chemical tastes into your water or snap at the handle when you’re trying to squeeze out the last bit of flavor.

    The real stainless steel tea strainer benefits come down to simplicity and longevity. Unlike those complicated gadgets with tiny hinges and spring-loaded lids that eventually fail, a solid metal mesh is virtually indestructible. It’s one of those few tea brewing accessories for beginners that actually gets easier to use over time because there are no moving parts to break. Plus, when it comes to maintenance, you don’t need a special toolkit; knowing how to clean tea infusers is as simple as a quick rinse under hot water or a soak in some mild soap. It’s efficient, it’s easy, and it just works.

    Five Rules for Choosing a Tool That Actually Works

    • Stop buying those tiny, ball-shaped infusers. They don’t give the tea leaves enough room to expand and unfurl, which means you’re getting a weak, stunted brew instead of the full flavor you paid for.
    • Check the mesh density before you buy. If you can easily poke your finger through the holes, you’re going to end up with a mouthful of loose leaves. Look for a fine, tight weave that keeps the sediment where it belongs.
    • Avoid anything with plastic components. I’ve seen too many “modern” infusers where the handle or the hinge is cheap plastic that cracks after a few dozen trips through the dishwasher. Stick to solid stainless steel; it’s easier to clean and won’t leach flavors into your tea.
    • Size matters more than you think. If you’re brewing a loose-leaf breakfast tea, you need a larger basket to accommodate the volume. A cramped infuser is just a recipe for a mediocre cup.
    • Look for a design that actually stays put. There is nothing more frustrating than a strainer that constantly slips into your mug while you’re trying to steep. Get one with a sturdy, well-balanced handle or a clip that actually grips the rim of your cup.

    The Bottom Line on Choosing Your Infuser

    Stop buying cheap, plastic-coated strainers that leach chemicals into your hot water; stick to food-grade stainless steel that won’t rust or break.

    Look for a fine mesh that actually catches the small bits, because nothing ruins a morning like chewing on loose tea leaves.

    Invest in a tool that is easy to clean and built to last, rather than a trendy gadget that’ll end up in a landfill by next season.

    Stop Buying Kitchen Junk

    I’ve seen too many people clutter their drawers with cheap, flimsy plastic strainers that snap the moment you apply any real pressure; if you’re going to invest in a tea infuser, buy a solid stainless steel one that actually holds its shape and lasts longer than a single season.

    Rosalind Hayter

    Stop Settling for Subpar Steeps

    Stop Settling for Subpar Steeps: Stainless Steel.

    At the end of the day, choosing the right tea infuser isn’t about collecting more kitchen clutter; it’s about making a conscious decision to stop settling for mediocrity. We’ve talked about why those flimsy, single-use plastic options are a waste of your hard-earned money and why a high-quality stainless steel model is the only logical investment. A fine mesh strainer ensures you aren’t chewing on loose leaves while trying to enjoy a quiet moment, and a sturdy metal build means you won’t be shopping for a replacement in six months. When you invest in tools that actually work, you remove the friction between you and a perfect cup of tea.

    I spent years in high-pressure commercial kitchens where every piece of equipment had to earn its place on the line. Your home kitchen deserves that same level of respect. Don’t let a cheap, broken gadget ruin your morning ritual or turn a simple habit into a chore. Buy something solid, keep your workspace organized, and focus on the ritual rather than the gear. Once you have the right tools in your hand, you can finally stop worrying about the equipment and just focus on the flavor.

    Frequently Asked Questions

    How do I know if the mesh is fine enough to catch the small particles in loose-leaf oolong or chamomile?

    If you’re brewing delicate oolong or those tiny chamomile buds, don’t settle for a coarse sieve. You want a “micro-mesh.” A good rule of thumb? Hold the strainer up to a bright light. If you can see large gaps or if the light pours through unevenly, it’s too coarse. You want a tight, uniform weave that looks almost like a solid sheet of silver. If it can catch a grain of fine salt, it can handle your tea.

    Is it actually worth the extra money to go with stainless steel over those silicone versions I see everywhere?

    Look, I’ve seen enough cheap silicone gadgets end up in the landfill to know the answer. Silicone feels soft and convenient, but it’s a trap. It stains, it traps odors, and after a few months of heavy use, it starts to warp or degrade. Stainless steel might cost a few dollars more upfront, but it’s a one-time purchase. It’s durable, dishwasher-safe, and won’t leach anything into your tea. Buy the steel; save your money.

    How do I properly clean a fine mesh strainer without getting tea residue stuck in the tiny holes?

    Don’t just throw it in the dishwasher and hope for the best; the heat can actually bake those tannins into the mesh. Instead, soak it in warm, soapy water for ten minutes first. Use a soft-bristled dish brush—not a metal scrubber—to gently agitate the holes. If you’re dealing with stubborn staining, a quick dip in a bit of white vinegar will lift the residue right out without damaging the steel.

  • How to Use a Handheld Cheese Grater

    How to Use a Handheld Cheese Grater

    I spent twenty years in commercial kitchens, and if there is one thing that drives me up the wall, it’s seeing people waste money on those flimsy, single-use plastic shredders that end up in a landfill after three months. You’re standing there at the dinner table, trying to finish a beautiful pasta dish, but you’re fighting with a piece of junk that just tears at the cheese instead of shaving it. A decent parmesan grater shouldn’t be a “gadget” you pull out of a drawer once a year; it should be a sturdy, reliable tool that feels substantial in your hand and actually does the job without a struggle.

    I’m not here to sell you on some high-tech, electric nonsense or overpriced designer versions that look pretty but perform poorly. My goal is to cut through the marketing fluff and tell you exactly what to look for in a tool that will last a lifetime. I’m going to share what I’ve learned from years of high-volume catering and my own home kitchen to help you find a solid, metal grater that makes cooking feel less like a chore and more like a pleasure.

    Table of Contents

    Ditch the Plastic Junk for Stainless Steel Cheese Shredders

    Ditch the Plastic Junk for Stainless Steel Cheese Shredders

    I’ve seen it a thousand times in commercial kitchens and home pantries alike: someone buys a cheap, plastic-handled shredder that feels flimsy the moment you put any pressure on it. These little gadgets are designed to break, and they usually end up in a landfill within six months. If you want to do this right, you need to invest in stainless steel cheese shredders. Metal doesn’t flex, it doesn’t crack under pressure, and most importantly, it doesn’t harbor bacteria in those tiny plastic crevices. When you’re working with a block of aged Parmigiano-Reggiano, you need a tool that feels like an extension of your hand, not a piece of disposable junk.

    For those of us who value precision, I always recommend looking into microplane style graters. They are indispensable when you need that delicate, snowy texture for fine grating for pasta dishes. A high-quality rasp allows you to control exactly how much you’re adding to the plate without turning your meal into a pile of heavy, uneven clumps. Stop settling for tools that fight you; get something heavy-duty that actually stays sharp.

    Finding the Right Kitchen Gadget for Parmesan

    Finding the Right Kitchen Gadget for Parmesan.

    When you’re standing at the counter, you need to decide how much effort you’re actually willing to put into your meal. If you’re just tossing cheese over a quick bowl of spaghetti, a standard box grater might do the trick, but it’s rarely the most efficient choice. For those nights when you want something more refined, I always suggest looking into microplane style graters. They allow for incredibly fine grating for pasta and salads, turning a hard block of cheese into a light, snowy texture that melts instantly into the heat of the dish.

    On the other hand, if you’re prepping for a larger crowd or working with particularly aged, stubborn wheels, you might need more heavy-duty hard cheese shredding tools. I’ve seen too many people try to force a delicate zester through a dense piece of Pecorino and end up with a broken tool and a sore wrist. My rule of thumb is simple: match the tool to the density of the cheese. Don’t buy a specialized kitchen gadget for parmesan unless you actually plan on using it more than once a month. Keep it simple, keep it sturdy, and buy for the task at hand.

    How to Actually Use Your Grater Without Making a Mess

    • Stop grating directly over the pot. You’ll lose half your cheese to the steam or the floor. Grate into a small chilled bowl first, then sprinkle it on top of your dish when you’re ready to serve.
    • Keep your cheese cold. If you’re working with a block of Parmigiano-Reggiano, pull it straight from the fridge. Warm cheese turns into a gummy paste that clogs up your grater blades instantly.
    • Invest in a microplane for finishing. A heavy-duty box grater is fine for prep, but if you want those delicate, snow-like flakes that melt instantly into pasta, a fine microplane is your best friend.
    • Don’t let the cheese dry out in the grater. If you have bits stuck in the metal, don’t try to pick them out with a knife. Just rinse it under hot water immediately after you’re done; it’s much easier than scrubbing dried cheese later.
    • Check your blade sharpness. If you find yourself pressing down hard just to get a shred, your grater is garbage. A good stainless steel grater should do the work with almost zero pressure.

    My Rules for Choosing a Grater

    Invest in solid metal over plastic every single time; it’s more hygienic, stays sharper, and won’t end up in a landfill after six months.

    Match your tool to your task—use a fine microplane for delicate finishing and a sturdy box grater when you actually need volume.

    Prioritize easy cleanup and durability, because a gadget that’s a pain to wash is a gadget that’s going to sit in your drawer gathering dust.

    ## Invest in the Tool, Not the Trend

    “I’ve seen too many people waste twenty dollars on a flimsy, plastic cheese shredder that ends up in the landfill after three months of bent blades and frustration. If you’re going to grate cheese, buy a solid metal grater that actually holds an edge; it’s the difference between a meal that feels effortless and one that feels like a chore.”

    Rosalind Hayter

    Investing in Your Kitchen's Future

    Investing in Your Kitchen's Future: Grater.

    At the end of the day, choosing a parmesan grater shouldn’t be a stressful decision, but it should be a deliberate one. We’ve talked about why you need to steer clear of those flimsy, single-use plastic shredders that end up in a landfill after three months of frustration. Instead, focus on finding a tool made of high-quality stainless steel that can handle a hard aged cheese without dulling or bending. Whether you opt for a classic box grater for bulk prep or a handheld microplane for that delicate, snowy finish, make sure it is a piece of equipment that feels substantial in your hand. If it feels cheap now, it will break by next season.

    I know it’s tempting to just grab whatever is cheapest at the big-box store, but I’m asking you to look at your kitchen differently. Every time you pull out a tool that actually works, you’re removing a tiny bit of friction from your life. Cooking should be about the joy of the ingredients and the rhythm of the meal, not fighting with a piece of subpar metal. Stop settling for “good enough” and start building a collection of tools that last a lifetime. Your future self—the one who isn’t scrubbing plastic bits out of a broken shredder—will thank you for it.

    Frequently Asked Questions

    Is a microplane actually better than a traditional box grater for hard cheeses?

    Look, it depends on what you’re actually making. If you’re shaving delicate curls of aged Parmigiano-Reggiano over a finished pasta dish, the microplane is king—it’s fast, effortless, and won’t leave you with chunks. But if you’re prepping a large batch of cheese for a baked casserole, a sturdy box grater is much more efficient. Don’t overthink it; just pick the tool that matches the texture you need for the recipe.

    How do I keep my grater from getting clogged with cheese every two seconds?

    The secret is all in the temperature and the technique. If your cheese is room temperature, it’s going to turn into a gummy mess and clog those holes instantly. Keep your block of Parm in the fridge until the very second you’re ready to grate. Also, stop pressing down hard like you’re trying to win a fight; use light, steady strokes. If it still sticks, a quick wipe with a damp cloth between batches works wonders.

    Are there specific types of stainless steel I should look for to avoid rust after washing?

    Look for “18/10” stamped on the metal. That number tells you the ratio of chromium and nickel; the 10% nickel is what actually protects the steel from pitting and rust. I’ve seen plenty of cheap graters turn orange after just a few washes because they’re using low-grade alloys. If you want a tool that survives a lifetime in a wet kitchen, don’t settle for anything less than high-quality, food-grade 18/10 stainless steel.

  • Essential Tasks for a Food Processor

    Essential Tasks for a Food Processor

    I still remember the chaos of a Saturday night service in my old catering days—the frantic rush to prep fifty pounds of mirepoix while the clock was ticking against us. I’ve seen too many home cooks try to replicate that professional speed with a flimsy, $40 plastic gadget that smells like burning rubber the moment you try to chop an onion. Most people think a food processor is just another countertop clutter-maker, but the truth is that most of them are just expensive paperweights disguised as kitchen aids. If it can’t handle a heavy load without stalling out or leaking juice all over your prep station, it doesn’t belong in your kitchen.

    I’m not here to sell you on the latest smart-tech nonsense or a machine with more buttons than you’ll ever actually press. My goal is to help you identify a real, heavy-duty workhorse that will actually earn its keep for the next twenty years. I’m going to break down exactly what makes a machine worth the investment and, more importantly, which “must-have” features are just marketing fluff designed to empty your wallet. Let’s get down to business and find you a tool that actually works.

    Table of Contents

    Why High Speed Motor Kitchen Appliances Outlast Trendy Plastic Junk

    Why High Speed Motor Kitchen Appliances Outlast Trendy Plastic Junk

    I’ve seen it a thousand times in commercial kitchens: a cheap, lightweight machine hums along for three months, struggles with a single heavy batch of dough, and then dies a quiet death in the back of a pantry. Most people fall into the trap of buying based on color or price tag, but if you aren’t looking at the engine, you’re just buying expensive landfill. High-speed motor kitchen appliances aren’t just a luxury; they are a matter of mechanical integrity. A powerful, well-built motor doesn’t just work faster; it handles resistance without overheating, which is exactly how you avoid that dreaded burnt-out smell halfway through dinner prep.

    When you’re comparing a standard food processor vs blender, the distinction becomes even clearer regarding longevity. A blender is great for liquids, but a high-torque processor is designed to tackle the heavy lifting of chopping, grating, and emulsifying. If you invest in a machine with a robust motor and metal components rather than thin, brittle plastic, you aren’t just buying a tool—you’re buying decades of reliability. Stop settling for disposable gadgets that fail the moment things get tough.

    Food Processor vs Blender Choosing Substance Over Mere Convenience

    Food Processor vs Blender Choosing Substance Over Mere Convenience

    I see this mistake constantly in the homes I organize: someone buys a high-powered blender thinking it’s a Swiss Army knife, only to realize it’s useless when they need to chop a mountain of mirepoix. When you’re weighing the food processor vs blender debate, you have to look at the physics of the task. A blender is designed for liquid integration—think smoothies or silky soups—where the blades need to pull ingredients into a vortex. But if you try to use that same spinning blade to dice an onion or shred carrots, you’ll end up with a watery, uneven mess.

    A proper machine with interchangeable discs is what actually changes your workflow. I’m talking about using automatic vegetable slicing techniques to prep a week’s worth of vegetables in minutes, rather than hacking away with a knife until your wrists ache. If you are tight on space, don’t just buy a tiny, weak unit; look for the best food processor for small kitchens that offers genuine versatility without the footprint of a commercial beast. You want a tool that handles the heavy lifting of prep work, leaving you free to actually focus on the cooking.

    Five Ways to Make Sure Your Processor Actually Earns Its Keep

    • Stop buying “specialty” attachments you’ll only use once. Stick to the basics—a sharp S-blade, a slicing disc, and a shredding disc. If a machine comes with twelve different plastic bits that take up half your cabinet, walk away.
    • Prioritize motor wattage over flashy digital displays. I’ve seen too many people buy a machine because it has a touchscreen, only to have the motor burn out the first time they try to process a pound of hard carrots. You want raw power, not a computer on your counter.
    • Check the build quality of the bowl and lid. If the plastic feels thin or flimsy, it’s going to crack under pressure or leak liquid during a puree. Look for heavy-duty, BPA-free materials that feel substantial in your hands.
    • Learn the “pulse” technique before you start cranking it on high. Most people ruin their textures—turning salsa into mush or pesto into soup—because they don’t know how to control the machine. A little patience with the pulse button goes a long way toward professional results.
    • Clean it immediately. I know, it’s not glamorous, but if you let dough or vegetable residue dry in those crevices, you’re looking at a machine that’s a nightmare to maintain. A quick rinse and a thorough hand-wash right after use will extend the life of the seals and blades by years.

    The Bottom Line: What Your Kitchen Actually Needs

    Stop looking at the price tag and start looking at the motor; a high-torque, heavy-duty machine is the only way to ensure you aren’t replacing a burnt-out plastic shell in eighteen months.

    Don’t let marketing fool you into buying a blender when you need a processor; if you want to prep vegetables and dough rather than just sipping smoothies, buy the tool designed for the job.

    Invest once in quality materials like stainless steel and thick, BPA-free plastics so you can spend your energy on the cooking, not on managing a drawer full of broken gadgets.

    The Truth About Your Countertop

    “A food processor shouldn’t be a seasonal gadget you pull out for one recipe; it should be a heavy-duty workhorse that earns its keep every single week by actually doing the hard labor for you.”

    Rosalind Hayter

    Making the Right Investment

    Making the Right Investment in food processors.

    At the end of the day, choosing a food processor isn’t about finding the one with the most buttons or the sleekest LED display. It’s about recognizing the difference between a gadget that’s destined for a junk drawer in six months and a machine that will actually earn its keep in your kitchen for the next decade. We’ve looked at why motor strength matters, why you shouldn’t confuse a processor with a blender, and why skipping the cheap plastic alternatives is the only way to go. If you invest in a heavy-duty model with a high-torque motor and durable blades, you aren’t just buying an appliance; you are buying back your time and reducing the sheer frustration of meal prep.

    My advice is simple: stop chasing the trends and start building a toolkit that works as hard as you do. A kitchen is only as functional as the tools you allow into it, so be intentional with every dollar you spend. When you choose quality over convenience, you create a space where cooking feels less like a chore and more like a seamless part of your life. Buy the machine that can handle the heavy lifting, maintain it well, and let it become a reliable workhorse in your home. Your future, less-stressed self will thank you.

    Frequently Asked Questions

    How do I tell if a motor is actually high-performance or just a cheap one wrapped in a fancy housing?

    Don’t let a sleek, brushed-metal finish fool you; that’s just marketing. To find the real muscle, you have to look at the weight and the specs. A high-performance motor is heavy because it’s packed with copper, not cheap fillers. If the unit feels light as a feather, it’s going to struggle the second you throw in something dense like frozen dough or fibrous vegetables. Look for wattage that actually matches the task, not just a pretty LED display.

    Is it worth spending the extra money on a model with glass bowls instead of the standard plastic?

    If you’re looking for longevity, the answer is a resounding yes. Plastic bowls look fine on day one, but they’re prone to scratching, staining from turmeric, and eventually cracking under pressure. Once that plastic gets cloudy and nicked, it’s a breeding ground for bacteria and a headache to clean. A heavy glass bowl is an investment in hygiene and durability. It won’t absorb odors or warp, making it a true kitchen workhorse.

    How much counter space should I actually allocate for a machine that I'll likely use only a few times a week?

    Here’s the truth: if you aren’t using it daily, don’t let it squat on your precious prep space. I’ve seen too many kitchens cluttered with heavy machines that just collect dust. If you only use it a few times a week, find a deep cabinet or a dedicated pantry shelf. Allocate enough room for the cord and the lid, but keep your counters clear for actual chopping and assembly. A cluttered workspace is a recipe for stress.

  • How to Use a Skimmer Spoon for Soups

    How to Use a Skimmer Spoon for Soups

    I still remember the chaos of a Saturday night service in a commercial kitchen, the air thick with steam and the frantic rhythm of orders flying in. I was hovering over a massive pot of simmering stock, trying to keep the liquid crystal clear, when my cheap, lightweight skimmer spoon actually snapped right in the middle of the rush. It was a flimsy piece of stamped metal that felt more like a toy than a tool. That moment taught me a hard lesson: if you’re going to invest in a skimmer spoon, it needs to have enough weight to feel substantial and enough strength to handle the heat without bending like a piece of tin foil.

    I’m not here to sell you on some high-tech, silicone-coated gadget that’s going to end up in a landfill by next Christmas. My goal is to cut through the marketing noise and help you find the workhorse tools that actually earn their place in your drawer. I’m going to show you exactly what to look for in terms of mesh density and handle durability so you can stop fighting your equipment and start focusing on your food.

    Table of Contents

    Mastering Cooking Foam Removal for Crystal Clear Results

    Mastering Cooking Foam Removal for Crystal Clear Results

    Mastering Cooking Foam Removal for Crystal Clear Results

    If you’ve ever sat staring at a pot of stock only to find it clouded with gray, unappetizing bubbles, you know exactly how frustrating it is. That foam isn’t just unsightly; it’s a collection of proteins and impurities that can turn a bright, clean broth into something muddy and bitter. When I was managing commercial kitchens, we didn’t just ignore it. We treated cooking foam removal as a non-negotiable step in the process. You can’t just stir it back in. You have to physically lift those impurities out of the liquid while they are still floating on the surface.

    The trick is patience and using the right tool. I always reach for a high-quality stainless steel skimmer because it provides the surface area you need to sweep up the debris without disturbing the liquid underneath. Avoid using a standard slotted spoon if you can; they’re often too small and clunky for delicate work. Instead, use a wide, shallow tool that lets the liquid flow through quickly while catching the solids. If you master this one simple habit, your homemade soups will look—and taste—like they came from a professional kitchen.

    The Art of Removing Impurities From Soup With Ease

    The Art of Removing Impurities From Soup With Ease

    When I was managing commercial kitchens, I saw too many cooks try to rush through a stock by just letting the sediment settle and hoping for the best. That’s a mistake. If you want a truly professional-grade result, you have to be proactive about removing impurities from soup while it’s still simmering. It isn’t just about aesthetics; those little bits of protein and fat that float to the top can turn a clean, bright broth into something cloudy and bitter if you let them sit.

    The trick is to work in stages. I always recommend using a high-quality stainless steel skimmer rather than trying to ladle out the foam with a standard spoon. A ladle is too bulky and often pulls up the liquid you’re trying to save, whereas a skimmer allows the liquid to pass right through the holes while catching the debris. It requires a bit of patience and a steady hand, but once you master these kitchen skimming techniques, you’ll notice the difference in your final dish immediately. Your sauces will be silkier, and your consommés will actually look like they belong in a high-end restaurant.

    Five Ways to Stop Fumbling with Your Skimmer

    • Ditch the flimsy plastic. If you’re skimming a hot stock or a heavy sauce, a cheap plastic skimmer will warp or even melt. Invest in a stainless steel version with a heavy-duty handle so you actually feel in control of the movement.
    • Size matters more than you think. Don’t buy a tiny spoon for a massive stockpot; you’ll spend all day making micro-movements. Get a wide, flat surface area that can clear a large patch of foam in a single sweep.
    • Mind the holes. I’ve seen some decorative skimmers with holes so small they clog with every bit of sediment they catch. Look for a mesh or perforated pattern that’s wide enough to let the liquid flow through instantly without getting stuck.
    • Watch your technique. Don’t plunge the skimmer deep into the liquid; you’ll just stir the impurities back into the pot. Keep it light and skim the surface gently to lift the foam off without disturbing the clarity underneath.
    • Clean it immediately. If you let dried protein or fat sit in those tiny perforations, you’ll be scrubbing for twenty minutes later. Rinse it under hot water the second you’re done so the residue doesn’t turn into cement.

    The Bottom Line on Choosing a Skimmer

    Stop buying those thin, flimsy plastic versions; you need a heavy-duty stainless steel skimmer with a solid handle that won’t warp when things get hot.

    Look for a wide, shallow mesh pattern—it’s the only way to lift impurities without accidentally scooping up the actual ingredients you’re trying to cook.

    Treat your skimmer like any other quality tool: keep it clean and avoid abrasive scrubbers that can damage the mesh, and it’ll serve you for decades.

    The Truth About Your Tools

    I’ve seen too many home cooks struggle with a cloudy broth because they’re using a flimsy, lightweight spoon that bends the moment it hits a hot pot; if you want a clear soup, you need a skimmer with enough weight and surface area to actually do the job without making you fight the liquid.

    Rosalind Hayter

    The Bottom Line on Skimmers

    The Bottom Line on Skimmers: Professional tools.

    At the end of the day, a skimmer isn’t just another piece of metal cluttering your utensil drawer; it is the difference between a murky, unrefined broth and a professional-grade stock. We’ve talked about why you need to ditch the flimsy plastic options and why mastering the technique of removing impurities is vital for both clarity and flavor. Whether you are clarifying a delicate consommé or simply cleaning up the foam from a hearty stew, having a heavy-duty, well-balanced tool makes the job feel less like a chore and more like a standard part of your process. Don’t settle for tools that bend or break when you actually need them; invest in something that feels substantial in your hand and does the work for you.

    My advice is simple: stop overcomplicating your kitchen setup with gadgets that promise the world but deliver nothing. A good skimmer is a testament to the idea that quality beats quantity every single time. When you buy tools that are built to last, you aren’t just organizing your kitchen; you are investing in your own culinary confidence. Focus on the fundamentals, keep your workspace efficient, and remember that the best meals often come from the simplest, most reliable methods. Now, go grab that skimmer and start making something worth tasting.

    Frequently Asked Questions

    Should I go with a stainless steel skimmer or is there a reason to choose something else?

    Go with stainless steel. It’s the industry standard for a reason: it’s durable, won’t react with acidic stocks, and can handle high heat without warping. If you’re looking at silicone, it’s fine for gentle tasks, but it lacks the rigidity you need to lift heavy impurities. Avoid anything with a wooden handle if you want something that lasts; a solid stainless steel construction is easier to clean and won’t crack after a year of heavy use.

    How do I pick the right size so I'm not constantly chasing foam around a large pot?

    Look, if you’re using a tiny spoon for a massive stockpot, you’re just playing a losing game of whack-a-mole. You need a skimmer with a surface area that actually matches your vessel. For a standard Dutch oven or medium pot, aim for a skimmer about 4 to 5 inches wide. If you’re working with a large commercial-sized stockpot, don’t settle for anything less than 6 inches. You want to clear the surface in one sweep, not ten.

    Are there specific types of delicate broths where a mesh skimmer is better than a perforated one?

    If you’re working on something truly delicate, like a consommé or a light vegetable stock, go with the fine mesh skimmer. A perforated spoon is great for heavy-duty tasks, but those tiny holes can actually let small particles slip through, clouding your liquid. A fine mesh acts like a sieve, catching the smallest bits of sediment while letting the liquid pass. It takes a bit more patience, but for a crystal-clear broth, it’s worth the extra effort.

  • Managing Juices in a Roasting Pan

    Managing Juices in a Roasting Pan

    I still remember the chaos of my first commercial kitchen, where the air was thick with the smell of rendered fat and the constant, rhythmic sizzle of meat hitting hot metal. I watched seasoned chefs reach for a heavy, reliable basting pan without a second thought, while the amateur cooks were fumbling with thin, non-stick pans that would smoke and peel the moment things got serious. It wasn’t about how fancy the equipment looked; it was about whether that pan could actually hold its heat and survive a heavy sear.

    I’m not here to sell you on some high-tech, gadget-filled piece of cookware that promises the world but breaks by next Christmas. My goal is to cut through the marketing noise and help you identify a basting pan that is built to last for decades, not just a single season. I’ll show you exactly what to look for in terms of weight, material, and handle stability so you can stop throwing money away on trendy plastic junk. We’re going to focus on the tools that actually do the work, ensuring your kitchen remains a functional space rather than a cluttered showroom.

    Table of Contents

    Choosing a Stainless Steel Roasting Pan Built to Last

    Choosing a Stainless Steel Roasting Pan Built to Last

    When you’re looking for a stainless steel roasting pan, ignore the shiny, lightweight sets that look great on a showroom floor but buckle under high heat. You want something with a heavy-duty tri-ply construction. A thick base isn’t just a luxury; it’s what ensures even heat distribution so you don’t end up with hot spots that scorch your roast. I always tell my clients to look for a pan that feels substantial in the hand—if it feels flimsy in the store, it’ll definitely warp in your oven.

    Beyond the weight, pay attention to the rim design. A deep, sturdy edge is essential for collecting pan juices without making a mess of your stovetop. I’ve seen too many people struggle with shallow pans that overflow, making the whole process of making gravy from drippings a nightmare. If the pan is built right, those juices stay contained, allowing you to master your meat basting techniques without the cleanup turning into a full-day ordeal. Stick to high-quality metal that can handle the heat and the weight.

    The Necessity of Truly Oven Safe Cookware

    The Necessity of Truly Oven Safe Cookware.

    I’ve seen far too many home cooks reach for a pan only to realize halfway through a recipe that the handles aren’t rated for high heat. It’s a dangerous, frustrating mistake that can ruin a meal and a perfectly good piece of equipment. When you’re investing in quality, you aren’t just buying a vessel; you are buying peace of mind. You need oven safe cookware that can transition seamlessly from the stovetop to a 450-degree oven without warping, cracking, or leaching chemicals into your food. If a pan can’t handle the heat, it has no business being in a serious kitchen.

    Beyond safety, there is the matter of flavor. A pan that is truly built for the oven allows you to master essential meat basting techniques that elevate a simple roast into something professional. When your pan can withstand consistent, high temperatures, you can properly render fat and develop that deep, golden-brown crust that makes a meal memorable. Plus, a sturdy pan ensures you aren’t losing precious liquid to evaporation or uneven heat distribution, which is the first step toward making gravy from drippings that actually tastes like something.

    Five Rules for Picking a Pan That Won't Fail You

    • Look for heavy-gauge construction. If the pan feels light or flimsy in your hand, put it back on the shelf. You need weight to ensure even heat distribution and to prevent the metal from warping the first time it hits a high temperature.
    • Prioritize a tight-fitting lid. A good basting pan isn’t just about the base; the lid is what traps the moisture and creates that essential steam environment. If the lid is loose or wobbly, you’re just losing precious juices to the oven air.
    • Check the handle stability. I’ve seen too many people nearly burn themselves because a handle was poorly attached or too thin to grip with an oven mitt. Look for handles that are securely riveted, not just screwed on, so they can handle the weight of a heavy roast.
    • Stick to stainless steel or cast iron. I don’t care how pretty a non-stick coating looks in the store; it’s going to flake off eventually. If you want a pan that survives decades of scrubbing and high heat, go with materials that can actually take a beating.
    • Mind the depth. Don’t get seduced by a shallow pan just because it looks sleek. You need enough depth to hold your juices and perhaps some aromatics like garlic or rosemary without them spilling over the sides when the liquid starts to bubble.

    My Golden Rules for Buying a Basting Pan

    Skip the non-stick coatings if you want longevity; stick to heavy-duty stainless steel or cast iron that can actually handle high heat without peeling.

    Check the handles and rivets twice—if they look flimsy or thin, they won’t hold up when you’re pulling a heavy, juice-filled roast out of a hot oven.

    Don’t get distracted by fancy bells and whistles; focus on weight and heat distribution, because a pan that warps is just expensive scrap metal.

    ## Stop Buying Disposable Cookware

    “I’ve seen too many people spend a fortune on a dozen trendy, non-stick gadgets that end up in a landfill within two years; if you’re going to buy a basting pan, buy one heavy enough to hold its shape and high-quality enough to be passed down to your kids.”

    Rosalind Hayter

    Stop Buying, Start Investing

    Stop Buying, Start Investing in quality cookware.

    At the end of the day, choosing a basting pan shouldn’t be an exercise in scrolling through endless pages of colorful, non-stick options that will eventually peel and fail you. We’ve covered why you need heavy-duty stainless steel, the absolute necessity of verifying oven-safe ratings, and why skipping the cheap, thin-walled pans is the best way to save money in the long run. If you prioritize material quality and weight, you aren’t just buying a piece of cookware; you are investing in a tool that will perform the same way ten years from now as it does today. Don’t let the marketing fool you—durability is the only metric that actually matters when you’re standing over a hot stove.

    I’ve seen enough commercial kitchens go through mountains of discarded plastic and flimsy aluminum to know that a well-run kitchen relies on reliability. A good basting pan is a workhorse, meant to handle high heat and heavy juices without breaking a sweat. Once you get the right gear, stop worrying about the latest gadget and focus on your technique. Master your heat control, learn how to deglaze properly, and treat your tools with respect. When you build a kitchen based on solid foundations rather than passing trends, you create a space where cooking becomes a joy rather than a chore.

    Frequently Asked Questions

    Is it actually worth the extra money to go with heavy-gauge stainless steel over a cheaper aluminum version?

    Look, if you’re looking for a quick fix, buy the aluminum. But if you want a tool that actually performs, the extra investment in heavy-gauge stainless steel is non-negotiable. Aluminum heats up fast, sure, but it’s prone to hot spots and can warp if you aren’t careful. Heavy-gauge steel offers the heat retention and durability you need for real roasting. It’s the difference between a pan you toss in two years and one you pass down.

    Can I use my basting pan on the stovetop to sear meat before putting it in the oven, or will I ruin it?

    You absolutely can, and frankly, you should. Searing your meat in the same pan before it hits the oven is how you build real flavor; that’s where the fond comes from. Just make sure you aren’t using a pan with plastic or wooden handles that can’t take the heat. If it’s a solid piece of stainless steel or cast iron, go for it. It won’t ruin the pan—it just makes the meal better.

    How do I know if a pan is truly "oven safe" up to high temperatures, especially if it has a plastic or wooden handle?

    Don’t trust the fancy packaging; do your own homework. If a pan has a wooden or plastic handle, it’s a red flag for high-heat roasting. Even if the label says “oven safe,” those materials can scorch, crack, or leach chemicals when things get real. My rule? If you want to go high, stick to all-metal construction. If you must use a hybrid, check the manufacturer’s specific temperature limit in your notebook—and never guess.