Author: Rosalind Hayter

  • Using a Mortar and Pestle for Spices

    Using a Mortar and Pestle for Spices

    I still remember the frantic energy of a commercial kitchen during a Saturday night rush, where every second felt like a battle against the clock. I’d watch junior chefs reach for their electric spice grinders the moment a recipe called for crushed aromatics, thinking they were being efficient. But then I’d see the results: dry, dusty powders that had lost all their volatile oils and soul. There is a specific, rhythmic thud and scrape that comes from using a heavy stone mortar and pestle that no high-speed blade can ever replicate. It’s not just about prep work; it’s about releasing the actual life of the ingredient through physical pressure.

    I’m not here to sell you some dainty, ceramic decorative piece that will chip the first time it hits a peppercorn. My goal is to help you identify the heavy-duty, lifetime tools that actually belong on your countertop. I’m going to walk you through the different materials—from granite to marble—so you can stop wasting money on kitchen gadgets that end up in a junk drawer. We’re going to focus on weight, grit, and durability, ensuring you buy a tool that works as hard as you do.

    Table of Contents

    Granite vs Marble Mortar and Pestle Choosing Lifetime Tools
    Granite vs Marble Mortar and Pestle Choosing Lifetime Tools

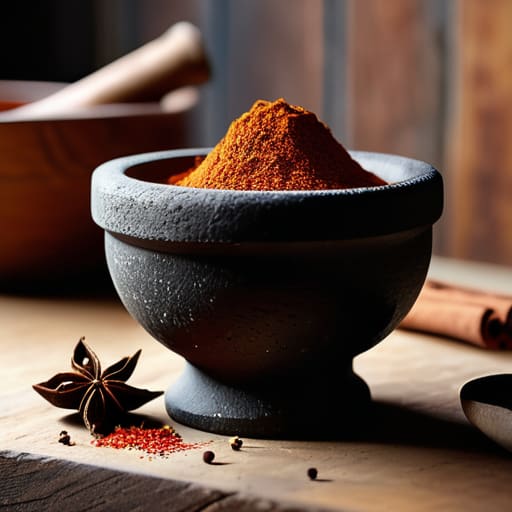
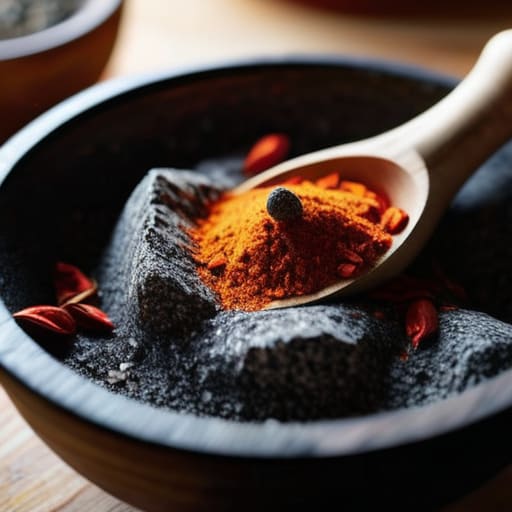
    When you’re standing in the kitchen deciding between granite vs marble mortar and pestle, don’t get distracted by how pretty the marble looks on your countertop. Marble is beautiful, sure, but it’s a softer, more porous stone. While it works fine for delicate tasks, it can soak up oils and scents, which means your garlic paste might start smelling like last week’s basil. If you want something that can handle the heavy lifting, go with granite. It’s dense, rugged, and stays put when you’re really putting your weight into crushing spices for maximum flavor.

    I always tell my clients to prioritize texture over aesthetics. A granite piece has a natural grit that acts like a built-in abrasive, making it much more efficient for breaking down tough dried peppercorns or fibrous roots. Marble is better suited for gentle tasks, like bruising soft herbs, but it lacks the sheer staying power of its darker cousin. If you want a tool that will survive decades of daily use without losing its edge, invest in the granite. It’s the workhorse of the two, and in my experience, you want a workhorse in your kitchen.

    Best Materials for Herb Crushing Without the Plastic Junk
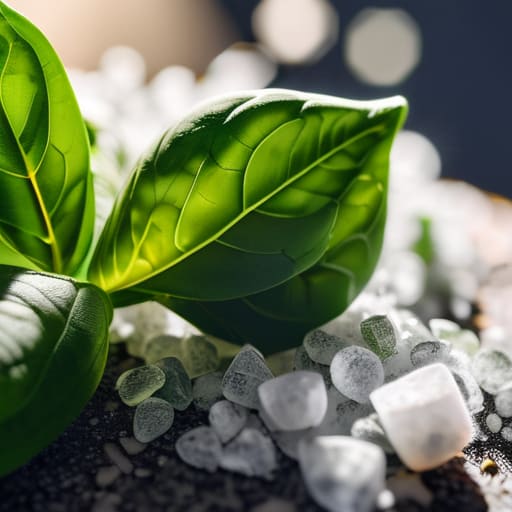
    Best Materials for Herb Crushing Without the Plastic Junk

    If you’re still reaching for that electric spice grinder every time you want to make a pesto or a dry rub, you’re missing the point. Electric blades chop; they don’t crush. When you use traditional culinary grinding techniques, you aren’t just breaking things down—you’re releasing the essential oils that make food actually taste like something. For herbs specifically, you want a material that offers enough friction to bruise the leaves without turning them into a watery mush.

    When looking at the best materials for herb crushing, I always steer people away from anything lightweight or synthetic. Wood is fine for light tasks, but for serious flavor, you need weight. If you want to get the most out of your aromatics, stick to heavy stone. It provides the necessary resistance for crushing spices for maximum flavor and ensures the tool won’t slide across your counter while you’re working. Avoid those cheap, resin-based imitations you see in big-box stores; they’re nothing more than landfill-bound plastic disguised as stone, and they’ll never give you the texture a professional kitchen demands.

    Five Rules for Getting the Most Out of Your Stone Tools

    • Stop treating it like a blender. If you try to force a massive amount of ingredients in at once, you’re just going to end up with a messy paste instead of a textured grind. Work in small batches and let the weight of the stone do the heavy lifting.
    • Season your stone just like you would a new cast iron skillet. Before you ever touch a peppercorn, grind up a handful of coarse salt and work it into the pores of the stone. It cleans out any residual dust from the manufacturing process and prepares the surface for real food.
    • Watch your technique—it’s a rhythm, not a hammer strike. Most people make the mistake of just pounding vertically, which can actually crack a delicate marble bowl. You want to use a combination of firm, circular grinding motions and controlled pressure to really release those essential oils.
    • Keep your workspace dry. I’ve seen too many people try to wash their mortar and pestle in a crowded sink, only to have it slip or chip. Hand wash it with warm water and a stiff brush, then let it air dry completely before you put it back in the cupboard.
    • Don’t be afraid of the “imperfect” grind. One of the reasons I moved away from electric spice grinders is that they pulverize everything into a uniform powder. A real mortar and pestle gives you varying particle sizes, which creates layers of flavor in your sauces and rubs that a machine simply can’t replicate.

    The Bottom Line on Your Mortar and Pestle

    Stop looking for a “set” and start looking for weight; a tool that’s too light won’t do the heavy lifting required to actually break down fibers.

    Prioritize granite or volcanic stone over marble if you’re crushing tough spices, as the slightly rougher surface provides the friction you need to get the job done.

    Treat your mortar like my cast iron—it’s an investment in texture and flavor that should last decades, so skip the cheap, porous ceramic imitations.

    ## The Soul of the Kitchen

    “An electric spice grinder is just a way to shave off the flavor and call it a day; if you want to actually taste the oils and the life in your herbs, you need to put some weight behind a stone pestle and do the work yourself.”

    Rosalind Hayter

    Invest in the Tool, Master the Technique
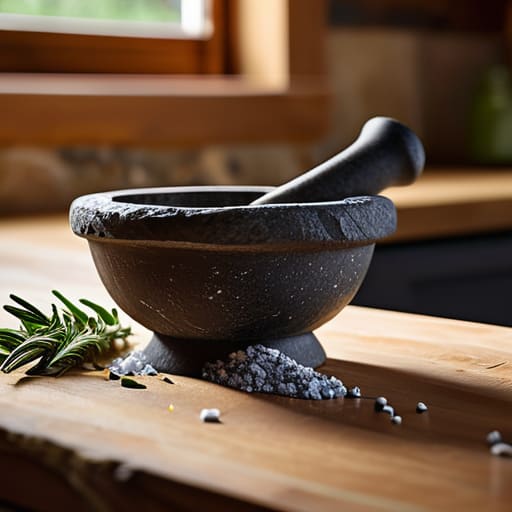
    Invest in the Tool, Master the Technique.

    At the end of the day, choosing a mortar and pestle isn’t about picking the prettiest object for your countertop; it’s about selecting a tool that can handle the physical demands of real cooking. Whether you decide on the heavy-duty reliability of granite or the slightly more delicate precision of marble, make sure you are choosing a material that won’t crack under pressure or absorb unwanted odors. Skip the cheap, lightweight imitations you find in big-box stores. If you invest in a solid, heavy stone piece, you are buying a tool that will serve you just as well twenty years from now as it does today.

    My advice is simple: stop looking for shortcuts and start embracing the process. There is a specific kind of satisfaction that comes from crushing your own spices and feeling the oils release under your hand—something an electric grinder can never replicate. A kitchen is only as good as the habits you build within it, and taking the time to use a proper mortar and pestle is a way of respecting your ingredients. Buy once, use it well, and let the quality of your tools elevate the quality of your food.

    Frequently Asked Questions

    How do I clean a stone mortar and pestle without stripping away the seasoning or leaving a soapy taste in my spices?

    Forget the dish soap. If you use it, your next batch of pesto will taste like a lemon-scented cleaning aisle, and you’ll never get that residue out of the stone’s pores. Instead, use coarse salt and a little warm water. Scrub the surfaces with the salt—it acts as a natural abrasive to lift stuck-on bits—then rinse thoroughly. If it’s really stubborn, a splash of white vinegar works, but salt is your best friend here.

    Is it worth spending more on a heavy granite model, or will a smaller, lighter one work just as well for my daily cooking?

    If you’re just crushing a few cloves of garlic for Tuesday’s pasta, a smaller model is fine. But if you actually want to cook—really cook—invest in the heavy granite. Weight is your best friend here; it does the work so your wrists don’t have to. A heavy base stays put while you’re grinding, whereas a light one tends to skitter across the counter. Buy the weight once, and you’ll never need another.

    How do I know if my mortar and pestle is actually made of solid stone rather than a cheap resin composite designed to look like marble?

    Here’s the quick test: pick it up. A real stone mortar has a surprising, honest weight to it—it should feel substantial in your hands, not hollow. Then, run your finger along the surface. Resin composites often feel unnaturally smooth or “waxy,” whereas real stone has a natural, slight grit or temperature coolness. Finally, look for consistent veining; if the pattern repeats perfectly, it’s a printed fake. Real stone is beautifully imperfect.
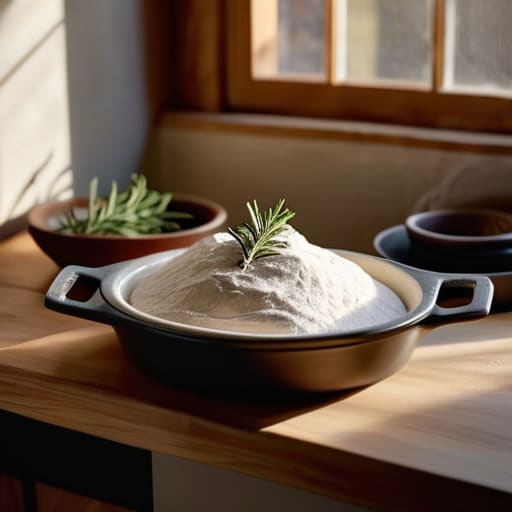
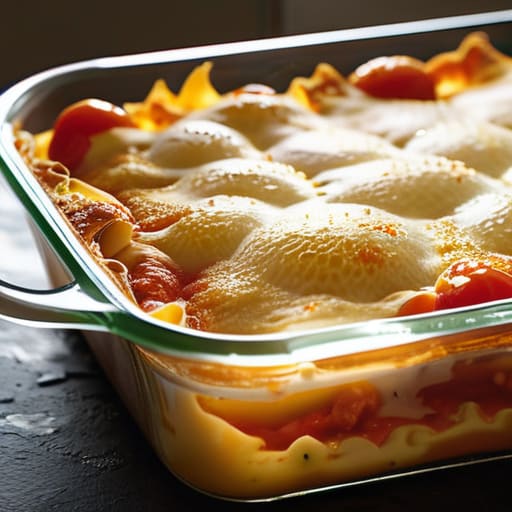
  • Choosing the Right Baking Dish

    Choosing the Right Baking Dish

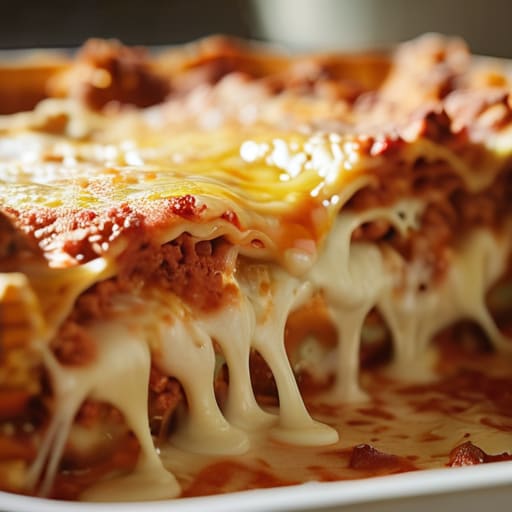
    I’ve spent twenty years in commercial kitchens watching people throw money down the drain on “specialty” cookware that ends up in a landfill by next Christmas. Most of those colorful, thin-walled sets you see in big-box stores are nothing more than expensive clutter; they heat unevenly, crack under stress, and frankly, they’re a joke. If you’re looking for a high-tech, gadget-heavy solution to your lasagna problem, you’re in the wrong place. A real, reliable baking dish doesn’t need a fancy brand name or a silicone lid—it just needs proper thermal mass to get the job done right every single time.

    I’m not here to sell you on trends or tell you that you need a different pan for every single recipe. My goal is to cut through the noise and help you build a collection of tools that actually work as hard as you do. I’m going to show you exactly which materials—from heavy-duty ceramic to seasoned cast iron—are worth your hard-earned money and which ones are just plastic junk in disguise. Let’s get your kitchen organized with pieces that will last a lifetime.

    Table of Contents

    The Great Debate Glass vs Ceramic Bakeware

    The Great Debate Glass vs Ceramic Bakeware

    I’ve spent enough hours in commercial kitchens to know that your choice of material changes everything about how your food actually behaves. When people ask me about glass vs ceramic bakeware, they usually want to know which one looks better on a dinner table. That’s fine, but I care about how the heat moves. Glass is predictable; it’s great for seeing if your lasagna is bubbling, but it has a major flaw: it holds onto heat for a long time. If you pull a glass dish out of the oven, your food keeps cooking for several minutes on the counter.

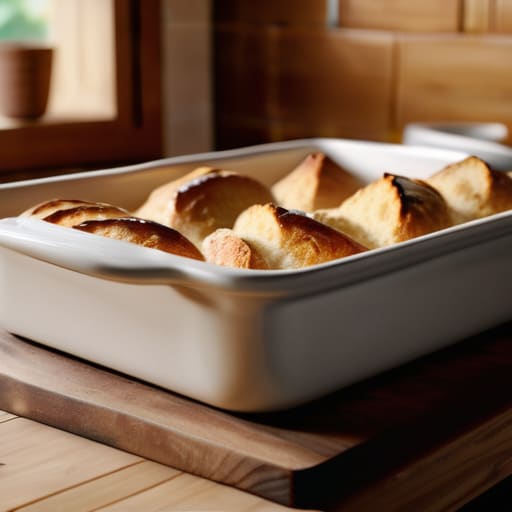
    Ceramic, on the other hand, is a different beast entirely. It’s much heavier and offers superior heat distribution in baking, which is vital when you’re trying to get an even rise on a savory bread pudding or a thick casserole. Because ceramic is more porous than glass, it tends to absorb and radiate heat more steadily. However, you have to be careful with temperature shocks. I always tell my clients that if you’re going to invest in high-end ceramic, you need to follow proper kitchenware maintenance tips—never take a hot dish straight from the oven to a cold marble countertop, or you’ll be buying a replacement by dessert.

    Why Heat Distribution in Baking Defines Your Results

    Why Heat Distribution in Baking Defines Your Results

    Look, I’ve seen too many home cooks pull a lasagna out of the oven only to find the edges are scorched while the center is still lukewarm. It’s frustrating, and frankly, it’s usually a tool problem, not a recipe problem. When we talk about heat distribution in baking, we aren’t just talking about getting things hot; we’re talking about how that heat moves through the walls of your vessel. If your material can’t manage that flow, you’re going to end up with unevenly cooked meals every single time.

    This is exactly why I’m so picky about the best materials for casserole dishes. Heavy-duty ceramic or thick stoneware acts as a thermal battery. It absorbs the heat from your oven and releases it slowly and steadily. This prevents those sudden temperature spikes that ruin delicate gratins. On the flip side, if you’re using thin, cheap alternatives, the heat hits the food too fast. You want a piece of oven safe cookware that holds its temperature long enough to cook the food through, rather than just burning the surface.

    My Rules for Choosing a Dish That Won't Let You Down

    • Stop buying sets of twelve matching dishes. You really only need two or three high-quality, heavy-duty pieces in different sizes. Most of those massive 20-piece sets are just filler, and you’ll end up with a cupboard full of flimsy junk you never touch.
    • Check the weight before you buy. If a ceramic dish feels light as a feather in the store, it’s going to be a nightmare in your oven. You want something with some heft; mass equals heat retention, and heat retention is what prevents your lasagna from being lukewarm in the middle.
    • Look for straight sides, not sloped. If you’re making something like a gratin or a layered casserole, those sloped edges from “decorative” dishes make it impossible to get clean portions. Straight sides mean even cooking and much easier serving.
    • Avoid anything with delicate handles or overly intricate patterns. I’ve seen too many people ruin a beautiful meal because their fancy dish was too awkward to grab with oven mitts. If you can’t maneuver it safely, it doesn’t belong in your kitchen.
    • Match the dish to the task, not the trend. If you’re doing a quick weeknight bake, a standard ceramic dish is fine. But if you’re looking for that perfect, crispy crust on a bread pudding, skip the glass and reach for something that can handle high, sustained heat without shattering.

    The Bottom Line on Your Bakeware

    Stop chasing the cheap glass sets that crack the moment they hit a hot oven; invest in heavy-duty ceramic or stoneware that holds heat steady and actually lasts.

    Remember that heat distribution is everything—if your dish has thin walls, you’re going to end up with burnt edges and a raw center every single time.

    Buy for utility, not for the aesthetic; a dish that’s easy to clean and goes straight from the oven to the table is worth far more than a trendy piece of junk you’re afraid to use.

    ## The Cost of Cheap Bakeware

    “I’ve seen too many people buy a dozen flimsy, mismatched glass dishes only to have them crack under heat stress six months later; do yourself a favor and buy one heavy-duty ceramic piece that actually holds its temperature, because a kitchen built on disposable tools is just a recipe for frustration.”

    Rosalind Hayter

    Stop Collecting, Start Cooking

    Stop Collecting, Start Cooking with quality bakeware.

    At the end of the day, choosing a baking dish isn’t about having a cabinet full of mismatched, colorful containers that serve no real purpose. It’s about understanding that material matters. Whether you opt for the even, steady heat of a heavy ceramic dish or the classic reliability of glass, you need to prioritize thermal mass and durability. Don’t get distracted by the flashy, thin-walled sets sold in big-box stores; they’ll warp or crack the moment you put them to real work. Stick to the basics: find a few high-quality pieces that distribute heat predictably and build a foundation that won’t fail you mid-recipe.

    My advice is simple: stop chasing the trends and start investing in your craft. A kitchen shouldn’t be a graveyard for “as seen on TV” gadgets that end up in a landfill after six months. Instead, aim for a collection of tools that feel substantial in your hands and improve with every use. When you own gear that actually works, you stop worrying about the equipment and start focusing on the food. Cook with intention, use what you have, and buy things that are meant to be passed down, not tossed out. That is how you build a kitchen that truly serves you.

    Frequently Asked Questions

    Is it actually worth the extra weight and cost to switch from my current glass dishes to heavy-duty ceramic?

    Look, I’ve seen enough flimsy glass shatter in a hot oven to know the frustration. If you’re cooking for a crowd or making something that needs a steady, even heat—like a lasagna that actually holds its temperature—then yes, it is worth it. You’re paying for thermal mass, not just weight. Stop buying disposables and invest in heavy-duty ceramic. It’s a one-time cost for a tool that won’t quit on you.

    How do I know if a baking dish is truly oven-safe or just cheap material that's going to crack under high heat?

    Look, don’t just trust the label on the bottom and hope for the best. If you’re looking at a dish in a store, check the weight. If it feels light and hollow, it’s likely thin, cheap material that’ll succumb to thermal shock the second you take it from the counter to a hot oven. I always look for heavy-duty ceramic or thick-walled stoneware. If it feels substantial in your hands, it’s built to handle the heat.

    Can I use the same ceramic dishes for both oven baking and serving at the table, or will they look too messy?

    You absolutely can, and honestly, you should. In my years managing catering lines, we never wasted time transferring food to different vessels if we didn’t have to. If you choose a high-quality, heavy-duty ceramic dish with a clean silhouette, it looks intentional and elegant on the table. Just avoid anything with chipped edges or baked-on stains. A sturdy, well-maintained dish makes the transition from oven to table seamless and effortless.

  • Getting Good Sear Marks on a Griddle Pan

    Getting Good Sear Marks on a Griddle Pan

    I spent twenty years in commercial kitchens, and if there is one thing that still makes my blood boil, it’s seeing people pour money into those thin, lightweight “professional” griddle pans that warp the second they hit a hot burner. I remember one particular catering gig where we tried to use a cheap, stamped-metal griddle for a rush of breakfast orders; the heat distribution was so uneven that half the hash browns were burnt to a crisp while the other half were still steaming in the middle. It was a complete waste of ingredients and a total embarrassment. You don’t need a gadget with ten different bells and whistles; you need a piece of equipment that actually holds its temperature.

    I’m not here to sell you on some trendy, overpriced kitchenware that will end up in a landfill by next Christmas. Instead, I’m going to tell you exactly what to look for in a griddle pan that can actually stand the heat of daily use. We’re going to focus on weight, material, and longevity—the things that actually matter when you’re standing over a hot stove. I’ll help you skip the junk and invest in a tool that will serve you for decades.

    The Cast Iron Griddle Benefits You Wont Find in Plastic

    The Cast Iron Griddle Benefits You Wont Find in Plastic

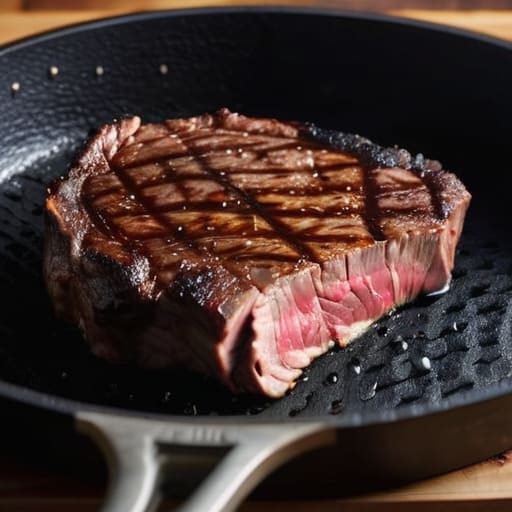
    I’ve spent enough years in commercial kitchens to know that most people treat their cookware like it’s disposable. They buy a cheap, Teflon-coated pan, use it until the coating flakes off into their breakfast, and then toss it in the bin. That is a waste of money and a waste of space. When you switch to cast iron, you aren’t just buying a tool; you’re investing in a piece of equipment that actually gets better with age. One of the primary cast iron griddle benefits is its incredible thermal mass. Unlike thin, plastic-handled pans that lose heat the second a cold piece of meat hits the surface, a heavy cast iron slab stays hot. This is the secret to achieving perfect grill marks every single time without the food sticking or steaming in its own juices.

    If you’re debating between a standard griddle pan vs frying pan, remember that the goal here is heat retention and surface texture. High-heat cooking surfaces like cast iron allow you to sear proteins with the intensity of an outdoor grill, right on your stovetop. You don’t need fancy gadgets to master indoor grilling techniques; you just need a surface that can handle the temperature. Stop settling for flimsy alternatives that fail when things get serious.

    Griddle Pan vs Frying Pan Choosing Tools That Endure

    I see people make this mistake all the time: they try to force a standard skillet to do a job it wasn’t built for. A frying pan is your workhorse for eggs, sautéing vegetables, or searing a delicate piece of fish where you need control over the surface area. But if you’re trying to mimic a backyard barbecue, a flat frying pan just won’t cut it. You need the ridges of a proper tool to facilitate indoor grilling techniques without turning your meal into a soggy, steamed mess.

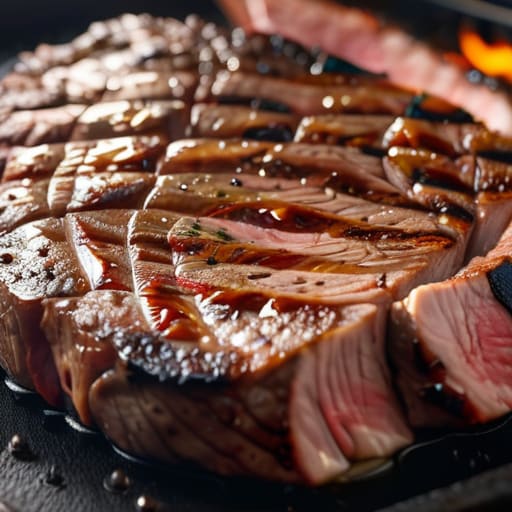
    The real difference in the griddle pan vs frying pan debate comes down to heat distribution and texture. A frying pan is designed for contact, while a griddle is about those distinct, charred lines. When you’re achieving perfect grill marks on a steak or a thick slice of halloumi, those raised ridges allow fat to drain away from the food. This prevents the meat from boiling in its own juices, ensuring you get that smoky, crusty finish we all want, even when you’re stuck inside on a rainy Tuesday.

    Five Rules for Getting the Most Out of Your Griddle

    • Stop using aerosol cooking sprays; they leave a sticky, gummy residue on your griddle that’s a nightmare to scrub off. Stick to a high-smoke point oil or a little bit of solid fat.
    • Let the pan get properly hot before you even think about dropping food on it. If you don’t wait for that heat to build up, you’ll end up steaming your food in its own juices instead of getting those beautiful sear marks.
    • Don’t crowd the surface. I see people try to cook six burgers at once in a small pan, and all they get is a gray, sad mess. Cook in batches so the temperature stays steady and the food actually browns.
    • Learn the art of the “dry clean.” For most daily use, skip the heavy soap and just use hot water and a stiff brush. If you’re using cast iron, make sure you dry it immediately on the stovetop to prevent any rust from setting in.
    • Invest in a sturdy metal spatula. If you’re using a heavy-duty griddle, a flimsy plastic turner is going to snap or melt the moment things get serious. You need something with some weight behind it to flip properly.

    My Rules for Buying a Griddle That Actually Works

    Stop chasing the “non-stick” label on cheap pans; look for heavy-duty materials like cast iron or high-grade carbon steel that can handle high heat and last for decades.

    Check the weight and the ridges—a real griddle needs enough mass to hold steady heat and deep enough grooves to let the fat drain away from your food.

    Don’t buy a specialty gadget if you don’t have the space; ensure the pan fits your most-used stovetop burner and actually serves a purpose beyond one single recipe.

    Investing in Your Kitchen's Future

    At the end of the day, choosing a griddle pan isn’t about following a culinary trend or filling up a cupboard with shiny new gadgets. It’s about recognizing the difference between a tool that performs and a tool that merely occupies space. We’ve looked at why you should ditch the flimsy, disposable non-stick options in favor of something with real heft, and why understanding the distinction between a standard frying pan and a dedicated griddle is essential for your workflow. If you invest in a heavy-duty, high-quality piece—ideally something like cast iron that actually improves with age—you aren’t just buying cookware; you are eliminating future waste and ensuring your kitchen remains functional for decades to come.

    My advice is simple: stop looking for the cheapest option and start looking for the last option. A kitchen should be a place of reliability, not a graveyard for cracked plastic and peeling coatings. When you choose tools that are built to endure, you free up your mental energy to focus on what actually matters—the food, the flavors, and the people you’re feeding. Build your kitchen on a foundation of quality over quantity, and I promise you won’t find yourself constantly hunting for replacements. Now, go grab that notebook, sketch out your setup, and start building a kitchen that actually works for you.

    Frequently Asked Questions

    Do I really need a dedicated griddle pan if I already have a heavy-duty cast iron skillet?

    Look, I’ll give it to you straight: you don’t need one, but you’ll probably want one. A heavy skillet is a workhorse, but it’s round. If you’re trying to sear four salmon fillets or a stack of pancakes at once, you’re going to run out of real estate fast. A rectangular griddle pan maximizes your surface area and lets you cook more efficiently without crowding the pan—which, as any pro knows, just leads to steaming instead of searing.

    How do I stop my food from sticking to the ridges if I'm not using a non-stick coating?

    Look, if you’re ditching the non-stick coatings, you have to respect the heat. The biggest mistake people make is trying to flip food too early. You need to wait for that natural sear to happen; once the food releases itself from the ridges, it’s ready. Use a high-smoke point oil—like avocado or grapeseed—and make sure your pan is preheated properly. If you’re using cast iron, a well-seasoned surface is your best friend.

    Is it worth the extra effort to season a cast iron griddle, or should I just buy one that's pre-seasoned?

    Look, if you’re looking for a quick fix, buy the pre-seasoned one. It’ll get you cooking immediately. But if you want to do it right, take the extra twenty minutes to season it yourself. A factory coating is often just a thin layer of oil that won’t stand up to real use. Building that base layer manually ensures the pan is truly ready for your kitchen, not just ready for the store shelf.

  • Different Types of Colanders for Straining Food

    Different Types of Colanders for Straining Food

    I spent twenty years in high-pressure commercial kitchens, and if there is one thing I learned, it’s that the kitchenware industry loves to sell you problems you don’t actually have. You walk into a big-box store and see aisles overflowing with specialized, silicone-coated, collapsible gadgets that promise to revolutionize your pasta night, but most of those colander types are just expensive ways to clutter your cabinets. I’ve seen enough flimsy plastic strainers crack under the weight of a simple batch of potatoes to know that “trendy” is usually just a synonym for disposable.

    I’m not here to help you decorate your kitchen; I’m here to help you equip it. In this guide, I’m stripping away the marketing fluff to give you a straight-talk breakdown of the only colander types worth your hard-earned money. We are going to focus on durability, drainage, and function—the three things that actually matter when you’re standing at the sink. My goal is to make sure that whatever you buy today is something you’ll still be using twenty years from now, not something you’ll be tossing in the bin by next Christmas.

    Table of Contents

    The Lasting Strength of Stainless Steel vs Silicone Colander

    The Lasting Strength of Stainless Steel vs Silicone Colander

    I’ve seen it a thousand times in both commercial kitchens and client homes: someone buys a colorful silicone trainer thinking it’s the modern choice, only to have it lose its shape or trap odors within a year. When you’re looking at a stainless steel vs silicone colander debate, you have to look past the aesthetic. Silicone might feel forgiving in your hand, but it lacks the structural integrity required for heavy-duty work. If you are draining a massive pot of heavy pasta, a silicone model can buckle or sag, making the process more stressful than it needs to be.

    In my experience, a high-quality stainless steel model is the only way to go if you want a tool that survives a lifetime of use. It doesn’t stain, it doesn’t absorb the scent of yesterday’s garlic, and it can handle the heat of a boiling pot without a second thought. When I’m putting together a kitchen strainer material guide for my clients, I always tell them to prioritize durability over “squishiness.” Invest in steel; it’s a one-and-done purchase that actually makes your food preparation more efficient.

    Choosing Food Preparation Tools That Actually Endure

    Choosing Food Preparation Tools That Actually Endure

    When you’re looking to build a kitchen that actually functions, you have to stop thinking about what looks good in a catalog and start thinking about durability. Most people approach their shopping by looking at the price tag first, but I’ve learned through years of managing high-volume catering that the cheapest option is almost always the most expensive in the long run. If you want to avoid the cycle of constant replacement, you need to treat your food preparation tools as long-term investments rather than disposable goods.

    My rule of thumb is simple: if it’s made of thin, flimsy plastic, it’s probably going to end up in a landfill within a year. Instead, I always recommend looking at the weight and the construction of the item. Whether you are deciding between a fine mesh sieve vs colander for different tasks, the goal is the same: stability and substance. A heavy-duty tool won’t wobble when you’re pouring a heavy pot of boiling water, and it won’t crack when you toss it in the sink. Buy once, buy well, and keep your cabinets free of the clutter that comes from buying junk.

    My Rules for Choosing a Colander You Won't Replace Next Year

    • Prioritize diameter over depth. A shallow, wide colander allows steam to escape much faster when you’re draining pasta, which prevents that dreaded “mushy noodle” syndrome caused by trapped heat.
    • Check the rim stability. If you’re looking at a stainless steel model, make sure it has a thick, rolled rim. Cheap ones with thin edges will warp under hot water or tip over the moment you put a heavy load of potatoes in them.
    • Match the mesh to the task. Don’t try to drain fine grains like quinoa in a standard large-hole pasta strainer; you’ll end up with a sink full of grit. Keep a smaller, fine-mesh sieve on hand for those delicate jobs.
    • Look for integrated handles, not just side loops. When a colander is full of boiling water and heavy vegetables, you need a secure grip. Those tiny little wire loops are a recipe for a burn if they slip.
    • Avoid the “all-in-one” gimmick sets. You don’t need a nesting set of five different plastic bowls just because they look tidy in the cupboard. One solid, heavy-duty stainless steel colander will outperform a whole drawer of flimsy plastic alternatives every single time.

    My Rules for Buying a Colander

    Skip the silicone and plastic; if it isn’t heavy-duty stainless steel, it’s just more clutter waiting to end up in a landfill.

    Look for stability over novelty—a colander that wobbles or tips while you’re draining heavy pasta is a tool that’s working against you.

    Prioritize ease of cleaning and durability; you want a piece of equipment that can handle a lifetime of boiling water and heavy use without cracking or staining.

    ## The Cost of Cheap Plastic

    “I’ve seen enough flimsy, neon-colored plastic strainers end up in landfills to know that if a colander feels like it’s going to snap under the weight of a pound of pasta, it’s a waste of your money and your cabinet space. Buy steel, buy weight, and buy something that won’t crack the first time you try to drain a heavy batch of potatoes.”

    Rosalind Hayter

    Making the Right Call for Your Kitchen

    Making the Right Call for Your Kitchen.

    At the end of the day, choosing a colander isn’t about finding the prettiest item in a catalog; it’s about deciding which tool won’t end up in a landfill by next season. We’ve looked at why stainless steel is the gold standard for durability and why you should think twice before reaching for those flimsy, colorful silicone versions that lose their shape the moment they hit hot water. Whether you need a heavy-duty mesh strainer for fine grains or a classic perforated bowl for pasta, remember that functionality must always trump fashion. If you invest in quality materials now, you won’t be back in the kitchenware aisle three months from now searching for a replacement.

    My advice is simple: stop treating your kitchen like a showroom and start treating it like a workspace. A well-organized kitchen is built on a foundation of reliable, heavy-duty tools that you can trust every single time you turn on the stove. When you stop chasing every passing trend and start focusing on pieces that actually endure, you’ll find that cooking becomes less of a chore and more of a craft. Buy it once, use it daily, and let your tools work as hard as you do.

    Frequently Asked Questions

    Is a mesh strainer actually better for small items like quinoa, or am I just buying another gadget I'll lose in the back of a drawer?

    It’s not just another gadget, but you have to be smart about it. A standard solid-hole colander is useless for quinoa or lentils; those tiny grains will just slip right through the holes and end up in your sink. If you cook grains, beans, or even fine pasta, a fine-mesh stainless steel strainer is a non-negotiable tool. Just skip the cheap, flimsy versions. Get a sturdy one, and it’ll earn its spot on your counter.

    How do I know if a stainless steel colander is actually high-quality or just cheap metal that's going to rust in six months?

    Look for the “18/10” stamp on the bottom. That’s your first line of defense—it means the steel has enough chromium to actually resist rust. Next, give it a weight test. If it feels like a tin can, put it back. You want something with a heavy gauge that doesn’t flex when you fill it with pasta. Finally, check the welds; if the seams look messy or pitted, it’s a cheap imitation.

    Do I really need different colanders for pasta and vegetables, or can one heavy-duty piece do it all?

    Look, I’ve seen enough commercial kitchens to know that “specialized” is often just a marketing term for “more clutter.” If you invest in one high-quality, heavy-duty stainless steel colander with a sturdy rim, you can absolutely handle both pasta and vegetables. The key is size and drainage speed. One large, well-built piece is far better than a drawer full of mismatched plastic gadgets that will eventually end up in a landfill.

  • How to Use an Immersion Blender

    How to Use an Immersion Blender

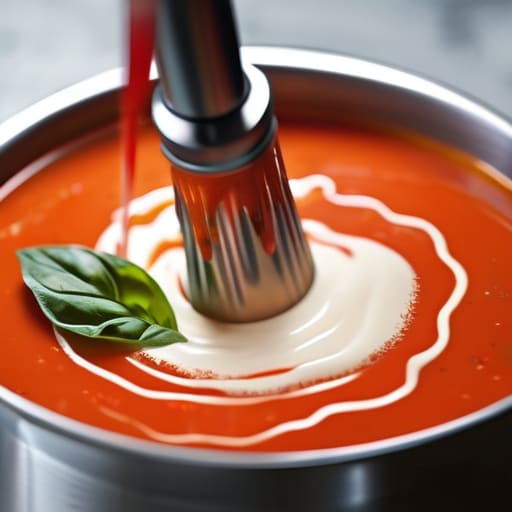
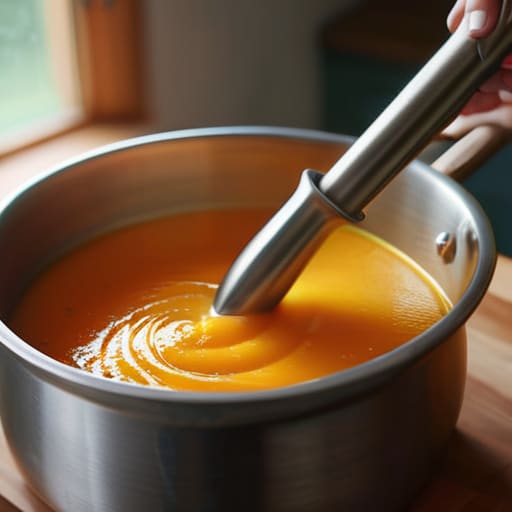
    I’ve lost count of how many times I’ve seen a “must-have” kitchen gadget end up in a junk drawer, gathering dust and shame. Most people think they need a $500 high-speed countertop blender just to whip up a quick seasonal soup, but honestly? That’s just expensive noise. I spent two decades managing commercial kitchens where efficiency was everything, and I can tell you that a cheap, flimsy immersion blender is nothing more than a glorified, plastic paperweight that will burn out the moment it hits a frozen vegetable. If you’re tired of fighting with bulky machines and cleaning up a mess of splatters every time you want a smooth puree, it’s time to stop buying trends and start investing in actual tools.

    I’m not here to sell you on the latest shiny gadget with twenty different attachments you’ll never touch. My goal is to help you find a heavy-duty immersion blender that actually feels like a professional tool in your hand—something built to last through years of daily use. I’m going to cut through the marketing fluff and tell you exactly what to look for in terms of motor power, build quality, and real-world durability. Let’s get your kitchen working for you.

    Table of Contents

    Stick Blender vs Countertop Blender Choosing Lasting Quality

    Stick Blender vs Countertop Blender Choosing Lasting Quality

    I get asked this question at least once a week when I’m consulting on kitchen layouts: “Do I really need both, or is one just a waste of counter space?” Look, if you’re someone who makes a massive protein shake every single morning, a heavy-duty countertop unit has its place. But for most of the real, hearty cooking I do—think velvety butternut squash or a quick batch of pesto—the stick blender vs countertop blender debate usually settles in favor of the handheld. A countertop blender is a bulky beast that’s a pain to wash and takes up precious real estate. A high-quality wand, however, goes straight to the pot, saving you from transferring hot liquids and risking a burn.

    If you want to master the art of efficiency, focus on versatility. I love emulsifying vinaigrettes with a stick blender right in the jar; it’s faster, cleaner, and gives you much better control over the texture than a massive blade spinning at high speeds. Don’t buy a cheap, lightweight model that vibrates your teeth loose. Invest in something with weight and a metal shaft. You want a tool that feels like an extension of your hand, not a piece of disposable plastic.

    The Best Immersion Blender for Smoothies and Daily Rituals

    The Best Immersion Blender for Smoothies and Daily Rituals

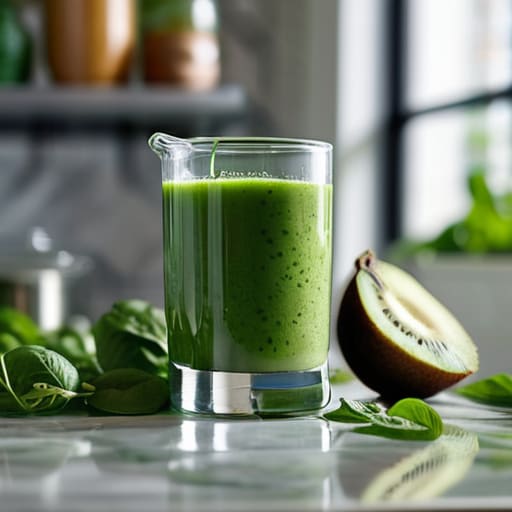
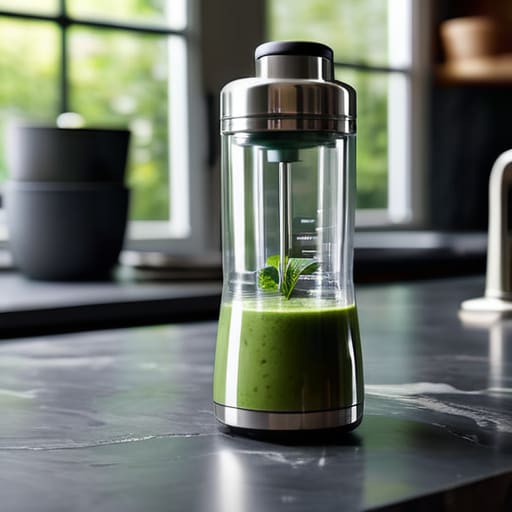
    If you’re looking for the best immersion blender for smoothies, don’t expect it to replace a high-speed Vitamix for frozen, rock-hard fruit. However, for your morning green juice or a quick protein shake, a solid handheld unit is much more efficient. I’ve seen too many people clog up their bulky countertop blenders for a single serving, only to spend ten minutes scrubbing the blades afterward. A good stick blender allows you to blend directly in your glass or a small beaker, which keeps the mess contained and the workflow tight.

    When it comes to your daily rituals, versatility is king. Beyond the breakfast rush, I rely on mine for emulsifying vinaigrettes with a stick blender in a simple mason jar—it takes ten seconds and creates a much more stable dressing than shaking it by hand. Just remember that the secret to a smooth texture is keeping the head fully submerged; if you lift it too early, you’ll just end up with air bubbles and a splattered countertop. It’s about using the tool with intention, not just plugging it in and hoping for the best.

    Five Rules for Buying a Blender That Won't End Up in a Junk Drawer

    • Look for metal shafts, not plastic. Plastic blades might look fine on the shelf, but they scratch, stain, and eventually crack. A stainless steel shaft is a non-negotiable if you want a tool that can handle hot soups and heavy ingredients without warping.
    • Check the weight and the grip. If the blender feels like a lightweight toy in your hand, it’s going to vibrate like crazy when you turn it on. You want something with enough heft to feel stable, but a handle that’s ergonomic enough that your hand won’t cramp during a long prep session.
    • Don’t overlook the motor’s power. You don’t need a commercial-grade beast for every task, but if you’re planning on crushing frozen fruit or thick stews, a weak motor will just burn itself out in six months. Aim for something that sounds steady, not strained.
    • Prioritize easy cleaning. In my years managing catering kitchens, the biggest time-waster was always the cleanup. If the blades aren’t detachable or if the design has too many nooks and crannies where food gets stuck, you’ll find every excuse to avoid using it.
    • Test the attachment variety. A good immersion blender should be a modular part of your kit. If it comes with a whisk or a chopper attachment that actually feels sturdy, you’re getting a multi-tool rather than a single-use gadget that takes up unnecessary drawer space.

    My Bottom Line on Choosing an Immersion Blender

    Stop chasing the lowest price tag; a cheap, lightweight motor will burn out the first time you try to blend something thick like hummus or frozen fruit.

    Prioritize metal shafts over plastic ones—not just for durability, but because you can actually sanitize them properly without worrying about stains or odors.

    Look for a tool that feels balanced in your hand, because if it’s clunky and awkward to hold, it’s just going to end up gathering dust in the back of your cupboard.

    The Truth About Your Countertop

    Most people treat an immersion blender like a cheap novelty, but if you buy one with a heavy-duty motor and a stainless steel shaft, you’re not just buying a gadget—you’re buying the ability to whip up a silky soup or a quick sauce without the endless, noisy cleanup of a bulky countertop blender.

    Rosalind Hayter

    Making the Right Call for Your Kitchen

    Making the Right Call for Your Kitchen

    At the end of the day, choosing an immersion blender shouldn’t feel like a high-stakes gamble, but it is worth the effort to get it right. We’ve looked at why you might choose the versatility of a stick blender over the bulk of a countertop unit, and why investing in a heavy-duty model for your daily smoothies is a move that pays off in the long run. Don’t let the marketing fool you into thinking you need a dozen different attachments; focus on build quality and motor power. If the tool feels flimsy in your hand, it won’t survive your kitchen, no matter how many fancy buttons it has. Stick to the basics, prioritize durability over bells and whistles, and you’ll end up with a tool that actually earns its place on your counter.

    My philosophy has always been that a well-equipped kitchen is built on intention, not impulse. You don’t need a drawer full of specialized gadgets that end up gathering dust in the back of a cabinet. Instead, aim for a collection of reliable, hardworking essentials that make your life easier every single time you cook. When you buy things that are meant to last a lifetime, you aren’t just saving money—you’re building a foundation for better habits. So, skip the trendy plastic junk, invest in the real deal, and get back to the joy of cooking with tools you can actually trust.

    Frequently Asked Questions

    How do I tell if a blender is actually heavy-duty or just another piece of cheap plastic masquerading as professional gear?

    Pick it up. If it feels light and hollow, like a toy, put it back. A real tool has weight to it, usually from a high-torque motor and metal components. Check the shaft—if it’s plastic, it’ll crack or warp under heat. You want stainless steel. Look for seamless construction where the blade meets the guard; if there are flimsy plastic seams, those are just failure points waiting to happen.

    Is it worth spending more on a model with a metal shaft, or will a plastic one hold up for my daily soups?

    If you’re making daily soups, spend the extra money on the metal shaft. Don’t let the price tag intimidate you; it’s a one-time investment. Plastic shafts tend to warp over time when exposed to high heat, and they can even crack if you’re blending something thick like a hearty lentil soup. A stainless steel shaft is durable, easy to sanitize, and won’t leach chemicals into your food. Get the metal one—it’s built to last.

    Can I actually use an immersion blender for thick sauces, or is it strictly for thin liquids like smoothies?

    You can absolutely use one for thick sauces, but you have to stop treating it like a countertop blender. If you try to force a heavy, viscous sauce through a tiny blade without giving it room to move, you’ll just burn out the motor. The trick is to work in stages. Start with a bit of liquid to get things moving, then slowly incorporate the thicker elements. Just don’t expect it to do the heavy lifting of a Vitamix.

  • How a Coffee Grinder Affects Flavor

    How a Coffee Grinder Affects Flavor

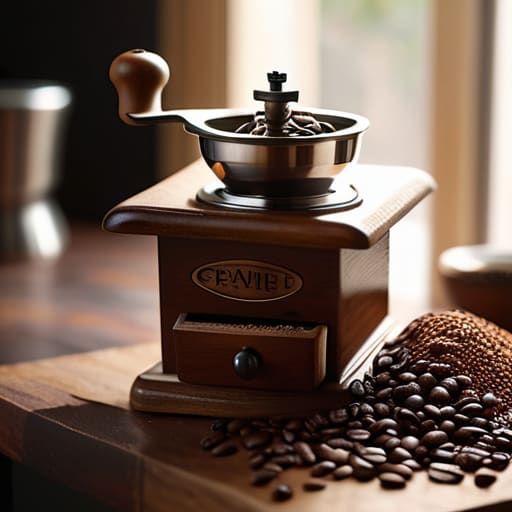
    I spent two decades managing high-pressure commercial kitchens where every second and every tool mattered, and if there is one thing that drives me up the wall, it’s seeing people throw money away on “smart” gadgets that do nothing but clutter a countertop. I recently watched a friend spend a small fortune on a touchscreen-operated, Wi-Fi-enabled coffee grinder that looked more like a piece of sci-fi movie prop than a kitchen appliance. It was a shiny, plastic nightmare that struggled to produce a consistent grind, proving once again that complexity is not a substitute for quality. You don’t need an app to tell you when your beans are ready; you need a machine that actually does its job without breaking down after six months of light use.

    I’m not here to sell you on the latest over-engineered trend or convince you that you need a thousand-dollar setup to enjoy a decent cup. My goal is to cut through the marketing fluff and help you find a reliable, heavy-duty tool that will still be sitting on your counter ten years from now. I’m going to walk you through exactly what to look for in a high-quality burr system and why you should ignore the flashy lights in favor of build quality and grind consistency.

    Table of Contents

    The Truth About Ceramic vs Steel Burrs

    The Truth About Ceramic vs Steel Burrs.

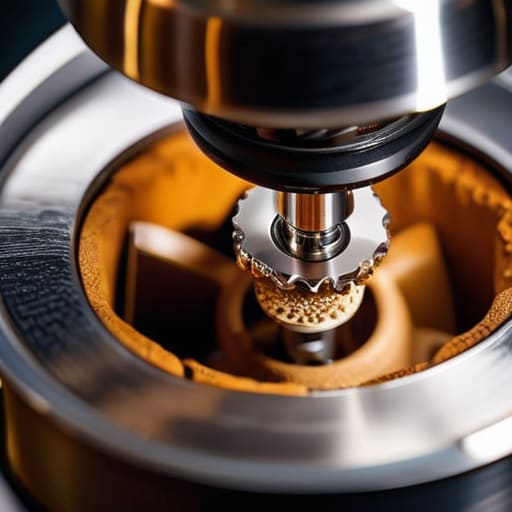
    When you’re looking at the guts of a machine, you’ll inevitably run into the debate of ceramic vs steel burrs. After years of managing high-volume service, I’ve learned that there is no “perfect” material—only the right tool for the job you’re actually doing. Ceramic is popular because it stays cool during long sessions, which helps preserve those delicate oils, but it can be brittle. If you drop a ceramic component or use it incorrectly, it can chip, and those tiny shards are the last thing you want in your cup.

    Steel, on the other hand, is the workhorse of the industry. It’s incredibly sharp and provides a much more consistent particle size, which is non-negotiable if you are searching for the best grinder for espresso. While steel can generate a bit more heat during heavy use, the precision it offers usually outweighs that concern for most home cooks. If you want a setup that feels substantial and reliable, I almost always lean toward steel. Just make sure you aren’t buying a cheap unit that lacks the stability to handle the torque.

    Mastering Coarse vs Fine Grind Settings

    Mastering Coarse vs Fine Grind Settings guide.

    If you can’t control your grind, you’re just guessing, and guessing is a recipe for a bitter, undrinkable cup. Understanding coarse vs fine grind settings is the difference between a muddy mess and a clean, vibrant brew. When I was managing catering lines, we didn’t have time for trial and error; you had to get the texture right the first time. For a French press, you want something coarse, like sea salt, to prevent the silt from clogging your palate. If you go too fine there, you’ll end up with a cup that tastes like dirt.

    On the other end of the spectrum, if you’re hunting for the best grinder for espresso, you need to be able to dial in a much finer, powdery consistency. This is where many people get frustrated—they think their equipment is broken when, in reality, they just haven’t mastered the adjustment mechanism. Whether you are working with a conical or flat burr setup, remember that even a tiny shift in the dial changes how water extracts the oils. Stop treating your settings like a suggestion; treat them like the science they are.

    Five Rules for Keeping Your Grinder from Becoming Kitchen Junk

    • Stop buying “all-in-one” machines that claim to do everything; if the motor feels flimsy and the plastic housing is thin, it’s going to burn out before you’ve even mastered your pour-over.
    • Clean your burrs more often than you think you need to; coffee oils go rancid quickly, and if you aren’t clearing out that old, stale residue, your expensive beans will taste like cardboard no matter how fresh they are.
    • Treat your grinder like a precision tool, not a blender; never force the adjustment dial if it feels stuck, or you’ll end up stripping the gears and turning a solid investment into a paperweight.
    • Keep your beans in airtight, opaque containers away from the stove; heat and light are the enemies of flavor, and no amount of high-end grinding can fix a bean that’s already gone stale in your pantry.
    • Invest in a small, dedicated scoop rather than eyeing the beans by hand; consistency in the amount of coffee you use is the first step toward a repeatable, reliable brew that doesn’t require guesswork.

    Cut Through the Noise: My Three Golden Rules for Grinders

    Stop chasing the cheapest option on the shelf; a heavy-duty burr grinder is an investment in your morning sanity, not just a kitchen gadget.

    Don’t let the fancy settings fool you—the real skill is learning how to match your grind size to your specific brewing method so you aren’t wasting good beans.

    Prioritize build quality over bells and whistles; I’d much rather have a sturdy, manual or electric machine that lasts twenty years than a plastic one that ends up in a landfill by next Christmas.

    The Cost of Cutting Corners

    I’ve seen enough cheap, plastic-toothed grinders end up in a landfill to know the truth: if you’re buying a machine that can’t handle a consistent grind, you aren’t just wasting money—you’re sabotaging your morning before the kettle even whistles.

    Rosalind Hayter

    Investing in Your Morning Ritual

    Investing in Your Morning Ritual: Coffee Grinder

    At the end of the day, choosing a grinder isn’t about chasing the latest kitchen gadget or buying whatever looks sleek on a social media feed. It’s about understanding that the quality of your burrs—whether you opt for the durability of steel or the heat-resistance of ceramic—directly dictates the flavor in your cup. Once you master the relationship between your grind setting and your brewing method, you stop guessing and start actually enjoying your coffee. Don’t let a cheap, inconsistent machine turn your morning routine into a frustrating chore; prioritize mechanical reliability over aesthetic trends every single time.

    I’ve spent decades in professional kitchens seeing how the right tool can transform a chaotic service into a seamless flow, and your home kitchen deserves that same level of respect. A good grinder is a foundational piece of equipment, much like a well-seasoned cast iron skillet, that should serve you for years rather than months. Stop settling for the mediocre, pre-ground stuff or the disposable plastic junk that ends up in a landfill by next season. Buy something that feels heavy in your hand and works exactly how it’s supposed to. When you invest in the right gear, you aren’t just buying a tool—you’re investing in a better daily habit.

    Frequently Asked Questions

    How often do I actually need to clean the burrs to keep my coffee from tasting bitter or stale?

    If you’re noticing a bitter, burnt taste in your cup, your burrs are likely choked with old oils. I don’t believe in overcomplicating things: give them a thorough dry brush once a week. If you’re a heavy drinker or use oily beans, do a deep clean with a specialized cleaning pellet once a month. Don’t let rancid residue ruin a good roast; keep those blades clean and your coffee will stay bright.

    Is it worth spending the extra money on an electric grinder, or can I get the same results with a reliable manual one?

    Look, if you aren’t brewing coffee for a dozen people every morning, you don’t need to drop hundreds on an electric unit. A high-quality manual grinder will give you the exact same grind consistency as the expensive electric models, provided the burrs are decent. I’d much rather see you spend that extra cash on better beans or a solid cast iron skillet. Save the electricity; just be prepared to put in a little elbow grease.

    How do I know if my grinder is actually producing a consistent grind or if it's just spitting out uneven chunks?

    The easiest way to tell? Stop looking at the machine and start looking at the grounds. Spread a handful of your fresh grind onto a flat, white plate. If you see a mix of fine dust and large, jagged boulders, your grinder is failing you. A quality burr grinder should produce a uniform texture—think coarse sea salt for French press or fine sand for espresso. If it’s uneven, you’re just brewing inconsistent, bitter coffee.

  • What Matters in a Home Espresso Machine

    What Matters in a Home Espresso Machine

    I’ve spent twenty years in commercial kitchens, and if there is one thing I’ve learned, it’s that most people treat an espresso machine like a piece of high-tech jewelry rather than a tool. I see them every day: shiny, overpriced plastic contraptions with more buttons than a cockpit, designed to look good on a countertop for six months before the internal pump dies and they end up in a landfill. You don’t need a machine that requires a software update just to pull a shot; you need something with heft and soul that actually does the job without a fuss.

    I’m not here to sell you on the latest trend or convince you that you need a thousand-dollar setup to enjoy your morning. My goal is to help you cut through the marketing noise and find a machine that is built to last. I’ll be sharing my honest, experience-based take on what actually matters—from build quality to ease of cleaning—so you can invest in a piece of equipment that becomes a permanent fixture in your kitchen, not just another piece of clutter.

    The Truth About Single Boiler vs Dual Boiler Systems

    The Truth About Single Boiler vs Dual Boiler Systems.

    Most people walk into a kitchen supply store and get immediately overwhelmed by the technical jargon, but the debate between single boiler vs dual boiler systems really comes down to how you actually use your morning ritual. If you’re someone who views coffee as a slow, meditative process, a single boiler is a perfectly fine, budget-friendly way to start. You’ll brew your shot, then wait a minute or two for the machine to heat up enough to steam your milk. It’s a bit of a dance, and it requires some patience, but it works if you aren’t in a rush.

    However, if you want to master advanced milk frothing techniques without the constant waiting game, you need to invest in a dual boiler. These machines have separate heating elements for brewing and steaming, meaning you can do both at the exact same time. For anyone serious about their home barista equipment, that ability to maintain consistent extraction temperature control while steaming is a game-changer. It’s the difference between a clunky, stop-and-start process and the seamless flow you’d see in a professional cafe.

    Why Portafilter Compatibility Matters for Lifelong Use

    When you’re looking at high-end gear, it’s easy to get blinded by the shiny chrome and forget about the actual mechanics of how you’ll be using it every morning. One thing I see people overlook constantly is portafilter compatibility. You aren’t just buying a machine; you’re entering an ecosystem. If you buy a machine with a proprietary or obscure attachment system, you are effectively locking yourself into a corner. If a part breaks five years from now, or if you eventually decide you want to upgrade to a precision basket to improve your shots, you might find yourself stuck with a heavy paperweight because you can’t find the right accessories.

    I always tell my clients to look for standardized sizes. A machine that plays well with the industry standard means you have the freedom to experiment with different home barista equipment as your skills evolve. Whether you’re refining your puck preparation or eventually looking into more advanced tools for better extraction temperature control, you want gear that grows with you. Don’t buy into a closed system that forces you to replace the whole unit just because you wanted a different handle or a better basket.

    Five Rules for Buying an Espresso Machine That Won't End Up in a Landfill

    • Prioritize build quality over digital screens. I’ve seen too many “smart” machines with touchscreens that fail after two years; give me heavy brass, stainless steel, and physical switches that feel substantial in my hand every single time.
    • Don’t neglect the grinder. An expensive espresso machine is a paperweight if you’re feeding it inconsistent grounds; invest in a high-quality burr grinder that can actually handle the fine precision required for a proper shot.
    • Check for repairability before you swipe your card. If a part breaks and you can’t find a replacement online or a technician who can fix it, you haven’t bought a tool—you’ve bought a future piece of trash.
    • Size matters, but not in the way you think. Don’t just measure your counter space; consider the “workflow footprint”—make sure you have enough room to actually move around, clean the machine, and place your cups without feeling cramped.
    • Learn the maintenance requirements upfront. A machine that requires daily, deep cleaning just to stay functional might be too high-maintenance for your lifestyle; be honest with yourself about how much time you’re actually willing to spend on upkeep.

    My Golden Rules for Buying an Espresso Machine

    Stop chasing the latest touchscreen trends; prioritize build quality and internal components that can actually be repaired rather than replaced.

    Don’t get caught in a compatibility trap—ensure your machine uses standard parts so you aren’t stuck with a paperweight when a specific brand-name piece fails.

    Match the machine’s complexity to your actual morning routine, because a professional-grade setup is useless if you’re too rushed to maintain it properly.

    Making the Right Call for Your Countertop

    At the end of the day, choosing an espresso machine isn’t about finding the one with the most flashing lights or the slickest touchscreen interface. It’s about understanding the mechanics of what you actually need. You have to weigh the simplicity of a single boiler against the precision of a dual system, and you absolutely cannot overlook the importance of portafilter compatibility. If you buy a machine that uses proprietary, flimsy parts, you aren’t buying a tool; you’re buying a temporary appliance that will eventually end up in a landfill. Focus on the build quality, the ease of maintenance, and the ability to find replacement parts ten years down the road. Invest in hardware that respects your craft.

    I’ve seen too many people treat their kitchen like a showroom for trendy gadgets, only to realize six months later that they’re fighting their equipment every single morning. Don’t let that be you. A great espresso machine should feel like an extension of your hands, a reliable partner in your daily ritual that stays steady and consistent. When you stop chasing the latest plastic fad and start prioritizing longevity and function, you turn a simple caffeine fix into a meaningful moment of calm. Buy it once, maintain it well, and let it serve you for a lifetime.

    Frequently Asked Questions

    Do I really need a built-in grinder, or should I invest in a separate high-quality burr grinder instead?

    Get a separate burr grinder. Period. I’ve seen too many people buy all-in-one machines only to realize the built-in grinder is the weak link. When that little motor dies or the burrs go dull, your entire expensive machine becomes a paperweight. A standalone, high-quality burr grinder gives you better grind consistency and, more importantly, room to upgrade. Buy them separately so you can fix, replace, or improve one without touching the other.

    How much counter space am I actually going to lose to a machine that looks good but is a pain to clean every single morning?

    Look, don’t just measure the footprint of the machine; measure the “workflow radius.” If you buy a massive, industrial-looking beast, you aren’t just losing twelve inches of counter; you’re losing the space needed to set down your grinder, your knock box, and your scale. If you’re constantly shuffling things around just to wipe down a spill, that machine is winning and you’re losing. Buy for the space you actually use, not just the aesthetic.

    Is it worth paying the premium for a commercial-grade machine if I'm only making one or two shots a day?

    Look, I’ve seen enough commercial kitchens to know that “overbuilt” is often better than “just enough.” If you’re only pulling two shots a day, you don’t need a massive, multi-group machine that eats electricity. But don’t mistake “home use” for “cheaply made.” Pay the premium for build quality—heavy brass, stainless steel, and repairable parts—not for extra features. Buy a machine that can be serviced in ten years, not one you have to toss.

  • Benefits of Using a Slow Cooker

    Benefits of Using a Slow Cooker

    I spent twenty years in commercial kitchens where every second and every cent counted, so nothing irritates me more than seeing people clutter their counters with “smart” kitchen gadgets that do nothing but take up space. I’ve seen countless folks fall for the marketing hype, buying a high-tech, digital-display slow cooker that promises to revolutionize their lives, only to have it end up gathering dust in a cabinet when the fancy interface breaks. You don’t need a computer in your kitchen to make a decent pot of stew; you just need a heavy-duty vessel that can actually hold heat and survive a decade of daily use.

    In this guide, I’m cutting through the noise to tell you what actually matters when you’re shopping for gear. I’m not here to sell you on the latest trends or expensive bells and whistles that you’ll never touch. Instead, I’m going to share my no-nonsense criteria for finding a workhorse that earns its spot on your countertop. We’ll talk about weight, lid seals, and why sometimes the simplest models are the smartest investment you can make for a functional home.

    Table of Contents

    Unlocking the Low and Slow Cooking Benefits

    Unlocking the Low and Slow Cooking Benefits

    Unlocking the Low and Slow Cooking Benefits

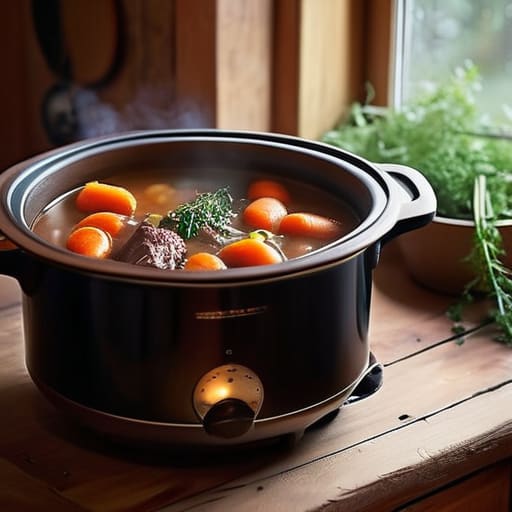
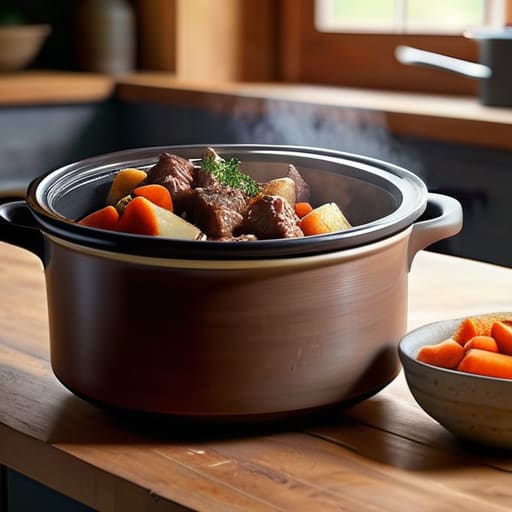
    When I was managing commercial kitchens, we relied on high heat to move volume, but there is a specific magic that happens when you step away from the flame. The real low and slow cooking benefits aren’t just about convenience; it’s about chemistry. When you cook proteins at a steady, lower temperature over several hours, the connective tissues—the tough stuff that makes cheap cuts of meat difficult to chew—slowly melt into gelatin. This process transforms a budget-friendly chuck roast into something that falls apart with nothing more than a fork.

    Beyond the texture, this method is my secret weapon for efficient living. I’m a big believer in set it and forget it meals because they allow you to reclaim your evening without sacrificing a real, home-cooked dinner. Instead of hovering over a stove after a long day, you can rely on those consistent heat levels to do the heavy lifting for you. It’s the most reliable way to ensure that even the most basic ingredients end up tasting like they took all day to prepare.

    Slow Cooker vs Pressure Cooker Choosing Lasting Utility

    Slow Cooker vs Pressure Cooker Choosing Lasting Utility

    I see this debate all the time: do you buy a high-tech pressure cooker or stick with a traditional ceramic pot? If you’re looking for speed, the pressure cooker wins. It’s great for when you’ve forgotten to take the meat out of the freezer and need dinner in thirty minutes. But if you ask me, speed isn’t always the goal of a good meal. When it comes to slow cooker vs pressure cooker, the real winner for flavor is the one that doesn’t rush the process.

    A pressure cooker forces food to cook under intense heat, which can sometimes leave proteins feeling a bit rubbery if you aren’t careful. A classic crock pot, however, allows connective tissues in tougher, cheaper cuts of meat to melt away naturally over several hours. This is where you find those truly tender results that make set it and forget it meals worth the counter space. If you want to build a kitchen based on utility rather than hype, prioritize the tool that masters patience. It’s the difference between a rushed meal and a dinner that actually tastes like it had time to develop.

    Five Rules for Making Your Slow Cooker Actually Work for You

    • Stop drowning your ingredients in liquid. Unlike a stovetop pot, a slow cooker traps all that steam inside, so things don’t evaporate. If you add too much water or broth at the start, you’ll end up with a bland, watery soup instead of a rich, flavorful stew.
    • Layer your ingredients with intention. Always put your hardest, densest vegetables—like carrots, potatoes, or onions—at the very bottom. They need the direct heat from the element to soften, whereas delicate meats should sit on top so they don’t turn into mush.
    • Skip the “set it and forget it” trap with dairy. If a recipe calls for cream, cheese, or yogurt, wait until the very end. If you toss milk into a slow cooker for eight hours, it’ll break and separate, leaving you with a grainy texture that’s frankly unappetizing.
    • Don’t be a lid-lifter. Every time you peek to see if things are done, you release all that captured heat and reset the cooking clock. If you’re constantly lifting the lid, you aren’t slow cooking; you’re just making your dinner take twice as long.
    • Invest in a heavy ceramic insert, not a cheap replacement. If you’re buying a unit, make sure the crock is substantial and retains heat well. A thin, flimsy ceramic liner won’t distribute temperature evenly, and you’ll find yourself fighting unevenly cooked food.

    My Golden Rules for Choosing a Slow Cooker

    Stop chasing the latest multi-functional gadget with twenty buttons; look for a heavy-duty ceramic insert and a simple, reliable heating element that won’t quit on you.

    Size matters more than you think—buy a model that fits your actual lifestyle, not just your smallest recipe, so you aren’t constantly upgrading when you actually have people over for dinner.

    Focus on durability over bells and whistles; a high-quality slow cooker should be a permanent fixture on your counter, not a piece of plastic junk relegated to the back of the pantry after six months.

    The Truth About the Slow Cooker

    A slow cooker isn’t a magic wand that makes bad ingredients taste good; it’s a reliable workhorse that respects the chemistry of time. Stop looking for a gadget that does the thinking for you and start looking for one that lets you focus on the prep.

    Rosalind Hayter

    Final Thoughts on Your Slow Cooker Investment

    Final Thoughts on Your Slow Cooker Investment

    At the end of the day, choosing a slow cooker isn’t about finding the one with the most buttons or the flashiest digital display. It’s about identifying a tool that can handle the heavy lifting of your weekly meal prep without falling apart. We’ve looked at how the low-and-slow method transforms tough cuts of meat into something tender, and we’ve weighed the steady reliability of a slow cooker against the high-speed intensity of a pressure cooker. My advice remains the same: skip the single-use gimmicks and look for a model with a solid heating element and a heavy-duty ceramic or stoneware insert. If you buy a piece that is built to endure, you aren’t just buying a kitchen appliance; you are investing in a reliable workhorse that will serve your household for years to come.

    A well-run kitchen is built on foundation, not trends. Once you have a quality slow cooker sitting on your counter, the real magic happens in your habits—learning how to prep your ingredients efficiently and how to let time do the hard work for you. Don’t let the fear of a cluttered pantry or a complicated recipe stop you from embracing this method. Focus on the quality of your tools and the consistency of your routine. When you stop chasing every new gadget and start mastering the basics, you’ll find that cooking becomes less of a chore and more of a seamless part of your life. Now, grab your notebook, plan your first batch, and let the machine do the rest.

    Frequently Asked Questions

    Is it actually worth spending more on a heavy ceramic crock, or will a cheap glass one do the same job?

    Don’t let the price tag fool you into thinking glass is a shortcut. In my experience, a heavy ceramic crock is worth every extra cent. Ceramic holds heat much more steadily, which is the whole point of low-and-slow cooking. Cheap glass tends to have hot spots and can even crack under thermal shock if you aren’t careful. If you want consistent results and a tool that won’t fail you mid-meal, go with the ceramic.

    How do I know if a slow cooker is powerful enough to handle a large roast without leaving the meat tough?

    Don’t get distracted by fancy digital displays; look at the wattage and the heating element. For a large roast, you need a unit that can consistently hit a simmer without struggling. If your slow cooker takes two hours just to get warm, that meat is going to sit in lukewarm liquid, turning it tough and gray instead of tender. Look for a heavy-duty model with a thick ceramic insert that holds heat steady.

    Can I safely use my slow cooker to cook frozen meat, or is that a recipe for food poisoning?

    Don’t do it. I know it’s tempting when you’re rushing, but putting frozen meat straight into a slow cooker is a massive safety risk. Because these machines heat up gradually, that meat sits in the “danger zone” for far too long, allowing bacteria to multiply before the temperature actually climbs. It’s not worth the risk of food poisoning. Thaw your proteins in the fridge overnight first; it’s the only way to ensure a safe, reliable meal.

  • Replacing Parchment Paper With Silicone Baking Mats

    Replacing Parchment Paper With Silicone Baking Mats

    I spent twenty years in commercial kitchens where efficiency was the only law, and if there’s one thing that drives me up the wall, it’s watching people throw money down the drain on single-use disposables. I see it every time I walk into a client’s home: stacks of parchment paper and aluminum foil cluttering the pantry, destined for a landfill after one use. Honestly, if you’re still reaching for those flimsy sheets every time you want to bake a batch of cookies, you’re just working harder for no reason. Investing in a high-quality silicone baking mat isn’t some trendy kitchen hack; it’s a fundamental move toward a more functional, waste-free workspace.

    I’m not here to sell you on some overpriced, designer gadget that looks pretty on a social media feed but fails the first time it hits a hot oven. My goal is to cut through the marketing fluff and tell you exactly what to look for in a silicone baking mat that will actually survive years of heavy use. I’ll share what I’ve learned from professional catering lines and my own home to help you pick tools that last a lifetime.

    Table of Contents

    Why I Chose a Reusable Parchment Paper Alternative

    Why I Chose a Reusable Parchment Paper Alternative

    I’ve spent enough time in commercial kitchens to know that waste is the enemy of a functional workspace. Every time I see someone tearing off a huge sheet of parchment paper just to bake a single tray of cookies, I see money and resources going straight into the bin. When I transitioned from managing large catering crews to organizing home kitchens, I realized that most people aren’t looking for more clutter—they’re looking for efficiency. Switching to a reusable parchment paper alternative wasn’t just about being green; it was about streamlining my workflow.

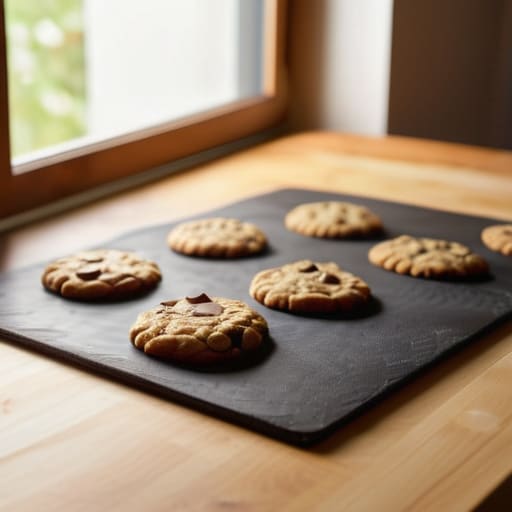
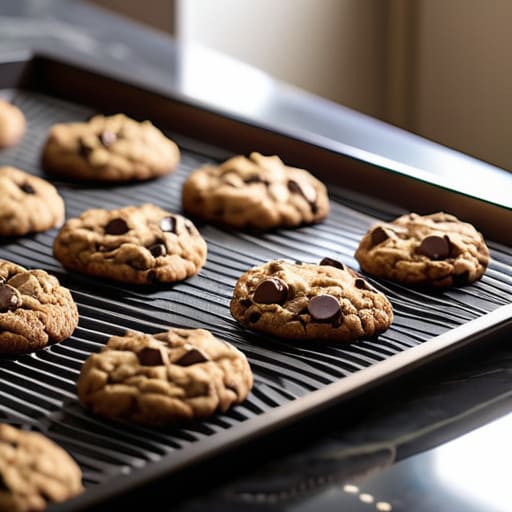
    Beyond the environmental impact, there is a massive practical advantage to how these mats perform. Unlike flimsy paper that curls up or tears when things get sticky, a high-quality mat provides a consistent, non-stick pastry surface every single time. I’ve found that they offer much more stability under a heavy rolling pin or a heavy sheet pan. When you’re comparing silicone vs parchment paper, the real winner is the tool that stays flat and predictable. You aren’t fighting your equipment; you’re just cooking.

    The Truth About Even Heat Distribution Baking

    The Truth About Even Heat Distribution Baking.

    The truth is, most people think a baking mat is just about preventing a mess, but it’s actually about how the heat behaves. When you use standard parchment, you’re essentially creating a thin, irregular barrier that can lead to hot spots or scorched bottoms. A high-quality mat provides a much more consistent non-stick pastry surface that helps regulate how energy moves from your pan into your dough. I’ve seen too many amateur bakers struggle with cookies that are burnt on the edges but raw in the middle; that’s usually a heat management issue, not a recipe flaw.

    When you’re looking at even heat distribution baking, you want a tool that acts as a stabilizer. Because these mats are engineered to sit flush against your sheet pan, they eliminate those tiny air pockets that cause uneven cooking. It’s a subtle difference, but once you switch from the flimsy, crinkled texture of disposable paper to a flat, professional-grade surface, you’ll notice your pastries come out with a much more uniform golden hue. It’s about working with the physics of your oven, not fighting against it.

    My Rules for Getting the Most Out of Your Mats

    • Stop over-greasing. One of the biggest mistakes I see is people slathering oil on a silicone mat like they’re prepping a cast iron skillet. These things are designed to be non-stick; a light wipe with a damp cloth is usually all you need to keep them ready for the next batch.
    • Watch your temperature limits. I’ve seen too many people crank the oven to 500°F thinking they can sear a protein on a mat, only to end up with a melted, sticky mess. Check the manufacturer’s rating, but generally, stay within the standard baking range to avoid warping the silicone.
    • Don’t use them for everything. A silicone mat is a dream for cookies and delicate pastries, but if you’re trying to get a heavy, crusty bread bottom, you might actually want a stone or a sheet pan. Know when the tool is the right fit for the job.
    • Clean them properly to avoid buildup. If you notice your cookies are starting to stick, you’ve likely got a layer of burnt sugar or grease buildup. Skip the abrasive scrubbers—they’ll tear the surface—and just use warm, soapy water and a soft sponge.
    • Store them flat or hung. I keep mine in a slim drawer, but if you’re tight on space, hanging them on a peg is fine too. Whatever you do, don’t pile heavy cast iron or heavy pots on top of them in your cupboard, or you’ll end up with permanent creases that ruin the even surface.

    The Bottom Line on Silicone Mats

    Stop treating your kitchen like a landfill; switching to a reusable mat saves you money and cuts down on the endless cycle of buying and tossing parchment paper.

    Don’t expect a miracle for delicate pastries, but for cookies, roasted veggies, and everyday bakes, the non-stick reliability is unbeatable.

    Quality matters—look for food-grade, heavy-duty silicone that won’t warp or peel after three uses, because I’m not interested in adding more cheap junk to your drawers.

    ## Stop Buying Trash

    “I’ve spent enough years in commercial kitchens to know that a good tool isn’t a luxury—it’s a way to save your sanity and your wallet. A quality silicone mat isn’t just about stopping things from sticking; it’s about cutting out the endless cycle of buying, wasting, and throwing away flimsy parchment paper that fails you right when the oven gets hot.”

    Rosalind Hayter

    Making the Right Call for Your Kitchen

    Making the Right Call for Your Kitchen.

    At the end of the day, a silicone baking mat isn’t some luxury item or a high-tech gadget you need to justify; it’s just a sensible, long-term solution to a common problem. We’ve talked about how they save you from the constant cycle of buying disposable parchment, how they help manage heat distribution for a better bake, and how they simplify your cleanup routine. When you stop viewing your kitchen tools as single-use items and start looking at them as investments in your daily workflow, everything changes. You aren’t just buying a mat; you are eliminating unnecessary waste and making your baking process much more predictable.

    My advice is simple: stop overcomplicating your pantry and start focusing on quality. You don’t need a drawer full of specialized gadgets that only work once a year. Instead, build a kit of reliable, heavy-duty essentials that can handle the heat and stand the test of time. Whether you are a seasoned pro or just trying to get through a batch of cookies without a mess, remember that a functional kitchen is built on smart, intentional choices. Grab a good mat, trust your instincts, and get back to the actual joy of cooking.

    Frequently Asked Questions

    Are these mats actually dishwasher safe, or will they just warp and degrade after a few cycles?

    Look, I get the skepticism. After years in commercial kitchens, I’ve seen plenty of “durable” gear melt into a sad, warped puddle after one trip through a high-heat cycle. Most decent silicone mats are absolutely dishwasher safe, but here’s my advice: use the top rack and skip the heavy-duty drying cycle. High heat is the enemy of longevity. If you treat them with a little respect, they’ll outlast your favorite rolling pin.

    Can I use them for high-heat roasting, or are they strictly for baking cookies and pastries?

    Don’t go pushing them to their absolute limits. Most quality mats are rated up to 450°F or 480°F, which is plenty for cookies or roasting vegetables, but I wouldn’t dream of using one for a high-heat sear or heavy roasting that requires intense, direct heat. If you’re cranking the oven to 500°F for a crusty bread or a quick roast, stick to my cast iron or a heavy baking sheet.

    Do they actually prevent sticking with sticky doughs, or am I still going to need a little grease?

    Look, I’ll give it to you straight: if you’re working with a high-sugar dough or something particularly tacky, don’t rely on the mat alone. While a good silicone mat is miles ahead of parchment, it isn’t magic. For those “sticky” situations, I still recommend a quick, light spray of oil or a thin wipe of butter. It’s not about the mat failing; it’s about ensuring a clean release so you aren’t fighting your food.

  • How to Use a Kitchen Scale for Accurate Cooking

    How to Use a Kitchen Scale for Accurate Cooking

    I spent two decades in commercial kitchens where “eyeballing it” wasn’t just a suggestion—it was a fast track to a ruined service and wasted food costs. I see people today buying these expensive, gadget-heavy smart scales that sync to their phones, yet they still can’t get a consistent loaf of bread to rise. It’s frustrating because most people treat kitchen scale usage like some high-tech chore rather than the simple, foundational habit it actually is. If you’re still relying on those flimsy plastic measuring cups to estimate your flour or liquids, you aren’t cooking; you’re just hoping for the best.

    I’m not here to sell you on a new piece of tech or a complicated system that requires a manual. My goal is to strip away the fluff and show you how to use a basic, reliable scale to bring true discipline to your countertop. I’ll show you exactly how to integrate proper kitchen scale usage into your daily routine so you can stop wasting ingredients and start getting the same professional results every single time you cook.

    Table of Contents

    Baking by Weight vs Volume a Habit for Success

    Baking by weight vs volume a habit for success.

    If you’ve ever pulled a cake out of the oven only to find it’s dense, gummy, or strangely dry, the culprit likely isn’t your oven—it’s your measuring cups. Most people rely on volume, but when it comes to baking by weight vs volume, volume is a liar. A cup of flour can vary by as much as twenty percent depending on how tightly you pack it into the vessel. One day you’re light and airy; the next, you’re essentially baking a brick. By switching to a scale, you eliminate that variable entirely.

    I tell my clients that consistency is the difference between a hobbyist and a professional. To get it right, you need to master measuring dry ingredients accurately by using grams rather than cups. This isn’t just about being “fancy”; it’s about discipline. Once you get used to the process, you’ll realize how much time you save by using a single bowl and utilizing the tare function to zero out your container between ingredients. It keeps your workspace clean and your ratios perfect every single time.

    Measuring Dry Ingredients Accurately Without the Waste

    If you’re still scooping flour into a measuring cup, you’re likely packing more into that cup than the recipe intended. It’s a common mistake, but one that ruins the texture of a delicate sponge or a hearty loaf of bread. To start measuring dry ingredients accurately, you need to stop treating your ingredients like liquids. Instead, place your mixing bowl directly on the scale and use the tare function explained in my previous guide to zero it out. This allows you to add flour, sugar, or even cocoa powder directly into the vessel without ever touching a measuring spoon.

    The real beauty of this method is the reduction in mess and wasted product. When you’re working with expensive spices or small amounts of specialty flours, every gram counts. By switching to a scale, you eliminate the need for a mountain of dirty dishes and the constant “leveling off” dance with a knife. It’s about streamlining your workflow and ensuring that what goes into the bowl is exactly what the recipe demands. Once you get into the rhythm of weighing as you go, you’ll wonder how you ever managed with those bulky, imprecise cups.

    Five Ways to Stop Fighting Your Scale and Start Using It

    Five Ways to Stop Fighting Your Scale and Start Using It
    • Master the tare function like your life depends on it. The “zero” button isn’t just a suggestion; it’s your best friend. Put your bowl down, hit tare, add your flour, hit tare again, and add your sugar. It keeps your workspace clean and prevents you from having to wash five different measuring cups just to make one batch of cookies.
    • Stop using your scale for things that don’t need it. You don’t need to weigh a single clove of garlic or a pinch of salt. Use the scale for the heavy hitters—flour, sugar, butter, meat, and liquids. If you’re weighing every single tiny spice, you’re just wasting time and making your workflow clunky.
    • Keep your scale on a flat, stable surface. I’ve seen people try to weigh ingredients on a pile of cookbooks or a slightly tilted countertop, and it drives me up the wall. If the surface isn’t level, your readings are lies. Find a dedicated spot on your counter and keep it there.
    • Mind the capacity limits. Every scale has a breaking point, and if you try to weigh a heavy Dutch oven on a delicate digital scale meant for spices, you’re going to break it. Check the max weight capacity before you start loading up your ingredients, especially if you’re prepping for a large meal.
    • Clean it immediately. Kitchen spills and flour dust are the enemies of precision. A scale that’s coated in dried honey or fine powder won’t give you an accurate reading, and it’s a nightmare to clean once it gets stuck in the sensors. Wipe it down after every single use.

    The Bottom Line: Three Rules for a More Disciplined Kitchen

    Stop relying on measuring cups for everything; if you want consistency—especially in baking—start weighing your ingredients.

    Invest in a heavy-duty, digital scale that you can actually rely on, rather than a cheap plastic one that will fail you mid-recipe.

    Use your scale to minimize mess and waste by using the “tare” function, letting you build your recipe in a single bowl instead of cluttering your counter with extra dishes.

    The Cost of Guesswork

    Stop treating your ingredients like an afterthought; if you aren’t weighing your food, you aren’t cooking with precision, you’re just hoping for the best.

    Rosalind Hayter

    Stop Guessing and Start Cooking

    Stop Guessing and Start Cooking with precision.

    At the end of the day, a kitchen scale isn’t just another gadget to clutter your countertop; it is a tool for discipline. We’ve covered why you need to ditch the inconsistent measuring cups for dry goods and why weighing your ingredients is the only way to ensure your baking actually turns out the way the recipe intended. By moving away from volume and embracing weight, you eliminate the variables that lead to wasted flour, ruined batches, and a lot of unnecessary frustration. It’s about minimizing waste and maximizing your results through consistent, repeatable precision.

    My advice is simple: don’t let the fear of a new habit hold you back from becoming a better cook. It might feel a little slower at first to tare your scale and weigh every single gram, but once it becomes muscle memory, you’ll wonder how you ever managed without it. A kitchen should be a place of competence and confidence, not a place where you’re constantly second-guessing your measurements. Invest in a decent scale, build the habit, and focus on the craft of cooking rather than the luck of the draw. You’ll find that true culinary control comes from the small, steady details.

    Frequently Asked Questions

    Do I really need a separate scale for liquids, or can I just use the same one I use for flour and sugar?

    You absolutely do not need two scales. In fact, I’d tell you that buying a second one is exactly the kind of unnecessary gadget clutter I try to help people avoid. Most decent digital scales have a tare function for a reason; just place your vessel on the scale, hit zero, and pour. Whether it’s flour or milk, one reliable scale is all you need to keep your workspace clean and your measurements precise.

    How do I keep my scale accurate if I'm constantly adding and subtracting weight with different bowls?

    You need to master the “tare” function—it’s your best friend. Place your empty bowl on the scale, hit the tare button to reset it to zero, and then add your ingredient. If you need to add a second item, just hit tare again. Don’t bother with a mountain of dirty bowls; use one large one, tare between ingredients, and keep your workspace clear. It’s about efficiency, not making a mess.

    Is it worth investing in a heavy-duty commercial scale, or will a cheap digital one do the job for a home cook?

    Look, I’ve seen enough commercial kitchens to know the difference, but don’t go throwing money at a heavy-duty industrial scale just because you saw it in a professional setting. For home use, those are overkill and often too bulky for a standard counter. Instead, skip the cheap, flimsy plastic ones that lose calibration after a month. Invest in a mid-range, stainless steel digital scale with a high capacity and a stable base. It’s the sweet spot for durability and precision.