Author: Rosalind Hayter

  • Selecting Microwave Safe Bowls for Daily Use

    Selecting Microwave Safe Bowls for Daily Use

    I’ve spent two decades in professional kitchens, and if there is one thing that drives me up the wall, it’s the sheer amount of money people waste on “specialty” kitchenware that is essentially glorified trash. I see it every time I walk into a big-box store: rows of colorful, flimsy plastic containers that claim to be high-tech, but end up warping, staining, or leaching chemicals into your leftovers after just three uses. We’ve been conditioned to think we need a different container for every single meal, but most of those trendy plastic sets are just disposable junk disguised as convenience. When it comes to finding reliable microwave safe bowls, you don’t need a gadget; you need materials that actually respect the heat.

    I’m not here to sell you on a lifestyle brand or a subscription box of mismatched Tupperware. My goal is to cut through the marketing noise and help you build a kitchen that actually works. I’m going to show you exactly which glass and ceramic options are worth your hard-earned money and which ones you should leave on the shelf. We are going to focus on durability and function, ensuring that the pieces you buy today are still sitting in your cupboard ten years from now.

    Table of Contents

    A Microwave Safe Materials Guide for Lasting Quality
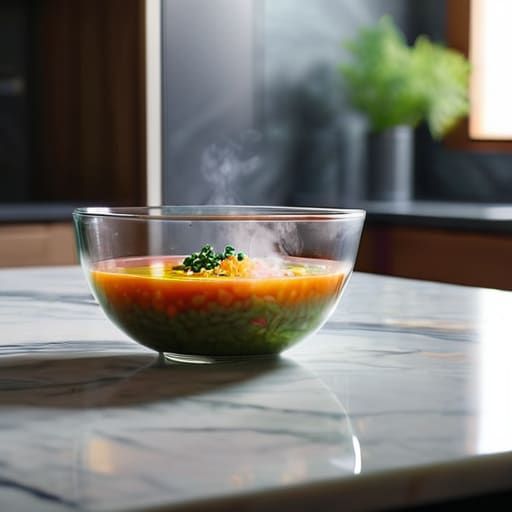
    A Microwave Safe Materials Guide for Lasting Quality

    When I was managing commercial kitchens, we didn’t have the luxury of guessing which containers could handle a high-heat blast. You either knew the material, or you risked a mess—or worse, a safety hazard. This is why I always tell my clients that understanding the difference between microwave safe vs non-microwave safe materials is the first step to a functional kitchen. You want to look for high-quality borosilicate glass or heavy-duty ceramics. These aren’t just about durability; they are about ensuring your food doesn’t pick up a chemical aftertaste from low-grade materials.

    If you’re looking for a reliable microwave safe materials guide, start with tempered glass. It’s the gold standard because it handles temperature shifts without cracking and is incredibly easy to sanitize. Avoid anything with metallic trim—even a tiny bit of gold leaf can spark—and stay far away from thin, single-use plastics. I’ve seen too many people ruin a perfectly good meal by using flimsy containers that warp the moment they get warm. Invest in heat resistant dinnerware that you can use for serving, too. It saves space, reduces clutter, and ensures you aren’t constantly replacing junk.

    Microwave Safe vs Non Microwave Safe Know the Difference
    Microwave Safe vs Non Microwave Safe Know the Difference

    Look, I’ve seen it all in commercial kitchens—from high-end catering setups to home cooks who think any container with a lid is fair game. The problem is that the line between what’s functional and what’s dangerous is often drawn in invisible ink. When you’re navigating microwave safe vs non-microwave safe options, you have to look past the pretty patterns on the rim. If a dish is labeled “microwave safe,” it means the material won’t crack under heat or leach nasty stuff into your leftovers. If it isn’t, you’re essentially playing a game of roulette with your dinner.

    The biggest mistake I see is people reusing old, stained plastic containers for reheating. Those containers weren’t built for high heat; they were built for the fridge. Once they start to warp or look cloudy, they’re done. To stay on the safe side, I always tell my clients that investing in high-quality glass or ceramic is the only way to go. It’s about avoiding toxic chemicals in kitchenware that can migrate into your food the moment things get hot. If you wouldn’t want to eat off a piece of melting plastic, don’t cook your meal in it.

    Five Rules for Choosing Bowls That Won't Fail You

    • Stop trusting the “microwave safe” label blindly. I’ve seen plenty of cheap ceramic bowls marked as safe that still end up getting those tiny, ugly cracks after a month of use. If you want something that lasts, look for high-quality tempered glass or heavy-duty stoneware.
    • Avoid anything with metallic trim or gold leaf. It sounds obvious, but I see people buying beautiful, vintage-style bowls for their aesthetic, only to realize they can’t actually heat soup in them without a spark show in their kitchen. If it shines, keep it out of the microwave.
    • Check the bottom of the bowl for a stamp, but don’t let it be your only guide. A stamp is a good start, but if the bowl feels suspiciously light or thin, it’s likely cheap material that will warp or leach chemicals when things get hot.
    • Think about the temperature swing. If you take a bowl straight from a cold fridge and throw it into a high-power microwave, even “safe” materials can suffer from thermal shock. Give your food a moment to settle, or better yet, use bowls designed for temperature transitions.
    • Invest in glass over plastic every single time. I know plastic is convenient, but it’s flimsy, it stains, and it eventually breaks down. If you want a kitchen that actually works, buy a set of real glass bowls. They’re easier to clean, they don’t hold onto old smells, and they won’t melt into your leftovers.

    The Bottom Line on Microwave Safety

    Stop guessing and start reading; if a bowl doesn’t explicitly state it’s microwave-safe, leave it out of the microwave entirely.

    Prioritize glass and ceramic over plastic to avoid chemical leaching and the frustration of bowls that warp or stain after a few uses.

    Invest in quality pieces that serve a dual purpose—tools that are safe for heating but sturdy enough to stay in your cupboard for decades.

    The Real Cost of Cheap Plastic

    “I’ve seen enough commercial kitchens to know that if a bowl can’t handle a little heat without warping or leaching chemicals, it has no business being in your cupboard. Stop buying into the cycle of disposable plastic junk and invest in real glass or ceramic; your health and your wallet will thank you in the long run.”

    Rosalind Hayter

    Stop Settling for Disposable Kitchenware
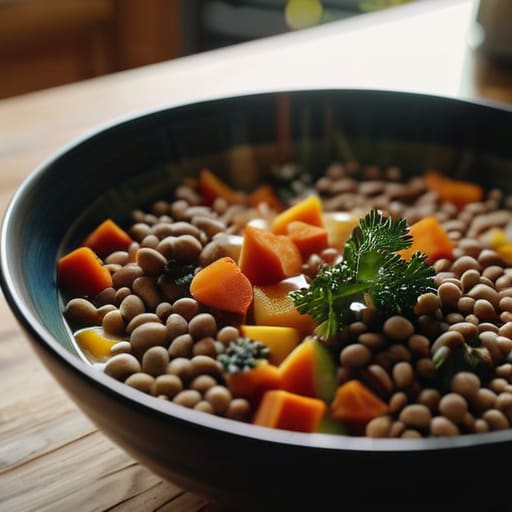
    Stop Settling for Disposable Kitchenware.

    At the end of the day, choosing the right bowls comes down to knowing exactly what you’re putting in your food. We’ve walked through the difference between sturdy glass and ceramic versus those flimsy, questionable plastics that leach chemicals the moment they get warm. Remember: if it feels lightweight and disposable, it probably isn’t worth the space in your cupboard. Stick to high-quality, non-reactive materials like tempered glass or heavy stoneware. It’s a small shift in how you shop, but it makes a massive difference in the longevity of your kitchenware and, more importantly, your peace of mind when you sit down to eat.

    I know it can feel overwhelming with all the trendy, colorful sets flooding the market, but don’t let the marketing fool you. A functional kitchen isn’t built on a collection of gadgets; it’s built on a foundation of reliable, honest tools. When you invest in real bowls that can handle the heat, you aren’t just buying more dishes—you’re investing in a kitchen that actually works for you. Stop chasing the next plastic fad and start building a collection of pieces that will last a lifetime. Your future self, and your dinner, will thank you for it.

    Frequently Asked Questions

    How can I tell if an old ceramic bowl I inherited is actually safe for the microwave if the label is gone?

    If the label’s gone, don’t guess. I’ve seen too many people end up with scorched food or cracked dishes because they played it safe with an old heirloom. First, look at the bottom; if you see any metallic gold or silver trim, keep it away from the microwave—that’s a fire hazard. Next, do the water test: fill the bowl with water, microwave it for a minute, then check the bowl. If the bowl is hot but the water is cold, the material is absorbing energy and it’s not microwave-safe. Toss it in the sink and use it for serving instead.

    Is it really worth the extra money to buy glass instead of just sticking with cheap microwave-safe plastic?

    Look, I get the temptation to save a few bucks on plastic, but in my experience, you’ll pay for it twice. Cheap plastic eventually warps, stains, and starts leaching chemicals into your food every time you hit “start.” It’s a cycle of constant replacement. Invest in glass or ceramic once. They don’t hold onto smells, they won’t melt, and they actually last. Stop buying disposable junk and buy something that stays in your cupboard for years.

    Why does my food sometimes get scalding hot in certain bowls while the bowl itself stays cool?

    That’s a common frustration, but it isn’t a defect—it’s physics. When you use materials like glass or high-quality ceramic, they don’t absorb much energy from the microwave’s waves. Instead, the waves pass right through the bowl and go straight into the moisture in your food. The food heats up, but the container stays relatively cool. It’s actually a sign of a good, non-reactive bowl. Just be careful; even if the bowl feels cool, the food inside can still burn you.
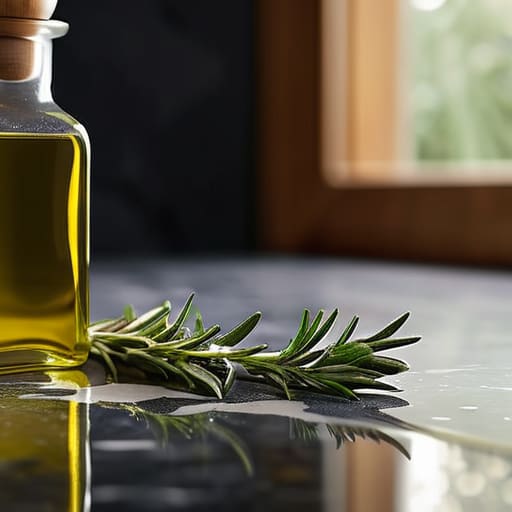
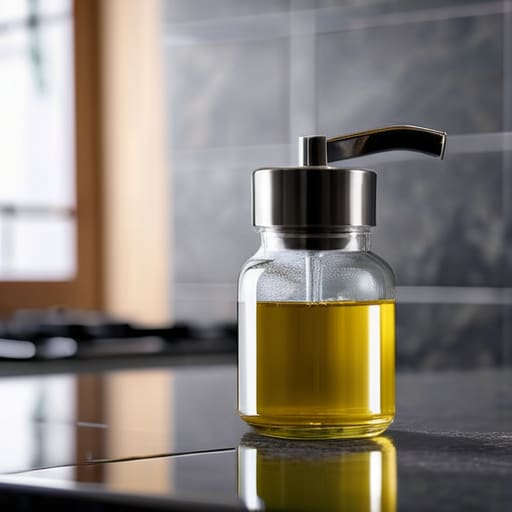
  • Choosing an Oil Dispenser for the Kitchen

    Choosing an Oil Dispenser for the Kitchen

    I still remember the chaos of a Saturday night service in a commercial kitchen, trying to sear scallops while my sous chef fumbled with a greasy, half-empty plastic bottle. There is nothing that breaks your rhythm faster than a cheap, leaking container that drips more than it pours. Most people think they need some high-tech, automated gadget to manage their pantry, but let me tell you: a glorified, expensive gadget is just another piece of countertop clutter waiting to happen. If you’re still fighting with a finicky, lightweight plastic bottle every time you want to sauté, you aren’t just wasting time—you’re wasting good ingredients. A proper, heavy-duty oil dispenser should be an extension of your hand, not a source of frustration.

    I’m not here to sell you on the latest kitchen trend or some overpriced designer bottle that looks pretty but performs poorly. My goal is to help you find the kind of reliable, built-to-last tools that I relied on during my twenty years in catering. I’m going to show you exactly what to look for in terms of weight, pour control, and material so you can stop buying junk and start investing in gear that actually works.

    Table of Contents

    Choosing a Leak Proof Oil Pourer Over Plastic Junk

    Choosing a Leak Proof Oil Pourer Over Plastic Junk.

    I’ve spent enough time in commercial kitchens to know that a messy station leads to a messy mind. When you’re mid-service, the last thing you need is a sticky, greasy residue coating your countertop because your cheap plastic bottle decided to weep through the cap. Most of those brightly colored, flimsy containers you see in big-box stores are designed for shelf appeal, not longevity. They warp with heat and eventually crack, leaving you with nothing but wasted oil and a cleaning headache.

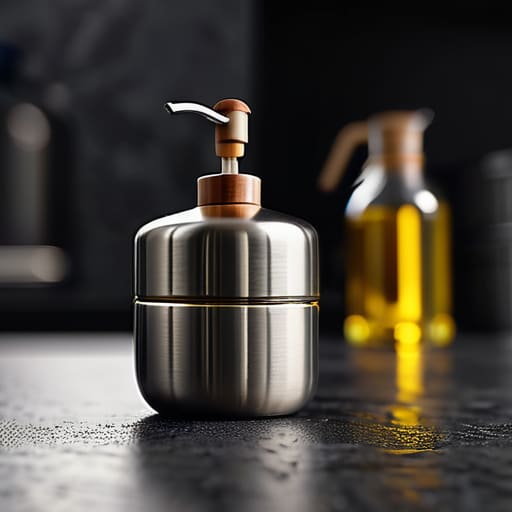
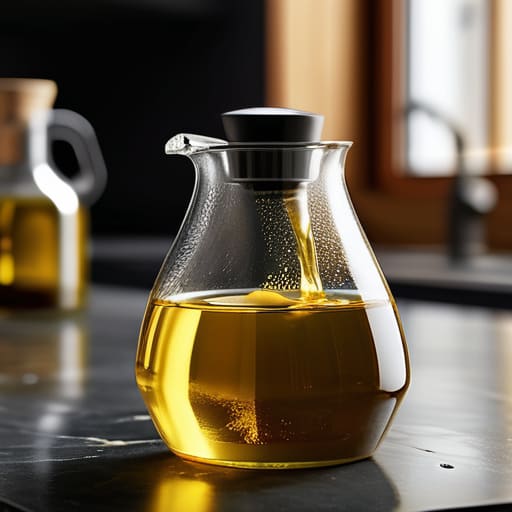
    If you want to do this right, invest in a leak-proof oil pourer made from materials that actually hold their shape. I always steer my clients toward a heavy glass or a high-quality stainless steel oil container. These aren’t just about looking better on your counter—though they certainly fall under the category of aesthetic kitchenware—they are about precision and control. A solid spout ensures you get exactly what you need for a sauté without the accidental flood, keeping your workspace clean and your mind focused on the food.

    Why Stainless Steel Oil Containers Outlast Every Trend

    Why Stainless Steel Oil Containers Outlast Every Trend

    I’ve seen enough cheap, painted-on kitchenware end up in the landfill to last a lifetime. Most people buy whatever catches their eye on a social media feed, only to find the finish peeling or the lid warping after three months of heavy use. If you want to stop that cycle, invest in a stainless steel oil container. Unlike plastic, which can leach flavors or degrade when exposed to light and heat, high-quality steel is inert and practically indestructible. It’s the kind of tool that survives moves, kitchen renovations, and decades of daily service without breaking a sweat.

    Beyond the sheer durability, there is a functional elegance to metal that plastic simply can’t replicate. A well-made oil pourer for cooking feels substantial in your hand; it has a weight to it that gives you better control over your flow. You aren’t fighting a flimsy spout or a lid that pops off mid-sear. When you choose materials that are built to endure, you aren’t just buying a gadget—you are investing in the long-term efficiency of your workspace.

    Five Rules for Picking a Dispenser That Won't Ruin Your Countertops

    • Look for a narrow neck. If the opening is too wide, you’ll end up pouring far more oil than the recipe calls for, and you’ll be cleaning up greasy splashes every single time you cook.
    • Prioritize glass or stainless steel over plastic. Plastic absorbs odors and stains over time, making your olive oil taste like whatever was in there three months ago.
    • Check the spout design. I always look for a precision pour spout with a clear drip edge; if it doesn’t have one, you’re going to have a permanent, sticky ring on your kitchen counter.
    • Size matters, but don’t go too big. A massive dispenser looks nice, but if it takes you three weeks to finish the bottle, the oil sitting in that open container will oxidize and lose its flavor.
    • Avoid anything with complicated mechanical pumps. In a professional kitchen, we value speed and simplicity; if you have to fiddle with a button or a lever just to get a drizzle, it’s a gadget you’ll eventually stop using.

    My Rules for a Functional Oil Station

    Prioritize weight and material; a heavy glass or stainless steel vessel stays put on the counter and won’t crack when you’re in a rush.

    Forget the “smart” gadgets; if the pour spout isn’t precise and easy to clean, it’s just more clutter in your workspace.

    Invest once and invest well; buying a high-quality dispenser means you aren’t constantly replacing flimsy plastic bottles that leak and ruin your cabinets.

    ## The Cost of Convenience

    “I’ve seen too many people buy a cheap, plastic squeeze bottle thinking they’re saving time, only to spend the next ten minutes wiping grease off their countertops. If you want a kitchen that actually functions, invest in a heavy glass or steel pourer; it’s the difference between fighting your tools and actually enjoying the cook.”

    Rosalind Hayter

    The Bottom Line on Your Kitchen Essentials

    The Bottom Line on Your Kitchen Essentials.

    At the end of the day, choosing an oil dispenser isn’t about finding the prettiest object on your countertop; it’s about finding a tool that respects your time and your ingredients. We’ve covered why you should steer clear of those flimsy, leak-prone plastic bottles and why investing in heavy glass or durable stainless steel is the only way to go if you want something that survives a busy kitchen. When you prioritize functional durability over cheap convenience, you stop dealing with greasy cabinets and wasted product. Stick to the materials that can handle the heat and the daily grind, and you’ll find that the right tools actually make cooking feel more intuitive.

    I know it’s tempting to grab whatever is on sale at the big-box store, but I’ve seen too many “must-have” gadgets end up in the back of a junk drawer within six months. My advice is simple: buy it once, buy it right, and make sure it earns its place in your workflow. A kitchen shouldn’t be a collection of passing trends; it should be a curated space of reliable instruments. Once you stop chasing the latest plastic craze and start building a kit of lifelong essentials, you’ll realize that true kitchen mastery starts with the basics. Now, put down the gadget catalog and go find something that’s built to last.

    Frequently Asked Questions

    How do I prevent oil from getting gummy and stuck around the spout?

    The “gummy” buildup is usually just oxidized oil, and it’s a mess waiting to happen. First, stop using wide-mouth bottles; a narrow spout is your best defense. Second, I always recommend a quick wipe with a microfiber cloth after every use. If it’s already stuck, don’t scrub it with harsh chemicals. Just soak the lid in hot, soapy water or a bit of rubbing alcohol. Keep it clean, and it stays functional.

    Is it worth getting a specialized vinegar dispenser, or should I just use one bottle for everything?

    Don’t fall into the trap of thinking you need a dedicated set for every liquid in your pantry. If you’re using basic balsamic or apple cider vinegar for everyday salads, one reliable glass dispenser is plenty. However, if you have high-end, aged vinegars you treat like fine wine, keep them in their original bottles to protect the flavor. Save your counter space; buy one quality pourer and use it for what matters.

    What’s the best way to clean out a narrow-neck glass dispenser without making a massive mess in my sink?

    Don’t bother trying to scrub inside with a tiny brush; you’ll just end up with oily water splashing everywhere. Instead, use the rice trick. Fill the dispenser about a third of the way with warm, soapy water and a handful of uncooked rice. Cap it tight and shake it vigorously. The rice acts as a natural abrasive, scouring the glass from the inside without the mess. Rinse it well, and you’re done.

  • How to Organize Your Spice Rack Efficiently

    How to Organize Your Spice Rack Efficiently

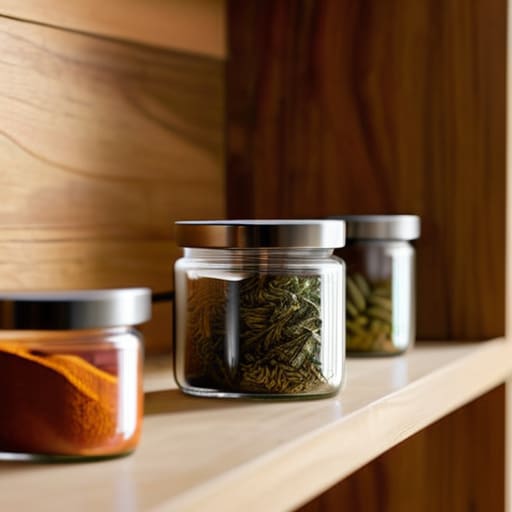
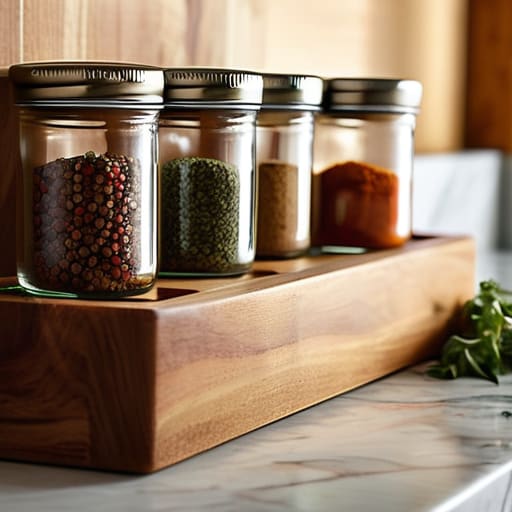
    I’ve spent twenty years in commercial kitchens, and if there is one thing that drives me up the wall, it’s seeing people waste money on those “aesthetic” spinning carousels or flimsy tiered plastic organizers you see on social media. Most of that stuff is just clutter disguised as decor. You buy a set of matching tiny glass jars that look pretty for exactly one week before you realize you’ve spent three hours decanting spices only to lose your cumin in a sea of identical labels. Real spice rack organization isn’t about making your pantry look like a magazine spread; it’s about functional accessibility so you aren’t hunting for smoked paprika while your garlic is burning in the pan.

    I’m not here to sell you on a lifestyle or a trendy gadget that will end up in a landfill by next Christmas. Instead, I’m going to show you how to build a system that actually survives the daily grind of real cooking. We are going to focus on durable materials, logical placement, and a layout that works for you, not the other way around. No fluff, no expensive nonsense—just practical, professional-grade methods to get your spices under control.

    Table of Contents

    Beyond the Plastic Chaos Essential Kitchen Cabinet Decluttering

    Beyond the Plastic Chaos Essential Kitchen Cabinet Decluttering

    Once you’ve sorted through the spices themselves, you have to face the reality of where they actually live. Most people treat their pantry like a graveyard for half-empty bags and mismatched jars, but true kitchen cabinet decluttering requires a more disciplined approach. I’ve seen too many home cooks struggle because they’re digging through a dark corner for a jar of cumin that expired during the last administration. If you aren’t using a tiered system or a dedicated riser, you’re essentially paying for storage space you can’t even see.

    If your cabinet depth is the problem, stop trying to stack things vertically and start thinking about accessibility. I’m a big believer in using drawer spice organizers for those shallow, wide spaces; it keeps everything visible at a glance so you aren’t hunting while your garlic is burning in the pan. If you have a deep, awkward corner, a rotating spice carousel is a lifesaver, provided it’s sturdy enough to handle the weight. The goal isn’t just to make it look pretty for a photo—it’s to ensure that when the heat is on, you can grab exactly what you need without a frantic search.

    Investing in Longevity With Uniform Spice Container Sets

    Investing in Longevity With Uniform Spice Container Sets

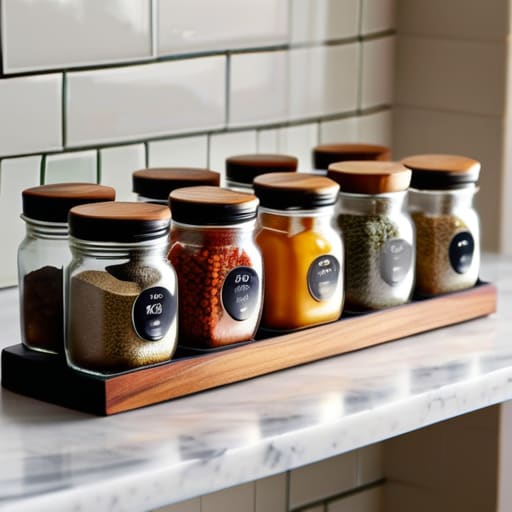
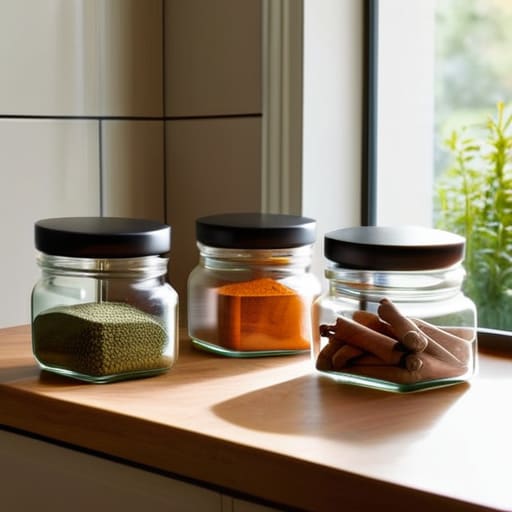
    Once you’ve finished your initial kitchen cabinet decluttering, you’ll likely notice a visual mess: mismatched half-empty bags, oversized grocery store jars, and labels that are impossible to read. This is where most people make a mistake and buy a cheap, multi-colored plastic set from a big-box store. Don’t do that. If you want a system that survives a move or a decade of heavy use, you need to invest in uniform spice container sets made of glass with airtight lids. Glass is non-reactive and won’t leach chemicals into your expensive saffron or cumin, and a consistent shape allows you to stack or line them up without wasting a single inch of shelf space.

    When I’m sketching out a new layout in my notebook, I always advise clients to match their containers to their storage method. If you have deep cabinets, look for taller, slimmer glass jars that fit perfectly into drawer spice organizers. If you’re working with limited counter space, a sturdy, tiered rack works wonders. The goal isn’t just to make the pantry look “Pinterest-perfect”; it’s to ensure that when you’re mid-service and need that smoked paprika, you aren’t digging through a graveyard of mismatched plastic.

    Five Rules for a Spice System That Won't Fall Apart

    • Stop buying pre-filled spice sets from big-box stores. Most of those “starter kits” come with flimsy plastic jars that leak or won’t seal properly, and you’ll end up with three bottles of dried parsley you never use. Buy your spices in bulk from a reputable source and transfer them into your own high-quality glass containers. It saves money and ensures your spices actually stay potent.
    • Group your spices by how you actually cook, not by the alphabet. If you’re making a taco, you want the cumin, chili powder, and smoked paprika all in one spot. If you’re baking, you need the cinnamon and nutmeg together. Organize by “flavor profiles”—Mediterranean, Baking, Heat, etc.—so you aren’t hunting through a dozen jars mid-sear.
    • Keep the heat away. I see people all the time storing their spice racks directly above the stove or right next to the oven. That constant heat is the fastest way to kill the flavor and oils in your spices, turning them into useless, dusty powders. Keep your collection in a cool, dark cabinet or a drawer away from the cooking zone.
    • Use a tiered system or a drawer insert so you can actually see the labels. There is nothing more frustrating than digging through a dark cabinet and knocking over five jars just to find the oregano. If you use a shelf, get a tiered riser; if you use a drawer, get a slanted insert. If you can’t see it, you won’t use it—and you’ll end up buying a duplicate.
    • Label everything, including the date. Don’t rely on your memory or the tiny print on the original packaging. Use a simple, clean label maker or even just a permanent marker on a piece of masking tape if you’re in a pinch. More importantly, write the date you opened the jar on the bottom. Spices don’t “expire” in a way that makes you sick, but they do lose their soul after a year or two. If it doesn’t smell like anything, toss it.

    The Bottom Line on Spices

    Stop buying “sets” just because they look pretty on Instagram; prioritize glass or high-quality metal containers that won’t crack or leach chemicals into your herbs.

    Label everything clearly and consistently—if you can’t identify a jar in two seconds during a dinner rush, your system has failed.

    Treat your spices like fresh ingredients, not permanent fixtures; if you haven’t touched that dusty jar of cardamom in a year, get rid of it to make room for what you actually use.

    The Cost of Chaos

    “If you’re spending half your prep time digging through a graveyard of half-empty, mismatched spice tins, you aren’t cooking—you’re just managing clutter. A proper spice system isn’t about making your pantry look pretty for a photo; it’s about making sure the right tool is in your hand the second you need it.”

    Rosalind Hayter

    Making It Stick

    Organizing kitchen spices, Making It Stick.

    At the end of the day, organizing your spices isn’t about achieving some perfect, Pinterest-ready aesthetic that looks good for five minutes before the chaos returns. It’s about the practical reality of your daily life. By clearing out the clutter in your cabinets, investing in high-quality uniform containers, and choosing a storage system that actually fits your workflow, you are removing the friction between you and a good meal. Remember, the goal is to stop hunting for that dusty jar of cumin while your garlic is burning in the pan. When you prioritize durability over trends and function over fluff, you create a kitchen that supports your cooking rather than fighting against it.

    Don’t let the sheer scale of a kitchen overhaul intimidate you. You don’t have to redo everything by tomorrow morning; just start with one shelf or one single drawer. Every time you reach for a well-labeled, easy-to-access jar, you’re reinforcing a better habit. A kitchen is a living, breathing part of your home, and it deserves to be a place of ease, not frustration. Build your system slowly, buy things that are meant to last, and focus on the rituals of cooking rather than the pursuit of perfection. Once you have a system that works, you’ll find that you don’t just cook better—you actually enjoy the process more.

    Frequently Asked Questions

    Should I keep my spices on the counter for easy access, or is it better to tuck them away in a drawer or cabinet?

    Keep them out of sight. I know those countertop spice carousels look cute in lifestyle magazines, but in a real working kitchen, they’re just clutter magnets that collect grease and dust. If you’re cooking daily, pull a drawer or a dedicated cabinet shelf. It keeps your prep space clear and protects your spices from light and heat—two things that kill flavor faster than anything else. Keep the counters for prep, not storage.

    How often do I actually need to check my spices for freshness before they lose their flavor?

    Don’t wait for a recipe to fail before you realize your cumin tastes like sawdust. I recommend a quick scent test every six months. Open the jar and take a deep whiff; if that punchy, aromatic hit is gone, it’s time to toss it. Heat and light are the enemies here, so if your spices are sitting right above the stove, expect them to lose their soul much faster.

    Is it worth the investment to buy matching glass jars, or can I just make do with what I already have?

    Look, I’m not a fan of spending money just for the sake of “aesthetic,” but there’s a functional reason to go with glass. If you’re using mismatched, half-used jam jars or flimsy plastic containers, you’re fighting your kitchen every time you cook. Uniform glass jars stack better, let you see exactly how much cumin you have left, and—most importantly—they seal properly. If you can make do with what you have, do it. But if you want a system that actually stays organized, the upgrade is worth it.

  • Rice Cookers and the Settings That Matter

    Rice Cookers and the Settings That Matter

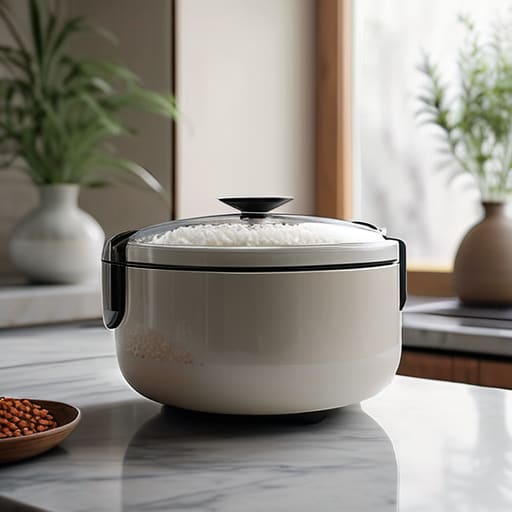
    I’ve spent twenty years in commercial kitchens, and if there’s one thing that drives me up the wall, it’s seeing people throw money away on high-tech, flashing-light gadgets that do nothing but take up counter space. I see these “smart” appliances in every home organization project I take on, and frankly, most of them are just overpriced plastic junk. You don’t need a machine with a touchscreen and a Wi-Fi connection to boil water and steam grain; you need a reliable electric rice cooker that does one job perfectly every single time you hit the button.

    I’m not here to sell you on the latest kitchen trend or some shiny, disposable gadget that’ll end up in a landfill by next Christmas. Instead, I’m going to pull back the curtain and show you exactly what to look for in a machine that actually lasts a lifetime. We’re going to focus on build quality, heating consistency, and functional design—the stuff that actually matters when you’re standing in your kitchen at 6:00 PM. I promise to give you the straight truth so you can invest in a tool that earns its keep.

    The Magic of Induction Heating Technology

    The Magic of Induction Heating Technology.

    If you’re looking at a sea of options, you’ll notice some models boast induction heating technology while others use a standard heating plate at the bottom. In my years managing commercial kitchens, I learned that how heat is distributed is the difference between a perfect grain and a scorched mess. Standard cookers heat from the bottom up, which often leaves the bottom layer mushy and the top layer undercooked. Induction, however, uses magnetic currents to heat the entire vessel more evenly. It’s a more precise, controlled way to cook, and it’s worth the extra investment if you actually care about texture.

    This precision is especially vital when you move beyond basic white rice. If you’re someone who prefers heartier grains, you’ll want a machine with dedicated brown rice cooking modes. These settings use that steady, consistent heat to penetrate the tougher outer bran of the grain without turning the center into paste. It’s about working smarter, not harder. When the heat is consistent, you aren’t constantly hovering over the machine; you can trust the technology to do the heavy lifting for you.

    Why a Quality Non Stick Inner Pot Matters

    Look, I’ve seen too many people treat the inner pot like an afterthought, but that’s a mistake that will cost you every single time you sit down to eat. If you buy a cheap unit with a thin, flimsy coating, you’re going to be scraping at the bottom of the bowl with a metal spoon within six months, ruining the surface and leaving you with a mess of burnt grains. You want a heavy-duty non-stick inner pot that actually holds heat evenly. When the coating is high-quality, the rice releases perfectly every time, meaning you spend less time scrubbing and more time actually enjoying your meal.

    It also comes down to how the machine handles different grains. If you’re someone who prefers whole grains, you’ll notice that specialized brown rice cooking modes rely heavily on the pot’s ability to maintain consistent, steady heat without creating hot spots. A thick, well-constructed pot ensures that even the toughest husks soften properly. Don’t settle for a lightweight tin bucket; invest in a model with a substantial pot that feels like it belongs in a professional kitchen.

    Five Rules for Buying a Rice Cooker That Won't End Up in a Landfill

    • Stop chasing the “smart” features. You don’t need a machine that connects to your Wi-Fi or sends notifications to your phone; you need a machine that heats evenly. If the interface looks more like a smartphone than a kitchen tool, walk away.
    • Prioritize the weight of the inner pot. A thin, flimsy aluminum pot is a recipe for unevenly cooked grains and a short lifespan. Look for a heavy-duty, thick-walled pot that retains heat—it’s the difference between mushy rice and perfect texture.
    • Check the seal, not just the buttons. A high-quality cooker needs a heavy, silicone-gasketed lid that creates a genuine vacuum. If the steam escapes easily during the cycle, your rice will be dry and your machine will burn out prematurely.
    • Buy for your actual volume, not your “guest” volume. If you’re a single person or a couple, don’t buy a massive 10-cup commercial-sized unit just because it’s on sale. A smaller, high-quality unit maintains better temperature control for smaller batches.
    • Look for easy-to-clean parts. If the lid isn’t detachable or the steam vent is a nightmare to scrub, you won’t use it. I’ve seen too many people abandon perfectly good cookers simply because they couldn’t get the old starch out of the crevices.

    My Golden Rules for Choosing a Rice Cooker

    Don’t get distracted by fancy touchscreens or “smart” features that will be obsolete in two years; focus on the heating technology and the quality of the inner pot.

    Invest in a heavy-duty, high-quality non-stick coating to prevent the constant, frustrating scraping that ruins both your rice and your cookware.

    Look for a machine that offers consistent, reliable heat distribution, because if the temperature fluctuates, you’re just going to end up with unevenly cooked, mushy grains.

    Making the Right Choice for Your Kitchen

    At the end of the day, choosing a rice cooker shouldn’t feel like a gamble. We’ve talked about why you need to look past the flashy buttons and focus on the fundamentals: induction heating for consistent temperature control and a heavy-duty, high-quality inner pot that won’t flake off into your food after six months. If you invest in a machine that respects the science of the grain and uses materials built to last, you aren’t just buying an appliance; you are buying consistency. Don’t let a cheap, plastic-heavy model clutter your counter and end up in a landfill by next Christmas. Buy it once, buy it right, and let the machine do the heavy lifting.

    My philosophy has always been that a well-run kitchen is built on reliability, not novelty. A good rice cooker is one of those quiet workhorses that stays in the background, doing its job perfectly every single time you press start. Once you have the right tools, you can stop worrying about whether the rice will be mushy or burnt and start focusing on the joy of the meal itself. Remember, the best kitchen setups aren’t about having the most gadgets; they are about having the right tools that empower you to cook with confidence. Invest in quality, simplify your routine, and enjoy the results.

    Frequently Asked Questions

    Is it actually worth paying the extra money for an induction model, or will a basic heating plate get the job done?

    Look, if you’re just making a quick batch of white rice once a week, a basic heating plate is fine. But if you actually cook—if you want consistent texture without that gummy, uneven mess at the bottom—go with induction. It’s more precise, it heats more evenly, and it’s faster. It costs more upfront, sure, but I’d rather invest in a tool that respects my ingredients than struggle with a cheap one every single night.

    How do I know if the inner pot is built to last or if it's just another thin, cheap coating that's going to flake off in six months?

    Here’s the truth: if the pot feels light like an empty soda can, put it back on the shelf. A quality inner pot needs heft; that weight usually means a thicker core that distributes heat evenly. When you tap it, it should sound solid, not tinny. Most importantly, look for high-quality ceramic or heavy-duty non-stick coatings. If the manufacturer can’t tell you exactly what the coating is made of, it’s probably cheap junk.

    Do I really need all these different settings, or am I just paying for extra buttons I'll never press?

    Look, I get it. You see a control panel with twenty different buttons and think you’re paying a premium for bells and whistles. Most of the time, you’re right. If you only ever make white rice, you don’t need a machine that thinks it’s a sous-vide. But a few key settings—like a dedicated brown rice mode or a slow cook function—actually matter. They manage heat curves you just can’t replicate with a stovetop. Stick to the basics, but don’t skimp on the versatility.

  • Benefits of Using a Vegetable Steamer

    Benefits of Using a Vegetable Steamer

    I’ve spent two decades in commercial kitchens, and if there is one thing that makes my blood boil, it’s seeing people waste good money on those flimsy, neon-colored plastic vegetable steamer baskets that melt or warp the second they hit real heat. You go into a kitchen supply store, and they try to sell you some high-tech, multi-tiered gadget with twenty different attachments, claiming it’s the “secret” to a healthy lifestyle. Let me tell you something: most of that is just expensive clutter designed to take up space in your cabinets. A proper vegetable steamer shouldn’t be a complicated science experiment; it should be a reliable, sturdy tool that does one job and does it perfectly every single time.

    I’m not here to sell you on the latest kitchen trend or a gadget that will end up in a landfill by next Christmas. Instead, I’m going to give you the straight truth based on years of professional catering and home organizing. I’ll show you exactly what to look for in a piece of equipment that actually lasts a lifetime, whether you choose stainless steel or heavy-duty silicone. My goal is to help you build a kitchen that works for you, focusing on durability and function over flashy packaging.

    Table of Contents

    Why a Stainless Steel Steaming Basket Wins Every Time

    Why a Stainless Steel Steaming Basket Wins Every Time

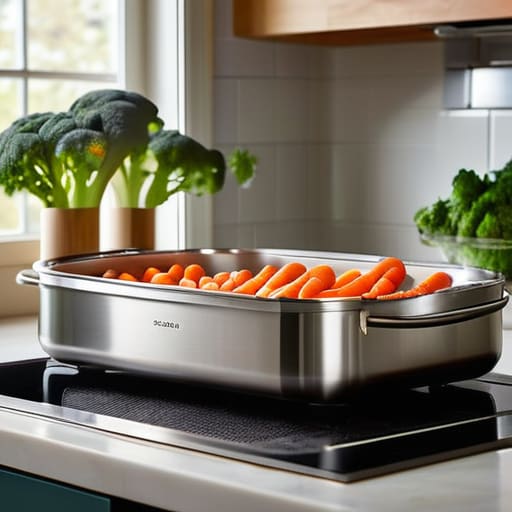
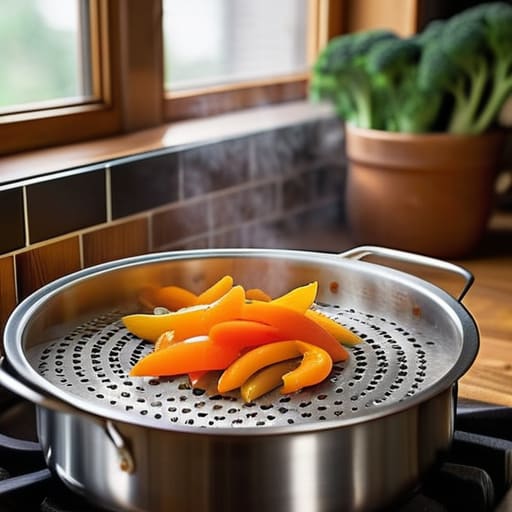
    Look, I’ve seen it all in commercial kitchens—people buying these elaborate, multi-tiered electric gadgets that take up half a counter and end up gathering dust in a cupboard by next season. If you want to do this right, you need to go back to basics with a stainless steel steaming basket. It’s simple, it’s indestructible, and it fits into any pot you already own. Unlike those flimsy plastic versions that can leach chemicals when they get too hot, high-quality steel is a lifelong investment that won’t warp or crack under pressure.

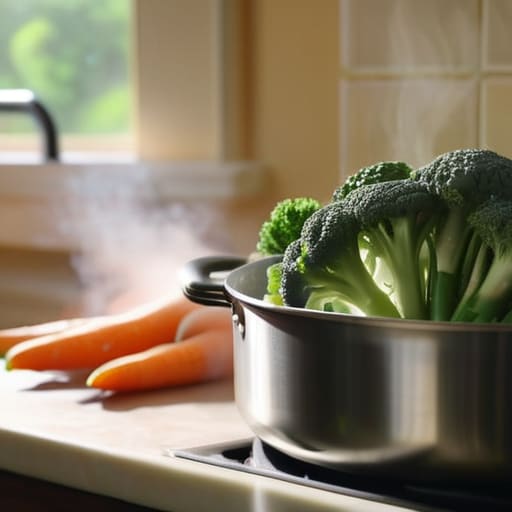
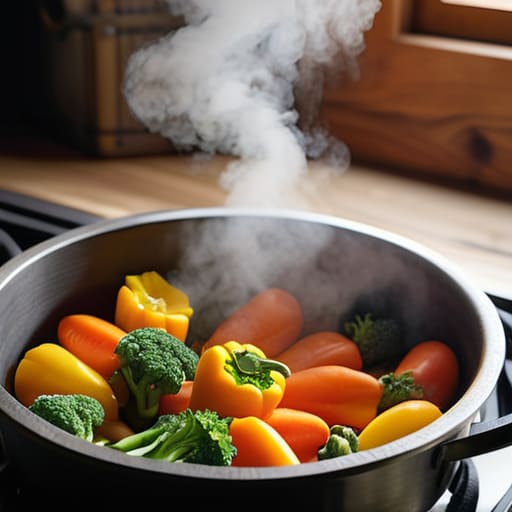
    Beyond the durability, there is the actual science of the food. When you compare nutrient retention steaming vs boiling, the winner is clear: boiling often leaches the good stuff right out of the water and down the drain. Steaming keeps the vitamins locked inside the produce, which is vital if you’re steaming vegetables for meal prep to stay healthy throughout the week. It’s one of those few kitchen essentials for healthy eating that actually delivers on its promise without adding unnecessary complexity to your routine.

    Choosing the Best Electric Vegetable Steamer for Your Kitchen

    Choosing the Best Electric Vegetable Steamer for Your Kitchen

    Now, if you aren’t ready to stand over a stovetop with a manual basket, you might be looking at electric models. I see these all the time in big-box stores, and frankly, most of them are just more plastic clutter destined for a landfill. If you’re going to plug something into your counter, make sure it’s worth the footprint. Look for a unit with a heavy-duty base and, most importantly, a stainless steel interior. I won’t touch anything that relies on non-stick coatings that flake off into your broccoli after six months.

    When you’re hunting for the best electric vegetable steamer, ignore the ones with twenty different “pre-set” buttons for every specific vegetable. You don’t need a computer to cook a carrot. Instead, focus on a machine with a simple timer and a clear view of the basket. This is vital for steaming vegetables for meal prep; you need to be able to see exactly when your greens have hit that perfect tender-crisp stage so you can batch-cook for the week without guesswork. Keep it simple, keep it sturdy, and keep it useful.

    How to Actually Use Your Steamer Without Making a Mess

    • Stop overcrowding the basket; if you pile your broccoli in there like a mountain, the steam can’t circulate, and you’ll end up with some mushy bits and some raw ones.
    • Time your vegetables by density, starting with the hard stuff like carrots or potatoes and adding the leafy greens in the last two minutes so nothing turns to sludge.
    • Keep your water levels honest; always check that you have enough liquid in the base to prevent a dry pot, but don’t fill it so high that it touches the food.
    • Invest in a decent pair of long-handled tongs rather than trying to fish out hot vegetables with a fork; it’s safer and keeps the texture intact.
    • Don’t forget to season immediately; a quick toss in a tiny bit of olive oil or a squeeze of lemon right after they come out of the steam makes all the difference.

    The Bottom Line on Steaming Right

    Stop buying those cheap, colorful plastic steamers that warp the first time they hit high heat; stick to stainless steel or high-quality silicone if you want something that actually survives your kitchen.

    Don’t get distracted by fancy electric models with twenty different presets; a simple, reliable steamer that lets you control the timing is all you really need to get the job done.

    Remember that the best tool is useless without the right technique—watch your timing and don’t overcook your greens just because the machine says it’s done.

    The Truth About Steamers

    “I’ve seen enough cheap, plastic steamer inserts melt and warp in commercial kitchens to know that if you aren’t investing in stainless steel, you’re just buying expensive landfill. A good steamer shouldn’t be a gadget you toss after a year; it should be a tool that sits in your cabinet for decades.”

    Rosalind Hayter

    Final Thoughts on Your Steaming Setup

    Final Thoughts on Your Steaming Setup.

    At the end of the day, choosing a vegetable steamer isn’t about finding the flashiest gadget on the market; it’s about finding a tool that actually does its job without falling apart. Whether you decide to go with a high-quality stainless steel basket that fits right into your existing pots or a dedicated electric steamer for those busy weeknights, remember to prioritize durability over convenience. I’ve seen too many people clutter their cabinets with cheap, BPA-laden plastic versions that warp the first time they hit high heat. Stick to the basics: look for materials that can withstand years of use and designs that are easy to clean. If you invest in quality gear now, you won’t be hunting for a replacement in six months.

    My advice is to stop overthinking the technical specs and start thinking about your actual cooking habits. A kitchen is only as good as the tools that make your life easier, not more complicated. Once you have a reliable steamer in your arsenal, you’ll find that eating well becomes less of a chore and more of a natural part of your routine. Focus on the consistency of your habits rather than the complexity of your equipment. Buy once, buy well, and then get back to what really matters: making good food for yourself and the people you love.

    Frequently Asked Questions

    Is it actually worth buying a dedicated electric steamer, or can I just use a basic stainless steel basket in a pot I already own?

    Look, if you’re asking me, save your money. You don’t need another bulky appliance taking up precious real estate on your counter. A dedicated electric steamer is often just another gadget destined to collect dust in the back of a cabinet. A solid stainless steel basket used in a pot you already own does the exact same job, lasts longer, and is much easier to clean. Stick to the basics; they work better.

    How do I keep my steamer from getting all that white, crusty mineral buildup from my tap water?

    That white crust is just mineral buildup, and it’s a nuisance, but it isn’t permanent. Don’t go buying some harsh chemical cleaner; that’s just more junk for your kitchen. Instead, grab some plain white vinegar. Fill your steamer with a mix of equal parts water and vinegar, let it simmer until the buildup dissolves, and then give it a good rinse. It’s simple, effective, and keeps your gear clean without the nonsense.

    Can I use a steamer for more than just vegetables, or am I just cluttering up my cabinets with a single-use tool?

    Listen, if you’re worried about cabinet real estate, let me put your mind at ease: a steamer is far from a single-use gadget. I’ve used mine for everything from delicate fish and dumplings to hard-boiled eggs and even reheating leftover rice without turning it into mush. As long as you aren’t buying a specialized machine for one specific food, a good steamer is a versatile workhorse that earns its spot on your counter.

  • Choosing Between Wood and Plastic Cutting Boards

    Choosing Between Wood and Plastic Cutting Boards

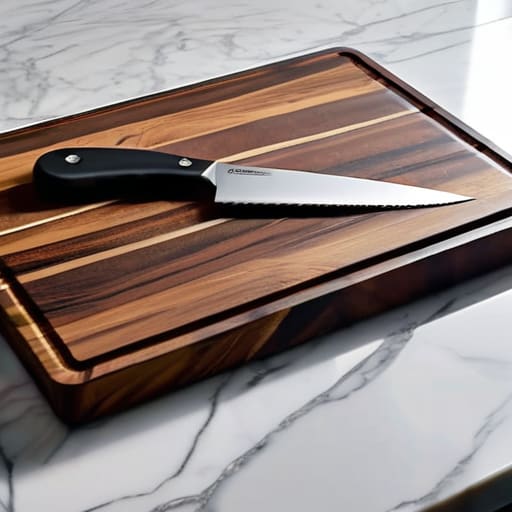
    I spent twenty years in commercial kitchens where the sound of a chef’s knife hitting a surface was the heartbeat of the room, and I can tell you one thing for certain: most people are getting this completely wrong. I see it every time I walk into a client’s home—rows of those flimsy, brightly colored plastic boards that look fine in a catalog but end up scarred, stained, and utterly useless within six months. People spend a fortune on “designer” kitchen sets, yet they haven’t given a single thought to the actual cutting board material they’re using to prep their family’s dinner. If you’re buying something that’s destined for a landfill by next Christmas, you aren’t investing in your kitchen; you’re just wasting money.

    I’m not here to sell you on some high-tech, gadget-of-the-month nonsense. My goal is to cut through the marketing fluff and tell you exactly what works based on decades of real-world use. I’m going to break down which materials actually protect your expensive knives and which ones are just expensive paperweights. We’re going to find you a piece that is built to last a lifetime, because a functional kitchen starts with tools that actually do their job.

    Table of Contents

    The Truth About Hygiene of Wood vs Plastic Boards

    The Truth About Hygiene of Wood vs Plastic Boards

    I see people get caught up in this massive debate about the hygiene of wood vs plastic boards, usually because they’ve heard some scary story about bacteria hiding in wood grain. Let me set the record straight: if you’re cleaning your tools, you’re cleaning them. The real issue isn’t the material itself, but how it holds up over time. Plastic boards are notorious for developing deep, nasty grooves from your knife work. Those scars are essentially tiny canyons where bacteria can hide, making it nearly impossible to truly sanitize the surface. Once a plastic board looks like a topographical map of the Andes, it’s time to toss it.

    Wood, on the other hand, is naturally antimicrobial. If you choose a high-quality piece, the fibers actually close up around bacteria, trapping them so they can be washed away during cleaning. When you’re looking for durable kitchen prep surfaces, you want something that stays smooth. I always tell my clients that investing in a solid wood block is about more than just aesthetics; it’s about preventing cross contamination in the kitchen by ensuring your surface doesn’t become a permanent breeding ground for germs.

    Selecting Durable Kitchen Prep Surfaces That Last Decades

    Selecting Durable Kitchen Prep Surfaces That Last Decades

    When you’re looking for durable kitchen prep surfaces, you have to look past the pretty pictures on social media and think about how the board actually behaves under a knife. I’ve seen too many people buy a cheap, thin board only to have it warp or crack within six months. If you want something that survives a decade of heavy use, you need to understand the difference between end grain vs edge grain cutting boards. An end grain board is essentially the gold standard; the wood fibers stand vertically, acting like a cushion that allows the knife blade to slide between the grains rather than slicing through them. This isn’t just about longevity for the board, but it’s also the best material for knife edge retention because it prevents your expensive blades from dulling prematurely.

    If an end grain block feels too intimidating or expensive for your current setup, an edge grain board is a perfectly respectable, sturdy middle ground. Both options offer a level of stability that plastic simply cannot match. My rule of thumb is simple: if it feels light enough to pick up with one finger, it isn’t going to last. Invest in something with heft and density.

    My Rules for Choosing a Board You Won't Regret Buying

    • Skip the cheap, thin boards you find at big-box retailers; if it feels light enough to toss with one hand, it’s going to slide around your counter and frustrate you the second you start chopping.
    • Go for thickness over everything else—a heavy, substantial board acts as an anchor for your prep work and won’t warp into a useless-looking curve after its first trip through the sink.
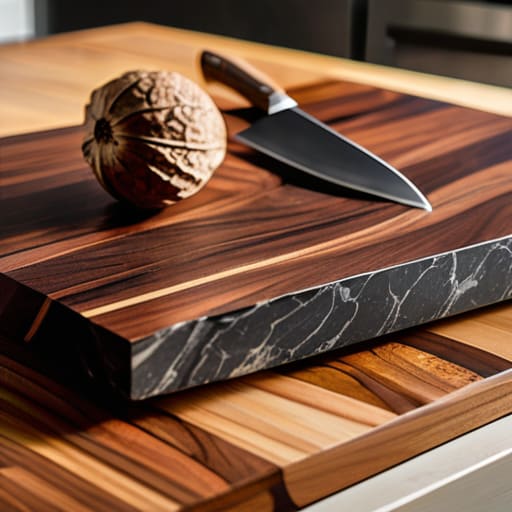
    • If you choose wood, make sure it’s a tight-grained hardwood like maple or walnut, because cheap, porous woods will soak up onion juices and garlic smells like a sponge.
    • Stop treating your high-quality boards like dishwasher-safe plastic; if you put a good wooden board in a high-heat cycle, you’re essentially killing it, so get used to the five-minute hand wash.
    • Invest in a dedicated board for proteins and a separate one for produce—I don’t care how much you love “multi-purpose” tools, cross-contamination is a headache you don’t need in a functional kitchen.

    The Bottom Line on Your Prep Surface

    Stop the cycle of buying cheap plastic boards every six months; invest once in a high-quality wood or composite surface that can be maintained for decades.

    Don’t let “sanitary” marketing fool you—a well-maintained wood board is just as safe as plastic, provided you actually take the time to clean and oil it properly.

    Match your board to your task, using heavy-duty blocks for heavy chopping and lighter, thinner boards for quick prep to ensure your tools—and your hands—don’t take unnecessary strain.

    The Real Cost of Cheap Tools

    I’ve seen enough commercial kitchens to know that a cutting board isn’t just a surface; it’s the foundation of your prep work. Stop chasing those cheap, colorful plastic boards that dull your knives and end up in a landfill after six months; buy a heavy, honest piece of wood that actually respects your blade and grows better with age.

    Rosalind Hayter

    Making the Right Call for Your Kitchen

    Making the Right Call for Your Kitchen.

    At the end of the day, choosing a cutting board isn’t about following the latest kitchen trend or buying the cheapest option on the supermarket shelf. It’s about understanding the balance between hygiene, durability, and knife care. If you want a surface that stands up to daily heavy lifting, go with a thick, end-grain wood block. If you need something lightweight for quick tasks, a high-quality composite might work, but for heaven’s sake, stop buying those thin, flimsy plastic boards that warp after a month of use. Invest in something that has some weight to it and actually respects the steel of your knives.

    My advice is simple: look at your kitchen as a workspace, not a showroom. A good cutting board is a silent partner in your cooking, and when you buy quality, you’re actually saving money in the long run because you won’t be replacing it every single year. Grab a solid piece, learn how to oil it properly, and treat it with a bit of respect. Once you have the right foundation, the actual cooking becomes the easy part. Now, put down the phone, go check your drawers, and start building a kitchen that actually works for you.

    Frequently Asked Questions

    How often do I actually need to oil a wooden board to keep it from cracking?

    Look, I get it—maintenance feels like another chore on an already long list. But if you want that board to last twenty years instead of two, you can’t skip this. As a rule of thumb, oil it whenever the wood looks dull or feels thirsty to the touch. For most home cooks, that’s about once a month. If you’re heavy on the prep work, check it more often. Keep it hydrated, and it won’t crack on you.

    Is it really safe to use the same board for raw chicken and vegetables if I scrub it well?

    Look, I’ve seen enough kitchen mishaps in commercial settings to tell you: don’t gamble with it. Even if you scrub it until your arms ache, a single board is a playground for cross-contamination. If you’re serious about food safety, keep them separate. Get one dedicated board for your proteins and another for your produce. It’s not about being obsessive; it’s about building a kitchen that actually works safely.

    Should I be looking for a heavy end-grain board, or is a standard edge-grain enough for everyday prep?

    Look, if you’re just chopping onions and garlic for Tuesday’s dinner, a standard edge-grain board is plenty. It’s reliable, easier to maintain, and gets the job done without a massive investment. But, if you’re serious about heavy-duty prep—think slicing through large roasts or constant, heavy knife work—go for the end-grain. It’s more forgiving on your blades and lasts longer, but it’s a commitment. Don’t overbuy for a lifestyle you don’t actually lead.

  • Choosing a Soup Ladle for Serving

    Choosing a Soup Ladle for Serving

    I remember standing in the middle of a commercial kitchen during a rush for a three-hundred-person wedding, staring in disbelief as a junior prep cook tried to serve a heavy beef consommé with a thin, stamped-metal soup ladle that was already starting to bend under the weight. It was a cheap, flimsy thing that looked more like a piece of bent silverware than a professional tool, and it was a disaster waiting to happen. That moment stayed with me because it perfectly illustrates how most people approach their kitchen gear: they buy for the look or the price tag, completely ignoring the actual physics of cooking.

    I’m not here to sell you on some designer, silicone-coated gadget that’ll end up in a landfill by next Christmas. My goal is to cut through the marketing noise and help you find a soup ladle that actually has some heft and integrity. I’m going to show you exactly what to look for in terms of weight, handle balance, and material durability so you can stop replacing the same cheap tools every year. We’re going to focus on buying it once and buying it right.

    Table of Contents

    A Kitchenware Material Guide for Lifetime Durability

    A Kitchenware Material Guide for Lifetime Durability

    When you’re looking at a shelf full of options, don’t let the shiny packaging fool you. Most of what you see in big-box stores is designed to end up in a landfill within two years. If you want to build a kitchen that actually functions, you need to understand this basic kitchenware material guide before you open your wallet. I always tell my clients to look for solid construction over aesthetic fluff.

    For most daily tasks, you can’t beat high-quality stainless steel. It’s non-reactive, meaning it won’t leach a metallic tang into your broth, and it can handle the heat of a commercial-grade burner without warping. If you’re dealing with heavy stews or thick chowders, you’ll want to look into different stainless steel ladle types—specifically those with a weighted head. A flimsy, thin-gauge metal tool is a nightmare when you’re trying to scoop from the bottom of a deep stockpot.

    I also tend to steer people away from anything with cheap, glued-on plastic handles. Those are a safety hazard waiting to happen. Instead, look for a seamless transition from handle to bowl or a heavy-duty silicone grip. An ergonomic ladle design isn’t just a luxury; it’s what prevents your wrist from cramping when you’re prepping a massive batch of soup for the week. Buy the heavy stuff once, and you’ll never have to shop for this again.

    Navigating Essential Stainless Steel Ladle Types.

    When you’re looking at different stainless steel ladle types, don’t get distracted by the fancy engravings or the ones that look like they belong in a museum. In a working kitchen, function beats form every single time. If you’re frequently prepping big batches of chili or stock, you need to look for the best ladle for large pots—specifically one with a deep, wide bowl. A shallow bowl is a recipe for spills and frustration, especially when you’re trying to move liquid from a heavy stockpot to a serving tureen.

    You also need to pay attention to the handle. I’ve seen far too many people buy a beautiful piece of steel only to realize it’s a nightmare to hold. Look for an ergonomic ladle design that feels balanced in your hand; if the weight is all in the bowl, your wrist is going to ache after a few minutes of heavy lifting. A solid, weighted handle gives you the leverage you need without the constant fear of the tool slipping. It’s about finding that sweet spot between a tool that feels substantial and one that actually moves with you.

    Five Rules for Choosing a Ladle That Won't End Up in a Junk Drawer

    • Check the weight and balance before you buy. If a ladle feels top-heavy or flimsy in your hand, it’s going to be a pain to use when you’re trying to serve a heavy batch of beef stew. You want something that feels like an extension of your arm, not a piece of cheap cutlery.
    • Look for a deep bowl, not a shallow one. I’ve seen too many people buy “designer” ladles that are basically just oversized spoons. If you can’t get a decent volume in a single scoop, you’re just going to be standing at the stove longer than you need to.
    • Prioritize a seamless construction. Avoid anything where the handle is just glued or poorly riveted to the bowl. Those little crevices are magnets for bacteria and food particles, and eventually, the handle will wiggle loose. A solid, single-piece design is much easier to keep clean.
    • Pay attention to the handle length. I’ve made the mistake of buying a “compact” ladle for a small kitchen, only to realize it’s too short to reach the bottom of a deep stockpot without my knuckles getting scalded. Make sure it’s long enough to keep your hands well away from the steam.
    • Skip the silicone-coated nonsense. While they might be “non-scratch,” they tend to peel and flake after a few months of heavy use. Stick to high-quality stainless steel; it’s easier to sanitize, it won’t degrade in a dishwasher, and it’ll still be in your drawer twenty years from now.

    The Bottom Line on Choosing Your Next Ladle

    Forget the cheap plastic or thin aluminum; if you want a tool that survives a decade of heavy stews and thick chowders, stick to high-quality stainless steel.

    Match the ladle to the task—use a deep, rounded bowl for liquids and a flatter design if you’re frequently serving thicker, chunkier soups.

    Look for a solid, ergonomic handle that feels balanced in your hand; if it feels flimsy or awkward in the store, it’s going to be a nuisance in your kitchen every single day.

    The True Test of a Ladle

    I’ve seen too many people treat a ladle like an afterthought, picking up some lightweight, hollow thing just because it was cheap. But if you’re scooping a heavy beef stew or a thick lentil soup, you need a tool that has some actual weight to it—something that won’t bend or snap when the work gets heavy.

    Rosalind Hayter

    Making the Right Choice for Your Kitchen

    Making the Right Choice for Your Kitchen.

    At the end of the day, choosing a soup ladle isn’t about finding the prettiest item on a retail shelf; it’s about matching the tool to your actual cooking habits. We’ve covered why you should steer clear of flimsy plastics and instead invest in heavy-duty stainless steel or high-quality silicone that can handle the heat of a commercial-grade stockpot. Whether you need a deep-well ladle for a thick beef stew or a more shallow design for delicate broths, remember that weight and balance matter. If a tool feels awkward or cheap in your hand during the first five minutes of testing, it’s going to be a nuisance for the next five years. Buy for durability, not for a trend.

    I’ve spent decades in professional kitchens seeing exactly how much damage a poorly made tool can do to a person’s workflow and their patience. My advice is simple: stop treating your kitchen like a showroom and start treating it like a workshop. When you invest in a single, solid ladle that feels right, you aren’t just buying a piece of metal; you are investing in your own efficiency. A well-organized, functional kitchen is built one reliable tool at a time. Pick something that will still be sitting in your utensil crock long after the latest kitchen gadget craze has faded into obscurity.

    Frequently Asked Questions

    How do I know if the handle is actually sturdy enough to handle a heavy pot of stew without bending?

    Look, don’t just trust the shiny finish. Grab the ladle and give the handle a firm, intentional bend—not enough to snap it, but enough to feel for any give. If it feels springy or “bouncy,” put it back on the shelf. You want a handle that feels like an extension of your arm, not a piece of wire. Ideally, look for a solid, seamless connection where the handle meets the bowl; any visible welds or joints are potential failure points.

    Is it worth spending more on a professional-grade ladle, or will a standard one from a big-box store do the job?

    Look, I’ve seen enough big-box ladles snap at the seam right when you’re serving a heavy batch of chili to know the difference. If you’re just scooping tea, a cheap one is fine. But for daily cooking? Spend the extra money on a professional-grade piece. A heavy-duty, single-piece construction won’t wobble or break, and it’ll actually feel balanced in your hand. It’s not about the brand; it’s about buying it once.

    Will a stainless steel ladle scratch my non-stick pots, or should I stick to silicone?

    If you’re using non-stick pans, yes, a stainless steel ladle will absolutely ruin that coating. One wrong move and you’ve got scratches that trap food and kill the pan’s performance. If your primary cookware is non-stick, stick to high-heat silicone. However, if you’re serious about buying gear that lasts a lifetime, I’d suggest investing in stainless steel or cast iron pots. They’re indestructible, and you won’t have to baby your tools.

  • Getting Less Sediment From a French Press

    Getting Less Sediment From a French Press

    I spent twenty years in commercial kitchens, and if there is one thing I learned, it’s that most people are being sold a lie by flashy marketing. You’ll walk into any high-end kitchen store and see these $200, designer french press models that look beautiful on a marble countertop but are essentially just overpriced glass and ego. They promise a “revolutionary brewing experience,” but let’s be honest: you’re paying for a logo, not a better cup of coffee. I’ve seen enough expensive gadgets end up in the back of a cluttered pantry to know that complexity is usually just a mask for inefficiency.

    I’m not here to sell you on a lifestyle or a brand name; I’m here to help you find a tool that actually works. In this guide, I’m going to strip away the hype and tell you exactly what to look for in a sturdy, reliable brewer that won’t break the moment you press the plunger. We’re going to focus on build quality and durability—the kind of stuff that lasts decades, not months. If you want a simple, no-nonsense way to make a great cup without wasting money on plastic junk, you’re in the right place.

    Mastering the Art of the Immersion Brewing Method

    Mastering the Art of the Immersion Brewing Method

    Mastering the Art of the Immersion Brewing Method

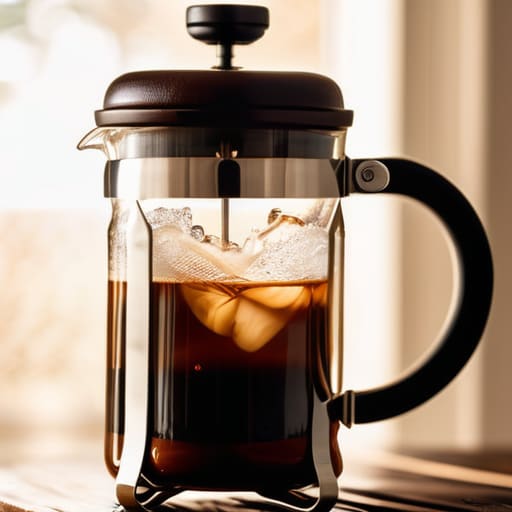
    Most people treat their morning coffee like a chore, but if you want to actually taste the nuances of the bean, you have to respect the immersion brewing method. Unlike drip machines that just run water through a filter, this technique lets the grounds sit and fully develop. The biggest mistake I see? Using grounds that are too fine. You need coarse coffee grounds—think the texture of sea salt—to ensure the water flows properly and doesn’t turn your breakfast into a muddy mess.

    Timing is everything here. You can’t just walk away and forget about it. I usually aim for a four-minute window; any longer and you’re looking at over-extraction, which is the fastest way to avoid bitter coffee and enjoy a clean finish. When it comes time to push down, don’t force it. Use a slow, steady plunger pressure technique. If you feel significant resistance, your grind is too fine. Treat the process with a little patience, and you’ll stop relying on those expensive, noisy machines that clutter your counter.

    Why Coarse Coffee Grounds Make or Break Your Morning

    If you’ve ever sat down with a cup of coffee only to find it tastes like a mouthful of battery acid, I can almost guarantee your grind size was the culprit. In my years managing professional kitchens, I learned that precision isn’t just for plating; it’s for the prep work, too. When you’re using an immersion brewing method, the water is in constant contact with the beans. If your grounds are too fine—think the consistency of table salt—they’ll over-extract almost instantly. This leads to that harsh, unpleasant flavor that ruins a perfectly good morning.

    To get it right, you need coarse coffee grounds that resemble sea salt or cracked peppercorns. This texture allows for a controlled coffee extraction time, ensuring the water pulls out the rich oils and subtle flavors without pulling out the tannins that cause bitterness. If the particles are too small, they’ll also slip right through your metal mesh filter, leaving you with a gritty, muddy mess at the bottom of your mug. Stick to a heavy, even grind, and you’ll stop fighting your equipment and start actually enjoying your brew.

    Five Ways to Stop Making Muddy, Bitter Coffee

    • Stop using tap water if it tastes like a swimming pool; if your water is mediocre, your coffee will be too. Use filtered water so you actually taste the beans, not the chlorine.
    • Ditch the timer on your phone and get a real one, or at least watch the clock closely. If you let that coffee sit in the press for ten minutes instead of four, you’re just brewing bitter sludge.
    • Don’t be stingy with the heat. If you’re using boiling water straight off the stove, you’re scorching the grounds. Let it sit for a minute to settle around 200°F before you pour.
    • Clean your mesh filter like your life depends on it. I’ve seen enough old, oily residue stuck in those metal screens to know it ruins every cup that follows. Scrub it well after every use.
    • Invest in a decent burr grinder. If you’re using those pre-ground bags from the supermarket, you’re fighting a losing battle. Freshly ground, coarse beans are the only way to get that clean, heavy body a French press is known for.

    The Bottom Line on Brewing Better

    Stop buying those flimsy, plastic-heavy brewers that feel like they’ll crack the first time they hit the counter; invest in a heavy-duty glass and stainless steel press that can actually handle daily use.

    Your grind size is non-negotiable—if you aren’t using a coarse, even grind, you’re going to end up with a cup full of silt and a bitter aftertaste that no amount of cream can fix.

    Don’t let the gear do the work for you; a good French press requires patience and a steady hand, so focus more on your timing and water temperature than on buying the most expensive brand on the shelf.

    The Bottom Line on Your Morning Brew

    At the end of the day, mastering the French press isn’t about following a complicated science experiment; it’s about respecting the process. We’ve covered why you need to ditch those flimsy plastic brewers for something substantial, why your grind size needs to be coarse enough to avoid a muddy mess, and how the immersion method pulls out those rich, heavy oils that paper filters just strip away. If you get the grind right and keep your water temperature steady, you’re already ahead of ninety percent of the people I see cluttering their counters with expensive, single-use machines. Investing in a solid glass and steel press means you are choosing a tool that works with you, not a gadget that will end up in a landfill by next year.

    My advice? Stop chasing the latest kitchen trend and start focusing on the fundamentals of good gear. A French press is one of those rare items that actually gets better with age, much like a well-seasoned cast iron skillet. It demands a little patience and a bit of attention to detail, but that’s exactly what makes the coffee taste so much better. Don’t let the morning rush rob you of a decent cup. Take those extra two minutes, settle into your routine, and enjoy a brew that was actually built to last.

    Frequently Asked Questions

    How do I know if my water temperature is actually right, or am I just guessing?

    Look, if you’re just eyeballing it, you’re probably burning your beans. I don’t care how much you trust your intuition; water is finicky. If the water is boiling hard, it’s too hot and will leave your coffee tasting bitter and scorched. Aim for about 200°F. If you don’t want to go buying a fancy digital thermometer, just let your kettle sit off the heat for about thirty to sixty seconds after it whistles. That’s my rule of thumb.

    Is it worth spending the extra money on a heavy glass press, or will a stainless steel one hold up better over time?

    Look, if you’re asking about longevity, stainless steel wins every single time. Glass is beautiful and lets you see the bloom, but it’s fragile—one slip on a granite countertop and your morning ritual is in pieces. A heavy-duty stainless steel press can take a beating and won’t crack if you accidentally knock it against the sink. If you want a tool that actually lasts a lifetime, go steel. It’s practical, not pretty, but it works.

    What should I do if my coffee tastes way too gritty or bitter even when I'm using coarse grounds?

    If it’s bitter, you’re over-extracting; your water has sat with those grounds for too long. Try pulling the plunger up a minute earlier. If it’s gritty, your grind is likely too uneven or your mesh filter is cheap. Don’t blame the beans—check your gear. A high-quality stainless steel filter makes a world of difference. Stop settling for silt in your cup; adjust your timing first, then look at your equipment.

  • Essential Features of a Heavy Duty Stand Mixer

    Essential Features of a Heavy Duty Stand Mixer

    I spent two decades in commercial kitchens where every second and every cent counted, and if there is one thing I learned, it’s that a shiny new appliance doesn’t make a chef. I see people pouring hundreds of dollars into a high-tech stand mixer that’s packed with digital screens and Bluetooth connectivity, only to have the motor burn out the moment they try to knead a decent batch of sourdough. It drives me up the wall. You don’t need a computer on your countertop; you need mechanical reliability and enough torque to handle a heavy dough without sounding like a jet engine taking off in your kitchen.

    I’m not here to sell you on the latest kitchen trend or help you justify an impulse buy. My goal is to help you identify the few machines actually worth the counter real estate—the ones built with metal gears and a heavy base that will still be working twenty years from now. I’ll cut through the marketing fluff and tell you exactly what to look for in terms of build quality and motor strength so you can invest in a tool, not a toy.

    Table of Contents

    Why Motor Wattage for Baking Actually Matters

    Why Motor Wattage for Baking Actually Matters

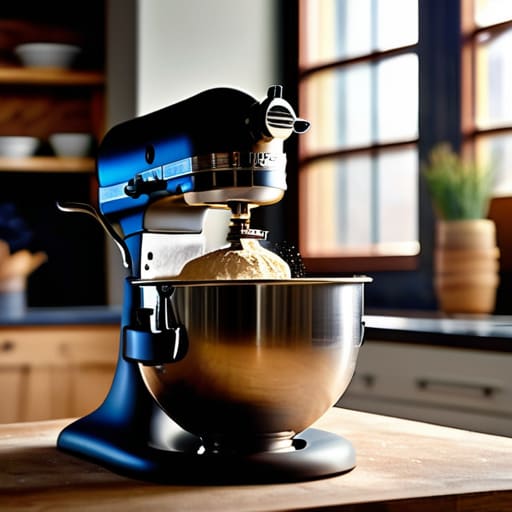
    When you’re looking at spec sheets, it’s easy to get distracted by the shiny finish or the color options, but I want you to look at the engine. Most people think a higher number is just a marketing gimmick, but when it comes to motor wattage for baking, that number represents the actual muscle behind your dough. If you’re just whipping up a light meringue or some sponge cake, a lower-wattage machine will get the job done just fine. But the moment you move into heavy-duty territory—like working with thick, hydration-heavy yeast doughs—a weak motor is going to struggle, heat up, and eventually burn itself out.

    I’ve seen too many people buy a “starter” machine only to have it stall out halfway through a batch of sourdough. If you plan on using your machine as serious bread making equipment, you need a motor that won’t quit when the resistance builds up. A robust motor ensures that the planetary mixing action remains consistent and steady, rather than stuttering or skipping beats. You aren’t just buying a gadget; you’re investing in a workhorse that needs the power to handle the heavy lifting without breaking a sweat.

    The Superiority of Stainless Steel Mixing Bowls

    The Superiority of Stainless Steel Mixing Bowls

    Look, I’ve seen enough cracked plastic and chipped melamine in commercial kitchens to last a lifetime. When you’re investing in high-quality kitchen appliance essentials, the bowl shouldn’t be an afterthought. I always tell my clients to opt for heavy-duty stainless steel. Unlike plastic, which absorbs odors and stains from everything from turmeric to berry juice, stainless steel is non-reactive and practically indestructible. It won’t warp or crack when you’re working through a heavy batch of dough, making it a cornerstone of reliable bread making equipment.

    Beyond just durability, there is a functional reason to prefer metal. A high-quality stainless steel bowl has a certain weight and thermal conductivity that helps keep your ingredients at the right temperature. When you’re utilizing the planetary mixing action of a serious machine, you need a vessel that can handle the centrifugal force without sliding around or flexing. A sturdy metal bowl provides the stability required to ensure your ingredients are incorporated properly, rather than just being splashed against the sides. It’s a small detail, but it’s the difference between a professional result and a messy countertop.

    Five Things to Look for Before You Commit to a Countertop Resident

    • Prioritize weight and stability over aesthetics. A mixer that feels light and airy in the hand is going to dance across your granite the second you try to knead a heavy sourdough. You want something with some serious heft that stays put when the work gets tough.
    • Check the attachment hub compatibility. Don’t get stuck with a machine that only does one thing. A real workhorse should have a standard hub so you can swap out the whisk for a pasta roller or a meat grinder later on.
    • Avoid the “all-in-one” trap. Those massive machines that claim to do everything from juicing to blending are usually just a collection of mediocre motors. Stick to a dedicated stand mixer; it’s better to have one tool that does one job perfectly than five tools that do five jobs poorly.
    • Inspect the planetary mixing action. It sounds technical, but it’s simple: the attachment needs to reach every single millimeter of the bowl. If your mixer leaves a ring of unmixed flour around the edge, you aren’t baking; you’re just making a mess.
    • Look for metal gears, not plastic. I’ve seen too many “beginner” models fail because a tiny plastic tooth snapped under pressure. If you want a machine that lasts as long as my vintage cast iron, you need to ensure the internal drive system is built from metal.

    My Golden Rules for Buying a Stand Mixer

    Don’t get distracted by flashy colors or digital screens; focus on the weight of the machine and the strength of the motor.

    Look for all-metal gear construction rather than plastic parts, because if you’re making heavy bread dough, plastic will strip within a year.

    Prioritize a mixer that has a heavy footprint—you want a tool that stays planted on your counter while it works, not one that dances its way toward the edge.

    I’ve seen too many people clutter their counters with colorful, lightweight mixers that struggle the moment they hit a heavy dough; if you aren’t buying a machine with enough heft and motor power to last you twenty years, you aren’t buying a tool, you’re just buying more future landfill.

    Rosalind Hayter

    Making the Right Call for Your Kitchen

    Making the Right Call for Your Kitchen.

    At the end of the day, choosing a stand mixer isn’t about picking the prettiest machine in the catalog; it’s about understanding the mechanics of your craft. We’ve talked about why you shouldn’t skimp on motor wattage when you’re tackling heavy bread doughs, and why investing in stainless steel bowls is a far better move than settling for flimsy, plastic-coated alternatives. If you prioritize durability and raw power over flashy digital displays and unnecessary attachments, you’re going to end up with a tool that actually earns its place on your countertop. Don’t let the marketing hype trick you into buying a glorified toy; buy for the long haul and focus on the build quality that can withstand years of daily use.

    My philosophy has always been that a kitchen should serve you, not become a graveyard for expensive, unused gadgets. A good stand mixer is more than just an appliance; it is a cornerstone of a functional workspace that simplifies your life and helps you master new skills. Once you have the right foundation, the real magic happens in the habits you build and the meals you share with the people you love. Stop chasing the latest kitchen trends and start building a collection of tools that you can pass down to the next generation. Invest in quality, keep your workspace organized, and let the cooking take care of itself.

    Frequently Asked Questions

    Is it worth paying extra for a mixer with a planetary mixing action, or is that just marketing fluff?

    It’s definitely not marketing fluff. In my years managing commercial kitchens, I learned that efficiency is everything. Planetary action means the attachment rotates on its own axis while also revolving around the bowl. This ensures the whisk or paddle hits every single inch of the container, eliminating those annoying pockets of unmixed flour at the bottom. If you want consistent dough and less manual scraping, it’s worth every extra penny.

    How do I know if a motor is actually heavy-duty or if it's just going to burn out the first time I try to knead a batch of sourdough?

    Look, don’t just trust the sticker on the box. If the manual doesn’t explicitly mention “all-metal gears,” walk away. Cheap mixers use plastic gears that strip the moment they hit a heavy dough. You want to feel the weight of the machine; a heavy, solid chassis usually means there’s a substantial motor and gear assembly underneath. If it feels light and hollow, it’s going to overheat the second you start kneading sourdough.

    Should I prioritize a tilt-head model for easy access, or is a bowl-lift design better for long-term durability?

    If you’re looking for convenience, go with the tilt-head. It’s easier to swap out attachments and scrape the sides of the bowl without a struggle. But if you’re planning on making heavy batches of bread or thick dough every single week, get the bowl-lift. The lift mechanism is sturdier and handles the torque of a heavy motor much better over time. For me, durability wins—I’d rather work a little harder for a machine that won’t shake itself apart.

  • How a Sauté Pan Differs From a Frying Pan

    How a Sauté Pan Differs From a Frying Pan

    I spent two decades in commercial kitchens where the heat is high and there is zero room for error, and if there’s one thing I learned, it’s that most people are being sold a lie. You walk into a high-end kitchen store and see these $200 “designer” sets, but half of them are nothing more than glorified non-stick pans that will peel and warp before your first anniversary. I’ve seen enough flimsy, overpriced junk to last a lifetime. When it comes to a real sauté pan, you don’t need a fancy brand name or a dozen useless gadgets; you need something with enough weight to hold a steady temperature and enough soul to handle a heavy sear without flinching.

    I’m not here to sell you on the latest kitchen trend or convince you that you need a specialized pan for every single ingredient in your pantry. My goal is to help you cut through the marketing noise and find the one reliable workhorse that actually earns its spot on your stovetop. I’m going to show you exactly what to look for in terms of construction and heat distribution so you can stop wasting money and start investing in tools that actually work as hard as you do.

    Saut Pan vs Frying Pan Differences You Cant Ignore

    Saut Pan vs Frying Pan Differences You Cant Ignore

    I see this mistake constantly when I’m helping clients organize their cabinets: they have a drawer full of shallow skillets and wonder why their sauces always break or their meat never sears properly. The biggest sauté pan vs frying pan differences come down to the walls. A standard frying pan has sloped sides, which is great for flipping an omelet, but it’s useless if you want to build a pan sauce or simmer something gently. A proper sauté pan has straight, vertical sides, which keeps your liquids contained and helps trap heat.

    When you’re looking for longevity, you want to prioritize even heat distribution cookware over something thin and cheap. Because of those high walls, a heavy-duty pan allows you to transition from searing a chicken breast to adding a splash of wine and letting it reduce without splashing hot grease all over your stovetop. If you invest in a high-quality piece with a heavy bottom, you aren’t just buying a vessel; you’re buying a tool that handles heat transitions like a professional.

    Stainless Steel vs Nonstick Saut Pan Choosing Longevity

    If you ask me, the debate between stainless steel vs nonstick sauté pan options is where most home cooks make their biggest mistake. They go for the nonstick because it’s easy, but they forget that those coatings are essentially disposable. Once that surface starts peeling or sticking, that pan is headed straight for the landfill. I’ve spent enough time in commercial kitchens to know that if you want something that survives a decade of heavy use, you need to invest in high-quality stainless steel.

    Stainless steel is my go-to for building a functional kitchen because it handles high heat and allows for that beautiful fond to develop on the bottom. That little bit of browned residue is gold—it’s the foundation of a great pan sauce. While nonstick might be fine for a quick morning omelet, it lacks the durability required for serious cooking. If you want even heat distribution cookware that won’t fail you mid-service, stick to a heavy-duty stainless option. It takes a little more practice to master the temperature, but the longevity and performance are worth every bit of the learning curve.

    Five Rules for Making Your Sauté Pan Work as Hard as You Do

    • Stop overcrowding the pan. I’ve seen so many home cooks try to dump a pound of chicken into a shallow pan all at once; you aren’t braising, you’re steaming. Cook in batches so the temperature stays high and you actually get that golden-brown sear you’re looking for.
    • Check the weight before you reach for your wallet. A flimsy, lightweight pan is going to warp the moment it hits a high flame. You want something with a heavy, even bottom—preferably stainless steel or cast iron—that distributes heat steadily so you don’t end up with hot spots.
    • Respect the “fond.” That little bit of browned, stuck-on goodness at the bottom of the pan after you cook your meat isn’t a mess to be scrubbed away immediately; it’s liquid gold. Deglaze the pan with a splash of wine, stock, or even water to turn those bits into a real sauce.
    • Don’t be afraid of high heat, but learn your limits. If you see the oil starting to smoke heavily, back off. You want a steady shimmer, not a kitchen fire. Mastering the temperature of your pan is more important than any expensive gadget you’ll find in a department store.
    • Invest in a lid that actually fits. One of the biggest mistakes I see in disorganized kitchens is people buying beautiful pans but neglecting the lid. If you want to transition from a sear to a gentle simmer, you need a tight-fitting lid to trap that moisture and heat.

    The Bottom Line on Your Next Sauté Pan

    Stop chasing every new gadget; if you’re going to invest in one piece of cookware, make it a heavy-duty sauté pan that can handle everything from a quick sear to a slow braise.

    Choose your material based on how you actually cook—stainless steel for longevity and high-heat searing, or nonstick only if you prioritize easy cleanup over lifelong durability.

    Prioritize weight and build quality over aesthetics; a pan that’s too light will warp under heat, and a warped pan is just expensive scrap metal.

    Making the Right Choice for Your Kitchen

    At the end of the day, choosing a sauté pan isn’t about following the latest kitchen trend or buying a ten-piece set that promises to do everything. It’s about understanding your actual cooking habits. If you find yourself constantly deglazing pans for pan sauces or needing that high, even sidewall to prevent splashes, a quality sauté pan is a non-negotiable tool. Whether you decide on the indestructible nature of stainless steel or the ease of a well-maintained nonstick, remember that longevity is the ultimate metric of value. Don’t get distracted by flashy handles or unnecessary coatings; focus on the weight, the heat distribution, and the fact that this piece will actually survive a decade of nightly dinners.

    I’ve spent enough time in commercial kitchens to know that the most expensive gear doesn’t make a better chef—the right habits do. A good sauté pan is just a vehicle for your skill, but it deserves to be a reliable one. Stop looking for the “perfect” pan and start looking for the one that works with you. When you invest in tools built to last, you aren’t just cleaning out your cabinets; you’re building a foundation for a kitchen that serves you. Buy it once, treat it well, and let the cooking do the rest.

    Frequently Asked Questions

    Is it worth the extra money to get a heavy-bottomed pan, or will a cheaper one do the job just as well?

    Look, I’ve seen enough cheap, thin pans warp into useless bowls of metal to know the answer. If you buy a lightweight, budget pan, you’re paying for a headache. A heavy bottom isn’t a luxury; it’s the difference between even heat and hot spots that scorch your garlic. Spend the extra money upfront for weight and density. It’s an investment in consistent cooking, not just a piece of cookware.

    How do I know if my sauté pan is actually high-quality or just another piece of overpriced junk?

    Pick it up. If it feels light or hollow, put it back on the shelf. A real sauté pan needs weight—that density is what holds heat steady when you drop in a cold piece of protein. Check the rivets; they should be flush and rock-solid, not wobbly. Finally, look at the base. If it’s thin or uneven, it’ll warp the moment things get hot. Don’t pay for a brand name; pay for the heft.

    Can I use a sauté pan for everything, or am I still going to need a separate skillet for certain types of cooking?

    Look, if you’re trying to slim down your cabinets, a good sauté pan can do about 80% of the heavy lifting. It’s a workhorse for braising and pan sauces. But don’t get cocky. You still need a lightweight skillet for things like quick eggs or delicate fish where you need high heat and a bit more maneuverability. A sauté pan is a marathon runner; sometimes you just need a sprinter.