Author: Rosalind Hayter

  • Choosing a Coffee Maker for Your Home

    Choosing a Coffee Maker for Your Home

    I’ve spent two decades in commercial kitchens, and if there is one thing I’ve learned, it’s that most people are being sold a lie when it comes to their morning caffeine fix. You walk into a big-box store and see rows of shiny, high-tech gadgets with touchscreens and built-in milk frothers that promise a “cafe experience” at home. Honestly? Most of those overpriced machines are just expensive plastic clutter waiting to break the moment the warranty expires. You don’t need a computer to brew a decent cup of coffee; you need a reliable coffee maker that focuses on heat stability and durability rather than bells and whistles that will inevitably fail you.

    I’m not here to pitch you on the latest trends or tell you which machine has the prettiest LED display. My goal is to cut through the marketing noise and help you find a setup that actually works for you without breaking your budget or your spirit. I’m going to share the honest, no-nonsense truth about what makes a machine last a lifetime and which “innovations” are just a waste of counter space. Let’s get your kitchen sorted with tools that are built to endure.

    Table of Contents

    Ditch the Single Serve Coffee Makers for Real Substance

    Ditch the Single Serve Coffee Makers for Real Substance

    Ditch the Single Serve Coffee Makers for Real Substance

    I see them in almost every kitchen I organize: those plastic, single-serve pods tucked into a corner, gathering dust or cluttering the counter. Look, I get it. They’re convenient when you’re running out the door, but they are the definition of the “trendy plastic junk” I warn people about. Not only are they a waste of money in the long run, but they also offer zero control over your brew. If you actually want to learn how to improve coffee flavor, you need to move away from pre-packaged, stale grounds trapped in plastic shells.

    If you want a morning caffeine routine that actually feels like a ritual rather than a chore, invest in one of the best drip coffee machines you can find. I’m talking about a machine with enough heft to stay put on your counter and enough precision to maintain a consistent heat. When you control the process, you control the quality. Stop settling for lukewarm, mediocre cups and start building a kitchen around tools that offer real substance and longevity.

    Finding the Best Drip Coffee Machines for Your Kitchen

    Finding the Best Drip Coffee Machines for Your Kitchen.

    If you’re serious about your morning caffeine routine, you need to stop looking at the flashy, touch-screen gadgets and start looking at thermal stability. When I’m scouting for the best drip coffee machines, I’m not looking for bells and whistles; I’m looking for a machine that can actually maintain a consistent heat. If the water temperature fluctuates too much during the cycle, you’re going to end up with a cup that tastes sour or thin. A machine that can hit that sweet spot—usually between 195°F and 205°F—is non-negotiable if you want to actually improve coffee flavor without needing a chemistry degree.

    Don’t get distracted by the endless marketing for “smart” brewers that connect to your Wi-Fi. Those are just more points of failure. Instead, focus on build quality. Look for heavy-duty heating elements and high-quality glass or stainless steel carafes. These are the essential kitchen appliances for coffee lovers who want a reliable cup every single day without having to replace the unit every eighteen months. Invest in a workhorse that prioritizes thermal consistency over digital gimmicks.

    Five Rules for Choosing a Brewer That Won't End Up in a Landfill

    • Prioritize repairability over aesthetics; if a machine uses proprietary plastic parts that can’t be replaced, walk away.
    • Look for metal heating elements rather than cheap plastic ones to ensure your coffee stays hot without that burnt, chemical aftertaste.
    • Avoid anything with a “smart” touchscreen or Wi-Fi connectivity; you don’t need an app to tell you your coffee is ready, and those circuits are just more points of failure.
    • Check the footprint before you buy; I’ve seen too many beautiful kitchens ruined by massive machines that leave zero room for actual food prep.
    • Invest in a machine that works with a reusable filter to save money and reduce the mountain of paper waste we all end up creating.

    My Golden Rules for Your Coffee Setup

    Stop chasing the latest tech-heavy gadget; focus on build quality and ease of cleaning so you actually use it every day.

    Prioritize machines with thermal carafes or high-quality glass over cheap plastic components that leach flavors and break within a year.

    Invest in a solid burr grinder alongside your brewer, because even the best machine can’t fix poorly ground, stale beans.

    ## The Cost of Convenience

    Stop treating your morning coffee like a disposable commodity; if you buy a machine made of cheap plastic that you’ll be tossing in a landfill by next Christmas, you aren’t saving money, you’re just wasting it.

    Rosalind Hayter

    Stop Chasing Trends and Start Brewing Better.

    At the end of the day, choosing a coffee maker isn’t about finding the flashiest gadget on the market or the one with the most buttons. It’s about recognizing that your kitchen deserves tools that serve a purpose without creating unnecessary clutter. We’ve talked about why you should move away from the waste of single-serve pods and why a high-quality drip machine is a far more sustainable and flavorful investment for your daily routine. When you prioritize build quality and ease of cleaning over gimmicks, you aren’t just buying an appliance; you are investing in your morning stability. Stick to the basics that work, and you’ll save yourself a headache—and a lot of money—in the long run.

    I’ve spent years in professional kitchens where we didn’t have time for equipment that failed when we needed it most. I want that same reliability for your home. Don’t let the marketing hype convince you that you need a complex machine to enjoy a decent cup of joe. A simple, well-made brewer paired with good habits is all you really need to master your morning ritual. Buy something that is built to last a lifetime, treat it with respect, and let it become a seamless part of your home. Build a kitchen that works for you, one steady cup at a time.

    Frequently Asked Questions

    How do I know if a high-end coffee machine is actually worth the investment or just fancy branding?

    Look past the polished chrome and the fancy logo. To see if a machine is worth your hard-earned money, check the build quality. Is it mostly plastic, or does it have metal internals and heavy-duty components? I look for thermal stability—does it hold a consistent temperature? If the manufacturer can’t tell you exactly how they manage heat or if the parts are easily replaceable when they eventually wear out, you’re just paying for a brand name.

    Is it better to go with a manual pour-over setup or stick to a reliable automatic drip machine?

    It depends on whether you value the ritual or the routine. If you actually enjoy the process—the precision, the control, and the quiet moment of morning mindfulness—go with a manual pour-over. It’s a setup that lasts decades. But if you’re someone who needs to grab a mug and get out the door without a fuss, stick to a reliable automatic drip. Don’t buy a pour-over just because it looks pretty on a shelf if you’re never going to use it.

    What are the actual signs that my current coffee maker is becoming a waste of space and money?

    If you’re constantly cleaning out calcified gunk from the reservoir or if your coffee tastes like burnt paper, it’s time to let it go. When a machine starts making more noise than usual—grinding or sputtering—it’s struggling to do its one job. But the biggest sign? If you find yourself skipping it because the cleanup is a headache, that machine isn’t a tool anymore; it’s just clutter taking up valuable counter space.

  • Benefits of Using a Dutch Oven

    Benefits of Using a Dutch Oven

    I’ve spent two decades in commercial kitchens, and if there is one thing that makes my blood boil, it’s watching people drop two hundred dollars on a designer-colored dutch oven just because it looks pretty on a social media feed. You don’t need a pastel-pink pot to make a decent stew, and you certainly don’t need a collection of five different versions of the same heavy pot. Most of those high-end brands are just marketing fluff wrapped around decent iron, and I am tired of seeing home cooks fall for the hype when they could be investing that money into better ingredients instead.

    I’m not here to sell you on a lifestyle or a specific brand name. My goal is to cut through the noise and help you identify a dutch oven that actually holds heat, distributes it evenly, and—most importantly—will still be sitting on your stovetop thirty years from now. I’ll tell you exactly what to look for in terms of weight and lid fit, and I’ll show you how to avoid the flimsy junk that ends up in a landfill after six months. Let’s get your kitchen sorted with tools that actually work.

    Table of Contents

    Cast Iron vs Enameled Choosing Your Last Durable Kitchen Essential

    Cast Iron vs Enameled Choosing Your Last Durable Kitchen Essential

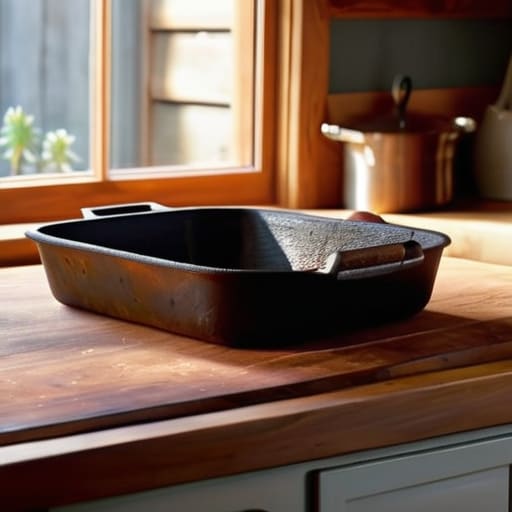
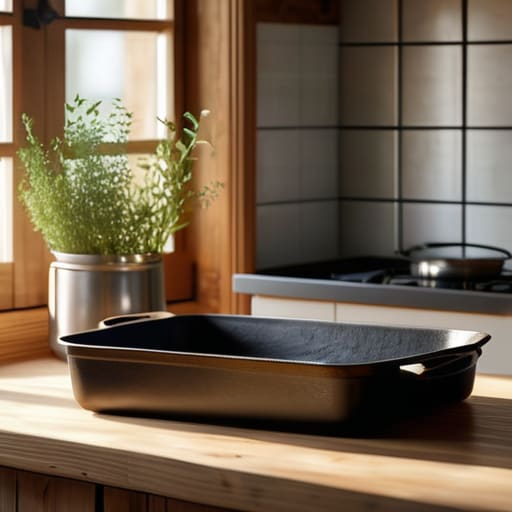
    When you’re standing in the cookware aisle, you’re essentially deciding between two different philosophies of cooking. Raw cast iron is the workhorse of the professional kitchen; it’s rugged, incredibly responsive to high heat, and offers unmatched heat retention in cookware. If you don’t mind the occasional maintenance, a plain iron pot is a lifelong companion. You’ll need to learn the art of seasoning cast iron dutch oven surfaces to keep them non-stick, but once that layer is built up, there is nothing quite like it for searing meat or baking bread.

    On the other hand, enameled versions are the polished cousins of the group. They come pre-coated with a glass-like finish, which means you can skip the oiling and go straight to acidic recipes like tomato-based sauces or braises without worrying about damaging the metal. While you lose that deep, seasoned patina, you gain convenience and easy cleanup. If you want the best dutch oven for stews that you can take straight from the stovetop to a beautiful table presentation without a second thought, the enameled route is your winner. Choose based on your patience, not the marketing.

    The Magic of Heat Retention in Cookware

    The Magic of Heat Retention in Cookware.

    If you’ve ever tried to simmer a thick beef stew in a thin, cheap stainless steel pot, you know the frustration of a sauce that keeps breaking or burning because the temperature fluctuates every time you move the lid. That is where the real science of heat retention in cookware comes into play. A heavy-duty vessel acts like a thermal battery; once it gets up to temperature, it stays there. This steady, unwavering heat is exactly what you need for those long, slow braises where patience is the main ingredient.

    When you are deciding between cast iron vs enameled dutch oven options, remember that the goal is thermal stability. A thick-walled pot won’t just cook your food; it will hold onto that energy, ensuring that even when you drop in a cold piece of meat, the temperature doesn’t plummet. This consistency is the secret to achieving that “fall-off-the-bone” texture without having to constantly babysit the stove. It’s not about fancy technology; it’s about mass and physics working together to do the hard labor for you.

    Five Rules for Making Your Dutch Oven Work for You

    • Stop babying your cast iron. If you’re using an enameled model, you can use mild soap, but if you’ve gone with raw cast iron, a little scrub and a light coating of oil is all it needs to stay seasoned and non-stick.
    • Don’t crowd the pot. I see people trying to sear a pound of meat all at once, which just ends up steaming the food in its own juices. Work in batches so you actually get that crust you’re looking for.
    • Respect the heat. You don’t need your burner on high to get a Dutch oven screaming hot; these things hold heat like a brick. Start medium, let it stabilize, and you’ll avoid the dreaded scorched bottom.
    • Use it for more than just stews. I use mine for braising short ribs, baking crusty sourdough, and even deep-frying. If you’re only pulling it out once a month for a chili, you aren’t getting your money’s worth.
    • Check the lid fit before you buy. A heavy, tight-fitting lid is the whole point of a Dutch oven—it traps the moisture and creates that mini-oven environment. If the lid wobbles like a loose tooth, put it back on the shelf.

    The Bottom Line on Your Next Dutch Oven

    Don’t get distracted by flashy colors or non-stick coatings that peel off in six months; choose between raw cast iron for high-heat searing or enameled for easy cleanup, but make sure it’s heavy enough to hold its heat.

    Stop buying “specialty” pots for every single dish and invest in one high-quality, large-capacity Dutch oven that can handle everything from a slow-braised short rib to a batch of homemade sourdough.

    View your cookware as a lifelong investment rather than a disposable gadget; if you buy a piece that is built to last, you’ll save yourself a fortune in replacements over the next few decades.

    The Truth About Your Cookware

    I’ve seen enough commercial kitchens to know that a fancy gadget is just a distraction; if you want a pot that actually earns its place on your stove, get a heavy Dutch oven that can handle a decade of Sunday roasts without flinching.

    Rosalind Hayter

    Making the Right Investment

    Making the Right Investment in Dutch ovens.

    At the end of the day, choosing a Dutch oven isn’t about picking the prettiest color on a showroom shelf; it’s about understanding how you actually cook. Whether you decide to go with the rugged, lifelong reliability of raw cast iron or the easy-to-clean convenience of an enameled model, you are looking for thermal mass and durability. You want a piece of equipment that can handle a heavy sear, hold steady heat for a slow braise, and survive being passed down to the next generation. Don’t let the marketing fluff trick you into buying a lightweight, thin-walled imitation that will warp the moment you turn up the flame. Buy for the long haul, because a real Dutch oven is a workhorse, not a countertop decoration.

    My advice is simple: stop chasing the latest kitchen trends and start building a foundation of tools that actually perform. A well-chosen Dutch oven will eventually become the most familiar object in your kitchen, seasoned by years of Sunday roasts and late-night stews. It’s more than just a pot; it’s a commitment to slowing down and doing things right. When you invest in quality, you aren’t just buying cookware—you’re buying the ability to cook better meals without the constant frustration of subpar gear. Get the right one, treat it with respect, and let it work for you for decades to come.

    Frequently Asked Questions

    Is it actually worth the extra money to go with an enameled model, or can I just stick to raw cast iron?

    Look, if you’re only making heavy stews and braises, raw cast iron is your best friend—it’s cheaper and indestructible. But if you want one pot that handles everything from a delicate tomato sauce to a sourdough loaf without worrying about acidic ingredients stripping your seasoning, pay the premium for enamel. It’s more maintenance-free and easier to clean. If you can afford the jump, enamel gives you more versatility for a single investment.

    How do I know if a Dutch oven is heavy enough to actually hold heat, or if it's just one of those thin, cheap imitations?

    Here’s the litmus test: pick it up. If it feels surprisingly light, like you’re lifting a hollowed-out tin, put it back on the shelf. A real Dutch oven should have some serious heft; that weight is what tells you the walls are thick enough to hold steady heat. If it feels flimsy in your hands, it’ll be flimsy on your stove, and your braises will never turn out right.

    Do I really need to spend time seasoning a new pot, or is that just something people do to make things more complicated than they need to be?

    Look, I get it. You want to cook, not perform a chemistry experiment. But if you bought raw cast iron, skipping the seasoning is a mistake you’ll pay for in ruined meals and rust. It’s not about making things complicated; it’s about building a non-stick surface that actually lasts. If you went with enameled, you can skip the hassle entirely. But for raw iron? Do the work once so the pot works for you forever.

  • Selecting the Best Cutting Board for Your Needs

    Selecting the Best Cutting Board for Your Needs

    I spent twenty years in commercial kitchens where the rhythm of the service depended entirely on the tools in front of you. I can still hear the rhythmic thwack-thwack-thwack of a chef’s knife hitting a heavy maple block, a sound that meant precision and speed. Most people, however, are trying to prep dinner on a thin, flimsy piece of plastic that slides around the counter like a hockey puck. It’s frustrating to watch because a cheap, undersized cutting board isn’t just an annoyance; it’s actively dulling your expensive knives and making your prep work twice as hard as it needs to be.

    I’m not here to sell you on some high-tech, bamboo-composite nonsense that’s going to crack the first time you chop an onion. My goal is to help you cut through the marketing fluff and find a piece of equipment that actually belongs in a working kitchen. I’m going to walk you through exactly what to look for in terms of wood species, thickness, and maintenance so you can invest in something that lasts a lifetime. We’re going to focus on durability and function, because your kitchen should work for you, not the other way around.

    Table of Contents

    The End Grain vs Edge Grain Debate

    The End Grain vs Edge Grain Debate.

    When you’re standing in the kitchenware aisle, you’ll see boards that look identical, but the way those wood fibers are oriented makes a massive difference in how they perform. I always tell my clients to look closely at the grain. With an edge grain board, the wood strips run parallel to the surface. They’re sturdy and usually a bit more affordable, but they tend to show knife marks more quickly. If you aren’t careful, those deep grooves can become a headache for hygiene and food safety because they trap moisture and food particles.

    Now, if you want to do things the professional way, you go with end grain. In an end grain setup, the wood fibers stand vertically, like a bundle of tiny straws. When your knife hits the surface, it slides between the fibers rather than slicing through them. This is the absolute best wood for chopping if you care about your cutlery, because it’s incredibly effective at preventing knife dulling. It’s a heavier, more expensive investment, but it heals itself as you work. If you’re looking for something that will actually last a lifetime, the end grain is worth every penny.

    Selecting the Best Wood for Chopping

    Selecting the Best Wood for Chopping.

    When you’re browsing the aisles, you’ll see a dozen different species of timber, but most of them are just marketing fluff. If you want the best wood for chopping, you need to look at density and grain structure. Maple is my old standby; it’s hard enough to handle heavy prep but forgiving enough to avoid preventing knife dulling prematurely. Walnut is a beautiful, darker alternative that offers a similar level of durability, though it tends to run a bit higher in price.

    I always tell my clients to steer clear of anything too soft, like pine, or anything overly exotic and oily that might leach flavors into your food. You want a tight grain pattern. This is vital for hygiene and food safety, as it prevents liquids from seeping deep into the fibers where bacteria can hide. Stick to closed-grain hardwoods that can handle a bit of seasoning and regular maintenance. If the wood feels lightweight or suspiciously cheap, leave it on the shelf. You’re looking for something with enough heft to stay put on your counter while you work.

    How to Actually Maintain Your Boards (And Not Ruin Them)

    • Stop using dishwashers; if you put a good wood board in a dishwasher, you’re basically asking it to crack and warp within a week. Hand wash with warm, soapy water and dry it immediately.
    • Get yourself a food-grade mineral oil or a beeswax conditioner. Once a month—or whenever the wood starts looking thirsty and dull—rub it in well to keep the moisture out and the wood from splitting.
    • Never, and I mean never, use your cutting board as a serving tray for acidic foods like lemons or vinegar. The acid can seep into the wood grain and strip away the oil you just worked so hard to apply.
    • If you see deep grooves or stains starting to form, don’t toss it. Grab some coarse sandpaper, sand it down smooth, and re-oil it. It’ll feel brand new and be ready for another decade of service.
    • Keep your boards upright when they dry. If you lean them flat against a wall or leave them lying flat on the counter, they can trap moisture underneath and start to warp or grow mold. Give them some airflow.

    My Rules for a Board That Actually Lasts

    Skip the cheap plastic or bamboo nonsense; if you want a board that won’t dull your knives or end up in a landfill by next year, invest in a solid piece of hardwood.

    Don’t get intimidated by the technical terms—just remember that end grain is the professional’s choice for longevity, while edge grain is perfectly fine if you’re on a tighter budget.

    A good board is only as good as your maintenance; keep it oiled and never, ever throw it in the dishwasher unless you want to ruin it permanently.

    The Real Cost of a Cheap Board

    “I’ve seen too many people blow their budget on fancy gadgets while they’re still hacking away at a thin, plastic slab that dulls their knives and wobbles on the counter. A serious kitchen starts with a heavy, reliable board—something that feels solid under your knife and actually stays in your kitchen for twenty years instead of twenty weeks.”

    Rosalind Hayter

    Making the Right Call

    Making the Right Call: Choosing cutting boards.

    At the end of the day, choosing a cutting board isn’t about finding the prettiest thing in a catalog; it’s about finding a tool that won’t fail you when you’re in the middle of a dinner rush. We’ve covered the heavy hitters: you need to decide if the durability of an end-grain board fits your lifestyle, or if a reliable edge-grain option is more practical for your space. Remember to prioritize hardwoods like maple or walnut over those cheap, soft woods that will scar and trap bacteria within weeks. If you invest in a solid, high-quality piece of wood, you aren’t just buying kitchenware—you are investing in the longevity of your knives and the safety of your food.

    My advice? Stop looking for the “perfect” gadget and start looking for the right foundation. A kitchen is only as functional as the tools you rely on every single day, and a good cutting board is the unsung hero of every meal you prep. Treat your board well—oil it regularly and keep it out of the dishwasher—and it will serve you for decades. Don’t let the trends dictate your setup. Build a kitchen that is steady, grounded, and built to last, one honest tool at a time. Now, go grab a bottle of food-grade mineral oil and get to work.

    Frequently Asked Questions

    How often do I actually need to oil these boards to keep them from cracking?

    Look, there’s no magic number, but if the wood looks dull or feels thirsty, it’s time. I usually check mine once a month, but if you’re a heavy cook using it daily, you might need to oil it every two weeks. A good rule of thumb? Drop a little water on the surface. If it soaks in immediately instead of beading up, grab your mineral oil. Don’t wait until you see a crack to start caring.

    Is it safe to use a wooden board for raw meat, or am I just inviting bacteria into my kitchen?

    Look, I get it. The idea of raw chicken juices soaking into a piece of wood sounds like a recipe for food poisoning. But here’s the reality: a well-maintained wood board is actually safer than those flimsy plastic ones. Wood has natural antimicrobial properties that pull bacteria deep into the fibers where they die off. Just don’t get lazy. Scrub it with hot, soapy water and never, ever throw it in the dishwasher.

    Can I put these in the dishwasher, or is that a one-way ticket to ruining them?

    If you put a real wood cutting board in the dishwasher, you’re essentially throwing money down the drain. The high heat and intense water pressure will warp the wood, crack the grain, and strip away every bit of moisture. It’s a one-way ticket to a ruined board. Treat it like a professional tool: hand wash with warm, soapy water, dry it immediately, and give it a little oil once in a while. That’s it.

  • Organizing Your Kitchen With Container Sets

    Organizing Your Kitchen With Container Sets

    I spent twenty years managing high-volume commercial kitchens, and if there is one thing I learned, it’s that most people are throwing money down the drain when they shop for a container set. I’ve seen countless “designer” collections arrive at my door, only to have the lids warp after the first trip through the dishwasher or the seals fail when things actually get heavy. You don’t need a rainbow of mismatched, flimsy plastic bins that clutter your cabinets and crack under pressure; you need tools that actually work for the long haul.

    I’m not here to sell you on some trendy, aesthetic lifestyle brand that looks good on a social media feed but fails in a real pantry. Instead, I’m going to give you the straight truth based on decades of professional kitchen experience and a lot of trial and error in my own home. I will help you identify the durable materials and functional designs that will survive your daily chaos, so you can stop replacing cheap junk and finally build a kitchen that serves you.

    Table of Contents

    Why Glass Food Storage Solutions Outlast Trendy Plastic

    Why Glass Food Storage Solutions Outlast Trendy Plastic

    I’ve spent two decades in commercial kitchens, and if there is one thing I’ve learned, it’s that plastic has a shelf life—and not a good one. You buy a cheap set of BPA-free plastic containers thinking you’re being smart, but six months later, they’re stained orange from your spaghetti sauce or warped from a trip through the dishwasher. They become a graveyard of cloudy, scratched-up junk that makes your cabinets look cluttered rather than organized.

    When you switch to glass food storage solutions, you aren’t just buying a vessel; you’re investing in a tool that won’t degrade. Glass doesn’t absorb odors, it doesn’t leach chemicals into your leftovers, and most importantly, it survives the heat of the oven or the rigors of the dishwasher without breaking a sweat. I always tell my clients to stop the cycle of constant replacement. If you opt for modular kitchenware sets made of tempered glass, you’re choosing pieces that will look exactly the same ten years from now as they do today. It’s about building a kitchen that works for you, not one that requires a constant trip to the big-box store.

    The Hidden Cost of Cheap Bpa Free Plastic Containers

    The Hidden Cost of Cheap Bpa Free Plastic Containers

    The truth is, those “BPA-free” labels are often used as a marketing shield to make you feel better about buying junk. I’ve seen it a thousand times in professional kitchens and in clients’ homes: you buy a massive, cheap set of BPA-free plastic containers, thinking you’ve made a smart, healthy choice. But six months later, the lids are warped, the seals are failing, and the plastic has become permanently stained by a single batch of tomato sauce. You aren’t just losing money; you’re creating a cycle of waste that clutters your cabinets with useless, scratched-up debris.

    When you opt for these low-grade sets, you’re also sacrificing your sanity during meal prep. Cheap plastic lacks the structural integrity needed for true space-saving kitchen storage. They don’t stack reliably, they bow under weight, and they rarely offer a truly airtight seal. Instead of investing once in high-quality gear, you find yourself constantly replacing mismatched lids and cracked bases. It’s a classic case of being penny-wise and pound-foolish. If you want a kitchen that actually functions, stop settling for disposables disguised as long-term solutions.

    My Non-Negotiables for Picking a Container Set That Actually Works

    • Prioritize nesting capability. If your containers don’t stack neatly inside one another when empty, you aren’t organizing your kitchen—you’re just managing a pile of clutter. I’ve seen too many cabinets wasted on sets that take up twice the space they should.
    • Match the lid to the container material. If you’re investing in glass, don’t pair it with a lid that’s going to warp the first time it hits the dishwasher. Look for high-quality silicone seals that actually create an airtight environment to keep your leftovers from drying out.
    • Size matters more than quantity. Most people buy a “mega set” with twenty tiny little pieces they’ll never use. I’d rather have five versatile, medium-sized containers that fit standard meal prep portions than a mountain of mismatched plastic scraps.
    • Check the seal for staining and odors. If you’re going to use plastic for anything other than dry goods, make sure it’s a high-grade material. There is nothing more frustrating than a container that smells like last week’s garlic pasta no matter how much you scrub it.
    • Stick to a uniform shape. Square or rectangular containers are far more efficient for shelf space than round ones. Round containers leave “dead air” in your pantry and fridge, which is exactly the kind of wasted space I spent twenty years trying to eliminate in commercial kitchens.

    The Bottom Line on Your Kitchen Storage

    Stop the cycle of constant replacement; investing in high-quality glass or heavy-duty containers saves you more money over time than buying cheap plastic every six months.

    Prioritize airtight seals and material durability to keep your food actually fresh, rather than just hiding it in a container that leaks or stains.

    Build a cohesive system of uniform shapes and sizes that fit your specific fridge and pantry layout, rather than collecting a mismatched graveyard of random lids.

    The Real Cost of a "Good Deal"

    “I’ve seen more kitchen cabinets filled with stained, warped, and lidless plastic junk than I care to count. You think you’re saving money by buying those cheap multipacks, but you’re actually just paying a tax on clutter and waste. Buy a set of glass or stainless steel once, and you’ll never have to shop for containers again.”

    Rosalind Hayter

    Making the Right Investment

    Making the Right Investment in glass containers.

    At the end of the day, choosing a container set isn’t about matching your backsplash or buying a dozen different shapes just because they look cute in a social media photo. It’s about recognizing that your kitchen tools are an investment in your daily efficiency and your health. We’ve talked about why cheap, flimsy plastic is a trap that leads to stained lids and wasted food, and why high-quality glass is the gold standard for anyone serious about organization. When you stop chasing the latest kitchen trend and start focusing on durability and utility, you save yourself money and a massive amount of frustration in the long run.

    My advice? Take a look in your cabinets right now. If you see a mountain of mismatched, warped plastic that makes you want to sigh every time you open the door, it’s time for a change. Don’t feel like you have to replace everything overnight, but start building a collection of pieces that you actually trust. A well-organized kitchen doesn’t need to be perfect, but it does need to be functional. Buy the good stuff once, use it every single day, and make your kitchen work for you instead of spending your life fighting with it.

    Frequently Asked Questions

    How do I know if a glass container is actually oven-safe or if it's going to shatter the moment it hits the heat?

    Look for the “oven-safe” stamp on the bottom of the dish—if it isn’t there, don’t risk it. More importantly, you need borosilicate glass, not standard soda-lime glass. Borosilicate handles thermal shock much better. Even then, follow my rule: never take a cold dish straight from the fridge and shove it into a preheated oven. Let it come to room temperature first. Gradual transitions prevent the stress that leads to shattering.

    Is it worth the extra money to buy sets with silicone seals, or is that just another unnecessary gadget?

    It’s not a gadget; it’s a necessity. If you’re looking to actually preserve food rather than just moving it from the fridge to the counter, those silicone seals are worth every extra cent. Without a proper airtight seal, your leftovers turn into science experiments within days. I’ve seen too many people buy “storage sets” that leak the moment they’re tilted. Buy the ones with the seals. It’s the difference between organization and just playing house.

    How can I organize a small pantry if I'm switching from mismatched plastic tubs to a uniform set of glass containers?

    First, clear everything out. You can’t organize a mess. Once the shelves are bare, group your new glass containers by category—grains, snacks, baking staples. Use the uniform shape to create “zones” on your shelves. Because glass is heavy and visible, stack the larger containers on the bottom and use the smaller ones for frequent-use items at eye level. It turns a chaotic pile of mismatched lids into a streamlined, visual inventory.

  • Comparing Silicone Baking Mats for Baking

    Comparing Silicone Baking Mats for Baking

    I’ve spent twenty years in commercial kitchens, and if there is one thing that drives me up the wall, it’s watching people throw money down the drain on “specialty” baking supplies that don’t actually work. I see it every time I walk into a kitchen supply aisle: rows of expensive, single-use parchment paper and flimsy, non-stick sprays that leave a chemical film on everything they touch. Honestly, if you’re still buying parchment every single week, you’re just paying a tax on your own inefficiency. You don’t need a pantry full of disposables; you need a few high-quality silicone baking mats that can actually stand up to the heat and the test of time.

    I’m not here to sell you on some flashy, high-tech gadget that promises to revolutionize your life. I’m here to tell you what actually works when the oven is hot and the cookies are sticking. In this guide, I’m going to cut through the marketing fluff and give you my straight-talk assessment of what to look for in a good mat, how to care for them so they don’t degrade, and why they are the only non-stick solution worth your counter space.

    Table of Contents

    The Superiority of Professional Pastry Equipment Over Paper

    In my years managing high-volume catering kitchens, I saw more money tossed into the trash can than I care to admit—mostly in the form of single-use parchment paper. It’s a convenience trap. You buy a roll, use three sheets, and suddenly you’re back at the store. When you switch to professional pastry equipment, you stop treating your baking like a disposable hobby and start treating it like a craft. A high-quality mat provides a consistent, level surface that paper simply can’t match, ensuring your cookies don’t warp or stick mid-bake.

    Beyond the immediate performance, this is about long-term efficiency. Moving toward eco-friendly baking supplies isn’t just a trend; it’s a smarter way to run a household. Instead of dealing with the frustration of torn, grease-soaked paper, you’re using a reliable, reusable parchment paper alternative that performs the same way every single time. It’s a one-time investment that pays for itself within a few months. If you want a kitchen that functions with precision rather than chaos, stop buying things meant to be thrown away.

    A Reliable Reusable Parchment Paper Alternative for Real Cooks

    A Reliable Reusable Parchment Paper Alternative for Real Cooks

    Look, I’ve spent enough time in commercial kitchens to know that “convenience” is often just a polite word for “wasteful.” Every time you tear off a sheet of parchment paper, you’re essentially throwing money into the trash. If you’re looking for a truly reusable parchment paper alternative, you need something that can handle the heat without curling up or tearing mid-bake. A high-quality silicone mat isn’t just a gadget; it’s a foundational piece of professional pastry equipment that simplifies your workflow. It stays flat, it stays put, and it does exactly what it’s supposed to do every single time.

    When you switch to these, you’ll notice the difference in how your dough releases. Instead of fighting with sticky bottoms, you’re working with one of the best nonstick baking surfaces available. I tell my clients that the real value isn’t just in the baking itself, but in the lack of cleanup. You don’t have to scrub a pan or hunt for a new roll of paper; you just rinse, dry, and you’re ready for the next batch. It’s about building a kitchen that relies on reliable tools rather than endless disposables.

    How to Actually Make Your Mats Work for You

    How to Actually Make Your Mats Work for You
    • Stop using them for everything; silicone is a dream for cookies and delicate pastries, but if you’re roasting heavy vegetables or high-fat meats, you’re better off sticking to a rimmed baking sheet to avoid a mess.
    • Don’t go cheap just because you saw a bargain at a big-box store; look for food-grade, platinum-cured silicone, otherwise, you’ll be dealing with a weird chemical smell every time the oven heats up.
    • Give them a proper scrub after every use—don’t just rinse them and call it a day—because if you let sugar or butter build up in the texture, your next batch of cookies will stick like glue.
    • Watch your oven temperature; most decent mats are rated up to 450°F, but if you’re a heavy-duty cook who likes to blast the heat, check the specs first so you don’t end up with a melted puddle on your rack.
    • Store them flat or rolled loosely; I’ve seen too many people fold them into tight creases, which eventually creates permanent ridges that mess up your dough’s contact with the surface.

    The Bottom Line on Silicone Mats

    The Bottom Line on Silicone Mats.

    Stop treating baking like a disposable hobby; investing in a high-quality silicone mat pays for itself in months by cutting down your constant parchment paper runs.

    Look for thickness and stability over fancy branding—a mat that’s too thin will warp in the oven, and a warped mat is just a piece of useless junk.

    Remember that a good tool is only as good as your maintenance, so keep them clean and store them flat to ensure they actually last you a decade instead of a season.

    Stop Buying Waste

    I’ve seen enough commercial kitchens go through mountains of single-use parchment to know it’s a fool’s errand; if you want a kitchen that actually functions, you stop throwing money in the trash every time you preheat the oven and you invest in a heavy-duty silicone mat that does the job once and stays doing it for years.

    Rosalind Hayter

    The Bottom Line on Silicone Mats

    Look, I’ve seen enough commercial kitchens to know that efficiency isn’t about having the flashiest gadgets; it’s about having tools that actually do their job without creating extra waste. We’ve covered why switching from single-use parchment to a high-quality silicone mat is a smarter move for your wallet and your pantry. By investing in a mat that provides consistent heat distribution and a reliable non-stick surface, you are effectively cutting out the middleman of endless grocery store runs for paper. It’s a simple, professional-grade upgrade that eliminates the frustration of sticking cookies to a tray or dealing with scorched edges. At the end of the day, it’s about minimizing the clutter and maximizing the results every time you preheat that oven.

    My advice is simple: stop chasing the latest kitchen trends and start building a foundation of quality. A good silicone mat isn’t a luxury; it’s a practical standard for anyone who wants a kitchen that works as hard as they do. When you stop buying disposable junk, you free up space—both in your cabinets and in your mind—to focus on what actually matters: the food. Cook with intention, use tools that stand the test of time, and remember that a well-ordered kitchen is the best place to start any good meal.

    Frequently Asked Questions

    How do I know if a mat is actually high-quality silicone or just cheap, toxic filler?

    Look, don’t just trust a shiny package. I always tell my clients to check the fine print for “100% food-grade silicone.” If it says “silicone blend” or doesn’t specify, walk away—that’s usually where the cheap, toxic fillers hide. A real test? The pinch test. Grab a corner and twist it. If the color turns white, it’s been padded with plastic fillers. High-quality silicone stays the same color no matter how much you stretch it.

    Can I use these mats in a convection oven, or will the air circulation mess with the heat?

    You can absolutely use them in a convection oven. In fact, I prefer it. Since those mats are thin and flat, they won’t block the airflow, which is exactly what you want for even heat distribution. Just keep an eye on your bake times; that circulating air can speed things up, so don’t get distracted by your notebook and let them overcook. They’re built to handle the heat, so let the fan do its job.

    Do I really need to scrub them, or can I just toss them in the dishwasher like everything else?

    Look, I get it. After a long day, the last thing you want to do is stand at the sink scrubbing. The short answer? Yes, you can toss them in the dishwasher. Most decent mats handle the heat just fine. However, if you’ve been baking something particularly sticky—like a heavy caramel or a thick glaze—I’d recommend a quick hand wash with warm, soapy water first. It prevents residue from baking onto the surface during the next cycle.

  • Selecting the Best Baking Sheets for Roasting and Baking

    Selecting the Best Baking Sheets for Roasting and Baking

    I’ve spent twenty years in commercial kitchens, and if there is one thing that makes my blood boil, it’s watching people pour money into those “non-stick” sets that start peeling and warping after three months of use. You see them in every big-box store—brightly colored, lightweight, and absolutely useless for actual cooking. Most people think they need a dozen specialized baking sheets for every conceivable task, but that’s just marketing fluff designed to clutter your cabinets. In my experience, a thin, flimsy pan isn’t a tool; it’s a disposable expense that will leave your cookies burnt on the bottom and raw in the middle.

    I’m not here to sell you on some fancy, gadget-heavy collection that promises the world but delivers nothing. My goal is to cut through the noise and show you exactly what to look for so you can buy once and buy right. I’m going to break down the heavy-duty materials that actually hold heat, the specific gauges you should demand, and why a simple, sturdy rim is often better than any high-tech coating. Let’s get your kitchen sorted with gear that actually works.

    Table of Contents

    Choose Commercial Grade Cookie Sheets for Longevity

    When I was managing catering lines for weddings, I saw a lot of home cooks make the same mistake: they buy whatever is on sale at the big-box stores. Those thin, lightweight pans are useless. They warp the second they hit a hot oven, and you’ll end up with unevenly cooked cookies or soggy roasted vegetables. If you want tools that actually work, you need to look toward commercial grade cookie sheets. I always tell my clients to look for something with heft. You want a pan that feels substantial in your hand, not something that bends under its own weight.

    The secret to a reliable kitchen is finding the best metal for even heat distribution. I personally swear by heavy-gauge aluminum. It’s what the pros use because it reacts quickly to temperature changes without creating hot spots that burn your food in one corner while leaving the other side raw. While some people swear by various non-stick bakeware options, I find that a high-quality, heavy-duty rimmed baking pan is much more versatile. You can use it for everything from sheet pan meal preparation to delicate pastries, and if you treat it right, it will outlive almost everything else in your pantry.

    The Best Metal for Even Heat Distribution

    The Best Metal for Even Heat Distribution

    When you’re looking for the best metal for even heat distribution, you need to look past the shiny finish and focus on density. In my years managing commercial kitchens, I learned that aluminum is the undisputed king for a reason. It conducts heat incredibly fast and spreads it across the surface of the pan almost instantly. This prevents those dreaded “hot spots” that leave you with one burnt edge and one undercooked center. If you want consistent results every time you pull something out of the oven, stick to heavy-gauge aluminum.

    I see people constantly reaching for those colorful non-stick bakeware options thinking they’re making life easier, but they often sacrifice heat control in the process. While they have their place for delicate tasks, they don’t distribute thermal energy nearly as well as a solid piece of metal. For serious sheet pan meal preparation, I always reach for heavy-duty rimmed baking pans made of thick aluminum. They hold their temperature steady even when you open the oven door, ensuring your roasted vegetables or proteins cook exactly as intended without the guesswork.

    Five Ways to Stop Wasting Money on Bad Bakeware

    • Skip the non-stick coatings. They look convenient at first, but once that chemical layer starts flaking off in your oven, the pan is trash. Stick to plain, high-quality aluminum that you can scrub without fear.
    • Check the rim height before you buy. If you’re making roasted vegetables or anything with a bit of sauce, a shallow sheet is going to end up making a mess of your oven floor. Get a rimmed baking sheet—it’s a non-negotiable for a functional kitchen.
    • Avoid the “set” trap. Retailers love to sell you a box of five matching pans for a cheap price, but they’re usually thin, flimsy, and prone to warping. I’d much rather see you buy two heavy-duty, professional-grade sheets than a dozen pieces of junk.
    • Size matters, but so does your oven. Before you fall in love with a massive commercial sheet, grab your notebook and actually measure your oven racks. There is nothing more frustrating than buying the “best” pan only to realize it won’t even slide into your kitchen.
    • Learn to clean with grit, not chemicals. If you get carbon buildup or burnt-on bits, don’t reach for a caustic spray. Use a little coarse salt or a specialized scouring pad. If you treat your metal right, it’ll be working for you twenty years from now.

    My Golden Rules for Buying Baking Sheets

    Stop buying the cheap, thin sets from big-box stores; look for heavy-gauge aluminum that won’t warp the first time you crank up the oven.

    Prioritize material over brand names—heavy-duty aluminum is the industry standard for a reason, as it distributes heat evenly without the hot spots that burn your cookies.

    Think about longevity, not convenience; invest in a few professional-grade sheets that can handle years of daily use rather than replacing flimsy plastic-coated pans every few months.

    I’ve seen enough flimsy, department-store pans warp into useless bowls after a single batch of cookies to know that if a baking sheet doesn’t have some serious weight to it, it isn’t worth the drawer space. Stop buying for the aesthetic and start buying for the heat.

    Rosalind Hayter

    Stop Buying, Start Investing

    Stop Buying, Start Investing in quality bakeware.

    At the end of the day, picking out the right baking sheets isn’t about finding the prettiest box on a store shelf; it’s about understanding the physics of your oven. Remember, you want heavy-gauge metal that won’t warp the moment things get hot, and you want that commercial-grade durability that can handle a daily workload without buckling. Skip the lightweight, flimsy sets that come in those colorful, trendy packages. If you focus on material thickness and heat distribution rather than brand names or aesthetics, you’ll save yourself a massive headache—and a lot of wasted money—in the long run.

    My goal is to see you walk into your kitchen feeling confident, not frustrated by equipment that fails you mid-recipe. A well-equipped kitchen isn’t built on a mountain of gadgets; it’s built on a foundation of reliable, hardworking tools that do exactly what they are supposed to do. Once you have the right sheets, the rest is just practice and patience. So, take a look in your pantry, toss out the junk that’s seen better days, and invest in pieces that will actually be there for you ten years from now. Happy baking.

    Frequently Asked Questions

    Should I bother with non-stick coatings, or is it better to stick with plain aluminum?

    Skip the non-stick. I’ve seen too many people treat those coated pans like they’re indestructible, but once that surface scratches or peels, the whole sheet is garbage. You can’t scrub them, and you certainly can’t use them for high-heat roasting. Stick with plain, heavy-duty aluminum. It’s easier to clean, handles the heat without breaking down, and—most importantly—it won’t end up in a landfill in two years.

    How do I tell if a baking sheet is actually heavy-duty or just thin metal disguised as professional grade?

    Here’s the trick: don’t just look at the label; feel the weight. If you pick up a pan and it feels like a piece of folded cardboard, put it back. A real heavy-duty sheet should have some heft to it. Also, look at the edges. If they’re thin or flimsy, they’ll warp the second they hit a hot oven. I always check the rim—if it feels solid and doesn’t flex when I press it, it’s a keeper.

    Is it worth getting different sizes for different tasks, or should I just stick to one standard size?

    Look, I know the temptation to buy one “do-it-all” size to save drawer space, but please don’t do that. In a professional kitchen, versatility comes from having the right tool for the job. You’ll want a standard half-sheet for your heavy roasting and cookies, but a smaller sheet is a lifesaver for quick breakfasts or single portions. One size rarely fits every meal, and trying to force it just leads to uneven cooking.

  • Why Silicone Spatulas Are Essential for Baking

    Why Silicone Spatulas Are Essential for Baking

    I’ve spent two decades in commercial kitchens, and if there is one thing that drives me up the wall, it’s watching people throw money away on those cheap, multi-colored sets of kitchen gadgets that look cute in a social media ad but fall apart after three washes. You don’t need a drawer full of flimsy, mismatched tools; you need one high-quality silicone spatula that can actually handle the heat of a real kitchen without melting or shedding bits of plastic into your sauce. I’ve seen too many “trendy” kitchen trends leave people with nothing but a cluttered drawer and a broken tool when they actually need to get down to business.

    I’m not here to sell you on some overpriced, designer brand that promises the moon. Instead, I’m going to tell you exactly what to look for so you can buy it once and buy it right. I’ll break down the difference between professional-grade heat resistance and the junk you find at big-box retailers, ensuring you invest in gear that becomes a permanent fixture in your kitchen. Let’s cut through the marketing fluff and get your kitchen working for you.

    Table of Contents

    Why Food Grade Silicone Properties Outlast Cheap Rubber Alternatives

    Why Food Grade Silicone Properties Outlast Cheap Rubber Alternatives

    I’ve seen enough commercial kitchens to know that cheap rubber is a recipe for frustration. When you’re working with high heat, rubber tools tend to warp, lose their shape, or worse, start to degrade and leave a weird smell in your food. This is where the food grade silicone properties really make the difference. Unlike rubber, silicone is chemically stable; it doesn’t leach anything into your batter and it holds its structural integrity even when things get hot.

    When comparing silicone vs rubber spatulas, it really comes down to durability and hygiene. Rubber is porous, meaning it picks up oils and scents that are nearly impossible to scrub out. Silicone, on the other hand, is non-porous and incredibly resilient. If you want the best spatula for scraping bowls clean without worrying about microscopic residue, you need a material that can handle being tossed in the dishwasher without becoming brittle. Investing in high-quality silicone isn’t just about the immediate performance; it’s about buying a tool that won’t end up in a landfill after six months of heavy use.

    Investing in High Temperature Kitchen Tools That Wont Melt Away

    Investing in High Temperature Kitchen Tools That Wont Melt Away

    I’ve seen it a thousand times in commercial kitchens: a cook gets a little too ambitious with a hot pan, and suddenly their cheap tool is a melted, gooey mess stuck to the side of the skillet. When you’re working with high heat, there is no room for compromise. Most budget options use low-grade materials that warp or even leach chemicals when they hit a certain temperature. If you want high temperature kitchen tools that actually hold their shape, you have to look for tools rated for heat resistance well above 450°F.

    When I’m choosing gear, I look for seamless construction. You don’t want a tool where the head is glued to the handle; that’s just a breeding ground for bacteria. A quality tool should be a single, solid piece. This makes them the absolute best spatula for scraping bowls and pans without worrying about the head snapping off mid-stir. Plus, if you’re like me and value efficiency, you want something that doubles as reliable, dishwasher safe baking utensils. If it can’t survive a heavy-duty cycle and a hot burner, it doesn’t belong in my kitchen.

    How to Pick a Spatula That Actually Earns Its Place in Your Drawer

    • Check for a solid core. I’ve seen too many people buy spatulas that are just a thin layer of silicone over a flimsy wire; they bend the second you try to scrape a heavy sauce, and that’s how you end up frustrated and throwing them in the bin.
    • Look for seamless construction. If there’s a visible seam where the silicone meets the handle, food particles are going to get trapped in there, and no amount of scrubbing will get them out—get a single-piece design to keep things hygienic.
    • Test the “flex factor.” A good spatula needs enough give to scrape every last drop out of a bowl, but enough backbone to fold a heavy batter without collapsing like a wet noodle.
    • Avoid the “gadget” trap of extra colors and patterns. Stick to neutral, high-quality colors that don’t stain easily, because once that cheap silicone picks up the pigment from a turmeric sauce, it’s essentially ruined.
    • Prioritize heat resistance over everything else. Before you buy, check the temperature rating on the packaging; if it isn’t rated for at least 450°F, don’t bother bringing it into a professional-grade kitchen.

    The Bottom Line on Choosing Your Spatula

    Stop buying the cheap, flimsy rubber versions that warp the first time they hit a hot pan; look for high-heat food-grade silicone that actually holds its shape.

    Don’t get distracted by fancy sets with twenty different colors; you only need one or two solid, heavy-duty spatulas that can handle everything from folding batter to scraping a pan clean.

    View your tools as a long-term investment rather than a disposable expense—a quality silicone spatula should be the last one you ever have to buy.

    The Cost of Cutting Corners

    I’ve seen enough melted plastic ruins in professional kitchens to know that a cheap spatula isn’t a way to save money—it’s just a way to guarantee you’ll be buying another one in three months. If it can’t handle the heat of a real pan, it doesn’t belong in your drawer.

    Rosalind Hayter

    The Bottom Line on Your Spatula

    The Bottom Line on Your Spatula.

    At the end of the day, choosing a silicone spatula isn’t about following a kitchen trend; it’s about recognizing the difference between a disposable tool and a reliable workhorse. We’ve covered why food-grade silicone is the only way to go if you want something that won’t leach chemicals or degrade under heat, and why investing in high-temperature resistance saves you from the frustration of a melted mess in your favorite pan. When you stop buying those flimsy, cheap rubber alternatives that end up in the landfill every six months, you aren’t just cleaning out your junk drawer—you are building a professional-grade foundation for your home cooking.

    I’ve spent enough years in commercial kitchens to know that the best cooks aren’t the ones with the most expensive gadgets, but the ones who respect their tools. A good spatula might seem like a small thing, but it’s the bridge between your ingredients and your finished meal. Don’t let a mediocre tool get in the way of a great recipe. Buy the quality version once, treat it with respect, and let it serve you for years to come. Your kitchen should be a place of efficiency and joy, not a graveyard for broken plastic.

    Frequently Asked Questions

    How can I tell if a spatula is actually food-grade silicone or just cheap, dyed plastic?

    Don’t be fooled by a bright color; that’s usually just cheap dye masking low-grade plastic. First, check the weight. Real silicone has a substantial, dense feel, whereas cheap imitations feel hollow or flimsy. Next, give it a “pinch test.” High-quality silicone is flexible but snaps back to its original shape instantly. If it feels greasy, smells like chemicals, or leaves a weird residue on your hands, put it back on the shelf.

    Are these silicone tools safe to throw in the dishwasher, or will they eventually warp and degrade?

    You can toss them in the dishwasher, but don’t just throw them in haphazardly. High-quality, food-grade silicone is heat-resistant and won’t melt or warp like those cheap rubber alternatives I’m always seeing. However, the real danger isn’t the silicone itself—it’s the cheap plastic handles or internal cores. If you’ve invested in a solid, one-piece tool, the dishwasher is fine. If it’s a cheap hybrid, the heat will eventually ruin the connection.

    Do I really need a solid silicone spatula, or is a one-piece design better than one with a wooden handle?

    Look, if you want a tool that actually lasts, go with the one-piece design. I’ve seen too many wooden-handled spatulas where the head eventually wiggles loose or, worse, food particles get trapped in the seam where the wood meets the silicone. That’s a breeding ground for bacteria you don’t want in your kitchen. A solid, seamless silicone spatula is easier to clean, more hygienic, and won’t fall apart on you in six months.

  • How to Use a Waffle Iron Correctly

    How to Use a Waffle Iron Correctly

    I’ve spent twenty years in commercial kitchens, and if there is one thing that drives me up the wall, it’s seeing people spend eighty dollars on a “smart” waffle iron that’s essentially just a glorified piece of plastic with a digital screen. You don’t need Bluetooth connectivity to make breakfast; you need even heat distribution and a surface that won’t flake off into your batter after three uses. Most of these trendy gadgets are designed to end up in a landfill by next Christmas, and frankly, it’s a waste of your hard-earned money.

    I’m not here to sell you on the latest kitchen gimmick or tell you that you need a specialized machine for every single type of batter. Instead, I’m going to show you how to identify a properly built waffle iron—the kind with heavy-duty plates and simple, reliable mechanics that actually hold their temperature. I’ll share what I look for when I’m sketching out a functional kitchen layout, focusing on tools that are built to last a lifetime. Let’s cut through the marketing fluff and find you something that actually works.

    Table of Contents

    Belgian Waffle Maker vs Classic Choosing Your Lifelong Companion

    Belgian Waffle Maker vs Classic Choosing Your Lifelong Companion

    When you’re staring at a wall of appliances, the choice between a belgian waffle maker vs classic style usually comes down to how much surface area you actually need. A classic iron produces those thinner, crispier waffles that are perfect for stacking high during a weekend brunch. If you like a lighter texture that soaks up syrup without getting soggy, go classic. However, if you want those deep, airy pockets that hold a mountain of fruit or whipped cream, the Belgian style is your winner. Just remember: the deeper the pocket, the more batter you’ll go through.

    I always tell my clients to look past the fancy lights and focus on the build quality. You don’t need a dozen electric waffle iron features like timers or automated shut-offs; you need plates that won’t flake after six months. I prefer heavy-duty models with high-quality non-stick waffle plates that can handle a decent amount of heat. If the coating feels thin or flimsy, walk away. You want a tool that stays in your cupboard for twenty years, not something you’ll be tossing in the bin by next summer.

    Electric Waffle Iron Features That Actually Matter

    Electric Waffle Iron Features That Actually Matter

    When you’re browsing the aisles or scrolling through endless online listings, it’s easy to get distracted by flashing LED lights or digital timers that promise “perfect” results. Honestly? Most of that is just noise. I’ve seen enough commercial equipment to know that the real heavy lifting happens in the heating element and the weight of the unit. You want something with enough heft to sit steady on your counter and heat distribution that doesn’t leave you with one side burnt and the other doughy. If the temperature isn’t consistent, even the best waffle batter recipes won’t save your breakfast.

    Another thing most people overlook until they’re standing over a sink full of scrubbing is the quality of the plates. I always tell my clients: don’t get seduced by thin, flimsy coatings. You want high-quality non-stick waffle plates that feel substantial. If the coating is cheap, it’ll start peeling within six months, and then you’re stuck with a piece of junk that’s impossible to use. Look for plates that are easy to wipe down; effective cleaning should take seconds, not a dedicated afternoon of scouring.

    My Rules for Avoiding the Gadget Graveyard

    • Prioritize weight over bells and whistles; a heavy, solid-plate iron distributes heat much more evenly than those lightweight, hollow plastic models that leave you with burnt edges and raw centers.
    • Look for removable plates if you can find them, because let’s be honest, cleaning thick batter out of deep crevices is a nightmare, and being able to soak the plates makes the whole process much more manageable.
    • Don’t get seduced by “smart” features or digital timers that promise perfection; a simple, reliable analog dial is usually more durable and tells you exactly what you need to know without the extra electronic headache.
    • Check the cord length before you buy; there is nothing more frustrating than setting up a beautiful breakfast station only to realize your outlet is three feet too far away, forcing you to use a dangerous, messy extension cord.
    • Invest in a high-quality silicone brush or a dedicated spreader rather than trying to use a fork; you want to coat those grids evenly without scratching the non-stick surface or denting the plates.

    The Bottom Line on Waffle Irons

    Stop chasing the latest “smart” features; you only need consistent heat and a heavy-duty non-stick surface that won’t flake off into your breakfast.

    Decide on your waffle style before you spend a dime, because a Belgian maker is a specialized tool that won’t serve you well if you just want a thin, crispy breakfast waffle.

    Invest in weight and build quality—if the appliance feels flimsy in your hands, it’s going to be a headache in your kitchen within six months.

    The Real Cost of a Cheap Waffle Maker

    “Most people think they’re saving money by picking up a twenty-dollar plastic waffle maker at a big-box store, but you aren’t saving anything when you’re throwing it in the landfill every eighteen months. Invest in a heavy-duty iron with consistent heat distribution; it’s better to own one reliable machine that works every single morning than a drawer full of broken gadgets that never quite crisp the edges.”

    Rosalind Hayter

    Making the Right Call

    Making the Right Call: Durable waffle irons.

    At the end of the day, picking a waffle iron shouldn’t feel like a chore, but it does require some discipline. Stop looking at the flashy countdown timers or the models that come with a dozen flimsy plastic accessories you’ll lose by next Tuesday. Focus on the fundamentals: a heavy-duty heating element, a non-stick surface that isn’t going to peel in six months, and a build quality that feels substantial in your hands. Whether you decide on a deep-pocketed Belgian maker for those slow Sunday mornings or a classic iron for a quick weekday bite, just make sure you are investing in durability over gimmicks. If you buy a piece of equipment that is built to last, you won’t find yourself back in the kitchen appliance aisle three years from now.

    I’ve spent enough time in commercial kitchens to know that the best tools are the ones that become an extension of your own hands. A good waffle iron isn’t just another gadget cluttering up your counter; it is an invitation to slow down and enjoy the process of making something from scratch. Don’t let the pursuit of the “perfect” machine stop you from actually getting into the kitchen and mastering your craft. Buy the heavy-duty iron, keep your counters clear, and focus on the food. The rest will take care of itself.

    Frequently Asked Questions

    Is it worth spending the extra money on a professional-grade model, or will a standard countertop version do the job?

    Look, if you’re making waffles once a month for a special brunch, a reliable countertop model is plenty. Don’t let a salesperson talk you into a commercial beast you don’t need. But, if you’re running a busy household or you truly love the craft, go professional. Those heavy-duty plates hold heat much more consistently, which means better texture and much longer life. Buy for your actual lifestyle, not your aspirations.

    How do I know if the non-stick coating is actually durable or just going to flake off into my breakfast in six months?

    Look, I’ve seen enough cheap, flaking pans in commercial kitchens to know a bad coating when I see one. If you’re looking at a non-stick iron, skip the ones that feel feather-light; weight usually indicates a better base. Check the specs for ceramic or high-grade PTFE, but honestly? The real test is the finish. It should feel smooth and substantial, not thin and scratchy. If the manufacturer won’t tell you exactly what the coating is made of, walk away.

    Should I be looking for something with adjustable temperature controls, or is that just another unnecessary feature?

    Look, I’ll be blunt: if you can afford the extra bit of money upfront, get the adjustable temperature controls. It’s not just a fancy gimmick. In a commercial kitchen, we never relied on a single “on” setting because heat behaves differently depending on the batter and the iron’s temperature. Having that control means you can prevent a burnt exterior with a raw middle. It’s the difference between a frustrating breakfast and a perfect one.

  • Why You Need a Digital Food Thermometer

    Why You Need a Digital Food Thermometer

    I remember standing in the middle of a chaotic commercial kitchen during a wedding reception, sweat stinging my eyes, watching a junior chef try to “feel” if a roast was ready by poking it with his finger. It was a recipe for disaster, and honestly, it’s a habit I see too often in home kitchens today. People treat cooking like a guessing game, but when you’re investing time and money into a good piece of protein, you shouldn’t be playing roulette with food safety. You don’t need a kitchen full of expensive, flashing gadgets, but you do need a reliable digital food thermometer to take the guesswork out of the equation once and for all.

    I’m not here to sell you on some high-tech, Bluetooth-enabled nonsense that requires a smartphone app just to tell you your chicken is cooked. My goal is to help you find a tool that is built to last and actually delivers an accurate reading every single time. I’m going to cut through the marketing fluff and show you exactly what to look for so you can stop worrying about undercooked meat and start cooking with total confidence.

    Table of Contents

    Mastering Accurate Cooking Temperatures for Life

    Mastering Accurate Cooking Temperatures for Life guide.

    After twenty years in commercial kitchens, I’ve learned that confidence doesn’t come from intuition; it comes from data. You can spend hours prepping a perfect brisket, but if you’re relying on the “touch test” or just hoping for the best, you’re gambling with your dinner. To stop the guesswork, you need to treat your kitchen like a workspace. Using a reliable tool to hit accurate cooking temperatures is the difference between a meal that’s dry and tasteless and one that’s actually worth the effort you put in.

    When you’re looking to upgrade your setup, don’t get bogged down in the technical jargon, but do understand the basics. For instance, knowing the difference between a thermocouple vs thermistor can help you decide how fast you need those readings. If you’re serious about consistency, invest in some high-quality culinary precision tools that won’t fail you when the heat is on. Once you have a solid device, keep a basic food safety temperature chart nearby. It takes the mental load off your plate so you can focus on the flavor, not the fear of undercooking.

    Choosing the Best Instant Read Thermometers That Last

    Choosing the Best Instant Read Thermometers That Last

    When you’re shopping for the best instant read thermometers, ignore the flashy screens and the “smart” features that require a Bluetooth connection. I’ve seen too many people waste money on gadgets that feel like toys and break within six months. Instead, look for build quality. You want something with a sturdy probe and a housing that can handle being bumped against a heavy cast iron skillet or dropped on a granite countertop.

    If you really want to understand the tech, you’ll eventually run into the debate of thermocouple vs thermistor. A thermocouple is the gold standard for speed and accuracy—it reacts almost instantly to temperature changes—while a thermistor is more budget-friendly but a bit slower. For my professional standards, I always lean toward a high-quality thermocouple. It’s one of those culinary precision tools that pays for itself the first time you pull a perfect, juicy roast out of the oven instead of a dry, overcooked mess. Don’t settle for “close enough” when it comes to your gear; buy the tool that does the job right every single time.

    Five Rules for Using Your Thermometer Like a Pro

    • Stop poking the bone. When you’re checking a roast or a thick piece of meat, aim for the thickest part of the muscle, but make sure the probe isn’t touching fat or bone, or you’ll get a reading that lies to you.
    • Give it a second to breathe. I see people pull the probe out the second they see a number, but most digital reads need a couple of seconds to stabilize. Wait for that final, steady digit before you decide the meat is done.
    • Clean it immediately after every single use. A tiny bit of dried protein or grease on that probe will ruin your accuracy and turn your kitchen into a breeding ground for bacteria. Wipe it down with a damp cloth or a bit of sanitizer right away.
    • Learn your carryover cooking. Remember, the temperature doesn’t stop rising the moment you take the pan off the heat. Pull your meat a few degrees early so it hits the perfect mark while it rests on the cutting board.
    • Treat it like a precision tool, not a kitchen knife. Don’t toss your thermometer into a crowded drawer full of heavy metal utensils. If you bend or crack that delicate probe, you’re back to guessing, and we don’t do that in my kitchen.

    The Bottom Line on Buying Better

    Stop wasting money on cheap, plastic gadgets that lose accuracy after a month; invest in a high-quality, metal-bodied thermometer that’s built to survive your kitchen.

    Accuracy is non-negotiable—a fast, reliable digital read is the only way to stop guessing and start cooking with the confidence of a pro.

    Remember that a thermometer is just a tool, not a magic wand; use it to build better habits so you never serve an undercooked roast or a dried-out chicken breast again.

    ## The Cost of Guesswork

    “I’ve seen too many people ruin an expensive cut of meat because they relied on ‘feel’ or a timer instead of a real reading. A good digital thermometer isn’t a luxury gadget; it’s the difference between a meal that’s a triumph and one that ends up in the trash.”

    Rosalind Hayter

    Stop Guessing and Start Cooking

    Stop Guessing and Start Cooking with thermometers.

    At the end of the day, a digital thermometer isn’t just another gadget to clutter your drawer; it is the most important tool for moving from guesswork to true culinary confidence. We’ve covered why you need speed, why accuracy is non-negotiable, and why you should invest in a sturdy, high-quality model rather than a cheap plastic version that will break after three uses. By prioritizing a reliable instant-read thermometer, you are protecting your food, your budget, and most importantly, your time. Don’t let a dry roast or an undercooked chicken breast ruin a meal you worked hard to prepare. Buy it once, buy it right, and let it do its job.

    I’ve spent decades in professional kitchens where precision was the difference between a satisfied guest and a wasted plate. I want that same standard for your home. Cooking should be a source of joy and connection, not a stressful game of “is this done yet?” Once you master the habit of checking your temperatures, you’ll realize that great cooking is actually quite simple when you have the right data in hand. Put down the timer, grab your thermometer, and start trusting your instincts backed by facts. Your kitchen—and your dinner guests—will thank you.

    Frequently Asked Questions

    How often should I actually be calibrating my thermometer to make sure it's still giving me honest readings?

    Look, I don’t expect you to pull out your ice bath every single Tuesday, but you can’t just set it and forget it. If you’re using your thermometer daily, check it once a month. If you only pull it out for holiday roasts, check it before the big event. If a reading feels “off”—like your chicken is suddenly gray but the probe says it’s done—stop immediately and calibrate it. Don’t trust a lying tool.

    Is it worth spending the extra money on a probe thermometer that stays in the oven, or should I stick to a quick instant-read?

    Look, if you’re roasting a small chicken, an instant-read is plenty. But if you’re serious about low-and-slow brisket or a large turkey, get the probe. It’s worth the extra investment because it monitors the temperature while you’re busy doing other things, preventing that panicked “is it done yet?” hovering. An instant-read is for precision in the moment; a probe is for peace of mind during a long cook. Get both if you can.

    What are the tell-tale signs that my current thermometer is failing and it's time to toss it for a real one?

    If you’re finding yourself staring at the screen, waiting more than five seconds for a reading, or if the numbers seem to jump around wildly every time you probe a piece of meat, it’s dead. Also, watch out for loose connections or a probe that feels wobbly. If it’s inconsistent, it’s dangerous. Don’t waste time trying to “calibrate” a piece of cheap plastic junk; just toss it and invest in a professional-grade tool.

  • Choosing Between Wooden and Plastic Cutting Boards

    Choosing Between Wooden and Plastic Cutting Boards

    I spent twenty years in commercial kitchens, and if there is one thing that drives me absolutely up the wall, it’s watching people pour money into those flimsy, neon-colored plastic cutting boards you see in every big-box store. They look clean for about five minutes, but then they get these deep, nasty grooves that trap bacteria and—even worse—they turn your expensive chef’s knife into a dull, useless piece of metal in no time. You don’t need a gadget that promises “advanced ergonomic grip” or some other marketing nonsense; you just need tools that actually work and won’t end up in a landfill by next Christmas.

    I’m not here to sell you on some overpriced, trendy lifestyle brand that looks good on a Pinterest board but fails the moment you try to dice an onion. My goal is to strip away the hype and give you the straight truth about what makes for real, professional-grade cutting boards that can handle a lifetime of heavy use. I’ll show you which woods are worth the investment, which ones are a total waste of counter space, and how to maintain them so they stay as reliable as the day you bought them.

    Table of Contents

    End Grain vs Edge Grain Boards a Lifetime Investment

    End Grain vs Edge Grain Boards a Lifetime Investment

    When you’re looking at the price tag on a high-end butcher block, you’re really deciding between two different philosophies of tool maintenance. Most people settle for edge grain because it’s cheaper and easier to find. In an edge grain setup, the wood fibers run parallel to the surface, which is fine for light tasks, but it eventually develops deep grooves that are a nightmare for preventing cross contamination in food prep. Once those cracks get deep, you’re just inviting bacteria to hide where your sponge can’t reach.

    If you want to do this right the first time, go with end grain. In an end grain board, the wood fibers stand vertically, like a bundle of straws. When your knife hits the surface, it slides between the fibers rather than slicing through them. This is the gold standard for knife edge protection tips because it prevents your blades from dulling prematurely. It’s a bit more of an investment upfront, but an end grain board will stay flat and resilient for decades, whereas edge grain boards tend to warp or scar much faster.

    Knife Edge Protection Tips for Your Finest Steel

    Knife Edge Protection Tips for Your Finest Steel

    Look, I’ve seen too many people drop a decent hundred dollars on a high-carbon steel chef’s knife only to ruin the edge within a month because they were hacking away at a glass or marble surface. If you want to keep your blades sharp, you have to respect the surface they land on. This is why choosing the best material for kitchen cutting boards isn’t just about aesthetics; it’s about preserving your investment. A soft, resilient wood surface—whether it’s an end grain or edge grain setup—gives way to the blade just enough to prevent the steel from rolling or chipping.

    Beyond just the material, you need to be mindful of your technique. Stop using a “sawing” motion with heavy pressure; let the weight of the knife do the work. I also recommend keeping a dedicated board for your proteins to ensure you’re preventing cross contamination in food prep. If you’re using a heavy wood board, remember that the way you maintain it matters just as much as the wood itself. A dry, well-oiled surface stays smooth, whereas a neglected, cracked board will chew up your knife edge faster than you can say “dull.”

    Five Rules for Keeping Your Boards in Working Order

    • Stop using your good wood boards for heavy-duty tasks like hacking through frozen meat or bones; save the heavy lifting for a dedicated plastic or composite board so you don’t ruin your investment.
    • Never, and I mean never, toss your wooden boards into the dishwasher; the heat and water will warp the wood and crack it faster than you can say “ruined,” so stick to hand-washing with mild soap.
    • Treat your boards like your skin—keep them hydrated with food-grade mineral oil once a month to prevent drying and splitting.
    • If you see deep grooves or dark stains starting to settle in, it’s time to grab some coarse salt and half a lemon to scrub them back to life.
    • Always use a stable surface; if your board is sliding around while you’re chopping, tuck a damp paper towel underneath it to lock it in place and keep your fingers safe.

    The Bottom Line on Your Cutting Surface

    Stop buying cheap plastic boards; invest in a high-quality wood board that protects your knives and lasts for decades.

    Choose your grain wisely—go for end grain if you want the ultimate professional surface, or edge grain for a reliable, budget-friendly workhorse.

    Treat your board like the tool it is by oiling it regularly and never, ever throwing it in the dishwasher.

    The Truth About Your Prep Surface

    Stop looking for the cheapest slab of wood or, heaven forbid, a plastic sheet that’ll end up in a landfill by next year. A real cutting board isn’t just a surface; it’s the foundation of your kitchen, and if you buy it right once, you’ll never have to shop for one again.

    Rosalind Hayter

    Making the Right Choice

    Making the Right Choice for cutting boards.

    At the end of the day, choosing a cutting board isn’t about finding the prettiest thing on a social media feed; it’s about deciding how much you value your tools and your time. We’ve covered why you should invest in the structural integrity of an end grain board to save your knives, and why you need to steer clear of those cheap, thin plastic slabs that end up in a landfill every six months. Whether you go with a sturdy edge grain for daily prep or a heavy-duty end grain for serious work, the goal is the same: buy it once, buy it right. Stop the cycle of constant replacements and start building a workspace that actually supports your cooking rather than fighting against it.

    I know it can feel overwhelming when you walk into a kitchen supply store and see a hundred different options, but remember that simplicity is your best friend. You don’t need a gadget for every task; you just need a reliable surface and a sharp knife. Once you have the right foundation, the rest of your kitchen habits will follow suit. Treat your gear with respect—oil your wood, clean it properly, and use it often—and it will serve you for decades. A well-maintained kitchen isn’t built on trends; it’s built on tools that stand the test of time.

    Frequently Asked Questions

    How often do I actually need to oil my board to keep it from cracking?

    If you’re asking this, you probably already know that a dry board is a dying board. I don’t have a set calendar for it, but I check mine once a week. If the wood looks dull or feels thirsty when you run your hand over it, grab the mineral oil. If you’re heavy on the prep work every day, you might need to oil it more often. Better to over-oil slightly than to let it crack.

    Is it safe to put a wooden board in the dishwasher, or am I just asking for trouble?

    Don’t even think about it. Putting a wooden board in the dishwasher is the fastest way to turn a beautiful investment into a warped, cracked mess. The intense heat and the soaking cycle will strip the natural oils right out of the wood, leaving it brittle and prone to splitting. If you want that board to last a lifetime, hand wash it with warm soapy water and dry it immediately. Keep it simple.

    How can I tell if my current board is too worn down to use safely?

    Run your hand across the surface. If it feels deeply grooved or pitted, those aren’t just “character marks”—they’re breeding grounds for bacteria. If you see dark staining that won’t scrub out, or if your knife feels like it’s catching in deep canyons every time you slice, it’s time to retire it. A board shouldn’t be a hazard. If it’s warping or splitting, toss it. Don’t risk your food safety for a piece of scrap wood.