Blog

  • Immersion Blenders for Soups and Sauces

    Immersion Blenders for Soups and Sauces

    I spent twenty years in commercial kitchens where every second and every cent mattered, and if there is one thing that drives me up the wall, it’s seeing people clutter their drawers with “multi-functional” plastic junk. I’ve seen enough $200 countertop blenders gather dust because they’re too heavy to clean and too finicky to use for a simple batch of soup. You don’t need a computerized, smart-tech monstrosity to get the job done; you just need a heavy-duty stick blender that actually has enough torque to handle a thick stew without smelling like burnt plastic halfway through.

    I’m not here to sell you on the latest shiny gadget or some overpriced brand name that relies on fancy marketing. My goal is to help you find a tool that actually earns its place on your counter by being durable, easy to clean, and powerful enough to last a decade. I’ll be sharing exactly what to look for in terms of motor strength and build quality so you can stop wasting money on disposable kitchen clutter and start investing in gear that works as hard as you do.

    Immersion Blender vs Food Processor Choosing Real Utility
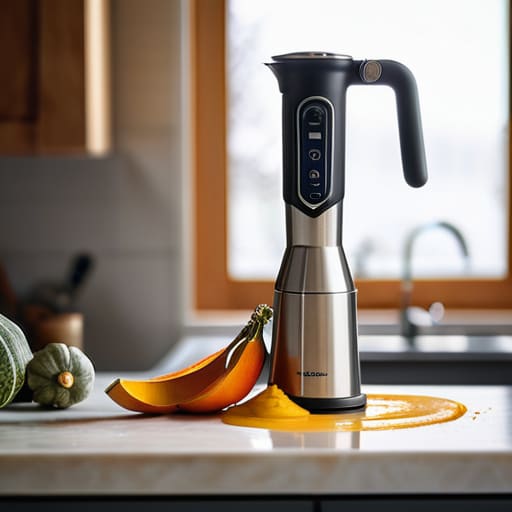
    Immersion Blender vs Food Processor Choosing Real Utility

    I see this mistake constantly when I’m helping clients audit their cabinets: they buy a massive, heavy food processor for tasks that a simple handheld tool could handle in half the time. When you’re weighing an immersion blender vs food processor, you have to look at your actual habits, not the “what if” scenarios. A food processor is a beast for chopping large quantities of vegetables or making dough, but it’s a nightmare to pull out, assemble, and scrub for a single batch of soup. If you aren’t prepping for a crowd every single night, that bulky machine is just taking up prime real estate.

    For most daily needs, a high-quality handheld unit is the superior workhorse. It excels at tasks where a food processor fails—specifically, blending hot liquids safely right in the pot. You don’t have to worry about transferring steaming liquid into a plastic bowl and risking a spill. If you’re looking for something to whip up a quick morning drink, the best stick blender for smoothies is one that offers enough power to crush ice without stalling. Just make sure you check the motor specs; you want something with enough muscle to last, not a toy that smells like burning plastic after two minutes.

    Why Handheld Blender Motor Wattage Actually Matters

    When you’re browsing the aisles, it is incredibly easy to get distracted by sleek designs or a pretty color, but I need you to look at the specs. Specifically, pay attention to the handheld blender motor wattage. In my years managing commercial kitchens, I learned that power isn’t just about speed; it’s about torque and endurance. A low-wattage motor might handle a light soup, but the moment you try to crush frozen fruit for a morning smoothie, it’ll struggle, overheat, and likely die within a year.

    If you are looking for the best stick blender for smoothies, you want something with enough muscle to pulverize ice and fibrous greens without stalling. A higher wattage ensures the blades maintain a consistent RPM, which prevents that dreaded uneven texture where you get chunks of ice mixed with liquid. Don’t settle for a motor that sounds like it’s gasping for air halfway through a task. Investing in a bit more power upfront is much cheaper than replacing a weak, plastic machine every twelve months.

    Five Rules for Choosing a Blender That Won't End Up in the Junk Drawer

    • Look for stainless steel blades and a metal shaft. I’ve seen too many people buy the cheap plastic-wand models that stain, crack, or warp the first time they hit something slightly frozen. Metal is non-negotiable if you want this to last a decade.
    • Check the bell guard design. A good blender needs a wide, well-designed guard that prevents air pockets from forming. If you’re constantly lifting the wand out of a soup to get rid of bubbles, you’re doing more work than the tool is doing for you.
    • Prioritize ergonomics over aesthetics. You’re going to be holding this for extended periods when making large batches of sauce or puree. If the handle feels flimsy or looks awkward in your hand, you’ll avoid using it, and that’s a waste of money.
    • Ensure it has variable speed control. A simple “on/off” switch is fine for a hobbyist, but if you want to actually control the texture of a silky bisque versus a chunky salsa, you need more granular control over the motor.
    • Don’t overlook the attachment compatibility. If you’re going to invest in a high-quality brand, make sure they offer a whisk or a chopper attachment that actually fits. It’s better to have one cohesive system than a drawer full of mismatched, low-quality bits.

    My Rules for Choosing a Blender That Won't End Up in the Junk Drawer

    Stop looking at the flashy features and start looking at the motor; if it doesn’t have enough wattage to handle a thick soup or frozen fruit, you’re just buying an expensive paperweight.

    Don’t let a salesperson convince you that a food processor can do everything; a high-quality immersion blender is the superior tool for texture and speed when you’re working directly in the pot.

    Invest in build quality over aesthetics—look for stainless steel shafts and heavy-duty attachments that can withstand daily use rather than flimsy plastic parts that will crack by next season.

    Making the Right Call for Your Kitchen

    At the end of the day, choosing a stick blender isn’t about finding the one with the most bells and whistles or the prettiest color on the shelf. It’s about understanding whether you need the raw power of high wattage to tackle thick stews or the specific utility of an immersion tool that can replace a bulky food processor for your daily tasks. Don’t let marketing jargon confuse you; focus on the motor strength and the build quality of the shaft. If you invest in a tool that is built to last rather than something designed to be replaced in a year, you aren’t just buying an appliance—you are investing in your kitchen’s efficiency.

    I’ve seen too many people clutter their cabinets with “as-seen-on-TV” gadgets that end up in a landfill before they’ve even been used twice. My advice? Keep it simple. Buy one reliable, heavy-duty stick blender that feels solid in your hand and does exactly what it promises. Once you have the right tool, the real work begins with how you use it. Good cooking isn’t about having every gadget under the sun; it’s about mastering the basics with equipment you can actually trust. Build a kitchen that works for you, one purposeful tool at a time.

    Frequently Asked Questions

    How do I know if a blender's blade design is actually good, or just more plastic for the sake of it?

    Look at the blade itself, not the shiny housing. If it’s thin, stamped metal that feels like a soda can, put it back. You want heavy-duty, stainless steel blades with a slight weight to them. Check the geometry: a good blade should have a slight curve or a multi-level design to create a vortex. If it’s just a flat, flimsy piece of metal, it’ll just spin ingredients around instead of actually pulling them into the blades.

    Is it worth paying a premium for a stainless steel shaft, or can I get away with something lighter?

    Get the stainless steel. I’ve seen too many people settle for plastic shafts only to have them crack or stain after a few months of heavy use. Plastic is lightweight, sure, but it’s also flimsy and can harbor bacteria in those tiny scratches. A heavy-duty stainless steel shaft is an investment in durability; it won’t snap when you’re blending something thick, and it’s much easier to keep sanitary. Buy it once, use it forever.

    Can I actually use a stick blender for thick things like hummus, or will I just burn out the motor?

    You can absolutely make hummus with a stick blender, but don’t go in blind. If you try to pulverize a mountain of chickpeas all at once, you’re asking for a burnt motor and a headache. The trick is patience and liquid. Add your tahini, lemon, and oil gradually, pulsing in short bursts rather than holding it down constantly. If it looks too thick to move, add a splash of water. Work with the machine, not against it.
  • Why Silicone Spatulas Are Essential for Baking

    Why Silicone Spatulas Are Essential for Baking

    I’ve spent two decades in commercial kitchens, and if there is one thing that drives me up the wall, it’s watching people throw money away on those cheap, multi-colored sets of kitchen gadgets that look cute in a social media ad but fall apart after three washes. You don’t need a drawer full of flimsy, mismatched tools; you need one high-quality silicone spatula that can actually handle the heat of a real kitchen without melting or shedding bits of plastic into your sauce. I’ve seen too many “trendy” kitchen trends leave people with nothing but a cluttered drawer and a broken tool when they actually need to get down to business.

    I’m not here to sell you on some overpriced, designer brand that promises the moon. Instead, I’m going to tell you exactly what to look for so you can buy it once and buy it right. I’ll break down the difference between professional-grade heat resistance and the junk you find at big-box retailers, ensuring you invest in gear that becomes a permanent fixture in your kitchen. Let’s cut through the marketing fluff and get your kitchen working for you.

    Table of Contents

    Why Food Grade Silicone Properties Outlast Cheap Rubber Alternatives

    Why Food Grade Silicone Properties Outlast Cheap Rubber Alternatives

    I’ve seen enough commercial kitchens to know that cheap rubber is a recipe for frustration. When you’re working with high heat, rubber tools tend to warp, lose their shape, or worse, start to degrade and leave a weird smell in your food. This is where the food grade silicone properties really make the difference. Unlike rubber, silicone is chemically stable; it doesn’t leach anything into your batter and it holds its structural integrity even when things get hot.

    When comparing silicone vs rubber spatulas, it really comes down to durability and hygiene. Rubber is porous, meaning it picks up oils and scents that are nearly impossible to scrub out. Silicone, on the other hand, is non-porous and incredibly resilient. If you want the best spatula for scraping bowls clean without worrying about microscopic residue, you need a material that can handle being tossed in the dishwasher without becoming brittle. Investing in high-quality silicone isn’t just about the immediate performance; it’s about buying a tool that won’t end up in a landfill after six months of heavy use.

    Investing in High Temperature Kitchen Tools That Wont Melt Away

    Investing in High Temperature Kitchen Tools That Wont Melt Away

    I’ve seen it a thousand times in commercial kitchens: a cook gets a little too ambitious with a hot pan, and suddenly their cheap tool is a melted, gooey mess stuck to the side of the skillet. When you’re working with high heat, there is no room for compromise. Most budget options use low-grade materials that warp or even leach chemicals when they hit a certain temperature. If you want high temperature kitchen tools that actually hold their shape, you have to look for tools rated for heat resistance well above 450°F.

    When I’m choosing gear, I look for seamless construction. You don’t want a tool where the head is glued to the handle; that’s just a breeding ground for bacteria. A quality tool should be a single, solid piece. This makes them the absolute best spatula for scraping bowls and pans without worrying about the head snapping off mid-stir. Plus, if you’re like me and value efficiency, you want something that doubles as reliable, dishwasher safe baking utensils. If it can’t survive a heavy-duty cycle and a hot burner, it doesn’t belong in my kitchen.

    How to Pick a Spatula That Actually Earns Its Place in Your Drawer

    • Check for a solid core. I’ve seen too many people buy spatulas that are just a thin layer of silicone over a flimsy wire; they bend the second you try to scrape a heavy sauce, and that’s how you end up frustrated and throwing them in the bin.
    • Look for seamless construction. If there’s a visible seam where the silicone meets the handle, food particles are going to get trapped in there, and no amount of scrubbing will get them out—get a single-piece design to keep things hygienic.
    • Test the “flex factor.” A good spatula needs enough give to scrape every last drop out of a bowl, but enough backbone to fold a heavy batter without collapsing like a wet noodle.
    • Avoid the “gadget” trap of extra colors and patterns. Stick to neutral, high-quality colors that don’t stain easily, because once that cheap silicone picks up the pigment from a turmeric sauce, it’s essentially ruined.
    • Prioritize heat resistance over everything else. Before you buy, check the temperature rating on the packaging; if it isn’t rated for at least 450°F, don’t bother bringing it into a professional-grade kitchen.

    The Bottom Line on Choosing Your Spatula

    Stop buying the cheap, flimsy rubber versions that warp the first time they hit a hot pan; look for high-heat food-grade silicone that actually holds its shape.

    Don’t get distracted by fancy sets with twenty different colors; you only need one or two solid, heavy-duty spatulas that can handle everything from folding batter to scraping a pan clean.

    View your tools as a long-term investment rather than a disposable expense—a quality silicone spatula should be the last one you ever have to buy.

    The Cost of Cutting Corners

    I’ve seen enough melted plastic ruins in professional kitchens to know that a cheap spatula isn’t a way to save money—it’s just a way to guarantee you’ll be buying another one in three months. If it can’t handle the heat of a real pan, it doesn’t belong in your drawer.

    Rosalind Hayter

    The Bottom Line on Your Spatula

    The Bottom Line on Your Spatula.

    At the end of the day, choosing a silicone spatula isn’t about following a kitchen trend; it’s about recognizing the difference between a disposable tool and a reliable workhorse. We’ve covered why food-grade silicone is the only way to go if you want something that won’t leach chemicals or degrade under heat, and why investing in high-temperature resistance saves you from the frustration of a melted mess in your favorite pan. When you stop buying those flimsy, cheap rubber alternatives that end up in the landfill every six months, you aren’t just cleaning out your junk drawer—you are building a professional-grade foundation for your home cooking.

    I’ve spent enough years in commercial kitchens to know that the best cooks aren’t the ones with the most expensive gadgets, but the ones who respect their tools. A good spatula might seem like a small thing, but it’s the bridge between your ingredients and your finished meal. Don’t let a mediocre tool get in the way of a great recipe. Buy the quality version once, treat it with respect, and let it serve you for years to come. Your kitchen should be a place of efficiency and joy, not a graveyard for broken plastic.

    Frequently Asked Questions

    How can I tell if a spatula is actually food-grade silicone or just cheap, dyed plastic?

    Don’t be fooled by a bright color; that’s usually just cheap dye masking low-grade plastic. First, check the weight. Real silicone has a substantial, dense feel, whereas cheap imitations feel hollow or flimsy. Next, give it a “pinch test.” High-quality silicone is flexible but snaps back to its original shape instantly. If it feels greasy, smells like chemicals, or leaves a weird residue on your hands, put it back on the shelf.

    Are these silicone tools safe to throw in the dishwasher, or will they eventually warp and degrade?

    You can toss them in the dishwasher, but don’t just throw them in haphazardly. High-quality, food-grade silicone is heat-resistant and won’t melt or warp like those cheap rubber alternatives I’m always seeing. However, the real danger isn’t the silicone itself—it’s the cheap plastic handles or internal cores. If you’ve invested in a solid, one-piece tool, the dishwasher is fine. If it’s a cheap hybrid, the heat will eventually ruin the connection.

    Do I really need a solid silicone spatula, or is a one-piece design better than one with a wooden handle?

    Look, if you want a tool that actually lasts, go with the one-piece design. I’ve seen too many wooden-handled spatulas where the head eventually wiggles loose or, worse, food particles get trapped in the seam where the wood meets the silicone. That’s a breeding ground for bacteria you don’t want in your kitchen. A solid, seamless silicone spatula is easier to clean, more hygienic, and won’t fall apart on you in six months.

  • How to Use a Waffle Iron Correctly

    How to Use a Waffle Iron Correctly

    I’ve spent twenty years in commercial kitchens, and if there is one thing that drives me up the wall, it’s seeing people spend eighty dollars on a “smart” waffle iron that’s essentially just a glorified piece of plastic with a digital screen. You don’t need Bluetooth connectivity to make breakfast; you need even heat distribution and a surface that won’t flake off into your batter after three uses. Most of these trendy gadgets are designed to end up in a landfill by next Christmas, and frankly, it’s a waste of your hard-earned money.

    I’m not here to sell you on the latest kitchen gimmick or tell you that you need a specialized machine for every single type of batter. Instead, I’m going to show you how to identify a properly built waffle iron—the kind with heavy-duty plates and simple, reliable mechanics that actually hold their temperature. I’ll share what I look for when I’m sketching out a functional kitchen layout, focusing on tools that are built to last a lifetime. Let’s cut through the marketing fluff and find you something that actually works.

    Table of Contents

    Belgian Waffle Maker vs Classic Choosing Your Lifelong Companion

    Belgian Waffle Maker vs Classic Choosing Your Lifelong Companion

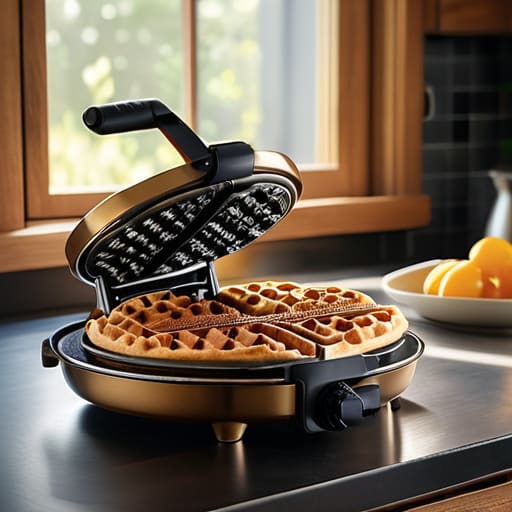
    When you’re staring at a wall of appliances, the choice between a belgian waffle maker vs classic style usually comes down to how much surface area you actually need. A classic iron produces those thinner, crispier waffles that are perfect for stacking high during a weekend brunch. If you like a lighter texture that soaks up syrup without getting soggy, go classic. However, if you want those deep, airy pockets that hold a mountain of fruit or whipped cream, the Belgian style is your winner. Just remember: the deeper the pocket, the more batter you’ll go through.

    I always tell my clients to look past the fancy lights and focus on the build quality. You don’t need a dozen electric waffle iron features like timers or automated shut-offs; you need plates that won’t flake after six months. I prefer heavy-duty models with high-quality non-stick waffle plates that can handle a decent amount of heat. If the coating feels thin or flimsy, walk away. You want a tool that stays in your cupboard for twenty years, not something you’ll be tossing in the bin by next summer.

    Electric Waffle Iron Features That Actually Matter

    Electric Waffle Iron Features That Actually Matter

    When you’re browsing the aisles or scrolling through endless online listings, it’s easy to get distracted by flashing LED lights or digital timers that promise “perfect” results. Honestly? Most of that is just noise. I’ve seen enough commercial equipment to know that the real heavy lifting happens in the heating element and the weight of the unit. You want something with enough heft to sit steady on your counter and heat distribution that doesn’t leave you with one side burnt and the other doughy. If the temperature isn’t consistent, even the best waffle batter recipes won’t save your breakfast.

    Another thing most people overlook until they’re standing over a sink full of scrubbing is the quality of the plates. I always tell my clients: don’t get seduced by thin, flimsy coatings. You want high-quality non-stick waffle plates that feel substantial. If the coating is cheap, it’ll start peeling within six months, and then you’re stuck with a piece of junk that’s impossible to use. Look for plates that are easy to wipe down; effective cleaning should take seconds, not a dedicated afternoon of scouring.

    My Rules for Avoiding the Gadget Graveyard

    • Prioritize weight over bells and whistles; a heavy, solid-plate iron distributes heat much more evenly than those lightweight, hollow plastic models that leave you with burnt edges and raw centers.
    • Look for removable plates if you can find them, because let’s be honest, cleaning thick batter out of deep crevices is a nightmare, and being able to soak the plates makes the whole process much more manageable.
    • Don’t get seduced by “smart” features or digital timers that promise perfection; a simple, reliable analog dial is usually more durable and tells you exactly what you need to know without the extra electronic headache.
    • Check the cord length before you buy; there is nothing more frustrating than setting up a beautiful breakfast station only to realize your outlet is three feet too far away, forcing you to use a dangerous, messy extension cord.
    • Invest in a high-quality silicone brush or a dedicated spreader rather than trying to use a fork; you want to coat those grids evenly without scratching the non-stick surface or denting the plates.

    The Bottom Line on Waffle Irons

    Stop chasing the latest “smart” features; you only need consistent heat and a heavy-duty non-stick surface that won’t flake off into your breakfast.

    Decide on your waffle style before you spend a dime, because a Belgian maker is a specialized tool that won’t serve you well if you just want a thin, crispy breakfast waffle.

    Invest in weight and build quality—if the appliance feels flimsy in your hands, it’s going to be a headache in your kitchen within six months.

    The Real Cost of a Cheap Waffle Maker

    “Most people think they’re saving money by picking up a twenty-dollar plastic waffle maker at a big-box store, but you aren’t saving anything when you’re throwing it in the landfill every eighteen months. Invest in a heavy-duty iron with consistent heat distribution; it’s better to own one reliable machine that works every single morning than a drawer full of broken gadgets that never quite crisp the edges.”

    Rosalind Hayter

    Making the Right Call

    Making the Right Call: Durable waffle irons.

    At the end of the day, picking a waffle iron shouldn’t feel like a chore, but it does require some discipline. Stop looking at the flashy countdown timers or the models that come with a dozen flimsy plastic accessories you’ll lose by next Tuesday. Focus on the fundamentals: a heavy-duty heating element, a non-stick surface that isn’t going to peel in six months, and a build quality that feels substantial in your hands. Whether you decide on a deep-pocketed Belgian maker for those slow Sunday mornings or a classic iron for a quick weekday bite, just make sure you are investing in durability over gimmicks. If you buy a piece of equipment that is built to last, you won’t find yourself back in the kitchen appliance aisle three years from now.

    I’ve spent enough time in commercial kitchens to know that the best tools are the ones that become an extension of your own hands. A good waffle iron isn’t just another gadget cluttering up your counter; it is an invitation to slow down and enjoy the process of making something from scratch. Don’t let the pursuit of the “perfect” machine stop you from actually getting into the kitchen and mastering your craft. Buy the heavy-duty iron, keep your counters clear, and focus on the food. The rest will take care of itself.

    Frequently Asked Questions

    Is it worth spending the extra money on a professional-grade model, or will a standard countertop version do the job?

    Look, if you’re making waffles once a month for a special brunch, a reliable countertop model is plenty. Don’t let a salesperson talk you into a commercial beast you don’t need. But, if you’re running a busy household or you truly love the craft, go professional. Those heavy-duty plates hold heat much more consistently, which means better texture and much longer life. Buy for your actual lifestyle, not your aspirations.

    How do I know if the non-stick coating is actually durable or just going to flake off into my breakfast in six months?

    Look, I’ve seen enough cheap, flaking pans in commercial kitchens to know a bad coating when I see one. If you’re looking at a non-stick iron, skip the ones that feel feather-light; weight usually indicates a better base. Check the specs for ceramic or high-grade PTFE, but honestly? The real test is the finish. It should feel smooth and substantial, not thin and scratchy. If the manufacturer won’t tell you exactly what the coating is made of, walk away.

    Should I be looking for something with adjustable temperature controls, or is that just another unnecessary feature?

    Look, I’ll be blunt: if you can afford the extra bit of money upfront, get the adjustable temperature controls. It’s not just a fancy gimmick. In a commercial kitchen, we never relied on a single “on” setting because heat behaves differently depending on the batter and the iron’s temperature. Having that control means you can prevent a burnt exterior with a raw middle. It’s the difference between a frustrating breakfast and a perfect one.

  • Why You Need a Digital Food Thermometer

    Why You Need a Digital Food Thermometer

    I remember standing in the middle of a chaotic commercial kitchen during a wedding reception, sweat stinging my eyes, watching a junior chef try to “feel” if a roast was ready by poking it with his finger. It was a recipe for disaster, and honestly, it’s a habit I see too often in home kitchens today. People treat cooking like a guessing game, but when you’re investing time and money into a good piece of protein, you shouldn’t be playing roulette with food safety. You don’t need a kitchen full of expensive, flashing gadgets, but you do need a reliable digital food thermometer to take the guesswork out of the equation once and for all.

    I’m not here to sell you on some high-tech, Bluetooth-enabled nonsense that requires a smartphone app just to tell you your chicken is cooked. My goal is to help you find a tool that is built to last and actually delivers an accurate reading every single time. I’m going to cut through the marketing fluff and show you exactly what to look for so you can stop worrying about undercooked meat and start cooking with total confidence.

    Table of Contents

    Mastering Accurate Cooking Temperatures for Life

    Mastering Accurate Cooking Temperatures for Life guide.

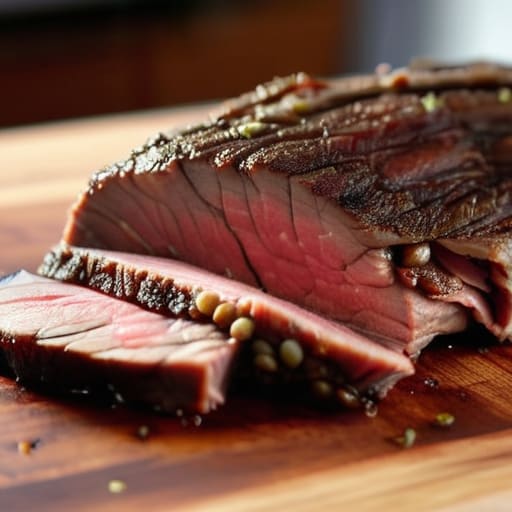
    After twenty years in commercial kitchens, I’ve learned that confidence doesn’t come from intuition; it comes from data. You can spend hours prepping a perfect brisket, but if you’re relying on the “touch test” or just hoping for the best, you’re gambling with your dinner. To stop the guesswork, you need to treat your kitchen like a workspace. Using a reliable tool to hit accurate cooking temperatures is the difference between a meal that’s dry and tasteless and one that’s actually worth the effort you put in.

    When you’re looking to upgrade your setup, don’t get bogged down in the technical jargon, but do understand the basics. For instance, knowing the difference between a thermocouple vs thermistor can help you decide how fast you need those readings. If you’re serious about consistency, invest in some high-quality culinary precision tools that won’t fail you when the heat is on. Once you have a solid device, keep a basic food safety temperature chart nearby. It takes the mental load off your plate so you can focus on the flavor, not the fear of undercooking.

    Choosing the Best Instant Read Thermometers That Last

    Choosing the Best Instant Read Thermometers That Last

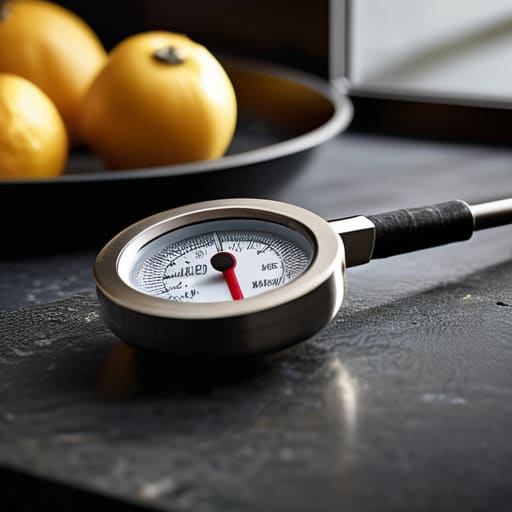
    When you’re shopping for the best instant read thermometers, ignore the flashy screens and the “smart” features that require a Bluetooth connection. I’ve seen too many people waste money on gadgets that feel like toys and break within six months. Instead, look for build quality. You want something with a sturdy probe and a housing that can handle being bumped against a heavy cast iron skillet or dropped on a granite countertop.

    If you really want to understand the tech, you’ll eventually run into the debate of thermocouple vs thermistor. A thermocouple is the gold standard for speed and accuracy—it reacts almost instantly to temperature changes—while a thermistor is more budget-friendly but a bit slower. For my professional standards, I always lean toward a high-quality thermocouple. It’s one of those culinary precision tools that pays for itself the first time you pull a perfect, juicy roast out of the oven instead of a dry, overcooked mess. Don’t settle for “close enough” when it comes to your gear; buy the tool that does the job right every single time.

    Five Rules for Using Your Thermometer Like a Pro

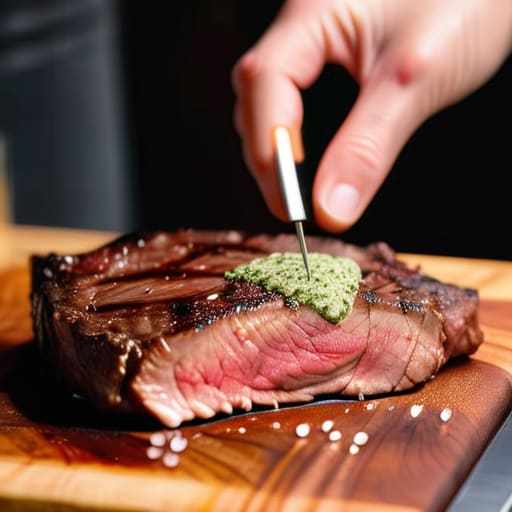
    • Stop poking the bone. When you’re checking a roast or a thick piece of meat, aim for the thickest part of the muscle, but make sure the probe isn’t touching fat or bone, or you’ll get a reading that lies to you.
    • Give it a second to breathe. I see people pull the probe out the second they see a number, but most digital reads need a couple of seconds to stabilize. Wait for that final, steady digit before you decide the meat is done.
    • Clean it immediately after every single use. A tiny bit of dried protein or grease on that probe will ruin your accuracy and turn your kitchen into a breeding ground for bacteria. Wipe it down with a damp cloth or a bit of sanitizer right away.
    • Learn your carryover cooking. Remember, the temperature doesn’t stop rising the moment you take the pan off the heat. Pull your meat a few degrees early so it hits the perfect mark while it rests on the cutting board.
    • Treat it like a precision tool, not a kitchen knife. Don’t toss your thermometer into a crowded drawer full of heavy metal utensils. If you bend or crack that delicate probe, you’re back to guessing, and we don’t do that in my kitchen.

    The Bottom Line on Buying Better

    Stop wasting money on cheap, plastic gadgets that lose accuracy after a month; invest in a high-quality, metal-bodied thermometer that’s built to survive your kitchen.

    Accuracy is non-negotiable—a fast, reliable digital read is the only way to stop guessing and start cooking with the confidence of a pro.

    Remember that a thermometer is just a tool, not a magic wand; use it to build better habits so you never serve an undercooked roast or a dried-out chicken breast again.

    ## The Cost of Guesswork

    “I’ve seen too many people ruin an expensive cut of meat because they relied on ‘feel’ or a timer instead of a real reading. A good digital thermometer isn’t a luxury gadget; it’s the difference between a meal that’s a triumph and one that ends up in the trash.”

    Rosalind Hayter

    Stop Guessing and Start Cooking

    Stop Guessing and Start Cooking with thermometers.

    At the end of the day, a digital thermometer isn’t just another gadget to clutter your drawer; it is the most important tool for moving from guesswork to true culinary confidence. We’ve covered why you need speed, why accuracy is non-negotiable, and why you should invest in a sturdy, high-quality model rather than a cheap plastic version that will break after three uses. By prioritizing a reliable instant-read thermometer, you are protecting your food, your budget, and most importantly, your time. Don’t let a dry roast or an undercooked chicken breast ruin a meal you worked hard to prepare. Buy it once, buy it right, and let it do its job.

    I’ve spent decades in professional kitchens where precision was the difference between a satisfied guest and a wasted plate. I want that same standard for your home. Cooking should be a source of joy and connection, not a stressful game of “is this done yet?” Once you master the habit of checking your temperatures, you’ll realize that great cooking is actually quite simple when you have the right data in hand. Put down the timer, grab your thermometer, and start trusting your instincts backed by facts. Your kitchen—and your dinner guests—will thank you.

    Frequently Asked Questions

    How often should I actually be calibrating my thermometer to make sure it's still giving me honest readings?

    Look, I don’t expect you to pull out your ice bath every single Tuesday, but you can’t just set it and forget it. If you’re using your thermometer daily, check it once a month. If you only pull it out for holiday roasts, check it before the big event. If a reading feels “off”—like your chicken is suddenly gray but the probe says it’s done—stop immediately and calibrate it. Don’t trust a lying tool.

    Is it worth spending the extra money on a probe thermometer that stays in the oven, or should I stick to a quick instant-read?

    Look, if you’re roasting a small chicken, an instant-read is plenty. But if you’re serious about low-and-slow brisket or a large turkey, get the probe. It’s worth the extra investment because it monitors the temperature while you’re busy doing other things, preventing that panicked “is it done yet?” hovering. An instant-read is for precision in the moment; a probe is for peace of mind during a long cook. Get both if you can.

    What are the tell-tale signs that my current thermometer is failing and it's time to toss it for a real one?

    If you’re finding yourself staring at the screen, waiting more than five seconds for a reading, or if the numbers seem to jump around wildly every time you probe a piece of meat, it’s dead. Also, watch out for loose connections or a probe that feels wobbly. If it’s inconsistent, it’s dangerous. Don’t waste time trying to “calibrate” a piece of cheap plastic junk; just toss it and invest in a professional-grade tool.

  • Choosing Between Wooden and Plastic Cutting Boards

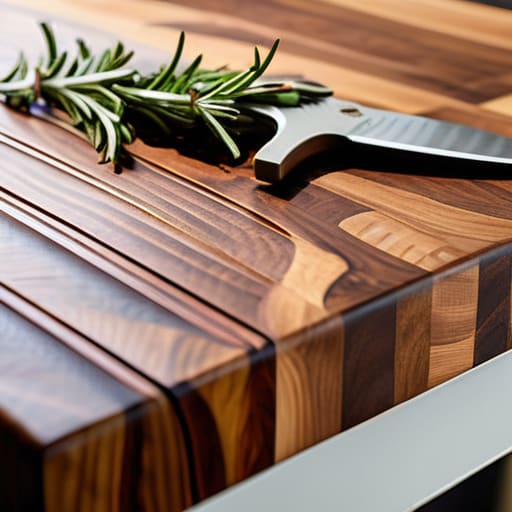
    Choosing Between Wooden and Plastic Cutting Boards

    I spent twenty years in commercial kitchens, and if there is one thing that drives me absolutely up the wall, it’s watching people pour money into those flimsy, neon-colored plastic cutting boards you see in every big-box store. They look clean for about five minutes, but then they get these deep, nasty grooves that trap bacteria and—even worse—they turn your expensive chef’s knife into a dull, useless piece of metal in no time. You don’t need a gadget that promises “advanced ergonomic grip” or some other marketing nonsense; you just need tools that actually work and won’t end up in a landfill by next Christmas.

    I’m not here to sell you on some overpriced, trendy lifestyle brand that looks good on a Pinterest board but fails the moment you try to dice an onion. My goal is to strip away the hype and give you the straight truth about what makes for real, professional-grade cutting boards that can handle a lifetime of heavy use. I’ll show you which woods are worth the investment, which ones are a total waste of counter space, and how to maintain them so they stay as reliable as the day you bought them.

    Table of Contents

    End Grain vs Edge Grain Boards a Lifetime Investment

    End Grain vs Edge Grain Boards a Lifetime Investment

    When you’re looking at the price tag on a high-end butcher block, you’re really deciding between two different philosophies of tool maintenance. Most people settle for edge grain because it’s cheaper and easier to find. In an edge grain setup, the wood fibers run parallel to the surface, which is fine for light tasks, but it eventually develops deep grooves that are a nightmare for preventing cross contamination in food prep. Once those cracks get deep, you’re just inviting bacteria to hide where your sponge can’t reach.

    If you want to do this right the first time, go with end grain. In an end grain board, the wood fibers stand vertically, like a bundle of straws. When your knife hits the surface, it slides between the fibers rather than slicing through them. This is the gold standard for knife edge protection tips because it prevents your blades from dulling prematurely. It’s a bit more of an investment upfront, but an end grain board will stay flat and resilient for decades, whereas edge grain boards tend to warp or scar much faster.

    Knife Edge Protection Tips for Your Finest Steel

    Knife Edge Protection Tips for Your Finest Steel

    Look, I’ve seen too many people drop a decent hundred dollars on a high-carbon steel chef’s knife only to ruin the edge within a month because they were hacking away at a glass or marble surface. If you want to keep your blades sharp, you have to respect the surface they land on. This is why choosing the best material for kitchen cutting boards isn’t just about aesthetics; it’s about preserving your investment. A soft, resilient wood surface—whether it’s an end grain or edge grain setup—gives way to the blade just enough to prevent the steel from rolling or chipping.

    Beyond just the material, you need to be mindful of your technique. Stop using a “sawing” motion with heavy pressure; let the weight of the knife do the work. I also recommend keeping a dedicated board for your proteins to ensure you’re preventing cross contamination in food prep. If you’re using a heavy wood board, remember that the way you maintain it matters just as much as the wood itself. A dry, well-oiled surface stays smooth, whereas a neglected, cracked board will chew up your knife edge faster than you can say “dull.”

    Five Rules for Keeping Your Boards in Working Order

    • Stop using your good wood boards for heavy-duty tasks like hacking through frozen meat or bones; save the heavy lifting for a dedicated plastic or composite board so you don’t ruin your investment.
    • Never, and I mean never, toss your wooden boards into the dishwasher; the heat and water will warp the wood and crack it faster than you can say “ruined,” so stick to hand-washing with mild soap.
    • Treat your boards like your skin—keep them hydrated with food-grade mineral oil once a month to prevent drying and splitting.
    • If you see deep grooves or dark stains starting to settle in, it’s time to grab some coarse salt and half a lemon to scrub them back to life.
    • Always use a stable surface; if your board is sliding around while you’re chopping, tuck a damp paper towel underneath it to lock it in place and keep your fingers safe.

    The Bottom Line on Your Cutting Surface

    Stop buying cheap plastic boards; invest in a high-quality wood board that protects your knives and lasts for decades.

    Choose your grain wisely—go for end grain if you want the ultimate professional surface, or edge grain for a reliable, budget-friendly workhorse.

    Treat your board like the tool it is by oiling it regularly and never, ever throwing it in the dishwasher.

    The Truth About Your Prep Surface

    Stop looking for the cheapest slab of wood or, heaven forbid, a plastic sheet that’ll end up in a landfill by next year. A real cutting board isn’t just a surface; it’s the foundation of your kitchen, and if you buy it right once, you’ll never have to shop for one again.

    Rosalind Hayter

    Making the Right Choice

    Making the Right Choice for cutting boards.

    At the end of the day, choosing a cutting board isn’t about finding the prettiest thing on a social media feed; it’s about deciding how much you value your tools and your time. We’ve covered why you should invest in the structural integrity of an end grain board to save your knives, and why you need to steer clear of those cheap, thin plastic slabs that end up in a landfill every six months. Whether you go with a sturdy edge grain for daily prep or a heavy-duty end grain for serious work, the goal is the same: buy it once, buy it right. Stop the cycle of constant replacements and start building a workspace that actually supports your cooking rather than fighting against it.
    I know it can feel overwhelming when you walk into a kitchen supply store and see a hundred different options, but remember that simplicity is your best friend. You don’t need a gadget for every task; you just need a reliable surface and a sharp knife. Once you have the right foundation, the rest of your kitchen habits will follow suit. Treat your gear with respect—oil your wood, clean it properly, and use it often—and it will serve you for decades. A well-maintained kitchen isn’t built on trends; it’s built on tools that stand the test of time.

    Frequently Asked Questions

    How often do I actually need to oil my board to keep it from cracking?

    If you’re asking this, you probably already know that a dry board is a dying board. I don’t have a set calendar for it, but I check mine once a week. If the wood looks dull or feels thirsty when you run your hand over it, grab the mineral oil. If you’re heavy on the prep work every day, you might need to oil it more often. Better to over-oil slightly than to let it crack.

    Is it safe to put a wooden board in the dishwasher, or am I just asking for trouble?

    Don’t even think about it. Putting a wooden board in the dishwasher is the fastest way to turn a beautiful investment into a warped, cracked mess. The intense heat and the soaking cycle will strip the natural oils right out of the wood, leaving it brittle and prone to splitting. If you want that board to last a lifetime, hand wash it with warm soapy water and dry it immediately. Keep it simple.

    How can I tell if my current board is too worn down to use safely?

    Run your hand across the surface. If it feels deeply grooved or pitted, those aren’t just “character marks”—they’re breeding grounds for bacteria. If you see dark staining that won’t scrub out, or if your knife feels like it’s catching in deep canyons every time you slice, it’s time to retire it. A board shouldn’t be a hazard. If it’s warping or splitting, toss it. Don’t risk your food safety for a piece of scrap wood.

  • What to Look for in an Air Fryer

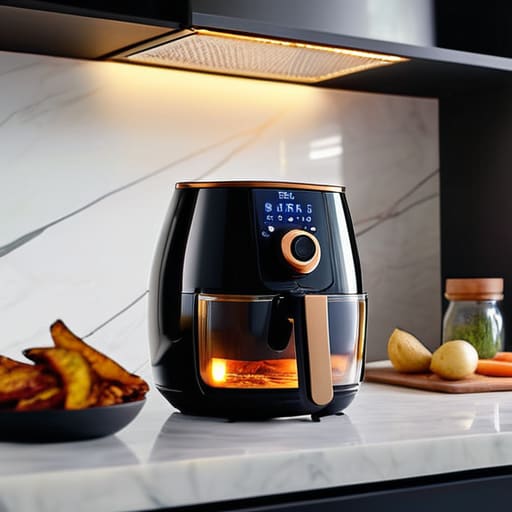
    What to Look for in an Air Fryer

    I’ve spent twenty years in commercial kitchens watching people throw money down the drain on “revolutionary” equipment that ends up as nothing more than expensive clutter in a junk drawer. Lately, it seems like every time I open a magazine or scroll through social media, there is a new, shiny, plastic air fryer being touted as the second coming of culinary technology. Most of these gadgets are built with cheap components that will rattle and fail within a year, and frankly, the hype surrounding them is exhausting. You don’t need a machine that requires a PhD to operate or a countertop-sized beast that takes up all your prep space just to crisp up some frozen fries.

    I’m not here to sell you on the latest trend or convince you that a countertop appliance can replace a properly seasoned cast iron skillet. My goal is to cut through the marketing noise and tell you exactly what to look for if you actually want a tool that works for you. I’ll be sharing my honest, experience-based take on which models are worth the investment and which ones are just overpriced plastic toys. Let’s get your kitchen organized with gear that actually lasts.

    Mastering Rapid Air Circulation for Genuine Flavor

    Mastering Rapid Air Circulation for Genuine Flavor.

    The secret to why these machines work isn’t magic; it’s physics. Most people think they’re just baking with a fan, but it’s really about rapid air circulation hitting your food from every single angle simultaneously. In a standard oven, heat lingers and moves sluggishly, often leaving you with breaded items that are soggy on the bottom and burnt on top. In a high-quality unit, that intense, moving heat mimics the effect of a professional convection oven, stripping away moisture from the surface to create that crisp exterior we all crave without the heavy grease.

    When you’re comparing an air fryer vs deep fryer, you have to understand that you aren’t just substituting oil for air; you are changing how heat penetrates the ingredient. To get the most out of this process, don’t crowd the basket. I see people pile food in like they’re prepping for a banquet, but if the air can’t move, you’ve just built a very expensive, very loud steamer. For the best results, give your ingredients breathing room so the heat can circulate freely. That’s how you get a crunch that actually holds up.

    Air Fryer vs Deep Fryer a Lesson in Longevity

    In my twenty years managing commercial kitchens, I saw plenty of people try to replicate deep-frying at home, usually with disastrous, greasy results. When you look at the air fryer vs deep fryer debate, it isn’t just about health; it’s about the reality of your kitchen maintenance. A deep fryer is a heavy, cumbersome beast that requires liters of oil, a massive cleanup, and a high fire risk if you aren’t careful. It’s a one-trick pony that demands way too much of your time and your cabinet space.

    On the other hand, modern units leverage convection cooking technology to mimic that crunch without the heavy oil soak. While a deep fryer relies on heat transfer through liquid, these machines use high-velocity air to sear the surface of your food. From a professional organizer’s perspective, I much prefer the streamlined nature of a countertop unit. It’s easier to clean, easier to store, and far more versatile for daily meals. If you’re looking for efficiency and longevity, skip the vat of oil and invest in a machine that actually fits your lifestyle.

    Five Rules for Making Your Air Fryer Actually Useful

    • Stop overcrowding the basket. I’ve seen people pile frozen fries in like they’re trying to win a contest, but if the air can’t circulate around every single piece, you’re just making soggy, sad food. Give the ingredients room to breathe so they actually crisp up.
    • Invest in real metal tongs, not those flimsy silicone-tipped ones that melt if you look at them wrong. You need a pair of sturdy, long-handled stainless steel tongs to flip your food without losing heat or risking a burn.
    • Forget the “one-touch” buttons and learn the manual settings. Most of these machines are finicky; I’ve found that setting the temperature yourself and checking the food halfway through is the only way to ensure you don’t end up with a burnt exterior and a raw middle.
    • Clean it after every single use. If you let grease build up in the bottom or on the heating element, you’re going to end up with a kitchen that smells like old oil every time you turn it on. A quick soak in warm, soapy water saves you a massive headache later.
    • Use a high-quality oil sprayer rather than pouring oil directly from the bottle. You only need a light mist to get that golden finish; dumping oil into the basket is a waste of good ingredients and makes the whole process unnecessarily messy.

    My No-Nonsense Rules for Air Fryer Success

    Invest in a model with a heavy-duty basket and metal components rather than thin, non-stick plastic that will flake off into your food within six months.

    Treat the air fryer as a tool for texture, not a replacement for your oven; use it for crisping and reheating, but don’t expect it to handle heavy, slow-braised meals.

    Clean your machine immediately after use to prevent grease buildup from choking the circulation fans, which is the fastest way to kill the motor and ruin the flavor.

    Final Thoughts Before You Buy

    At the end of the day, choosing an air fryer shouldn’t feel like a gamble. We’ve looked at how the rapid air circulation actually works to deliver texture, and why you should prioritize a sturdy, well-built machine over those flimsy, plastic-heavy models that end up in a landfill after a year. If you want this tool to actually earn its spot on your countertop, you need to focus on build quality and airflow efficiency rather than how many flashing LED lights it has. Don’t let the marketing fool you into thinking a gadget is a magic wand; a good air fryer is simply a high-performance tool that, when used correctly, makes your daily meal prep much more efficient.

    My advice is simple: stop looking for the “perfect” gadget and start looking for the reliable workhorse. A kitchen is only as good as the tools you actually use, and I’ve seen too many beautiful kitchens cluttered with expensive junk that just sits there gathering dust. Buy something that feels solid in your hands, something that can handle the heat day after day, and then master the technique. Once you stop chasing the latest trends and start focusing on quality, you’ll find that cooking becomes less about the equipment and more about the joy of a well-made meal.

    Frequently Asked Questions

    How do I know if a specific model is built to last, or if it's just more plastic junk that'll quit on me in a year?

    Look for weight and build quality. If the unit feels light and hollow like a cheap toy, put it back. You want a model with a heavy-duty heating element and a basket that actually clicks into place. Check the coating on the non-stick surface; if it looks thin or prone to flaking, it’s junk. I always check the manual for repairability, too. If it’s a sealed plastic box that can’t be serviced, it’s destined for a landfill.

    Can I actually use my existing metal pans and cast iron in an air fryer, or am I stuck with whatever flimsy basket it comes with?

    Listen, don’t feel tied to that flimsy, non-stick basket that comes in the box. Most of those are built to fail. If you have high-quality metal pans or a seasoned cast iron skillet, use them. Just make sure they aren’t so heavy they block all the airflow, and never use anything with a plastic handle—it’ll melt before your food is even cooked. Use your real tools; they handle the heat much better.

    Is it really worth the counter space if I already have a decent convection oven?

    Look, I get it. Counter space is precious, and a convection oven is a solid piece of equipment. But here’s the reality: a convection oven is a marathon runner, while an air fryer is a sprinter. If you’re just roasting a chicken, use the oven. But for quick, crispy textures without heating up the entire house, that small footprint is worth every inch. If you value speed and efficiency over bulk, make the room.

  • Benefits of Using Stainless Steel Cookware

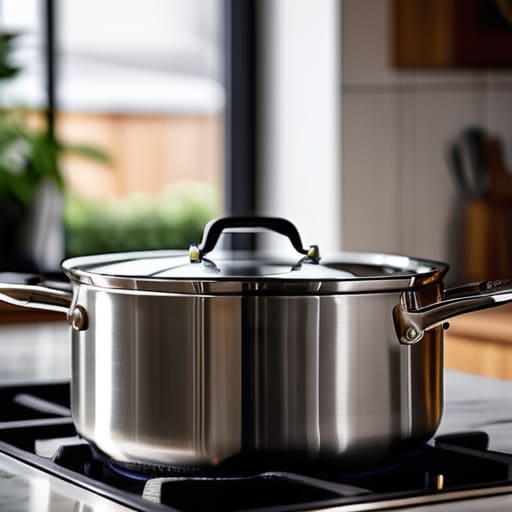
    Benefits of Using Stainless Steel Cookware

    I spent twenty years in commercial kitchens where the heat is high, the pace is relentless, and there is absolutely no room for gear that can’t take a beating. I’ve seen countless home cooks get talked into spending a fortune on those flashy, “smart” non-stick sets that start peeling after six months of heavy use. It’s infuriating. If you want a kitchen that actually works, you need to stop chasing trends and start investing in stainless steel pots. They aren’t magic, and they won’t cook your food for you, but they are the only tools I’ve ever seen that can handle a lifetime of searing, deglazing, and heavy scrubbing without falling apart.

    I’m not here to sell you on some high-tech gimmick or a brand name that’s just paying for a celebrity endorsement. My goal is to give you the straight truth about what to look for in quality construction so you don’t end up with a cabinet full of expensive junk. I’ll show you how to spot real weight, understand heat distribution, and choose the pieces that will actually outlive you. Let’s get your kitchen sorted the right way.

    Table of Contents

    The Truth About Tri Ply Construction Explained

    The Truth About Tri Ply Construction Explained.

    If you’ve ever tried to sear a steak in a cheap, single-layer pan only to find it has a massive hot spot in the middle and a cold ring around the edges, you already know why construction matters. Most budget pans are just thin sheets of metal that react to heat like a roller coaster. When we talk about tri-ply construction explained, we’re talking about sandwiching a core of aluminum or copper between layers of stainless steel. That aluminum layer acts as the engine, pulling heat across the entire surface so you don’t end up with burnt bits in one corner and raw meat in another.

    This isn’t just about fancy marketing; it’s about consistent heat distribution in steel pans. In my years managing commercial kitchens, I saw how much time and food was wasted because of uneven temperature control. A true tri-ply piece provides the stability you need for delicate sauces while giving you the heavy-duty thermal mass required for the best stainless steel for searing. You aren’t just buying a pot; you’re buying a tool that behaves predictably every single time you turn on the burner.

    Real Non Reactive Cookware Benefits for Better Flavor

    Real Non Reactive Cookware Benefits for Better Flavor

    If you’ve ever made a tomato sauce in a cheap aluminum pan only to have it taste like a handful of pennies, you’ve experienced why non-reactive materials matter. When you cook acidic ingredients—think citrus, wine, or tomatoes—they react with certain metals, leaching a metallic, off-putting tang into your food. One of the primary non-reactive cookware benefits is that it keeps your flavors clean and true to their ingredients. By using high-quality steel, you aren’t fighting the pan; you’re letting the food speak for itself.

    This isn’t just about avoiding a bad taste, though; it’s about control. When you utilize professional grade kitchenware, you gain a level of precision that flimsy pans simply can’t offer. Because the metal won’t warp or react to the pH of your sauce, you can simmer a reduction for hours without fear of chemical interference. It allows for a consistent, unaltered flavor profile from the first bite to the last. If you want your home cooking to taste like it came from a real kitchen, stop letting your equipment sabotage your seasoning.

    How to Actually Use Them Without Losing Your Mind

    • Stop fighting the food. If your protein is sticking like glue, your pan isn’t broken—your temperature is. Use the “water droplet test”: flick a few drops of water into the dry pan; if they dance around like beads of mercury, you’re ready to cook.
    • Ditch the metal scrapers for cleaning. I know it’s tempting to go at a burnt spot with a heavy-duty scrubber, but you’ll ruin the finish. Instead, let a little water and a pinch of baking soda simmer in the pot for ten minutes. It’ll lift the residue right off without the elbow grease.
    • Don’t go overboard with the oil. You don’t need a swimming pool of fat to prevent sticking. A light, even coating is all you need once the pan is properly preheated. Overloading with oil just creates a greasy mess that’s harder to clean later.
    • Treat your seasoning with respect. Unlike cast iron, you don’t need to “season” stainless steel, but you do need to dry it immediately after washing. Leaving it to air-dry in a rack is a recipe for those unsightly water spots that make a professional kitchen look amateur.
    • Learn the art of deglazing. Those little brown bits stuck to the bottom after searing meat? That’s called fond, and it’s liquid gold. Pour in a splash of wine, stock, or even just water while the pan is still hot to lift that flavor into a sauce. Don’t wash it down the drain.

    The Bottom Line: What to Look for Before You Buy

    Don’t get distracted by flashy sets; look for heavy-gauge, tri-ply construction that promises even heat distribution so you aren’t fighting hot spots all night.

    Prioritize non-reactive stainless steel to protect the integrity of your ingredients and ensure your food actually tastes like the seasoning you used, not the metal it’s sitting in.

    Stop chasing the latest “smart” kitchen gadgets and invest in a few high-quality, durable pieces that can handle daily use and last for decades.

    The Real Cost of Cheap Cookware

    “I’ve seen enough commercial kitchens to know that a cheap, thin-bottomed pot is just a way to burn your food and your budget at the same time; if you’re going to invest in a piece of equipment, make sure it’s heavy enough to hold the heat and honest enough to last you thirty years.”

    Rosalind Hayter

    The Bottom Line on Stainless Steel

    The Bottom Line on Stainless Steel cookware.

    Look, I know it can feel overwhelming when you’re staring down a wall of shiny metal in a kitchen aisle, but don’t let the marketing jargon confuse you. We’ve covered the essentials: you need that tri-ply construction to ensure heat actually moves through your food instead of just scorching the bottom, and you need a non-reactive surface so your delicate sauces don’t end up tasting like a chemistry experiment. When you stop chasing every new “smart” gadget and focus on the structural integrity of your pots, you’re making a decision that pays off every single time you turn on the stove. Investing in quality stainless steel means you are buying once and buying right, which is the only way to build a kitchen that actually serves your life.

    At the end of the day, a kitchen isn’t about having the most expensive collection of copper or the flashiest designer sets; it’s about having tools you can actually trust. I’ve spent decades in commercial kitchens and years organizing homes, and I can tell you that the best cooks aren’t the ones with the most stuff—they are the ones with the right tools and the discipline to use them. Grab a solid set of stainless steel, learn how to manage your heat, and let the gear do its job. Once you stop worrying about your pans, you can finally start focusing on the soul of the food.

    Frequently Asked Questions

    How do I stop my food from sticking to stainless steel if I'm not using a non-stick coating?

    The secret isn’t a magic coating; it’s physics. You have to master the “Leidenfrost effect.” First, heat your pan dry—no oil, no food—until a drop of water beads up and dances like a marble across the surface. Once that happens, you know it’s ready. Lower the heat slightly, add your fat, and let it shimmer. If you rush it or crowd the pan, you’re just inviting a mess. Patience prevents sticking.

    Is it actually worth the extra money to go for tri-ply, or can I get away with cheaper single-ply pots?

    Look, if you’re just boiling water for pasta, a cheap single-ply pot is fine. But if you actually want to cook—to sear a steak or simmer a delicate sauce without constant hot spots—save your money and go tri-ply. Single-ply pans are temperamental; they’ll scorch your garlic in a heartbeat because the heat doesn’t distribute evenly. I’ve seen too many people buy cheap sets only to replace them a year later. Buy the tri-ply once.

    How do I get rid of those stubborn rainbow stains or burnt-on bits without ruining the finish?

    Don’t panic—those rainbow swirls are just mineral buildup, not permanent damage. For the discoloration, a splash of white vinegar or a sprinkle of baking soda will do the trick. If you’re dealing with actual burnt-on food, skip the steel wool; it’ll scratch the surface. Instead, let some water and a bit of dish soap simmer in the pot for ten minutes. It’ll loosen the debris so you can wipe it away easily.

  • Choosing the Right Chef Knife for Your Kitchen

    Choosing the Right Chef Knife for Your Kitchen

    I still remember the chaos of a Saturday night service in my old catering days—the heat, the shouting, and the rhythmic thwack-thwack-thwack of prep work. In those high-pressure kitchens, you learned very quickly that a dull, cheap blade wasn’t just an inconvenience; it was a safety hazard and a total waste of time. I’ve seen too many home cooks walk into a specialty store and get talked into spending five hundred dollars on a flashy, laser-etched chef knife that looks great in a display case but feels like a heavy, unbalanced brick in your hand. You don’t need a status symbol; you need a tool that actually works.

    I’m not here to sell you on the latest titanium-coated gimmick or some overpriced Japanese steel that requires a degree in metallurgy just to maintain. My goal is to cut through the marketing fluff and help you find a single, reliable chef knife that will become a permanent fixture in your kitchen for the next twenty years. I’m going to show you exactly what to look for in terms of balance, weight, and edge retention so you can stop fighting your ingredients and start actually enjoying the process of cooking.

    Table of Contents

    The Truth About Professional Culinary Blades vs Trendy Junk

    The Truth About Professional Culinary Blades vs Trendy Junk.

    I’ve spent enough years in commercial kitchens to know that a shiny, overpriced box set from a big-box retailer is usually nothing more than a way to drain your bank account. Most of those “starter sets” are made of cheap, soft metal that loses its edge before you’ve even finished chopping your first onion. You aren’t buying a tool; you’re buying a way to frustrate yourself every single evening.

    If you want to do this right, you need to look toward professional culinary blades that are built for endurance, not aesthetics. There is a massive difference between a mass-produced blade and something forged with intent. You’ll often find yourself choosing between carbon steel vs stainless steel; while stainless is easier for most home cooks because it won’t rust if you leave it in the sink for five minutes, carbon steel offers a level of edge retention that is hard to beat. Just remember, a real tool requires respect. If you buy something high-quality, you have to be willing to put in the work to keep it sharp.

    Carbon Steel vs Stainless Steel Finding Your Forever Metal

    Carbon Steel vs Stainless Steel Finding Your Forever Metal

    When you’re standing at your cutting board, the choice between carbon steel and stainless steel isn’t just about aesthetics; it’s about how much work you’re willing to put into your tools. I’ve seen plenty of people jump into carbon steel because they want that razor-sharp edge that holds up during heavy prep work. It’s a fantastic material for precision slicing techniques, but it isn’t “set it and forget it.” If you leave a carbon blade in the sink or even let a drop of moisture sit on it, you’re going to see patina or rust before your next meal.

    On the flip side, stainless steel is the reliable workhorse for the busy home cook. It’s much more forgiving and doesn’t require constant vigilance to prevent corrosion. If you want a tool that can handle a bit of neglect without losing its integrity, stainless is your best bet. In the debate of carbon steel vs stainless steel, there is no objective winner—only what fits your lifestyle. If you have the patience for regular knife maintenance tips and a bit of oiling, carbon steel is unmatched. If you want something low-maintenance, stick with high-quality stainless.

    Five Rules for Keeping Your Blade in Fighting Shape

    • Stop using your chef knife like a can opener or a screwdriver. I’ve seen way too many decent blades with chipped tips because someone thought they could force it through a stubborn lid. A knife is a precision tool, not a multi-tool; use it only for slicing, dicing, and chopping.
    • Hand wash only. I don’t care what the box says—put that knife in the dishwasher and you’re asking for trouble. The high heat and harsh detergents will dull the edge and eventually ruin the handle. Wash it with warm soapy water, dry it immediately with a towel, and put it away.
    • Get a wooden cutting board. If you’re chopping on glass, marble, or even some of those cheap plastic mats, you’re essentially grinding your edge into dust every single time you slice. A thick, stable wood board provides the right amount of “give” to protect your steel.
    • Learn the difference between honing and sharpening. A honing rod isn’t actually fixing a dull edge; it’s just realigning the microscopic teeth of the blade that get bent during use. If the knife is actually blunt, you need a whetstone or a professional service, not just a quick swipe on a rod.
    • Store it properly. Leaving a knife loose in a junk drawer is a recipe for a dull blade and a sliced finger. Use a magnetic strip or a dedicated knife block to keep the edges protected and out of harm’s way. Your knives should be easy to grab and easy to keep sharp.

    The Bottom Line for Your Knife Drawer

    Stop chasing the latest gadget or a cheap set of twenty knives; one high-quality, well-balanced chef knife is worth more than a drawer full of dull, disposable metal.

    Choose your steel based on your lifestyle—go with stainless if you want low maintenance, or embrace the character and edge of carbon steel if you don’t mind a little extra care.

    A knife is only as good as the hand holding it, so prioritize how the tool actually feels in your grip over how pretty it looks in a social media ad.

    The One Tool That Matters

    A chef knife isn’t some status symbol to display on your magnetic strip; it’s a tool you should use until the blade is thin and the handle is worn smooth by your own hands. If it doesn’t feel like an extension of your arm, you’ve bought a gadget, not a piece of equipment.

    Rosalind Hayter

    Investing in Your Hands

    Investing in Your Hands: Quality chef knives.

    At the end of the day, choosing a chef knife isn’t about collecting a set of shiny objects to show off in a drawer. It’s about understanding the trade-offs between the low-maintenance reliability of stainless steel and the razor-sharp, temperamental soul of carbon steel. We’ve covered why you need to steer clear of those cheap, serrated garbage blades and why the metal you choose will dictate how you actually experience your prep work. Whether you go for a heavy-duty Western blade or a precise Japanese style, remember that the goal is function over fashion. If it doesn’t feel right in your hand after five minutes of chopping, it isn’t the right tool for your kitchen.

    I’ve seen too many people spend hundreds on “designer” kits only to end up frustrated because they didn’t respect the tool. A great knife is a lifelong companion, not a disposable gadget. Treat it with respect—keep it sharp, keep it dry, and never toss it in the dishwasher—and it will serve you through decades of family dinners and quiet Sunday meals. Stop looking for the “perfect” knife in a catalog and start looking for the one that makes you actually want to stand at the cutting board. Build your kitchen on quality foundations, and the cooking will follow naturally.

    Frequently Asked Questions

    How often do I actually need to sharpen this thing, and can I do it myself without ruining the edge?

    Listen, you don’t need to be a blacksmith, but you can’t be lazy either. If you’re cooking nightly, expect to hone the edge with a steel every few uses and do a real sharpening session every few months. Don’t panic about ruining it—just skip those electric grinders that shave metal away like a lawnmower. Grab a simple whetstone. It takes a little patience to learn the angle, but once you do, you’re set for life.

    Is it worth spending a fortune on a Japanese blade, or should I stick to something more heavy-duty like a German knife?

    Look, don’t get caught up in the “prestige” of a price tag. If you’re someone who hacks through butternut squash and heavy root vegetables, a delicate Japanese blade will just chip on you—and that’s a heartbreak you don’t need. Stick to a sturdy German knife for your heavy lifting. Save the Japanese steel for precision work, like fine slicing, but only if you’re prepared to treat it with the respect it demands.

    How do I know if a knife is actually well-balanced for my hand, or if it's just a pretty piece of metal?

    Hold the knife by the bolster—that’s where the blade meets the handle. If the weight feels like it’s all in the tip or dragging in the handle, put it back. A well-balanced knife should feel like a natural extension of your arm, not a heavy tool you’re fighting to control. I always do a quick “pinch test” on the blade; if the center of gravity feels steady right under your fingers, you’ve found a winner.

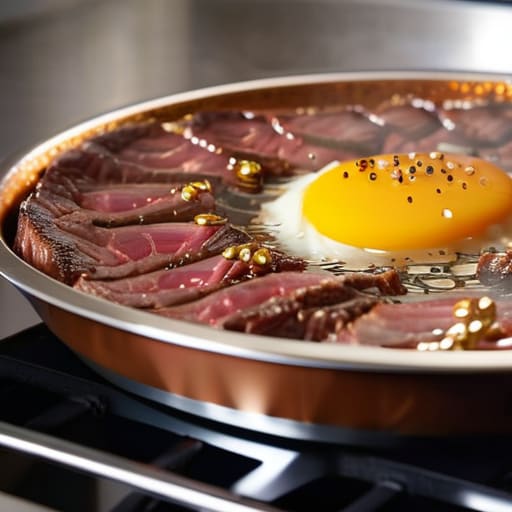
  • Seasoning and Caring for a Cast Iron Skillet

    Seasoning and Caring for a Cast Iron Skillet

    I spent two decades in commercial kitchens where efficiency was everything, and if there is one thing that drives me up the wall, it’s watching people spend fifty dollars on some “designer” non-stick pan that will be peeling and useless in six months. I’ve seen it a thousand times: people cluttering their cabinets with expensive, fragile junk when they could have just bought one reliable cast iron skillet and called it a day. You don’t need a drawer full of gadgets to cook a decent meal; you just need tools that actually work and have the decency to last longer than a single season.

    I’m not here to sell you on some complicated, high-maintenance myth or tell you that you need a chemistry degree to maintain your cookware. My goal is to give you the straight truth based on years of professional catering and my own obsession with restoring old metal. I’m going to show you how to select a real piece of equipment, how to maintain it without the drama, and why it is the only investment your kitchen truly needs. Let’s cut through the marketing noise and get back to basics.

    Cast Iron vs Stainless Steel Investing in Tools That Endure

    Cast Iron vs Stainless Steel Investing in Tools That Endure

    I’ve spent enough time in commercial kitchens to see both sides of this debate, and frankly, it isn’t about which one is “better”—it’s about knowing what job you’re hiring the tool to do. Stainless steel is my go-to for acidic sauces or when I need to deglaze a pan to make a quick pan sauce; it’s predictable and easy to clean. However, if you want that deep, crusty sear on a steak or a perfect cornbread, stainless steel simply won’t cut it. This is where the debate of cast iron vs stainless steel usually settles: one is for precision and acidity, while the other is for heat retention and soul.

    The real difference lies in how they handle heat. When you’re cooking with heavy cookware, you’re investing in thermal mass. A heavy pan doesn’t drop in temperature the second you toss in a cold piece of meat, which is the secret to a professional-grade sear. While stainless requires a bit more finesse to prevent sticking, a well-maintained piece of iron offers a natural, seasoned surface that becomes more reliable every single year. Don’t view them as competitors; view them as two different specialists in your arsenal.

    The Art of Non Stick Surface Creation for a Lifetime of Use

    Look, I see it all the time: people buy a beautiful piece of seasoned metal, cook one batch of eggs, and then toss it in the sink because it stuck. That’s not a failure of the pan; it’s a failure of technique. Real non-stick surface creation isn’t a one-time event that happens at the factory; it is a continuous relationship between you and your cookware. You are building a layer of polymerized oil, one meal at a time, that turns that raw metal into a slick, reliable tool.

    The secret isn’t some magic spray; it’s patience and heat management. You have to master the art of preheating cast iron before you even think about adding fat or food. If you drop an egg into a cold pan, you’ve already lost the battle. I always tell my clients to use a high-smoke point fat—think grapeseed or avocado oil—to build that foundation. If you treat the seasoning with respect and avoid the temptation to soak it in the sink, that surface will only get better with age.

    Five Rules for Living with Cast Iron (Without the Drama)

    • Stop the soap debate once and for all. You don’t need to scrub it with harsh chemicals, but a little mild dish soap won’t kill your seasoning like the internet trolls claim. Just avoid the dishwasher—that’s where good pans go to die.
    • Dry it immediately. Water is the enemy of everything I stand for. After washing, put that skillet back on a warm burner for a minute to evaporate every drop of moisture before you even think about applying a thin layer of oil.
    • Learn the “Low and Slow” method. Cast iron holds heat like a beast, which is its greatest strength and its biggest trap. If you crank the heat to high right away, you’ll scorch your food and your seasoning in one go.
    • Use it often, especially for fats. The best way to build a non-stick surface isn’t through some fancy spray; it’s by actually cooking. Searing a steak or frying some bacon helps bake that layer of polymerized oil into the metal.
    • Keep your seasoning tools simple. You don’t need a cabinet full of specialized oils. A high-smoke-point oil like grapeseed or even a bit of flaxseed oil works perfectly for maintenance. Skip the fancy infused oils for seasoning; they just leave a sticky mess.

    The Bottom Line on Your Cast Iron

    Stop chasing the latest non-stick coating; a well-seasoned cast iron skillet will outlast every piece of “trendy” plastic in your cupboard.

    Don’t be afraid of the maintenance—learning to clean and oil your pan isn’t a chore, it’s an investment in a tool that works harder every time you use it.

    Focus on quality over quantity; you don’t need a dozen specialty pans when one heavy-duty skillet can handle everything from searing steaks to baking cornbread.

    The Last Skillet You’ll Ever Buy

    At the end of the day, choosing cast iron isn’t about following some culinary trend; it’s about making a smart, long-term decision for your kitchen. We’ve looked at why this heavy hitter beats out stainless steel for heat retention and how a proper seasoning routine is the secret to a surface that actually performs. If you stop treating your cookware like it’s disposable and start treating it like an investment, you won’t find yourself replacing a cracked non-stick pan every two years. Remember, a well-maintained skillet isn’t just a tool—it is a functional cornerstone of a kitchen that actually works for you.

    I know it can feel intimidating to step away from the convenience of modern, flimsy gadgets, but I promise the effort is worth it. There is a certain kind of quiet satisfaction that comes from pulling a seasoned pan out of the cupboard, knowing it has been through a thousand meals and is ready for a thousand more. Don’t aim for a perfect, Instagram-ready kitchen; aim for a reliable one. Grab a real piece of iron, get it hot, and start building the habits that turn a simple tool into a lifetime companion. Happy cooking.

    Frequently Asked Questions

    Do I really need to avoid soap when cleaning it, or is that just an old wives' tale?

    It’s a bit of both. The old rule was that soap would strip away your seasoning, but modern dish soaps don’t contain lye like they used to. You won’t ruin your pan with a little Dawn. However, I still advise against soaking it in a soapy sink—that’s a recipe for rust. Scrub it while it’s warm, use a stiff brush, and get it bone-dry immediately. Don’t overthink it; just don’t let it sit in a puddle.

    How do I fix a skillet if the seasoning starts flaking off or it develops a rusty spot?

    Don’t panic; a little rust or flaking isn’t a death sentence for your skillet. If it’s just a small spot, scrub it out with some coarse salt and a bit of oil. If the seasoning is really peeling, you’ll need to strip it back. Scrub the pan down with steel wool until you hit bare metal, wash it thoroughly, dry it completely on the stove, and then start your seasoning process from scratch. It’s a chore, but it’s better than throwing it away.

    Can I actually use my cast iron in the oven for high-heat roasting without ruining the pan?

    Absolutely. In fact, that’s where the skillet really shines. High-heat roasting is one of the best ways to build a deep, resilient seasoning layer. Just make sure your pan is completely seasoned and your oven is preheated. I’ve roasted everything from whole chickens to heavy root vegetables in mine without a single issue. Just avoid using any pans with wooden or plastic handles—stick to pure metal so you aren’t dealing with a burnt mess.

  • Essential Guide to Kitchen Knife Sets

    Essential Guide to Kitchen Knife Sets

    I’ve spent twenty years in commercial kitchens, and if there is one thing that drives me up the wall, it’s the way big-box retailers try to sell you a twenty-piece knives set filled with useless, flimsy blades you’ll never touch. I’ve seen professional chefs weep over the sheer amount of countertop clutter these “complete” kits force upon you. Most of those extra serrated edges and tiny paring knives are just expensive filler designed to make the price tag look justified. You don’t need a mountain of mediocre steel; you need a few high-quality tools that actually hold an edge when the pressure is on.

    I’m not here to sell you on some flashy, high-tech gadgetry or a brand name that’s just paying for celebrity endorsements. My goal is to help you strip away the nonsense and identify the essential pieces that will actually make your prep work faster and safer. I’m going to show you how to build a collection of blades that are built to last a lifetime, focusing on durability, balance, and real-world utility. Let’s stop wasting money on junk and start investing in tools that actually work.

    Table of Contents

    Why a Professional Chef Knife Collection Outlasts Trendy Sets

    Why a Professional Chef Knife Collection Outlasts Trendy Sets

    I’ve seen it a hundred times in commercial kitchens and in clients’ homes: someone buys a flashy, twenty-piece set from a big-box store because it looks great in the box. But three months later, the “specialty” tools they never use are gathering dust, while the primary blade is already dull and chipped. A real professional chef knife collection isn’t about quantity; it’s about quality and purpose. When you invest in a few high-caliber pieces—specifically those with high carbon steel blades—you’re buying tools that can actually hold an edge through years of heavy prep work.

    Trendy sets often rely on cheap materials and flimsy construction to keep the price point low, which means they end up in a landfill far sooner than they should. I always tell people to look for ergonomic kitchen knife handles and solid weight. You want a tool that feels like an extension of your hand, not a plastic toy. It’s much better to own three exceptional knives that you know how to care for than a drawer full of mediocre metal that makes cooking feel like a chore.

    Choosing the Best Knife Set for Home Cooks Who Value Quality

    Choosing the Best Knife Set for Home Cooks Who Value Quality.

    When you’re looking for the best knife set for home cooks, ignore the flashy displays in big-box stores that promise “15 pieces for under fifty dollars.” Those sets are almost always a trap. You end up with a drawer full of flimsy, poorly balanced metal that dulls the moment it touches a tomato. Instead, look for quality over quantity. I always tell my clients to start with a few heavy hitters—a reliable chef’s knife, a paring knife, and a serrated blade—rather than a bloated collection of specialized gadgets you’ll use once a year.

    Pay close attention to the weight and the feel in your palm. You want ergonomic kitchen knife handles that feel like an extension of your hand, not something that causes cramping halfway through meal prep. I prefer blades made of high carbon steel because they hold an edge beautifully, though they do require a bit more respect when it comes to care. If the balance is off, the knife is working against you, not with you. Don’t settle for tools that make your job harder.

    Five Rules for Building a Knife Kit That Doesn't End Up in the Junk Drawer

    • Stop buying those massive 20-piece blocks. Most of those specialty slicers and tiny paring knives you’ll never touch are just taking up counter space and wasting your money. You only need a handful of high-quality blades to handle 95% of your kitchen tasks.
    • Prioritize the “Big Three” first. If you have a solid chef’s knife, a sharp utility knife, and a reliable serrated blade, you can cook almost anything. Don’t let a salesperson talk you into a fancy bread knife or a santoku if your core essentials are mediocre.
    • Weight and balance matter more than aesthetics. Pick up a knife and see how it sits in your hand. If it feels top-heavy or your wrist starts to ache after a minute of mimicking a chop, put it back. A knife should feel like an extension of your arm, not a heavy tool you’re fighting against.
    • Avoid the “razor-sharp” trap of cheap stainless steel. Some budget sets claim to be incredibly sharp right out of the box, but the metal is so soft it loses its edge after three uses. Look for high-carbon stainless steel; it holds an edge longer and actually stands up to daily prep work.
    • Respect the steel by ditching the dishwasher. I cannot stress this enough: never, ever put a good knife in the dishwasher. The heat and the harsh detergents will ruin the temper of the metal and dull the edge in no time. Hand wash, dry immediately, and store them properly.

    The Bottom Line on Building a Real Knife Collection

    Stop buying those massive 20-piece blocks filled with filler tools; you only need a handful of high-quality, versatile blades that you actually know how to use.

    Prioritize weight, balance, and steel quality over flashy packaging or “smart” features that will just end up in a junk drawer.

    View your knives as long-term investments rather than disposable kitchenware—buy once, maintain them properly, and they’ll serve you for decades.

    The Truth About Your Drawer

    Stop buying those twenty-piece “everything-but-the-kitchen-sink” sets that come in those flashy wooden blocks; you’ll end up using three knives and losing the rest in a junk drawer. Invest in three high-quality, well-balanced blades that you actually know how to handle, and you’ll spend less time fighting your prep work and more time actually enjoying your meal.

    Rosalind Hayter

    Stop Buying, Start Investing

    Stop Buying, Start Investing in quality knives.

    At the end of the day, a good knife set isn’t about how many pieces come in the wooden block or how shiny the packaging looks on a store shelf. It’s about knowing that when you’re mid-prep for a Sunday roast, your tools won’t fail you. We’ve talked about why you need to prioritize high-carbon steel over cheap, stamped metal and why a few versatile, high-quality blades will always beat a twenty-piece set of mediocre junk. If you focus on weight, balance, and the ability to hold an edge, you aren’t just buying kitchenware; you are investing in your own efficiency and safety.

    I know it can feel overwhelming with all the marketing noise out there, but I promise you, your kitchen deserves better than disposable tools. Don’t let the fear of spending a little more upfront keep you stuck in a cycle of replacing dull, flimsy blades every single year. Buy the right tools once, learn how to care for them properly, and then get back to the actual joy of cooking. A well-maintained knife is a lifelong companion, and once you feel that perfect balance in your hand, you’ll realize that simplicity is the ultimate sophistication in any professional or home kitchen.

    Frequently Asked Questions

    Do I actually need a twelve-piece block, or can I just get a few high-quality individual knives?

    Look, I’ve seen more cluttered countertops than I care to count, and most of those bulky twelve-piece blocks are just space-wasters. You don’t need a dozen specialized blades gathering dust. Honestly? Buy a high-quality chef’s knife, a paring knife, and maybe a serrated one. That’s it. Invest your money in those three tools rather than a mediocre set of ten. A few exceptional knives will serve you far better than a block full of junk.

    How often should I really be sharpening my knives, and is a honing steel enough to keep them ready?

    Listen, if you’re waiting until you can’t slice a tomato to think about sharpening, you’re already too late. For most home cooks, I recommend a professional sharpening every six to twelve months. Don’t mistake a honing steel for a sharpener, either. The steel just realigns the edge; it doesn’t actually remove metal to fix a dull blade. Use the steel frequently to keep things straight, but get them professionally ground when they truly lose their bite.

    Is it worth spending the extra money on forged steel, or is high-carbon stainless steel a better bet for a busy home kitchen?

    Look, I’ve seen both in commercial kitchens, and here’s the truth: for a busy home cook, high-carbon stainless steel is usually the smarter bet. Forged steel is beautiful and holds an edge, but it’s high-maintenance—if you don’t treat it like royalty, it’ll rust or pit. High-carbon stainless gives you that professional sharpness but handles the daily chaos of a home kitchen much better. It’s about durability and real-world usability, not just prestige.