Category: Household

  • Using a Ladle for Serving

    Using a Ladle for Serving

    I still remember the chaos of a Saturday night rush in a commercial kitchen—steam hitting the ceiling, the roar of the exhaust fans, and the sheer frustration of trying to serve a delicate consommé with a flimsy, lightweight spoon that felt like it might snap under the weight of a single serving. Most people think a ladle is just a scoop, but when you’re working at scale, you realize that true soup ladle utility is found in the weight, the balance, and the pour. I’ve seen too many home cooks waste money on those decorative, thin-walled gadgets that look pretty in a catalog but fail the moment they hit a heavy stew.

    I’m not here to sell you on some high-tech, silicone-coated nonsense that will end up in a landfill by next year. My goal is to cut through the marketing fluff and show you exactly what to look for in a tool that actually earns its place in your drawer. I’m going to share what I’ve learned from twenty years in professional catering about choosing a piece that offers lasting durability and precision. We’re going to focus on the practical stuff: weight, material, and how a tool should actually feel in your hand when you’re actually cooking.

    Table of Contents

    The Case for Stainless Steel Ladle Durability

    The Case for Stainless Steel Ladle Durability.

    I’ve seen enough cheap, injection-molded plastic melt into a batch of butternut squash soup to last a lifetime. When you’re working with high heat, you need tools that won’t warp or leach chemicals into your food. This is where stainless steel ladle durability becomes non-negotiable. A solid piece of high-grade steel isn’t just about longevity; it’s about the weight and the balance. When I was managing commercial catering lines, we didn’t have time for tools that felt flimsy or bent under the weight of a thick chowder. You want something that feels like an extension of your arm, not a piece of disposable junk.

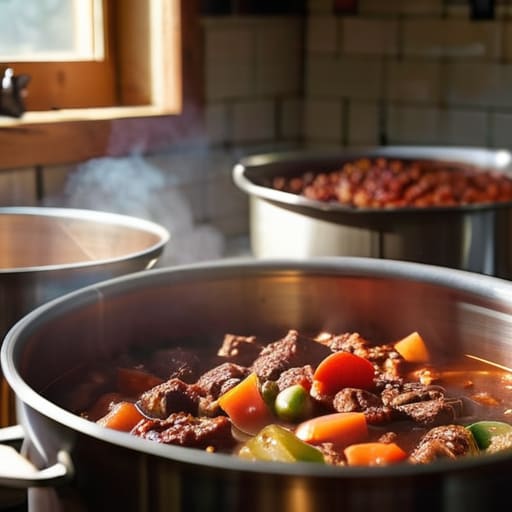
    Beyond just surviving the heat, a quality steel ladle is the best ladle for heavy stews because it can actually move the weight of the ingredients. If you’re trying to scoop a chunky beef stew with a lightweight, thin-walled spoon, you’re going to end up fighting the pot. A heavy-duty stainless option provides the heft needed to dive deep into a stockpot without feeling like you’re going to snap the handle. It’s a one-time investment that pays off every single time you reach for it.

    Measuring Liquid Volume With Ladles for Precision

    Measuring Liquid Volume With Ladles for Precision

    In my years managing commercial kitchens, I learned that a ladle isn’t just for serving; it’s a functional measuring tool. When you’re scaling up a recipe or portioning out a delicate reduction, you can’t just eyeball it. Measuring liquid volume with ladles provides a level of consistency that a standard measuring cup often lacks, especially when you’re working directly from a steaming stockpot. If you know your ladle holds exactly six ounces, you can portion out servings or add precise amounts of broth to a risotto without constantly washing extra equipment.

    However, you have to be picky about the shape. A shallow, wide ladle is great for clear consommés, but if you’re working with thick chowders or chili, you need something with deeper walls. When I’m looking for the best ladle for heavy stews, I prioritize a design that allows for a full, stable scoop without spilling half the contents on the stovetop. It’s about finding that balance between capacity and control. If the tool feels awkward, your precision goes right out the window.

    Five Ways to Make Your Ladle Actually Work for You

    • Check the depth of the bowl before you buy. If you’re mostly serving thin broths, a shallower bowl is easier to maneuver; if you’re dealing with hearty stews with chunks of potato or meat, you need a deep, wide bowl that won’t leave half your dinner stuck in the pot.
    • Test the weight and balance in your hand. A ladle that feels top-heavy or unbalanced will tire your wrist out during a long dinner service or a big family meal. It should feel like an extension of your arm, not a clumsy tool you’re fighting against.
    • Look for a reinforced handle connection. I’ve seen too many cheap ladles snap right where the handle meets the bowl because they were poorly welded. You want a solid, seamless transition that can handle the weight of a full pot of liquid without buckling.
    • Don’t ignore the edge profile. A well-designed ladle should have a slightly tapered or smooth edge that allows it to glide cleanly against the side of a pot or bowl, preventing those annoying drips that end up all over your stovetop.
    • Match your ladle to your storage reality. If you have limited drawer space, look for a design with a built-in hook or a flat-back handle. I prefer something that can hang on a rack; it keeps the tool accessible and prevents it from rolling around and clattering in a crowded utensil drawer.

    The Bottom Line on Choosing Your Ladle

    Stop wasting money on cheap, thin plastic or flimsy metal; invest in a heavy-duty stainless steel ladle that won’t bend or melt when you’re actually using it.

    Treat your ladle like a measuring tool, not just a scoop, to ensure your recipes stay consistent every single time you cook.

    Look for a balanced weight and a comfortable grip—if it feels awkward in your hand now, it’s going to be a nuisance every time you reach for it.

    ## The Tool, Not the Toy

    “A good ladle isn’t a gadget you pull out for a fancy dinner party; it’s a workhorse that should feel like an extension of your own arm every single time you reach for it.”

    Rosalind Hayter

    Final Thoughts on Your Next Ladle

    Final Thoughts on Your Next Ladle.

    At the end of the day, a ladle isn’t just another piece of clutter to toss in a drawer; it is a fundamental tool that dictates how smoothly your service goes, whether you’re feeding a family of four or hosting a dinner party. We’ve talked about why you need to ditch the flimsy plastic for heavy-duty stainless steel and why understanding your liquid volume is the secret to consistent results. Don’t settle for a tool that bends under the weight of a thick stew or fails to measure accurately when you’re following a recipe. Invest in something that feels substantial in your hand and actually performs the job it was designed for without breaking down after six months of use.

    My advice is simple: stop treating your kitchen tools like disposable commodities. When you choose gear based on durability and function rather than what looks pretty in a social media ad, you’re building a kitchen that respects your time and your sanity. A good ladle should be a lifelong companion in your cooking journey, something you can rely on year after year. Build your collection one quality piece at a time, and I promise you’ll spend far less money in the long run. Focus on the basics, master your habits, and let your tools work for you.

    Frequently Asked Questions

    How do I know if a ladle is actually sized correctly for my standard soup bowls or serving platters?

    Don’t just guess based on the handle length. Grab your standard soup bowl and a serving platter from the cupboard. A good rule of thumb: the ladle head should fill about two-thirds of your bowl without overflowing, and for platters, you want a capacity that allows for a decent portion without looking like you’re serving a giant bucket of liquid. If it feels too small for the vessel, you’ll end up making ten trips to the pot.

    Is there a real difference in performance between a solid stainless steel ladle and one with a silicone-coated edge?

    Honestly? Yes, there’s a massive difference, and it comes down to how you actually use them. If you’re constantly scraping the bottom of a heavy stockpot or serving delicate sauces, that silicone edge is a lifesaver—it won’t scratch your expensive pans or make that annoying metal-on-metal screech. But if you want something that feels substantial and won’t melt if you leave it resting on a hot rim, stick to solid stainless steel.

    What's the best way to clean and maintain a heavy-duty ladle so it doesn't end up tarnished or stuck in my utensil drawer?

    Don’t let a good tool sit in a drawer gathering grime. After you’re done, hand-wash your ladle with warm, soapy water immediately; leaving it to soak in a sink is how you invite water spots and pitting. Dry it thoroughly with a clean cloth right away—never let it air dry. If you see some stubborn tarnish, a little bit of bar soap or a gentle scrub with baking soda will bring that shine back without scratching the steel.

  • Choosing the Right Vegetable Peeler

    Choosing the Right Vegetable Peeler

    I still remember the chaos of a Friday night service in my old catering days—the frantic pace, the steam, and the absolute disaster of a prep station where someone had dumped a bin of mismatched, flimsy plastic gadgets. I watched a junior cook struggle for ten minutes with a dull, cheap tool, trying to navigate a mountain of root vegetables because they thought having a massive peeler variety was the key to efficiency. It wasn’t. In fact, all that clutter just got in the way. Most people think they need a specialized gadget for every single vegetable in their crisper drawer, but that’s just a fast track to a cluttered junk drawer and wasted money.

    I’m not here to sell you on the latest gadget-of-the-month or convince you that you need a different blade for every skin thickness. My goal is to help you cut through the marketing noise and identify the only three tools that actually matter for a functional kitchen. I’m going to show you how to build a toolkit based on durability and performance, not trends. We’re going to find the heavy-duty, stainless steel essentials that will last you a lifetime and keep your prep work moving smoothly.

    Table of Contents

    The Y Shaped Peeler vs Straight Peeler Debate

    The Y Shaped Peeler vs Straight Peeler Debate

    I’ve seen it a thousand times in commercial kitchens: a cook reaches for a tool, and if it isn’t the right shape for the job, the whole rhythm of the prep station falls apart. When it comes to the y-shaped peeler vs straight peeler debate, there is no universal winner, only the right tool for the specific task at hand. The Y-peeler is my go-to for high-volume work. Because of that perpendicular design, you can use your whole arm to pull the blade, which is much easier on the wrist when you’re tackling a mountain of carrots or potatoes. It’s built for speed and efficiency.

    On the other hand, the straight peeler is a different beast entirely. It offers much more control and precision, which is why you’ll see it used in more delicate professional chef peeling techniques. If you are working on something small or oddly shaped—think ginger or even using a citrus zester and peeler tool for garnishes—the straight model allows you to maneuver around curves without gouging the flesh. My advice? Don’t get caught in a one-or-the-other mindset. Buy one of each, but make sure they are heavy-duty stainless steel so they don’t end up in a landfill by next year.

    Stainless Steel Peeler Durability You Can Trust

    Stainless Steel Peeler Durability You Can Trust

    When I was managing commercial kitchens, I saw more money wasted on cheap, colorful plastic peelers than I care to admit. They look fine on the shelf, but after three months of heavy use, the blades go dull or the handles snap. If you want to invest in the best kitchen gadgets for vegetable prep, you need to look at the weight and the construction. A solid stainless steel handle isn’t just about aesthetics; it provides the balance you need for control. When you’re working through a five-pound bag of carrots, you don’t want a tool that flexes or feels flimsy in your hand.

    I always tell my clients to prioritize stainless steel peeler durability over flashy features. You don’t need a dozen different specialized tools cluttering your drawer. A high-quality, all-metal peeler can handle everything from delicate skinning to heavy-duty prep without breaking a sweat. Skip the gadgets that promise to do everything and instead find one piece of hardware that is built to be passed down to the next generation. If it feels light and hollow, put it back on the shelf.

    My Rules for Building a Peeler Drawer That Actually Works

    • Stop buying sets. Most of those “complete kitchen tool kits” include five different peelers that all do the exact same thing. You don’t need a collection; you need one reliable Y-peeler for your daily veggies and one sharp straight peeler for more delicate work.
    • Look for a built-in swivel blade. If you’re looking at a peeler and the blade doesn’t feel like it can handle a slight angle change, put it back. A good peeler needs to adjust to the curve of a potato or a carrot without you having to fight it.
    • Prioritize weight and grip. I’ve seen too many people buy those lightweight, all-plastic models because they look “modern.” In a busy kitchen, those slip right out of your hand when they’re damp. Go for something with a bit of heft and a non-slip handle.
    • Check the blade width. If you’re doing a lot of prep work—say, prepping large batches of potatoes for a dinner party—a wider blade is your best friend. It covers more surface area in fewer strokes, which saves you time and keeps your hands from getting tired.
    • Invest in a specialized julienne peeler only if you actually use it. Those serrated blades are great for making quick garnishes or salads, but they’re useless for standard peeling. Don’t let a “fancy” tool take up space in your drawer unless it’s part of your weekly routine.

    The Bottom Line on Peeler Longevity

    Stop buying cheap, plastic-handled peelers that snap or lose their edge after three months; invest in a heavy-duty stainless steel model that will last you a decade.

    Choose your shape based on your actual workflow—grab a Y-peeler for speed and efficiency with large vegetables, or a straight peeler if you need more precision for small, awkward tasks.

    Focus on ergonomics and build quality over trendy gadgets; a tool is only as good as how it feels in your hand when you’re prepping a week’s worth of vegetables.

    Less Is More in the Utility Drawer

    I’ve seen enough commercial kitchens to know that a drawer full of specialty peelers is just a graveyard for wasted money; you don’t need a different tool for every vegetable, you just need one reliable, heavy-duty peeler that doesn’t skip when you’re working through a bag of potatoes.

    Rosalind Hayter

    Don't Overcomplicate Your Prep

    Don't Overcomplicate Your Prep with quality tools.

    At the end of the day, you don’t need a specialized gadget for every single vegetable in your crisper drawer. Whether you decide that the ergonomic grip of a Y-peeler suits your hand better or you prefer the classic control of a straight blade, the most important factor is the build quality. Stick to stainless steel, avoid the flimsy plastic handles that snap after three months of heavy use, and remember that a single, reliable tool is worth more than a dozen mediocre ones. Once you have a solid piece in your hand, you can stop worrying about the gear and start focusing on the food.

    I’ve seen too many home cooks get overwhelmed by the sheer volume of kitchenware available on the market today. My advice is simple: build your kitchen around utility, not trends. A well-chosen peeler isn’t just a tool; it’s a small part of a workflow that should feel effortless and intuitive. When you invest in pieces that are meant to last, you aren’t just saving money in the long run—you are respecting your craft. Grab a good tool, find your rhythm, and get to work.

    Frequently Asked Questions

    Should I invest in a specialized peeler for things like ginger or small herbs, or is one good all-purpose tool enough?

    Look, I’ve seen too many cluttered junk drawers filled with “specialty” gadgets that end up in the landfill within a year. For 95% of what you’ll do, one high-quality, heavy-duty all-purpose peeler is plenty. If you’re really struggling with knobby ginger, a simple spoon works just as well—it’s what we used in commercial kitchens for decades. Don’t buy more clutter; just make sure the one tool you own is worth the weight.

    Is there a real difference in performance between a swivel blade and a fixed blade when I'm prepping large batches?

    When you’re prepping a massive pile of carrots or potatoes, the swivel blade is your best friend. It adapts to the curves of the vegetable, which saves your wrist a lot of unnecessary strain during long stretches of work. A fixed blade feels stable, sure, but it’s much more rigid. If you’re moving through large batches, that little bit of flexibility in a swivel blade keeps you fast and, more importantly, keeps you from getting fatigued.

    How can I tell if a peeler's blade is high-quality stainless steel versus the cheap stuff that dulls after three uses?

    Look, you can’t tell just by glancing at the shine, because even the cheap stuff looks bright in the store. Here’s the real test: weight and tension. A quality blade has a bit of heft to it and won’t flex like a piece of tin when you apply pressure. If it feels light and hollow, put it back. Also, check the edge—it should feel smooth, not serrated or jagged, even before you first use it.

  • Why Use a Salt Cellar

    Why Use a Salt Cellar

    I remember standing in the middle of a high-pressure commercial kitchen during a Saturday night rush, watching a line cook struggle with a standard salt shaker. He was trying to season a delicate reduction, but the tiny holes kept clogging, and the constant clink-clink-clink against the pan was just more noise in an already chaotic room. It was a perfect example of how the wrong tools turn a simple task into a nuisance. That’s when I realized that understanding the true salt cellar benefits isn’t about following some fancy culinary trend; it’s about removing the friction between you and your food. When you stop fighting with plastic lids and grinders, seasoning becomes a natural, rhythmic part of your cooking rather than a clumsy interruption.

    I’m not here to sell you on some overpriced, designer ceramic bowl that just sits there looking pretty on a marble countertop. I want to talk about why a simple, functional cellar is a lifetime investment for your workflow. In this post, I’m going to give you the straight truth on how a salt cellar actually changes your kitchen habits and why it’s one of the few things worth your money.

    Table of Contents

    Mastering the Salt Pinch Technique for Better Flavor

    Mastering the Salt Pinch Technique for Better Flavor

    Once you have your cellar positioned within arm’s reach, you need to change how you actually use the salt. I spent years in commercial kitchens watching chefs work, and the biggest difference between a cook and a pro is the rhythm of their seasoning. When you’re fumbling with a lid or a screw-top shaker, you lose that flow. By using the salt pinch technique, you aren’t just adding flavor; you’re controlling it. You learn to feel the weight of the crystals between your fingers, allowing you to drop a delicate dusting over a finished steak or a heavy handful into a boiling pot of pasta water without breaking your stride.

    This isn’t just about flair, though; it’s about improving seasoning precision. When you can see and feel the salt, you stop guessing. You’ll find yourself seasoning more evenly across the entire surface of your food rather than creating salty pockets. This level of culinary salt management turns a frantic cooking session into a controlled, steady process. It’s about making the seasoning a natural part of your movement, ensuring every bite is balanced without the constant need to stop and taste-test.

    Improving Seasoning Precision With Proper Culinary Salt Management

    Improving Seasoning Precision With Proper Culinary Salt Management

    When I was running large catering lines, speed was everything, but accuracy was what kept the guests coming back. You can’t achieve that level of consistency if you’re constantly fighting your ingredients. This is where improving seasoning precision becomes a matter of workflow rather than just luck. If you are using a standard shaker, you are essentially guessing. A cellar allows you to feel the grain between your fingers, giving you a tactile sense of exactly how much mineral content you’re adding to a sauce or a roast.

    Beyond the flavor, there is the practical side of culinary salt management that most home cooks overlook: stability. If you’re using high-end finishing salts like fleur de sel, you can’t just leave them sitting in a flimsy, open-top container. They are hygroscopic, meaning they pull moisture right out of the air. A well-designed cellar provides the necessary moisture control to keep your salt from turning into a hard, unusable brick. Investing in a proper vessel isn’t about being fancy; it’s about ensuring your expensive ingredients actually behave when you need them to.

    Five Ways a Salt Cellar Actually Changes Your Cooking Flow

    • Stop the “shaker shake.” When you use a cellar, you stop guessing how much salt is coming out of a tiny hole and start feeling the weight of the seasoning in your hand. It turns a repetitive motion into a deliberate, controlled action.
    • Keep your salt dry and ready. One of the biggest headaches in a busy kitchen is clumpy, damp salt from a poorly sealed container. A well-designed cellar keeps your kosher or sea salt free-flowing, so you aren’t fighting your ingredients mid-service.
    • Save your most precious time. I’ve seen too many home cooks waste seconds hunting for a lid or unscrewing a cap while a pan is getting too hot. A cellar sits open and accessible, right where you work, making seasoning a seamless part of your rhythm.
    • Reduce kitchen clutter and waste. You don’t need a cabinet full of different salt containers. One solid, high-quality cellar on your countertop holds your primary seasoning, keeping your workspace clear and your most important tool within arm’s reach.
    • Build better culinary habits. Using a cellar forces you to engage with your food. Instead of mindlessly shaking a container, you’re visually assessing the amount you’re using, which is the first step toward mastering flavor balance without needing a recipe.

    The Bottom Line: Why Your Salt Cellar Matters

    Stop fighting your tools; a salt cellar keeps your seasoning within reach so you can cook by instinct rather than hunting for a lid.

    Invest in quality over convenience; skip the plastic grinders and choose a simple, durable vessel that won’t end up in a landfill in two years.

    Build better habits; using a cellar encourages the controlled pinch, which is the fastest way to move from “following a recipe” to actually understanding how to season food.

    ## Efficiency Over Ornamentation

    A salt cellar isn’t some fancy countertop decoration for people who like to play chef; it’s a tool for anyone who wants to stop fighting their ingredients and start seasoning with intention. When you can grab a pinch without thinking, you stop measuring and start cooking.

    Rosalind Hayter

    Investing in Your Kitchen Rhythm

    Investing in Your Kitchen Rhythm with salt.

    At the end of the day, switching to a salt cellar isn’t about adding another piece of decor to your countertop; it’s about eliminating friction. We’ve talked about how it grants you the freedom to use the pinch technique, how it keeps your seasoning precise, and how it stops those annoying little clogs you get with traditional shakers. When you stop fighting with a lid or a narrow neck, you stop thinking about the tool and start thinking about the food. A good salt cellar is one of those rare items that actually simplifies your workflow instead of complicating it. It’s a small, permanent upgrade to your culinary environment that pays dividends every single time you turn on the stove.

    If there is one thing I’ve learned from twenty years in professional kitchens, it’s that the best tools are the ones that become invisible because they work so seamlessly. You don’t need a drawer full of expensive, single-use gadgets to be a better cook; you just need a few reliable essentials that respect your time and your craft. Buy the heavy ceramic or wood cellar that feels good in your hand and will still be sitting on your counter a decade from now. Stop chasing the trends and start building a kitchen that works for you, one intentional tool at a time.

    Frequently Asked Questions

    Will my salt get clumpy or hard to use if I live in a humid kitchen?

    It’s a fair concern, especially if you live in a coastal area or just have a heavy-duty steamer running on the stove. Yes, salt is hygroscopic, meaning it loves to pull moisture from the air. If your cellar is left wide open, it’ll turn into a hard crust. The trick is to use a lid with a good seal and keep the cellar away from the direct steam of the range. Keep it covered, and it stays free-flowing.

    Do I need a specific type of salt for a cellar, or can I just use my standard kosher salt?

    You don’t need anything fancy, but you do need consistency. I always recommend a high-quality kosher salt—the coarse, flaky kind. It’s much easier to grab a pinch of those crystals than it is to struggle with fine table salt, which tends to clump and makes it impossible to control your seasoning. If you’re using a specialty finishing salt like Maldon, keep that in a separate, smaller cellar for the final touch.

    How do I keep the cellar clean so I'm not just stirring old salt grains around?

    Don’t let it become a graveyard for old salt. Once a week, dump your cellar out entirely. Give it a quick rinse with warm water—no soap, please, unless you want your next meal tasting like Dawn—and let it dry completely on a towel. If you’re using flaky salt, moisture is your enemy; a damp cellar turns salt into a clumped mess. Keep it bone-dry, and your salt stays fresh.

  • Various Uses for a Kitchen Colander

    Various Uses for a Kitchen Colander

    I spent two decades in commercial kitchens where efficiency was the only metric that mattered, and if there is one thing that drives me up the wall, it’s seeing people clutter their cabinets with single-use gadgets that claim to revolutionize your prep work. You don’t need a specialized “pasta strainer,” a “vegetable washer,” and a “berry rinse basket” taking up all your prime real estate. Most of those flimsy, plastic contraptions are just expensive ways to occupy space. When you strip away the marketing hype, the real magic lies in mastering a few versatile colander uses with one single, heavy-duty stainless steel piece that won’t crack under pressure.

    I’m not here to sell you on a new way of life or a trendy kitchen gadget you’ll toss in the junk drawer by next Christmas. Instead, I’m going to show you how to actually work your tools so they work for you. I’ll be sharing the practical, no-nonsense ways I use a high-quality colander to streamline everything from rinsing grains to prepping garden greens, ensuring you get every cent of value out of your equipment. Let’s get your kitchen functioning properly.

    Table of Contents

    The Art of Washing Fresh Produce Properly

    The Art of Washing Fresh Produce Properly.

    Most people treat a colander like an afterthought, something they grab only when the pasta is done. But if you want to actually extend the life of your groceries, you need to view it as one of your most essential food preparation tools. I’ve seen too many people leave berries or leafy greens in their plastic store containers, only to find a fuzzy mess of mold three days later. Instead, use your colander for thorough washing fresh produce immediately after you get home.

    The trick is to be gentle. For delicate items like raspberries or spinach, don’t just blast them under a high-pressure faucet; let them sit in the colander under a light, steady stream. This method ensures you’re actually cleaning fruits and vegetables of grit and debris without bruising the surface. Once they’re rinsed, give the colander a good shake to get the excess water off. If you aren’t using a salad spinner, a high-quality stainless steel colander is your best salad spinner alternative—just make sure you let the greens air-dry on a clean towel so they stay crisp instead of turning into a soggy mess in the fridge.

    Cleaning Fruits and Vegetables Without the Mess

    Cleaning fruits and vegetables without the mess.

    If you’re still rinsing berries in a shallow bowl or, heaven forbid, letting them sit in a puddle of lukewarm water, you’re doing it wrong. Water is a breeding ground for mold, and if you don’t get the moisture off quickly, your expensive organic produce will turn to mush before you even hit the cutting board. I always tell my clients that cleaning fruits and vegetables is about more than just rinsing; it’s about managing moisture. Using a sturdy stainless steel colander allows gravity to do the heavy lifting, pulling the water away from the delicate skins of your peaches or strawberries immediately.

    For those leafy greens that seem to hold onto water like a sponge, don’t go out and buy a specialized gadget that will just clutter your cabinet. A high-quality colander is a perfectly fine salad spinner alternative if you know how to use it. Once you’ve finished washing, give the colander a gentle shake over the sink and let the greens sit for a few minutes. This simple step ensures your dressing actually sticks to the leaves instead of pooling at the bottom of the bowl.

    Five Ways to Actually Use Your Colander Beyond Just Rinsing Veggies

    • Stop using your colander as a temporary bowl for dry ingredients; instead, use it to drain pasta directly into the sink to avoid the “steam burn” dance when you’re trying to pour boiling water through a flimsy plastic strainer.
    • Keep a medium-sized stainless steel colander near your prep station to act as a makeshift compost bin for vegetable scraps, keeping the mess contained and off your cutting board.
    • Use a colander as a quick-drain station for marinated meats or tofu; let the excess liquid drip away in the fridge so you aren’t adding unnecessary moisture back into your pan during searing.
    • If you’re prepping large batches of grains like quinoa or rice, use your colander as a primary rinsing vessel to wash away starch before cooking, which prevents that gummy, overcooked texture.
    • For those of us who value a clean workspace, use a colander to serve as a “drainage tray” for washed herbs; let them sit in the colander for ten minutes after rinsing so they don’t turn into a soggy mess in your storage container.

    My Golden Rules for Colander Use

    Ditch the plastic; a heavy-duty stainless steel colander won’t crack under the weight of a heavy harvest or warp in the dishwasher.

    Use your colander for more than just rinsing; it’s a vital tool for draining pasta or even cooling down small batches of boiled items.

    Prioritize stability by choosing a model with a wide, sturdy base so it stays put in the sink instead of sliding around while you work.

    ## Stop Treating Your Colander Like an Afterthought

    “A good colander isn’t just a strainer for pasta; it’s your first line of defense in food prep. If you’re still using those flimsy, lightweight plastic bowls that tip over the second you add water, you’re making your life harder than it needs to be. Get yourself a heavy-duty stainless steel model that sits firmly in the sink—it’s a tool you’ll use every single day for the next thirty years.”

    Rosalind Hayter

    Beyond the Basics

    Stainless steel colander: Beyond the Basics.

    At the end of the day, a colander isn’t just a vessel for rinsing lettuce; it is a fundamental tool for maintaining the integrity of your ingredients and the efficiency of your workflow. From properly cleaning your produce to preventing that dreaded excess water from ruining your pasta dishes, the right strainer handles the heavy lifting of food prep. I’ve seen too many people clutter their cabinets with specialized “vegetable washers” or single-use gadgets that end up in a landfill within a year. Don’t fall for that trap. If you invest in a high-quality, heavy-duty stainless steel colander, you are covering dozens of essential tasks with a single, reliable piece of equipment that actually belongs in a professional kitchen.

    My advice is simple: stop looking for the next complicated kitchen hack and start mastering the tools you already have. A well-organized kitchen isn’t built on a mountain of expensive, trendy plastic; it is built on the foundation of durable, functional essentials used with intention. When you respect your tools and understand how to use them properly, you spend less time fighting your equipment and more time actually enjoying the process of cooking. Focus on the habits that make your life easier, and I promise your kitchen will feel less like a chore and more like the heart of your home.

    Frequently Asked Questions

    Can I use a stainless steel colander to strain hot pasta water without it warping or getting too hot to handle?

    Absolutely. In fact, a heavy-duty stainless steel colander is the only way to go for pasta. Unlike those flimsy plastic ones that melt or warp the moment they hit boiling water, high-quality steel is built for the heat. Just a tip from my years in commercial kitchens: don’t try to grab it by the rim with your bare hands. Even the best steel conducts heat, so always use a dry kitchen towel or heat-resistant mitts.

    Is it better to use a fine-mesh sieve or a traditional large-hole colander for delicate items like berries?

    If you’re dealing with berries, put that large-hole colander away. Those wide gaps are a recipe for losing your expensive raspberries down the drain. For anything delicate, you want a fine-mesh stainless steel sieve. It provides enough surface area to support the fruit without bruising it, and more importantly, it actually catches the small stuff. It’s a small investment that saves you the frustration of fishing blueberries out of your sink strainer.

    How do I properly clean and dry my colander to prevent water spots or any lingering food residue in the holes?

    Don’t just rinse it and shove it back in the cabinet. If you leave it damp, you’re inviting mildew and those annoying water spots. After washing with hot, soapy water—and I mean getting a brush into those tiny holes to clear out any stuck-on bits—give it a thorough shake. I always towel-dry mine immediately. It takes an extra thirty seconds, but it keeps the metal looking sharp and ensures your next batch of produce stays clean.

  • Different Types of Rolling Pins

    Different Types of Rolling Pins

    I still remember one of my first catering gigs—a massive wedding for two hundred guests—where I reached for a cheap, plastic-handled roller I’d picked up on a whim. Halfway through the pastry prep, the thing started to flex and wobble, leaving my dough uneven and my temper even shorter. It was a total waste of time and money, and it taught me a lesson I’ve carried into my freelance organizing work ever since: your tools should be an extension of your hands, not a hindrance. Most people get lost in the marketing fluff, thinking they need a specialized gadget for every single task, but when you actually look at the different rolling pin types available, most of that “essential” gear is just expensive clutter.

    I’m not here to sell you on some fancy, gold-plated kitchen accessory that will sit in your drawer gathering dust. My goal is to cut through the noise and help you identify the few, high-quality pieces that actually deserve a spot on your counter. I’ll break down the weight, material, and utility of various rolling pin types so you can build a kit that lasts a lifetime. No trends, no plastic junk—just the honest truth about what works.

    Table of Contents

    The French Rolling Pin vs American Style Debate

    The French Rolling Pin vs American Style Debate

    If you’ve spent any time in a bakery, you’ve seen the divide. On one side, you have the classic American style—that thick, heavy cylinder with handles on both ends. It’s easy to grip, especially if you’re working through a massive batch of biscuit dough, but it lacks finesse. On the other side is the french rolling pin vs American style debate, where the French version wins for anyone who actually cares about precision.

    The French style is essentially a tapered cylinder without handles. It might feel a bit intimidating at first, but the tapered rolling pin benefits are hard to ignore once you get the hang of it. Because you use your palms to control the pressure, you get much more even distribution. It’s truly the best rolling pin for pie crust because it allows you to feel exactly how much tension you’re applying to that delicate pastry. While the American style is fine for heavy bread dough, if you want a flaky, professional-grade crust, you need to ditch the handles and embrace the taper.

    Marble vs Wooden Rolling Pin Choosing Lasting Quality

    Marble vs Wooden Rolling Pin Choosing Lasting Quality

    When you’re deciding between a marble vs wooden rolling pin, you aren’t just picking a kitchen tool; you’re choosing how you want to interact with your dough. I’ve seen plenty of people get swept up in the aesthetic of heavy marble, and while it looks stunning sitting on a countertop, it’s a bit of a beast to handle. The weight is its greatest strength—it does a lot of the heavy lifting for you when you’re working with dense, chilled pastry—but it’s also unforgiving. If you aren’t careful with your pressure, you can end up tearing delicate dough rather than smoothing it out.

    On the other hand, a high-quality hardwood pin is the old reliable of the baking world. Wood is naturally forgiving and has a slight “grip” that helps you feel exactly what the dough is doing under your palms. If you’re looking for the best rolling pin for pie crust, a solid maple or beech wood option is hard to beat because it stays at a more consistent temperature with your hands. Just remember that wood requires a bit more respect; you can’t just toss it in the dishwasher. Proper rolling pin maintenance and cleaning—a quick hand wash and an occasional rub with food-grade mineral oil—is the only way to ensure it doesn’t crack on you in a year.

    My Rules for Picking a Pin That Won't End Up in the Trash

    • Forget the fancy patterns and engravings. They might look pretty in a catalog, but those grooves trap dough and make a mess of your workspace. Stick to smooth, solid surfaces that you can wipe clean in seconds.
    • Weight matters more than you think. A heavy marble pin does a lot of the work for you when you’re rolling out pastry, whereas a lightweight plastic one will just leave you exhausted and with uneven dough.
    • Avoid the “all-in-one” kits that come with a dozen different accessories. Most of those little gadgets are just clutter waiting to happen. Pick one high-quality wood or stone pin and learn how to use it properly.
    • If you go with wood, make sure it’s a tight grain. Cheap, porous woods will soak up moisture and harbor bacteria, which is the last thing you want near your food. A solid piece of maple or beech is worth the extra few dollars.
    • Check the diameter before you buy. If you’re working with small batches of cookie dough, a thick, heavy American-style pin might be overkill and hard to maneuver; a slimmer French style gives you much better control for delicate work.

    My Rules for Buying a Rolling Pin

    Skip the cheap, lightweight plastic or thin wood rollers; if it feels flimsy in your hand, it’s going to fail you when you’re actually working dough.

    Match your tool to your task—use a heavy marble pin for pastry that needs chilling and a solid wood or French style pin for everyday bread and crusts.

    Prioritize durability over “features”—you don’t need a rolling pin with built-in measurements or fancy patterns, you just need one that won’t warp or crack after three uses.

    The Truth About Your Tool Kit

    Stop looking for a rolling pin that promises to make you a master baker; look for one that actually holds its weight on the counter. Whether it’s heavy marble or solid wood, if it feels flimsy in your hands, it’s just more clutter waiting to happen.

    Rosalind Hayter

    Making Your Final Choice

    Making Your Final Choice of rolling pins.

    At the end of the day, there isn’t one “perfect” rolling pin, only the one that fits your specific workflow. If you’re tackling delicate pastry work or want that classic, tapered control, the French style is your best bet. If you prefer the stability and weight of a traditional American pin with handles, or the cool, heavy temperature of marble for flaky crusts, go with what feels intuitive to your hands. Don’t get caught up in the marketing fluff or buy a set of five different ones just because they look pretty in a kitchen display. Just pick one high-quality, solid piece—whether it’s heavy wood or stone—and make it your workhorse.

    I’ve seen too many people clutter their drawers with cheap, lightweight rollers that eventually warp or crack, leaving them frustrated right when they’re in the middle of a recipe. My advice is simple: invest in the tool, then invest in the skill. A great rolling pin is a lifelong companion in the kitchen, but it only works if you take the time to learn the rhythm of the dough. Stop chasing the latest kitchen gadget and start building a collection of reliable essentials that actually serve a purpose. Once you have the right tools in your hands, the real joy of cooking finally begins.

    Frequently Asked Questions

    How do I know if a rolling pin is made of real solid wood or just a cheap veneer that’s going to peel?

    Here’s the thing: if you see a seam running around the circumference of the pin, walk away. That’s a veneer, and it’ll start peeling the first time it hits moisture. A real, solid wood pin should feel heavy and consistent from end to end. I always check the grain; it should look continuous. If it feels suspiciously light or looks too “perfectly” patterned, it’s likely a cheap wrap. Buy the solid piece.

    If I’m working with a particularly sticky dough, will a marble pin actually help or just make a mess?

    Honestly? It might actually make things worse. Marble is great because it stays cold, which helps keep butter from melting in pastry dough, but it’s heavy and slick. If your dough is already sticky, that weight can cause it to tear rather than roll. For real sticky situations, I’d stick to a heavy wood pin. It has a bit more “grip” and control, which is exactly what you need when things get messy.

    Is it worth it to buy a specialized pastry blender and rolling pin set, or can I get by with just one good heavy-duty roller?

    Look, if you’re just making a basic pie crust once a month, a single heavy-duty roller is plenty. But if you actually want to master pastry, that pastry blender is non-negotiable. You can’t mimic that precise cutting motion with a rolling pin, no matter how much muscle you use. Save your money on fancy “sets” with matching patterns, but do buy a quality blender. It’s a functional tool, not a decoration.

  • Choosing Safe Oven Mitts

    Choosing Safe Oven Mitts

    I can still smell the singed cotton and hear the sharp intake of breath from my first year managing a high-volume catering kitchen. I once watched a talented sous chef nearly lose a fingertip because he reached for a heavy Dutch oven using a pair of those flimsy, patterned fabric gloves that look cute in a lifestyle magazine but have zero thermal integrity. It was a loud, painful reminder that oven mitt safety isn’t about having the prettiest accessories on your stove; it’s about the physical barrier between your skin and a 450-degree disaster. Most people treat these as an afterthought, but in a working kitchen, they are your first line of defense.

    I’m not here to sell you on some high-tech, silicone-coated gadget that will inevitably crack and end up in a landfill by next Christmas. Instead, I’m going to give you the straight truth about what actually works based on years of professional service and home organizing. We are going to cut through the marketing fluff and focus on durability, grip, and heat resistance. I’ll show you how to choose gear that lasts a lifetime so you can focus on the cooking, not on nursing a burn.

    Table of Contents

    Beyond the Trend Evaluating True Thermal Insulation Effectiveness

    Beyond the Trend Evaluating True Thermal Insulation Effectiveness

    When you’re standing over a hot stove or pulling a heavy Dutch oven out of a 450-degree oven, you don’t want to be thinking about whether your gear is actually doing its job. I’ve seen too many people grab a pair of those trendy, thin silicone sleeves thinking they’re invincible, only to realize they have zero grip and even less protection against a sudden steam burst. To truly judge thermal insulation effectiveness, you have to look past the aesthetic. A quality mitt shouldn’t just feel thick; it needs to provide a substantial barrier that prevents heat from transferring to your skin the moment you make contact.

    This is where the debate of silicone vs fabric mitts usually comes down to how you actually cook. Silicone is fantastic for waterproofing and grip, but if it’s too thin, it won’t stop that searing heat from soaking through. I prefer a heavy-duty, quilted cotton or linen base that has been treated for durability. You want something with enough heft to act as a buffer, ensuring that preventing kitchen burns is a built-in feature of the tool, not an afterthought. If it feels flimsy in your hand, it’s going to fail you when the pan is heavy and the heat is high.

    Mastering Safe Oven Handling Techniques for a Lifetime of Cooking

    Mastering Safe Oven Handling Techniques for a Lifetime of Cooking

    Even with the best gear, your habits are what actually keep you from a trip to the urgent care. I’ve seen too many home cooks try to “quick-grab” a hot pan with a thin towel or a pair of flimsy gloves that haven’t been washed in a month. One of the most important safe oven handling techniques I learned in commercial kitchens is to never assume a handle is cool just because it looks like it. Always use a double-grip method if you’re moving something heavy or awkward; use your mitts on both hands to maintain control.

    You also need to be mindful of your reach. I tell my clients all the time: don’t reach blindly into a hot oven. Clear your workspace before you even turn the heat on. If you’re debating between silicone vs fabric mitts, remember that silicone is great for grip and spills, but a heavy-duty quilted fabric provides better dexterity for maneuvering larger trays. Regardless of what you choose, make it a rule to inspect your gear for holes or thinning spots every single time you clean the kitchen. Consistency is your best defense against burns.

    Five Rules for Keeping Your Hands Out of the Fire

    • Ditch the thin, patterned fabric gloves. If you can feel the heat from a hot pan through the material, they aren’t doing their job. Look for heavy-duty silicone or thick, quilted cotton that actually provides a barrier between your skin and the heat.
    • Check your mitts for grease and food spills before every use. I’ve seen far too many people grab a mitt that’s soaked in old oil, which not only makes it slippery but can actually become a fire hazard when it hits a hot surface.
    • Never rely on a single, flimsy mitt to move multiple heavy pots. If you’re pulling a heavy Dutch oven out of the oven, use two thick, dry potholders or a high-quality silicone grip. One slip is all it takes to ruin a meal and burn yourself.
    • Make sure your mitts are sized correctly for your hands. There is nothing more dangerous than trying to maneuver a heavy baking sheet with a mitt that’s too bulky or too loose, leaving you with zero tactile control and a high risk of dropping whatever you’re holding.
    • Keep your oven mitts away from the stovetop burners. It sounds simple, but in a busy kitchen, it’s easy to set a cloth mitt down too close to a flame or a hot element. Treat your safety gear with the same respect you treat your knives—keep them in their proper place.

    The Bottom Line on Keeping Your Hands Safe

    Stop buying those thin, polyester-blend mitts that feel like nothing; if you can feel the heat through the fabric, it’s time to toss them and invest in heavy-duty, high-density silicone or thick quilted cotton.

    Treat your oven mitts like any other piece of professional gear—inspect them regularly for holes, thinning spots, or grease buildup that could compromise their heat resistance.

    Never prioritize speed over safety when moving heavy cast iron or hot trays; always ensure your grip is secure and your mitts are completely dry before you even think about reaching into a hot oven.

    ## The Cost of Cutting Corners

    “A cheap, thin oven mitt isn’t a tool; it’s a liability. In a professional kitchen, we don’t gamble with burns, and you shouldn’t either—invest in heavy-duty protection that actually stands between you and the heat, because a momentary saving on a piece of fabric isn’t worth a trip to the emergency room.”

    Rosalind Hayter

    Don't Let a Cheap Mitt Ruin a Good Meal

    Don't Let a Cheap Mitt Ruin a Good Meal.

    At the end of the day, kitchen safety isn’t about following a checklist of complicated rules; it’s about respecting the heat you’re working with. We’ve talked about why you need to ditch those thin, decorative fabric scraps for heavy-duty, professional-grade insulation and why your technique matters just as much as the gear you hold. Whether it’s checking for moisture inside your mitts to avoid steam burns or making sure your grip is steady before you lift a heavy Dutch oven, these small habits prevent the kind of accidents that sideline you from your kitchen for days. Investing in quality protection means you aren’t constantly worrying about whether your gear will hold up when things get hot.

    My philosophy has always been that a functional kitchen is built on reliability. When you stop chasing the latest kitchen gadgets and start focusing on the fundamentals—like having a reliable pair of mitts and the confidence to use them—you create a space where you can actually enjoy the process of cooking. Don’t settle for subpar tools that compromise your safety just because they look good on a social media feed. Build a kitchen that supports your passion, protects your hands, and stands the test of time. After all, the best meals are the ones you can cook with total peace of mind.

    Frequently Asked Questions

    How can I tell if my current mitts have lost their heat resistance before I actually burn myself?

    Don’t wait for a trip to the ER to realize your gear is failing. Grab a standard baking sheet, put it in a 350-degree oven for ten minutes, and then try to grab it with your mitts. If you feel even a hint of warmth through the fabric, or if you find yourself instinctively pulling your hands back, they’re done. Once the insulation thins or the fibers degrade, they’re just a false sense of security.

    Is it better to use heavy-duty silicone mitts or traditional thick cotton towels for high-heat tasks like roasting?

    If you’re pulling a heavy roast out of a 450-degree oven, skip the thin towels. I’ve seen too many people try to “double up” on kitchen cloths only to have the heat seep through in seconds. Go with heavy-duty silicone mitts for high-heat tasks. They provide a solid thermal barrier and, more importantly, a much better grip on heavy pans. Save the cotton towels for wiping counters or handling lukewarm dishes.

    How often should I be replacing my oven protection gear to ensure it’s still safe to use?

    Don’t wait for a hole to appear before you toss them. I always tell my clients to inspect their gear every few months. If you notice thinning fabric, scorched spots, or if those silicone grips feel tacky or cracked, it’s time. If you’re a heavy-duty cook using cast iron daily, expect to replace them every year or two. If they don’t feel substantial and protective anymore, they’re just a liability.

  • How to Cook Perfect Rice

    How to Cook Perfect Rice

    I’ve spent two decades in commercial kitchens where every second and every cent counts, and if there is one thing that drives me up the wall, it’s the way the appliance industry tries to sell you “smart” technology you don’t actually need. You don’t need a Wi-Fi-enabled machine that sends a notification to your phone just to tell you the grains are soft; you need a machine that actually respects the rice. Most of the fluff you’ll find in a generic rice cooker guide is designed to make you feel like you’re missing out on some high-tech miracle, when in reality, you’re just being sold expensive, disposable plastic.

    I’m not here to help you decorate your countertop with a gadget that will end up in a landfill by next Christmas. My goal is to give you a straight-shooting, experience-based look at what actually matters: build quality, heat distribution, and ease of cleaning. I’m going to cut through the marketing noise and show you how to pick a tool that will last you a decade, not a season. We’re going to focus on functional reliability over flashy buttons, ensuring your kitchen stays organized and your pantry stays stocked with food that’s actually worth eating.

    Table of Contents

    Finding the Best Rice Cooker for Jasmine Rice

    Finding the Best Rice Cooker for Jasmine Rice

    If you’re looking for the best rice cooker for jasmine rice, you need to understand that this specific grain is temperamental. Jasmine rice relies on a delicate balance of aroma and texture; if you overcook it, you end up with a gummy mess, and if you undercook it, it’s unpleasantly chalky. To get that floral fragrance and distinct, fluffy grain, I always look for a machine that offers precise temperature control. This is where you’ll notice a massive difference between induction heating and conventional heating methods. Induction heats the entire pot more evenly, preventing those dreaded hot spots that scorch the bottom while the top stays underdone.

    I also can’t stress enough how important the vessel itself is. Skip the cheap, thin aluminum models. You want a heavy-duty, high-quality non-stick rice cooker inner pot that can withstand daily use without the coating flaking off into your food. A thicker pot retains heat better and distributes it steadily, which is the secret to getting that consistent, professional result every single time. Don’t settle for a gadget that treats your rice like an afterthought.

    The Difference Between Induction Heating and Conventional Methods

    The Difference Between Induction Heating and Conventional Methods.

    When you’re looking at spec sheets, you’ll see a lot of jargon about heating elements, but let’s cut through the noise. The real difference between induction heating and conventional methods comes down to how the heat actually reaches your grain. Most basic models use a standard heating plate at the bottom. It’s fine for a quick batch of white rice, but the heat is often uneven, leading to those frustrating pockets of mushy rice at the bottom and crunchy bits at the top.

    Induction is a different beast entirely. Instead of a heating element warming up a plate, it uses magnetic currents to turn the inner pot itself into the heat source. This creates a much more consistent, wrap-around heat that respects the delicate structure of the grain. If you’re searching for the best rice cooker for jasmine rice, I almost always point people toward induction. It provides the precision needed to ensure every single grain is fluffy and distinct. It’s a bit more of an upfront investment, but in my experience, it’s the difference between “just okay” rice and a bowl of perfection every single time.

    Stop Treating Your Rice Cooker Like a Set-and-Forget Appliance

    • Stop relying on the plastic measuring cup that came in the box. Those things are notoriously inaccurate. If you want consistent results every single time, use a standard kitchen scale and measure your rice and water by weight. It takes ten extra seconds, but it saves you from a pot of mushy disappointment.
    • Don’t ignore the importance of the inner pot material. If you can afford it, go for heavy-duty stainless steel or a high-quality non-stick coating that isn’t going to flake off into your dinner in six months. A thin, flimsy pot will give you unevenly cooked grains and a shorter lifespan.
    • Treat your machine like a professional tool and clean it properly. That little steam vent might look insignificant, but if it gets clogged with starch buildup, your rice will cook unevenly. Take five minutes after it cools to wipe down the lid and clear the vent.
    • Learn your rice’s personality before you hit start. You can’t treat Basmati the same way you treat short-grain sushi rice. Every variety has a specific water-to-grain ratio that works best; once you find that sweet spot, write it down in your notebook so you aren’t guessing every Tuesday night.
    • Resist the urge to keep peeking. I know it’s tempting to lift the lid to see if it’s done, but every time you do, you’re letting out the steam and dropping the temperature. Trust the machine, keep the lid closed, and let the physics do the work.

    The Bottom Line: What Actually Matters

    Stop chasing the most expensive model on the shelf; if you aren’t cooking specialized grains, a solid, mid-range machine with a reliable heating element is all you need.

    Prioritize build quality over bells and whistles—I’d much rather have a sturdy, easy-to-clean inner pot than a digital screen that does ten things I’ll never use.

    Treat your rice cooker like any other piece of professional gear: buy it once, maintain it well, and stop replacing cheap plastic versions every two years.

    The Truth About Your Countertop

    A rice cooker shouldn’t be another piece of plastic cluttering your counter; it should be the one reliable workhorse that does one thing perfectly every single time you press start.

    Rosalind Hayter

    Making the Right Choice for Your Kitchen

    Making the Right Choice for Your Kitchen.

    At the end of the day, picking a rice cooker shouldn’t feel like a math exam. We’ve covered the essentials: knowing whether you need a specialized machine for your jasmine rice, understanding why induction heating is worth the extra investment, and recognizing that a heavy-duty build is always better than a flimsy plastic alternative. Don’t get distracted by every shiny new button or “smart” feature that promises to do your thinking for you. Focus on the mechanics and the material. If you prioritize a machine that handles heat evenly and a pot that won’t peel after six months, you’ve already won half the battle.

    My advice is simple: stop looking for a miracle gadget and start looking for a reliable tool. A good rice cooker is like a well-seasoned cast iron skillet; it’s something you buy once, take care of, and rely on for years to come. Once you have the right equipment sitting on your counter, the rest is up to you. It’s about the ritual of the meal and the discipline of the cook. Get the right gear, master your technique, and let the machine do its job so you can get back to enjoying the food.

    Frequently Asked Questions

    How do I know if a heavy-duty cooker is actually worth the extra money compared to a basic model?

    Look at the build quality and the heating consistency. A basic model is fine if you’re making a single pot of rice once a week, but if you’re cooking daily, you want a heavy-duty machine. I look for thick, non-stick inner pots that don’t warp and consistent temperature control. If the machine can handle different grain types without turning them into mush, it’s worth the investment. Don’t pay for bells and whistles; pay for durability.

    Can I use my rice cooker for things other than rice, or is that just another way to clutter my counters?

    Look, if you’re only using it for white rice, you’re missing the point. A good cooker is a workhorse, not a single-use paperweight. I use mine for steaming vegetables, making congee, or even poaching fish when I don’t want to stand over a stove. If you buy a quality machine, it earns its spot on your counter by doing more than one job. Use it, or it’s just clutter.

    What kind of inner pot material should I look for to make sure it actually lasts a lifetime?

    Look, if you want something that survives more than a few years of heavy use, stay away from those thin, non-stick coatings. They’re prone to peeling, and once that happens, the whole pot is trash. If you can find a model with a heavy-duty stainless steel or a thick, high-quality ceramic inner pot, grab it. They’re much harder to damage and won’t leave you hunting for a replacement in eighteen months.

  • Why You Should Use a Kitchen Scale

    Why You Should Use a Kitchen Scale

    I spent two decades managing commercial kitchens where “eyeballing it” was a fast track to a ruined profit margin and a wasted batch of dough. I see people today spending hundreds on fancy, high-tech gadgets and designer mixing bowls, yet they still struggle with inconsistent results because they refuse to embrace the simplest tool in the drawer. They think a recipe is a suggestion, but if you aren’t weighing your ingredients, you’re just playing a guessing game. Understanding kitchen scale importance isn’t about being a perfectionist or a scientist; it’s about stopping the cycle of wasted food and expensive mistakes that happen every time you misjudge a “cup” of flour.

    I’m not here to sell you on some trendy, over-engineered smart scale that connects to your phone. My goal is to give you the straight truth about why a basic, reliable scale is the only way to ensure your cooking actually works every single time you step up to the counter. I’ll show you how to cut through the clutter and use this one tool to master your recipes, save money, and finally get that consistent, professional result you’ve been chasing.

    Table of Contents

    Achieving True Baking Consistency and Accuracy Every Single Time

    Achieving True Baking Consistency and Accuracy Every Single Time

    If you’ve ever pulled a tray of cookies out of the oven only to find them flat, dry, or strangely gummy, you didn’t have a bad recipe—you had a measurement problem. The biggest culprit is the constant debate of gram vs cup measurement. When you scoop flour with a measuring cup, you’re essentially playing a guessing game; one person might pack that cup tightly, while another leaves it aerated and light. That tiny discrepancy is enough to ruin the chemistry of your dough. By switching to a scale, you’re embracing culinary precision techniques that professionals use to ensure every single loaf of bread or batch of muffins comes out exactly like the last one.

    Beyond just the texture, using a scale is about mastering accurate ingredient portioning to save yourself from constant trial and error. I’ve seen too many people throw out entire batches of expensive batter because the ratios were off. When you weigh your ingredients, you aren’t just being “fancy”—you are reducing food waste with scales and ensuring your hard-earned money doesn’t end up in the trash.

    Mastering Culinary Precision Techniques for Better Results

    Mastering Culinary Precision Techniques for Better Results.

    If you want to move beyond just following recipes and actually start understanding how they work, you need to embrace culinary precision techniques. In my years managing catering lines, I saw too many cooks ruin a batch of sauce or a delicate pastry because they were relying on “a pinch of this” or “a handful of that.” When you switch from volume to weight, you aren’t just being picky; you are eliminating the variables that cause failure.

    The biggest hurdle for most home cooks is the mental shift from gram vs cup measurement. A cup of flour can vary by as much as twenty percent depending on how tightly you pack it into the vessel, but fifty grams is always fifty grams. By using a scale, you ensure accurate ingredient portioning every single time you step up to the counter. This isn’t about being a scientist; it’s about having the confidence that your dinner will taste exactly like it did the first time you made it. Stop treating your ingredients like suggestions and start treating them like the foundation of a good meal.

    Five Ways a Scale Will Save Your Sanity (and Your Wallet)

    • Stop wasting expensive ingredients on failed batches. If you’re measuring flour by the cup, you’re likely packing it down and adding way too much. Weighing your dry goods ensures you aren’t throwing money in the trash every time a cake turns out like a brick.
    • Ditch the mountain of dirty measuring cups. Instead of grabbing five different vessels for oil, flour, sugar, and water, just put your bowl on the scale and tare it between each ingredient. It’s faster, more accurate, and makes the cleanup a breeze.
    • Get serious about your portions. Whether you’re trying to manage your health or just trying to make sure everyone at the table gets a fair share of a high-end protein, a scale takes the guesswork out of serving sizes.
    • Scale your recipes for crowds without the headache. When I was managing large-scale catering, we never “eyeballed” a recipe for 50 people. Using a scale allows you to multiply ingredients mathematically, ensuring the flavor profile stays exactly the same, regardless of the volume.
    • Stop relying on “medium” or “large” eggs. If a recipe calls for a specific weight of egg, use the scale. It sounds nitpicky, but in professional kitchens, that tiny variance is the difference between a perfect custard and a runny mess.

    My Bottom Line on Kitchen Scales

    Stop wasting money on “measuring cups” for dry goods; a scale is faster, more accurate, and eliminates the mess of extra dishes.

    Invest in a sturdy, digital scale with a high capacity—don’t buy a cheap plastic one that loses its calibration after three months.

    Treat weight as your new standard for every recipe, because consistency in the kitchen comes from numbers, not guesswork.

    The Myth of the Measuring Cup

    “If you’re still measuring flour by the cup, you’re not cooking; you’re gambling. A cup of flour can weigh anywhere from 120 to 160 grams depending on how hard you pack it, and that’s a massive margin for error. Stop guessing and start weighing—consistency isn’t a luxury, it’s the foundation.”

    Rosalind Hayter

    Stop Guessing and Start Building a Better Kitchen

    Stop Guessing and Start Building a Better Kitchen

    At the end of the day, a kitchen scale isn’t some high-tech luxury or a gadget meant to make your life more complicated; it is the foundation of a functional workspace. We’ve talked about how it eliminates the guesswork in baking, how it brings professional precision to your everyday cooking, and how it helps you manage your ingredients without the waste. If you are tired of following a recipe three times only to have it fail because your “cup” of flour was packed too tight, it is time to stop relying on volume and start trusting the numbers. Investing in a solid, reliable scale is one of the few decisions you’ll make in the kitchen that actually pays for itself through consistency and saved ingredients.

    My advice is simple: don’t let the fear of “getting technical” keep you from mastering your craft. You don’t need a degree in chemistry to cook well, but you do need the right tools to support your habits. Once you make the switch from measuring cups to grams, you’ll realize how much control you actually have over the food you serve your family. Focus on the fundamentals, buy things that are built to last, and remember that true culinary confidence comes from knowing exactly what is in your pan. Now, put down the measuring spoons, grab a scale, and get to work.

    Frequently Asked Questions

    Do I really need a digital scale, or can I just use a set of old-fashioned measuring cups?

    Look, I’ve seen plenty of people cling to those old measuring cups, but if you want to stop wasting ingredients, you need to make the switch. Cups are notoriously unreliable—one person packs their flour tight, another scoops it loosely, and suddenly your cake is a brick. A digital scale doesn’t care about how “fluffy” you think your flour is. It gives you the truth every single time. Invest in one; your sanity (and your recipes) will thank you.

    Is it worth spending extra money on a professional-grade scale, or will a cheap one from a big-box store do the job?

    Look, I’ve seen enough cheap, plastic scales end up in the landfill to know the answer. If you’re just weighing a bag of flour once a month, a big-box scale is fine. But if you actually cook, buy the professional-grade one. You want something with a steady readout, a solid platform, and a battery life that doesn’t die mid-recipe. Invest in the tool that won’t lie to you when precision matters.

    How do I know if my scale is actually accurate, and how often should I be checking it?

    Don’t just assume it’s working because the numbers are moving. Grab a heavy coin or a standard weight from a set and see if it hits the mark. If you don’t have those, a nickel is a decent hack—they weigh exactly five grams. Check your scale once a month, or whenever you notice a recipe acting up. If it’s off, it’s time to recalibrate or, frankly, toss it and buy something reliable.

  • Understanding Toaster Settings

    Understanding Toaster Settings

    I spent twenty years in commercial kitchens where every second counted, and if there is one thing I learned, it’s that you don’t need a smart-app-connected, touchscreen gadget to make a decent piece of sourdough. Most people treat their breakfast routine like a high-stakes science experiment, constantly fiddling with those confusing toaster settings only to end up with something that is either a piece of pale cardboard or a blackened slab of charcoal. It’s frustrating, it’s a waste of good bread, and frankly, it’s a total misuse of your morning energy.

    I’m not here to sell you on a fancy new appliance or a complicated manual. My goal is to help you find the sweet spot on that dial so you can stop guessing and start eating. I’m going to share the practical, no-nonsense logic behind how different breads react to heat, helping you master your current machine rather than replacing it. We’re going to strip away the guesswork and build a reliable habit that ensures your breakfast is consistent, every single morning.

    Table of Contents

    Finding Your Perfect Toast Darkness Levels

    Finding Your Perfect Toast Darkness Levels.

    Finding your perfect toast darkness levels isn’t about luck; it’s about understanding your specific machine and your morning routine. Most people just push the lever down and hope for the best, but that’s a recipe for a wasted slice of sourdough. I’ve learned that you have to account for the moisture content of your bread. A thick, heavy slice of artisanal rye requires a much longer dwell time than a thin, pre-packaged white bread. If you aren’t adjusting browning control based on what’s actually in your toaster, you’re essentially playing a guessing game with your breakfast.

    I always tell my clients that consistency comes from observation. Start by testing a single slice on a lower setting to see how the heating elements react. You’re looking for that optimal toast texture—crispy on the edges but still having a bit of give in the center. Once you find that sweet spot, write it down in my little notebook. It saves you from the frustration of preventing burnt toast every single morning and helps you build a predictable, efficient kitchen habit.

    A Toaster Temperature Guide for Reliable Results

    A Toaster Temperature Guide for Reliable Results

    Look, I’ve seen too many people treat their toaster like a game of chance, pushing the lever down and praying for the best. If you want to stop guessing, you need a mental toaster temperature guide that accounts for the density of what you’re sliding into the slots. A light, airy brioche is going to brown much faster than a dense, hearty sourdough. If you treat them the same, you’re either going to end up with limp bread or a smoke alarm going off in your kitchen.

    The secret to adjusting browning control effectively is to start lower than you think you need to. I always tell my clients: it is much easier to run a second cycle for an extra thirty seconds than it is to scrape charred bits off a ruined slice of sourdough. When you’re toasting different bread types, remember that frozen slices need a bit more time at a lower heat to thaw through, whereas fresh, soft bread can go from golden to blackened in a heartbeat. Find that middle ground, and you’ll stop fighting your breakfast.

    Five Ways to Stop Guessing and Start Toasting

    • Stop treating the dial like a suggestion; pick a number that works for your standard bread and stay there. If you’re constantly twisting it back and forth, you haven’t found your baseline yet.
    • Learn the difference between your bread types before you hit the lever. A thick-cut sourdough needs a lower, slower heat than a thin slice of white bread, or you’ll end up with a charred exterior and a gummy middle.
    • Don’t try to multitask with frozen bread. If you’re pulling something straight from the freezer, use the defrost setting if your machine has it, or drop your heat down a notch to give the center time to thaw without burning the crust.
    • Clean out the crumb tray more often than you think you need to. Those little burnt bits at the bottom don’t just create a mess; they smoke up your kitchen and can actually skew the heat distribution in the toaster.
    • Watch the bread, not the clock. Every appliance is different, and a “level 4” on a cheap plastic model isn’t the same as a “level 4” on a high-end stainless steel unit. Use your eyes to calibrate your machine once, then trust your gut.

    The Bottom Line on Better Toast

    Stop chasing the perfect number on the dial and start paying attention to the bread itself; sourdough and thick-cut slices will always need a different setting than a flimsy white bread.

    Treat your toaster like any other piece of equipment—clean out the crumb tray regularly so you aren’t smoking out your kitchen or dealing with uneven heating.

    Invest in a reliable, heavy-duty toaster that does one job well rather than buying a cheap plastic gadget loaded with features you’ll never touch.

    The Truth About the Dial

    Stop treating your toaster like a mystery box and start treating it like a tool; once you learn the temperament of your specific machine, you’ll stop wasting bread and start actually enjoying your morning.

    Rosalind Hayter

    Getting It Right Every Morning

    Getting It Right Every Morning with toast.

    At the end of the day, mastering your toaster settings is about removing the guesswork from your morning routine. We’ve talked about how different bread densities—from thick-cut sourdough to flimsy white slices—require a different approach to the dial, and how understanding your machine’s specific heat increments can save you from a drawer full of burnt crumbs. Remember, there is no magic number that works for everything; it’s about observing the pattern and adjusting based on what you’re actually putting in the slots. Once you stop treating the dial like a mystery and start treating it like a tool, you’ll find that consistent results become second nature.

    I know it seems like a small thing, but a functional kitchen is built on these tiny, reliable moments. You don’t need a smart toaster with a touchscreen or a dozen unnecessary gadgets to have a decent breakfast; you just need to know your equipment and respect the process. When you master the basics, you stop fighting your appliances and start enjoying the simple ritual of a good meal. Invest your energy into building better habits rather than chasing the latest kitchen trends. A well-run kitchen starts with the small things, and a perfectly toasted slice of bread is a perfect place to begin.

    Frequently Asked Questions

    Why does my bread keep burning on the same setting even when I haven't changed it?

    If you haven’t touched the dial but your toast is suddenly coming out like charcoal, stop looking at the settings and start looking at your bread. Fresh, thick-cut sourdough or homemade loaves have much higher moisture content than that dry, pre-sliced supermarket stuff. As bread sits in the pantry, it loses moisture and gets harder; that drier bread toasts much faster. Switch to a lower setting as your loaf ages.

    Is there a difference between setting the dial for sourdough versus standard white bread?

    There’s a massive difference, and if you treat them the same, you’re going to end up with either a gummy mess or a charcoal brick. Sourdough is denser and often has a higher moisture content; it needs a slightly lower setting for a longer duration to toast through that thick crust without burning the surface. Standard white bread is much more delicate. Turn it down a notch for the sourdough and keep it light for the white.

    Should I be using the defrost setting for frozen bagels, or just turning up the heat?

    Don’t bother cranking up the heat. If you just turn the dial to a higher setting, you’ll end up with a bagel that’s burnt on the outside and still icy in the middle—a total waste of good bread. Use the defrost setting. It’s designed to thaw the dough gently before the browning cycle kicks in. It takes an extra minute, but it’s the only way to get that perfect, even crunch.

  • Benefits of Using a Garlic Press

    Benefits of Using a Garlic Press

    I remember standing in the middle of a commercial kitchen during a Friday night rush, staring down a mountain of garlic cloves while a flimsy, $5 plastic gadget snapped right in my hand. It was a mess of half-crushed cloves and wasted time, a perfect example of why most people misunderstand true garlic press utility. We’ve been conditioned to think that a tool is “useful” just because it has eighteen different attachments or a sleek, modern design, but in my twenty years of catering, I’ve learned that complexity is usually just a mask for poor engineering. If a tool can’t handle a heavy clove without bending under pressure, it isn’t an asset; it’s just more clutter in your drawer.

    I’m not here to sell you on the latest high-tech kitchen trend or some overpriced gadget that promises to revolutionize your life. Instead, I’m going to give you the straight truth about what actually works when you’re standing at your cutting board. We are going to strip away the marketing fluff and focus on the mechanical durability and ease of cleaning that actually matters. By the end of this, you’ll know exactly how to choose a tool that serves your cooking rather than fighting against your workflow.

    Table of Contents

    Invest in Stainless Steel Kitchen Gadgets That Last

    Invest in Stainless Steel Kitchen Gadgets That Last.

    If you ask me, the quickest way to turn a kitchen into a graveyard of wasted money is by buying every colorful plastic tool you see on a late-night infomercial. Those flimsy gadgets snap at the hinge or crack the moment they hit a clove of garlic. I’ve seen it a thousand times in commercial kitchens: one cheap tool breaks, and suddenly your workflow is shot. If you want to actually enjoy your time at the stove, you need to invest in stainless steel kitchen gadgets that don’t flinch under pressure.

    Stainless steel isn’t just about looking professional; it’s about durability and hygiene. Unlike plastic, which can harbor bacteria in tiny scratches or absorb odors, high-quality steel is easy to sanitize and built to withstand years of heavy use. When you’re choosing between the garlic press vs knife debate, the press wins for sheer speed during a hectic weeknight meal, provided the tool is heavy-duty. A solid, steel construction ensures that the mechanical advantage actually works, giving you consistent results without the frustration of a tool that bends or breaks mid-prep.

    Choosing Best Garlic Crushing Tools Over Plastic Junk

    Choosing Best Garlic Crushing Tools Over Plastic Junk

    I’ve seen it a thousand times in commercial kitchens and in clients’ homes: a drawer full of colorful, flimsy plastic gadgets that snap the moment you apply any real pressure. When it comes to the best garlic crushing tools, plastic is a non-starter. It’s porous, it stains, and it traps those pungent oils in the cracks, making it nearly impossible to get it truly clean. If you want to save yourself the headache, skip the supermarket aisles filled with cheap novelty items and look for something with weight.

    When I’m evaluating a tool, I look for a design that prioritizes both durability and hygiene. You want something that functions as one of those genuine culinary prep time savers without requiring a specialized scrubbing brush to fix. A solid, heavy-duty model is much easier to rinse under a tap, ensuring you aren’t carrying yesterday’s garlic scent into today’s meal. Ultimately, the debate of garlic press vs knife usually comes down to how much time you have; if you’re in a rush, a high-quality metal press will do the job more consistently than a dull blade ever could.

    How to Actually Use Your Press Without Losing Your Mind

    • Stop peeling every single clove by hand; if you’re using a press, just smash the clove with the flat side of your knife to loosen the skin before dropping it in.
    • Don’t let the garlic sit in the chamber after you’re done, or you’ll be scrubbing dried paste out of the tiny holes for twenty minutes—clean it immediately.
    • If you find the garlic is just getting squished rather than pressed, check your tool’s hinge; a cheap one will flex, but a quality steel press should stay rigid under pressure.
    • Use a little bit of coarse salt on the garlic before pressing if you want to help the bits pass through the holes more smoothly and prevent sticking.
    • Keep a small bowl of water nearby to rinse the press right at the prep station; once that garlic juice dries, it becomes a nightmare to manage.

    The Bottom Line on Garlic Prep

    Stop buying cheap, plastic presses that snap the first time you hit a stubborn clove; if it doesn’t have some weight to it, leave it on the store shelf.

    Prioritize stainless steel or heavy-duty metal construction to ensure your tool survives years of use and can actually handle a dishwasher.

    Focus on functionality over gimmicks—a tool is only useful if it cleans easily and actually crushes the garlic without leaving half of it stuck in the mechanism.

    ## The Cost of Convenience

    “I’ve seen enough flimsy, plastic garlic presses end up in the landfill to know that if a tool can’t handle a single clove without bending, it’s not a kitchen essential—it’s just more clutter you’ll be throwing away in six months.”

    Rosalind Hayter

    Stop Overthinking Your Prep

    Stop Overthinking Your Prep with stainless steel.

    At the end of the day, a garlic press isn’t some high-tech miracle machine; it’s just a tool meant to save you time and frustration. We’ve covered why you need to ditch the flimsy plastic models that snap the moment you apply real pressure and why investing in heavy-duty stainless steel is the only way to go if you want something that survives a lifetime of use. Whether you choose a classic plunger style or a more modern lever design, the goal remains the same: efficiency without the cleanup headache. Stop settling for gadgets that fail you mid-recipe; buy the tool that actually does its job so you can focus on the flavors, not the hardware.

    I’ve seen too many people clutter their drawers with “as-seen-on-TV” nonsense that ends up in a landfill within six months. My advice is to keep your kitchen lean and your tools reliable. When you own gear that feels substantial in your hand and performs consistently every single time, you stop fighting your ingredients and start mastering your craft. A well-organized kitchen isn’t about having every single gadget on the market; it’s about having the right tools that work as hard as you do. Now, get that garlic crushed and get back to the stove.

    Frequently Asked Questions

    Is it actually worth the extra effort to clean a metal press, or am I just making more work for myself?

    Look, I get it. After a long day, the last thing you want is a sink full of scrubbing. But here’s the truth: if you buy a cheap plastic press, you’ll spend more time picking out stuck bits with a toothpick than you ever would cleaning a quality one. A heavy-duty metal press rinses clean in seconds. Don’t mistake a little rinse for “extra work”—it’s actually the shortcut to a kitchen that actually functions.

    Should I be peeling my garlic cloves before putting them in the press, or does that just clog up the mechanism?

    Peel them. I know it feels like an extra step when you’re in the middle of prep, but trust me: if you leave the skins on, you’re just asking for a headache. The skins are fibrous and won’t crush; they’ll just get jammed in the tiny holes or stuck in the plunger mechanism. It’s a mess to clean out afterward. Take the thirty seconds to peel them first—your gear (and your sanity) will thank you.

    Can I use a garlic press for other things like ginger or small herbs, or is that a recipe for a headache?

    You can, but don’t expect it to be a seamless process. I’ve used mine for ginger when I’m in a rush, but be prepared to spend extra time cleaning those tiny holes afterward. For soft herbs, it’s a bit of a mess—you’ll end up with a bruised paste rather than a clean mince. If you’re looking for precision, stick to a knife. Use the press for what it was built for, and save your sanity.