Blog

  • Essential Uses for a Stock Pot

    Essential Uses for a Stock Pot

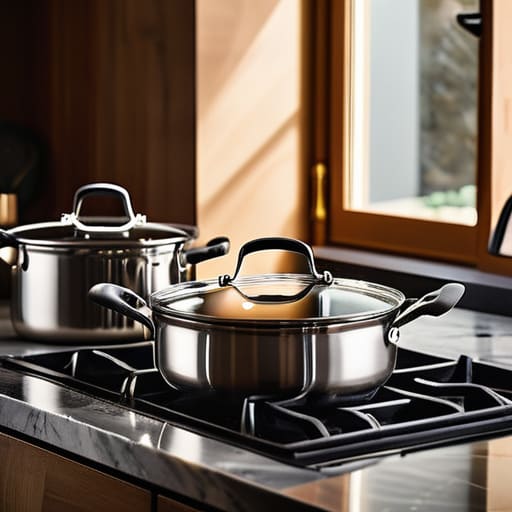
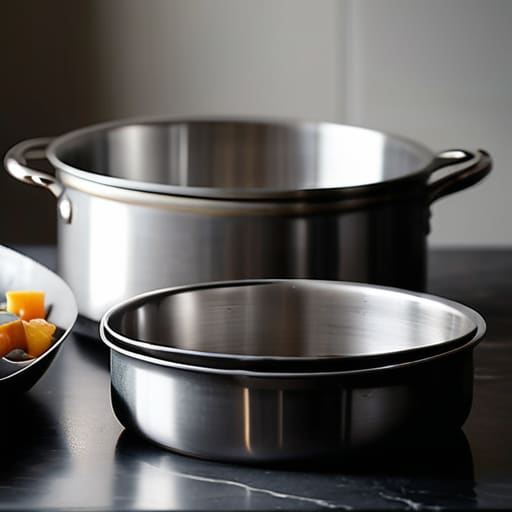
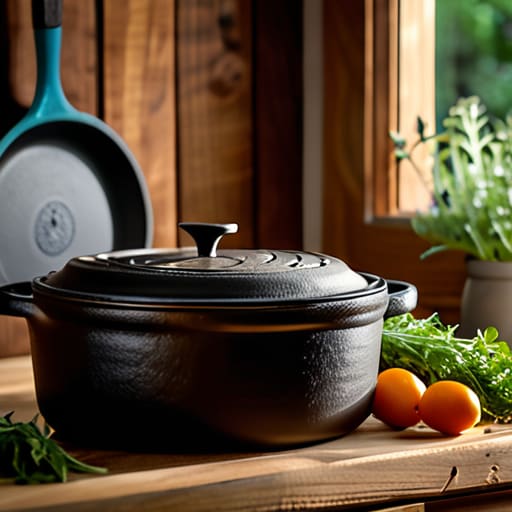
    I’ve spent twenty years in commercial kitchens, and if there is one thing that drives me up the wall, it’s watching people clog their cabinets with single-use gadgets that promise the world but deliver nothing. You don’t need a specialized “soup maker” or a high-tech electric pressure cooker to get a decent meal on the table. Most of that is just expensive marketing fluff designed to take up counter space. If you want to cook like a professional without the clutter, you need to master the most versatile tool in your arsenal: the heavy-duty stock pot. Understanding the true range of stock pot uses is the difference between a kitchen that feels chaotic and one that actually works for you.

    I’m not here to give you some flowery, theoretical lecture on culinary arts. I’m going to give you the straight talk on how to use that one big vessel to handle everything from slow-simmered bone broths to boiling massive batches of pasta for a crowd. My goal is to show you how to stop wasting money on trendy plastic junk and start relying on tools that last a lifetime. Let’s get your kitchen organized and functional, one hearty meal at a time.

    Table of Contents

    Making Homemade Bone Broth for Lasting Vitality
    Making Homemade Bone Broth for Lasting Vitality

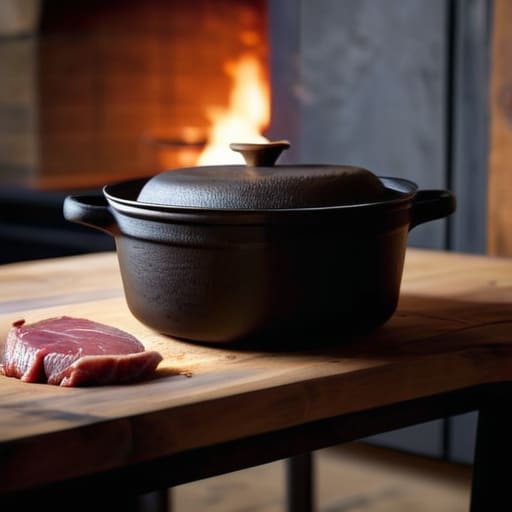
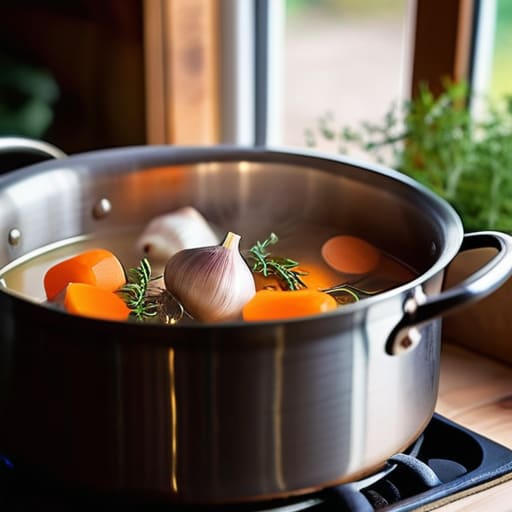
    If you want to see the true value of a heavy-duty pot, look no further than your stovetop on a Sunday afternoon. I’ve spent years in commercial kitchens, and if there is one thing I learned, it’s that you cannot rush a good broth. Making homemade bone broth requires time, patience, and—most importantly—a vessel that can hold a massive amount of bones, aromatics, and water without overheating. This is where the large capacity cookware benefits really shine. Instead of hovering over a small saucepan, you can toss in everything you have and let it simmer low and slow for twelve to twenty-four hours.

    I always recommend batch cooking for meal prep using this method. Once that broth is strained, you aren’t just left with a liquid; you’ve created a nutritional goldmine that you can freeze in small portions. It’s much more efficient than buying those salty, processed cartons from the grocery store. When you have a dedicated pot for this, you aren’t just cooking; you are investing in your pantry for the entire week ahead.

    The Large Capacity Cookware Benefits of Batch Cooking
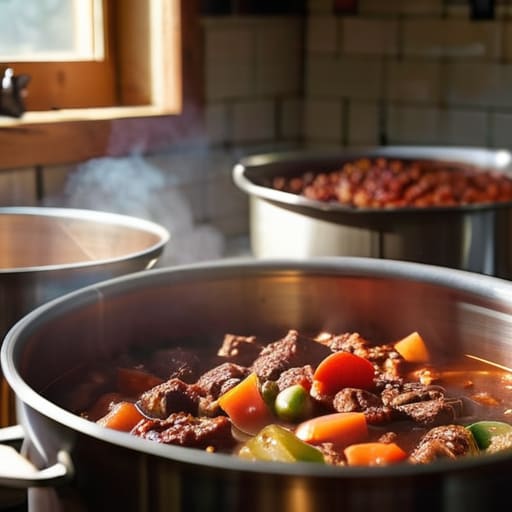
    The Large Capacity Cookware Benefits of Batch Cooking.

    If you’re still cooking every single meal from scratch on a Tuesday night after a long workday, you’re working harder than you need to. I learned the hard way during my years in catering that efficiency is everything. One of the biggest large capacity cookware benefits is the ability to transition from reactive cooking to proactive planning. When you use a heavy-duty pot to prepare a massive batch of chili, lentil stew, or marinara on a Sunday, you aren’t just making dinner; you’re buying yourself time for the rest of the week.

    Batch cooking for meal prep isn’t about eating the same bland leftovers for five days straight; it’s about having a solid foundation in your fridge. I always suggest using a high-quality vessel for this because you need something that can maintain a steady, even heat while cooking large quantities of food without scorching the bottom. Whether you are prepping grains or a hearty vegetable soup, having that extra volume allows you to cook once and eat well multiple times, saving you both money and mental energy.

    Five Ways to Put That Heavy Metal to Work

    • Don’t underestimate the power of a massive boil. Whether you’re prepping a mountain of pasta for a Sunday family dinner or blanching seasonal greens to freeze for later, a stock pot gives you the depth you need to prevent boil-overs and ensure even heat distribution.
    • Use it as your primary vessel for slow-simmered sauces. If you’re making a marinara or a ragu that needs to sit on the back burner for three hours, the thick walls of a proper stock pot will hold that steady, low heat much better than a shallow skillet ever could.
    • Master the art of the meal-prep grain soak. I often use my largest pot to cook up massive batches of quinoa, rice, or farro. Once they’re cooked and cooled, I portion them out into containers for the week; it’s much more efficient than standing over a small saucepan every single morning.
    • Make it your go-to for steaming large quantities. If you have a steamer basket that fits, a stock pot is the perfect base for steaming corn on the cob, whole fish, or even large batches of dumplings. It’s a cleaner, more controlled way to cook than boiling everything into mush.
    • Let it handle the heavy lifting of cornish hen or whole poultry. Instead of struggling with a cramped roasting pan, you can poach a whole chicken or a small bird directly in the pot with aromatics. It keeps the meat incredibly moist and leaves you with a delicious, flavorful liquid at the bottom for your next batch of soup.

    My Golden Rules for Stock Pot Success

    Stop buying cheap, thin-walled pots; a real stock pot needs weight and thickness to distribute heat evenly without hot spots.

    Use your capacity to your advantage by prepping large batches of grains or legumes, which saves you time and energy in the long run.

    Treat your stock pot as a workhorse, not a specialty item—if it can’t handle a heavy simmer or a massive amount of vegetables, it’s not worth the shelf space.

    The Core of a Functional Kitchen

    A stock pot isn’t just another piece of clutter in your cabinet; it’s the workhorse that turns scraps into gold and a single Sunday afternoon of cooking into a week of effortless meals. If you buy it right, you’ll never have to buy it again.

    Rosalind Hayter

    Investing in Longevity
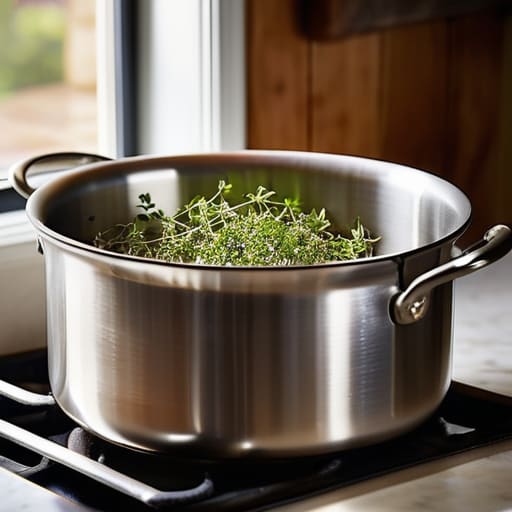
    Investing in longevity with quality cookware.

    At the end of the day, a high-quality stock pot isn’t just another piece of clutter in your cabinet; it is the workhorse of a functional kitchen. Whether you are extracting every bit of nutrition from bones for a rich broth or saving yourself hours of labor through smart batch cooking, this single vessel handles the heavy lifting that flimsy pans simply can’t. I’ve seen too many people buy a dozen specialized gadgets that end up in a junk drawer by next year. Instead, focus on the essentials. If you invest in one heavy-duty, reliable pot, you aren’t just buying cookware—you are investing in your own efficiency and the quality of the food you serve your family.

    My advice is simple: stop chasing the latest kitchen trends and start building a foundation. A well-organized kitchen is built on tools that serve a purpose and habits that stick. When you master the art of using a single, versatile tool like a stock pot, you realize that you don’t need a mountain of plastic to be a great cook. You just need the right equipment and the patience to use it well. Grab your notebook, plan your next big batch, and remember that good cooking is about substance, not how many gadgets you have on your counter.

    Frequently Asked Questions

    How do I know if I should buy a stainless steel stock pot or go with enameled cast iron?

    It really comes down to what you’re actually simmering. If you’re a frequent maker of acidic sauces or tomato-based stocks, go with enameled cast iron; the enamel protects the metal from reacting with the acid, and the heat retention is unmatched. However, if you want a versatile workhorse for boiling pasta or making massive batches of broth without the heavy lifting, a high-quality stainless steel pot is your best bet. It’s lighter, easier to clean, and indestructible.

    Is it worth getting a massive pot if I only cook for two people, or am I just wasting cabinet space?

    I get this question all the time, and my answer is always the same: don’t let “size” intimidate you. If you’re just two people, you don’t need a commercial-sized cauldron, but a decent, heavy-duty stock pot is still a non-negotiable. It’s not about the volume you use every night; it’s about the utility it provides when you do need it. Grab a medium-large one—it’ll save you cabinet space compared to owning five different specialized pots.

    Can I use my stock pot for everyday tasks like boiling pasta, or will it be too cumbersome for small meals?

    Look, I’ll be honest: if you’re just boiling a single serving of pasta, dragging out a massive stock pot is overkill and a pain to clean. But for a standard family meal? It’s actually my go-to. The extra room prevents water from boiling over and gives the noodles space to move without sticking. It’s not “cumbersome” if you use it right—it’s just efficient. Use your smaller saucepans for the small stuff; save the big pot for when you actually need the volume.
  • Benefits of Using Reusable Food Bags

    Benefits of Using Reusable Food Bags

    I spent twenty years in commercial kitchens, and if there is one thing I learned, it’s that most “eco-friendly” kitchen trends are just expensive ways to clutter your cabinets. I see people spending a fortune on these trendy, silicone-style reusable food bags that look great in a staged Instagram photo but leak the second you put a bit of heavy soup in them. It’s frustrating to watch someone throw money at a “sustainable” gadget only to have it end up in the trash three months later because the seal failed or the material warped in the dishwasher. If it doesn’t do the job reliably, it’s just more junk taking up space in your drawers.

    I’m not here to sell you on a lifestyle aesthetic or some overpriced brand name. My goal is to help you find the few, high-quality options that actually stand up to the rigors of a real, working kitchen. I’m going to break down exactly what to look for in reusable food bags so you can stop the cycle of constant replacement. We’re going to focus on durability, ease of cleaning, and actual utility—because a tool is only worth the space it occupies if it actually works.

    Table of Contents

    Invest in Bpa Free Silicone Storage That Lasts

    Invest in Bpa Free Silicone Storage That Lasts

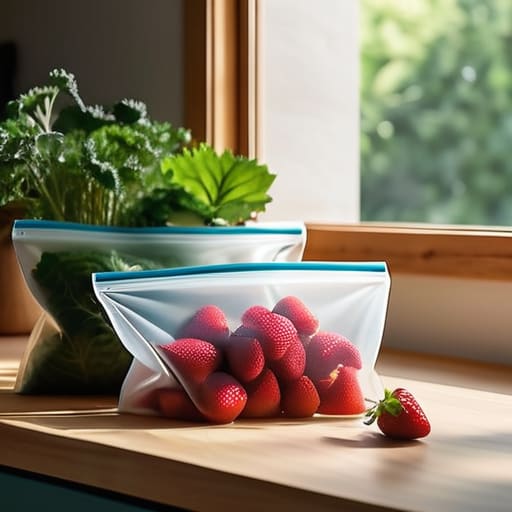
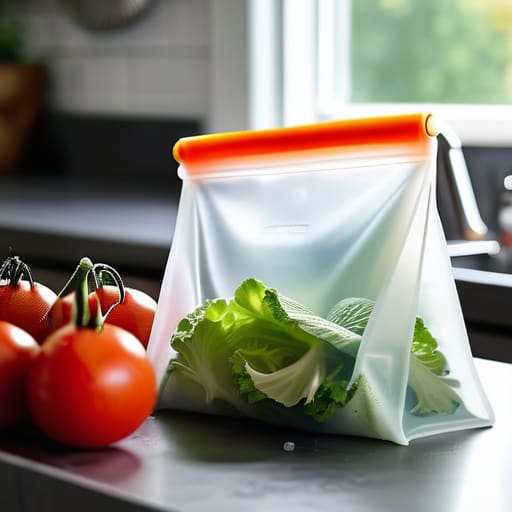
    If you’re tired of fighting with flimsy Ziploc bags that leak in your lunchbox or tear the moment you try to stuff a sandwich inside, it’s time to pivot to something sturdier. I’ve seen enough commercial kitchens to know that durability is everything. That’s why I always tell my clients to look into BPA free silicone storage. Unlike the cheap plastic alternatives that warp after a few trips through the dishwasher, high-quality silicone is virtually indestructible. It handles the freezer, the microwave, and the boiling water of a sous vide bath without breaking a sweat.

    These aren’t just for adults, either; they are excellent reusable snack containers for kids who tend to be a bit rough on their gear. They create a tight seal that actually keeps food fresh, which means less waste and more money staying in your pocket. When you invest in these, you aren’t just buying a container; you’re adopting one of those zero waste kitchen essentials that actually makes your life easier. Just make sure you learn the proper way to wash them so they stay pristine for years.

    Sustainable Food Packaging Alternatives for a Better Kitchen

    Sustainable Food Packaging Alternatives for a Better Kitchen

    If you’re looking to move beyond just silicone, you need to think about how you actually move food from point A to point B. For my clients, I always suggest looking into beeswax wraps as one of those sustainable food packaging alternatives that actually works. They are perfect for covering a bowl of leftover pasta or wrapping half an onion so it doesn’t dry out in the crisper drawer. Unlike plastic wrap, which is a nightmare to untangle and even worse for the planet, these wraps conform to the shape of your food and can be reused for months if you treat them right.

    For those of you tackling heavy-duty meal prep, don’t overlook glass. I’ve seen too many people try to save a few cents on cheap plastic containers only to have them stain, warp, or leach chemicals into a hot meal. If you want true eco friendly meal prep solutions, invest in a set of tempered glass containers with airtight lids. They are sturdy, they don’t hold onto smells, and they won’t crack the first time they hit the dishwasher. It’s about building a kit that survives your busiest weeks without needing a trip to the store to replace broken junk.

    My Rules for Choosing Bags That Won't End Up in the Trash

    • Check the seal before you buy. I’ve seen far too many “reusable” bags that leak the second you put a bit of moisture in them. If the seal isn’t airtight and sturdy, it’s just expensive trash waiting to happen.
    • Stick to food-grade silicone. Skip the cheap, thin plastics that start to smell like chemicals after three washes. Silicone is heat-resistant, dishwasher-safe, and won’t leach nasties into your leftovers.
    • Size matters more than you think. Don’t just buy one size; get a variety. There is nothing more frustrating than trying to cram a bulky sandwich into a tiny bag or wasting a massive pouch on a single lemon.
    • Look for easy-to-clean designs. If a bag has tiny, intricate crevices where old food can get trapped, you won’t use it. You need something smooth and simple that can handle a quick scrub or a trip through the dishwasher.
    • Match the bag to the task. Use heavy-duty silicone for sous vide or reheating, but grab something thinner and more flexible for storing snacks in a lunchbox. One tool shouldn’t be forced to do every single job in your kitchen.

    My Rules for a Practical, Zero-Waste Pantry

    Stop chasing trends and buy high-quality silicone or glass; if a container feels flimsy in your hand, it’s just more future landfill.

    Focus on functionality over aesthetics—a bag is only useful if it actually seals properly and fits into your existing workflow.

    View your storage tools as long-term investments rather than disposable expenses; buying once and buying well saves you more money in the long run.

    ## Stop Paying for Trash

    “I’ve seen enough commercial kitchens to know that if a tool isn’t durable enough to survive a daily rush, it doesn’t belong in your drawer. Stop wasting your hard-earned money on flimsy plastic bags that end up in a landfill by Tuesday; invest in reusable storage that actually holds its shape and does its job.”

    Rosalind Hayter

    Making the Switch Stick

    Making the Switch Stick with silicone tools.

    At the end of the day, moving away from single-use plastic isn’t about achieving some impossible standard of perfection; it’s about making smarter, more intentional choices for your pantry. We’ve talked about why investing in high-quality, BPA-free silicone is a better use of your hard-earned money and how switching to durable alternatives can actually simplify your kitchen workflow. When you stop cycling through a constant stream of flimsy, disposable bags that tear the moment they get wet, you aren’t just helping the environment—you are decluttering your mental space and your cabinets. A kitchen filled with tools that actually perform is a kitchen that stays organized and efficient.

    I know it can feel overwhelming to overhaul everything at once, but I promise you don’t have to do it all by Monday. Start with one thing—maybe it’s replacing your sandwich bags or upgrading your vegetable storage—and see how it feels to own something that doesn’t feel like trash the second you use it. My philosophy has always been that a well-run kitchen is built on a foundation of quality, not quantity. Focus on building a collection of gear that you can rely on year after year. Once you stop settling for the disposable junk, you’ll realize that true kitchen efficiency comes from owning less, but owning much better.

    Frequently Asked Questions

    Are silicone bags actually safe to use in the microwave or dishwasher, or will they degrade after a few months?

    Look, I’ve seen enough cheap kitchen gadgets end up in a landfill to know that “durability” is often just a marketing buzzword. If you buy high-quality, food-grade silicone, it’ll handle the dishwasher and microwave without breaking a sweat. Just avoid the bottom-shelf stuff that feels flimsy. Real silicone shouldn’t degrade or leach after a few months; if it does, you bought the wrong brand. Invest once, use it daily, and stop worrying.

    How do I prevent these reusable bags from getting that weird, slimy buildup or lingering food odors?

    Look, I’ve seen it happen in professional kitchens too—you neglect them, and they start to smell like a science experiment. To avoid that slimy buildup, you have to stop just rinsing them. Give them a proper scrub with a soft brush and mild, unscented soap after every single use. If odors linger, soak them in a diluted vinegar solution for twenty minutes. And please, let them air dry completely before you fold them away.

    Is it actually more cost-effective to buy high-end reusable bags, or am I better off just sticking to a heavy-duty roll of plastic wrap?

    Look, I get the temptation to stick with the plastic wrap—it’s cheap upfront. But if you’re looking at the math over a year, those rolls are a money pit. You’re constantly replacing them, and they end up in a landfill every single time. Invest in a few high-quality silicone bags or beeswax wraps now. They’ll cost more today, but they’ll pay for themselves in months by ending your endless cycle of buying plastic junk.

  • How to Clean and Maintain a Blender

    How to Clean and Maintain a Blender

    I’ve spent two decades in commercial kitchens where equipment failure isn’t just an inconvenience—it’s a disaster that halts service mid-rush. I’ve seen too many people drop a hundred dollars on a high-speed machine only to have it smell like burning plastic within six months because they treated it like a disposable gadget. Most of the advice you find online about blender maintenance is either way too complicated or just plain wrong, pushing expensive, branded cleaning kits that you absolutely do not need. If you aren’t taking care of the motor and the seals, you aren’t just wasting money; you’re throwing it straight into the trash.

    I’m not here to sell you a subscription to a cleaning service or a specialized chemical solution. I’m going to give you the straight truth about how to keep your tools running for a lifetime using nothing more than common sense and a few basic habits. We are going to focus on the practical realities of cleaning, blade care, and motor protection so you can stop replacing your kitchen gear every two years. Let’s get your machine working for you, not the other way around.

    Table of Contents

    Preventing Blender Motor Burnout Through Better Habits

    Preventing Blender Motor Burnout Through Better Habits

    Most people think a blender dies because it’s “cheap,” but in my experience, it’s usually because they treat the motor like an invincible beast. If you hear that high-pitched whine or smell something slightly metallic, stop immediately. You aren’t just making a smoothie; you’re pushing the machine to its breaking point. Preventing blender motor burnout comes down to one simple rule: don’t overload the jar with frozen chunks or heavy nut butters without enough liquid. If the blades struggle to catch the ingredients, the motor works twice as hard to compensate, and that’s exactly when the internal components start to cook themselves.

    Another habit that saves both your motor and your wallet is learning how to pulse rather than just hitting “high” and walking away. Give the machine a second to breathe. If you find yourself constantly removing stuck food from blender jars mid-cycle, your ratio is off. A little bit of patience and a bit more liquid will do more for extending kitchen appliance life than any fancy cleaning solution ever could. Treat the motor with respect, and it’ll serve you for a decade.

    Deep Cleaning Blender Pitcher Without the Scouring Pads

    Deep Cleaning Blender Pitcher Without the Scouring Pads

    Most people make the mistake of grabbing a heavy-duty scouring pad and scrubbing like they’re trying to remove rust from a ship’s hull. Stop that. You aren’t just cleaning a container; you’re working around precision edges. If you want to master cleaning blender blades safely, you need to stop treating the pitcher like a piece of ceramic. Instead, use the self-cleaning method I used to rely on in commercial kitchens: fill the jar halfway with warm water and a single drop of high-quality dish soap, then run it on high for thirty seconds. It does the heavy lifting for you without risking a nicked finger or a scratched surface.

    For those stubborn, dried-on bits that the soap cycle missed, don’t reach for the steel wool. Instead, try deep cleaning blender pitcher components by using a soft silicone brush or even a bit of coarse kosher salt and ice. The salt acts as a gentle abrasive that breaks down residue without damaging the finish. If you notice a lingering smell or a gummy texture near the base, check your gasket. Sometimes what feels like “dirt” is actually a sign that you’ll soon need a blender seal replacement to keep everything airtight and hygienic.

    Five Non-Negotiable Rules for Keeping Your Blender Running

    • Stop overloading the pitcher with frozen chunks; if you’re trying to blend a mountain of ice and hard fruit all at once, you’re just begging for a burnt-out motor. Use liquids to create a vortex first.
    • Check your blade assembly regularly for any wobbling or looseness. A loose blade isn’t just a noise nuisance; it’s a sign that the seal is failing and your motor is working twice as hard as it should.
    • Don’t let dried residue sit in the gasket overnight. That little rubber ring is where bacteria and old food hide, and if it gets stiff or cracked from neglect, your blender will start leaking all over your counter.
    • Listen to the machine. If you hear a high-pitched whine or a sudden change in the hum, stop immediately. It’s much cheaper to pause and fix a small issue than to replace a dead unit because you ignored the warning signs.
    • Invest in a high-quality, heavy-duty base rather than a lightweight plastic model. If you want a tool that survives more than two years of real use, you need weight and stability to handle the torque.

    The Bottom Line on Keeping Your Blender Running

    Don’t push your motor to its breaking point; if you smell something burning or the blades slow down, stop immediately and let the machine catch its breath.

    Clean your pitcher right after you use it—letting dried smoothie residue sit is just asking for a scrubbing battle that wears down the seals.

    Invest in quality and treat your gear with respect; a well-maintained blender is a tool for life, not another piece of plastic destined for the landfill.

    ## A Lesson in Longevity

    “A blender isn’t a disposable appliance you replace every two years; it’s a tool. If you treat it with a little respect—clean it properly and don’t force the motor to do work it wasn’t built for—it’ll serve you for a decade. Stop looking for the next shiny gadget and start taking care of the one you already have.”

    Rosalind Hayter

    Stop Replacing, Start Maintaining

    Stop Replacing, Start Maintaining your blender.

    At the end of the day, maintaining your blender isn’t about following a complicated manual; it’s about respecting the tool. We’ve covered how to protect that motor by not overloading it, and how to keep the pitcher pristine without stripping the finish with harsh abrasives. If you take those few extra seconds to rinse it out immediately and avoid running it on high for things that don’t require it, you are already ahead of ninety percent of the people I see in professional kitchens. It’s the difference between owning a piece of equipment that actually serves you and owning another piece of countertop clutter that’s destined for a landfill in eighteen months.

    My goal has always been to help you build a kitchen that works for your life, not one that demands constant repairs and replacements. When you invest in quality gear and back it up with disciplined habits, you stop being a consumer and start being a cook. Don’t let a little bit of dried smoothie or a strained motor derail your rhythm. Take care of your tools, and they will take care of you for decades. Now, put that notebook away, clean your station, and go make something worth eating.

    Frequently Asked Questions

    How can I tell if my blender motor is actually dying or if I'm just overloading it?

    Listen, I’ve seen this a dozen times in commercial kitchens. If your blender smells like ozone or starts stuttering, don’t panic and don’t immediately go shopping for a new one. First, stop what you’re doing and let it cool down completely. If it runs fine once it’s rested and you’ve lightened the load, you were just pushing it too hard. But if it smells burnt even with just water and a drop of soap? That motor is toast.

    Is it worth investing in a high-end glass pitcher, or are the plastic ones actually better for daily use?

    If you’re asking me, go with glass every single time. Plastic might seem convenient because it’s lightweight, but it’s a trap. It scratches, it stains, and eventually, it starts to smell like whatever you blended last Tuesday. A heavy-duty glass pitcher is an investment in hygiene and longevity. It won’t leach chemicals into your smoothies, and it stays clear for years. Buy the glass; it’s one less piece of disposable junk to replace.

    What’s the best way to deal with that nasty buildup around the blade assembly without ruining the seals?

    Don’t go at it with a toothbrush and harsh chemicals; you’ll just degrade the rubber seals and end up with a leaky mess. Instead, fill the pitcher halfway with warm water and a few drops of mild dish soap. Pulse it on high for thirty seconds. If there’s stubborn gunk, add a tablespoon of baking soda to that mixture and let it sit for ten minutes. It breaks down the residue without attacking the integrity of the gaskets.

  • A No-nonsense Guide to Seasoning Cast Iron: Skip the Hype and Build a Lifetime Finish

    A No-nonsense Guide to Seasoning Cast Iron: Skip the Hype and Build a Lifetime Finish

    I remember standing in a commercial kitchen ten years ago, watching a young line cook nearly toss a perfectly good skillet into the trash because it had a bit of surface rust. He thought it was ruined, but I knew better. Most people treat their cookware like it’s disposable, thinking they need to buy a new non-stick pan every time a coating chips. That is a massive waste of money. Learning how to season a cast iron skillet isn’t some complicated culinary ritual reserved for professionals; it’s simply about building a protective layer of polymerized oil that makes the metal work for you.

    I’m not here to give you a complicated recipe or tell you that you need expensive, specialized oils to get the job done. In this guide, I’m stripping away the fluff to show you the practical, no-nonsense way to maintain your gear. I’ll walk you through the exact steps of how to season a cast iron skillet so you can stop worrying about food sticking and start enjoying a tool that actually gets better with age. Let’s get to work.

    Guide Overview

    Total Time: 1-2 hours
    Estimated Cost: $5-15
    Difficulty: Beginner

    Tools & Supplies

    • Oven (for heating the skillet)
    • Paper towels (for applying oil)
    • Kitchen scale (optional, for measuring oil)
    • Cast iron skillet (1 unit)
    • Cooking oil (high smoke point, e.g., flaxseed or grapeseed, 1-2 tablespoons)
    • Mild dish soap (for initial cleaning, 1 small amount)

    Step-by-Step Instructions

    • 1. First, you need to get that pan clean. If you’ve just pulled a crusty, burnt mess out of the cupboard, grab a stiff brush and some warm water. I know, I know—the purists will tell you never to use soap, but if you’re dealing with old food residue, a tiny drop of mild dish soap won’t ruin a well-seasoned pan. Just make sure you scrub every inch of the surface and dry it immediately with a lint-free towel. Never, ever let it air dry, or you’re just inviting rust to the party.
    • 2. Once it’s bone-dry, put the skillet back on a low burner for a few minutes. I call this the “evaporation phase.” Even if it feels dry to the touch, moisture loves to hide in the microscopic pores of the iron. You want to ensure the metal is completely dehydrated before you even think about adding oil. Keep a close eye on it; we’re just looking to drive out the dampness, not cook the metal.
    • 3. Now, pick your oil. This is where most people mess up by grabbing whatever vegetable oil is sitting in the pantry. You want something with a high smoke point and minimal impurities. I personally swear by grapeseed oil or flaxseed oil because they create a sturdy, hard film. Avoid extra virgin olive oil for this step—it’ll burn too quickly and leave your pan feeling gummy and gross.
    • 4. Pour about a teaspoon of oil into the warm pan and grab a paper towel. Spread the oil around until the entire surface—the bottom, the sides, and even the handle—is thinly coated. Here is the golden rule: you want to wipe it all off until it looks like there’s almost nothing left. If you leave a thick layer of oil, you won’t get a smooth seasoning; you’ll get a sticky, tacky mess that’s a nightmare to clean later.
    • 5. Slide that pan into your oven. Set it to around 450°F (or about 230°C) and place the skillet upside down on the middle rack. Putting it upside down prevents any excess oil from pooling in the bottom of the pan. Let it bake for at least an hour. This intense, consistent heat is what actually polymerizes the oil, turning that liquid fat into a hard, protective layer that’s bonded to the iron.
    • 6. Once the hour is up, turn the oven off but do not touch the pan. Let the skillet cool down completely inside the oven. I’ve seen people rush this part, pulling the pan out while it’s still screaming hot, only to have the seasoning crack or peel. Patience is a tool, just like a good knife, and it’s just as necessary for a successful seasoning.
    • 7. Repeat this process if you’re starting from scratch or if the pan looks dull. One layer of oil is a start, but a truly bulletproof skillet comes from building up multiple thin layers over time. If you do this regularly after every heavy use, you won’t have to worry about seasoning it again for years.

    The Polymerization Process Explained Building a Lifetime Bond

    The Polymerization Process Explained Building a Lifetime Bond

    Now, I know that seeing a pan go from dull grey to a deep, slick black can feel a bit intimidating if you’re doing it for the first time. You might find yourself staring at that skillet wondering if you’ve gone too far or if you’ve missed a spot. If you ever feel stuck or just want to bounce some ideas off someone who gets the obsession with proper maintenance, I always suggest checking out the Casualwestmidlands chat. It’s a great place to find real-world advice from people who actually use their gear every day, rather than just reading theoretical nonsense. Sometimes, a quick bit of community wisdom is exactly what you need to gain the confidence to keep cooking.

    Look, I know “polymerization” sounds like something out of a chemistry textbook, but you don’t need a degree to understand what’s happening in your pan. When you heat that oil to a specific temperature, it isn’t just sitting there; it’s undergoing a chemical transformation. The oil molecules bond together and create a hard, plastic-like layer that is fused directly to the metal. This isn’t just a coating you can scrub off—it’s a permanent part of the pan’s surface. That is exactly how you build a non-stick foundation that actually lasts.

    If you find yourself wondering how to fix a sticky cast iron pan, it’s usually because you didn’t let that layer cure properly or you used too much oil. A common mistake is applying a thick layer that turns gummy instead of thin, even layers that bake into a smooth finish. To get it right, focus on the polymerization process explained through patience: thin layers, high heat, and consistent application. Once you master this, you aren’t just cooking; you’re building a tool that will outlive us both.

    Choosing the Best Oil for Cast Iron Seasoning

    Now, let’s talk about what you’re actually putting in that pan. I see people at specialty shops wasting money on expensive “seasoning blends” that are really just overpriced oils. You don’t need a magic potion; you need an oil with a high smoke point that can stand the heat. For most of my daily work, I swear by grapeseed oil because it’s incredibly stable. If you can’t find that, flaxseed oil is a popular choice, but be careful—it can get gummy if you aren’t precise.

    The goal here is to find the best oil for cast iron seasoning that will actually undergo that chemical transformation we talked about earlier. If you use an oil with a low smoke point, like extra virgin olive oil, you’ll end up with a tacky, uneven mess. If you find yourself struggling with how to fix a sticky cast iron pan, it’s almost certainly because the oil you chose didn’t polymerize correctly. Stick to high-heat oils, apply them in thin, translucent layers, and you’ll build a surface that lasts decades.

    Five Rules to Keep Your Skillet from Failing You

    • Stop overthinking the “soap” debate; a little mild dish soap won’t strip a well-seasoned pan, but leaving food scraps to rot in the corners certainly will.
    • Don’t rush the heat; if you aren’t seeing a tiny bit of wispy smoke, that oil isn’t polymerizing, and you’re just making a greasy mess instead of a protective layer.
    • Keep your layers thin—I see people globbing oil on like they’re frying chicken, but you want to wipe it out until the metal looks almost dry to avoid a tacky, uneven finish.
    • Treat your cast iron like a living thing by drying it thoroughly on a warm stovetop burner after every wash; moisture is the enemy of a good seasoning.
    • Skip the fancy “specialty” seasoning sprays and stick to high-smoke point oils you actually have in your pantry; consistency is better than chasing trends.

    The Long Game in Your Kitchen

    At the end of the day, seasoning your skillet isn’t some complicated chemistry experiment; it’s just about being consistent. Remember that it all comes down to choosing the right oil, applying thin layers, and letting that heat do the heavy lifting through polymerization. You don’t need a cabinet full of fancy sprays or expensive specialty cleaners to get the job done. Just keep your pans clean, dry them thoroughly every single time, and don’t be afraid to re-season a spot if it starts to look dull. If you stick to these basics, you aren’t just maintaining a pan; you are building a foundation for every meal you cook from here on out.

    I’ve spent decades in commercial kitchens where equipment was treated like disposable hardware, but my personal kitchen is different. I want my tools to have a story. Every time you pull that seasoned skillet out of the cupboard, you’re using something that has been shaped by your own hands and your own heat. Stop worrying about making it “perfect” on the first try and just start using it. A well-loved skillet is a living thing that gets better with every sear and every sauté. Treat it with respect, and I promise it will be the most reliable partner you have in your kitchen for the next fifty years.

  • The 7 Best Essential Tools for Every Home Cook to Master the Kitchen

    The 7 Best Essential Tools for Every Home Cook to Master the Kitchen

    I’ve spent twenty years in commercial kitchens and high-pressure catering environments, and if there is one thing I’ve learned, it’s that a cluttered drawer full of single-use plastic gadgets is the enemy of a good meal. Most people walk into a kitchen store and see a shiny new tool for every niche task, but they end up with a graveyard of expensive junk that just gets in the way. You don’t need a gadget that peels an apple or chops a single clove of garlic; you need a foundation of reliability. Finding the true essential tools for every home cook isn’t about how much you spend, but about choosing pieces that actually stand the test of time.

    In this post, I’m cutting through the marketing noise to give you my no-nonsense shortlist. I’ve narrowed it down to just seven items—the heavy hitters that I’ve relied on from professional banquet halls to my own small kitchen. I’m going to show you exactly which tools are worth your hard-earned money and which ones you should leave on the store shelf. By the time we’re done, you’ll have a streamlined, functional setup that works for you, not against you.

    A Chef’s Knife That Doesn't Lie

    A Chef’s Knife That Doesn't Lie.

    Before you start clearing out your cabinets to make room for these essentials, I always tell my clients to take a hard look at what they actually use versus what they just keep because it looked pretty in a catalog. If you find yourself overwhelmed by the clutter, sometimes the best thing you can do is step away from the kitchen and clear your head; I’ve found that even a quick trip to find a ts escort norwich can provide that much-needed mental reset before you dive into a big reorganization project. Once you’ve regained your focus, you’ll be much better equipped to decide which pieces are truly worth the counter space and which ones are just taking up room.

    Most people walk into a kitchen store and get distracted by flashy sets with twelve different blades. Let me save you the headache: you only need one high-quality chef’s knife that actually feels balanced in your hand. I spent years in commercial kitchens where a dull or poorly weighted knife wasn’t just annoying; it was a safety hazard. If you can’t control the blade, you can’t cook with confidence.

    The Heavyweight Champion: Cast Iron

    If there is one thing I refuse to let anyone replace with a non-stick coated pan, it’s cast iron. I spend my weekends restoring old pieces I find at estate sales, and frankly, they perform better than anything you’ll find on a big-box store shelf today. A seasoned cast iron skillet provides a level of heat retention that is absolutely essential for getting a proper sear on a steak or baking a foolproof cornbread.

    Stop Using Plastic Spatulas

    I see it all the time when I’m helping clients organize their kitchens: a drawer full of melted, warped plastic spatulas. It’s a waste of space and a waste of money. Instead, you should invest in a couple of solid silicone spatulas and a sturdy stainless steel turner. These are the workhorses that handle the high heat of a sauté pan without degrading or leaving weird residue behind.

    The Truth About Cutting Boards

    Please, for the love of your countertops, stop using those flimsy, thin plastic boards that slide around the second you touch them. They are unstable and they dull your knives faster than you can imagine. I always recommend a thick, heavy wood cutting board—something like maple or walnut. A heavy board stays put, providing a stable surface that makes chopping much safer and more efficient.

    Stainless Steel for the Long Haul

    When it comes to your pots and pans, skip the multi-layer “non-stick” promises and go straight for tri-ply stainless steel. In my catering days, we relied on stainless because it is incredibly durable and doesn’t react with acidic ingredients like tomatoes or lemon juice. You want a pot that can go from the stovetop to the oven without a second thought.

    A Real Measuring Tool

    I know, I know—cooking feels like an art, and many of you want to “eyeball it.” But if you want consistent results, especially when you’re working with baking or delicate sauces, you need accurate measuring tools. I’m not talking about those plastic sets that lose their shape after three washes. Get yourself some heavy-duty stainless steel measuring cups and spoons.

    The Only Colander You Need

    Most people buy a giant, oversized colander that takes up half a cabinet and is rarely used. You don’t need a gadget for every single task; you just need one sturdy, stainless steel strainer that can handle multiple jobs. A good one can drain pasta, rinse delicate greens, or even act as a sieve for straining out lumps in a sauce.

    The Bottom Line

    At the end of the day, building a functional kitchen isn’t about filling every inch of your drawer with shiny new arrivals from a catalog. It’s about the heavy hitters: a sharp chef’s knife, a reliable cast iron skillet, and a solid cutting board that won’t wobble when you’re in a rhythm. If you focus on these core essentials, you’ll find that you aren’t just saving money; you’re actually simplifying your workflow. When you strip away the clutter of single-use gadgets, you’re left with a streamlined workspace where you can actually breathe and focus on the food in front of you.

    I’ve spent decades in high-pressure kitchens and quiet home spaces alike, and I can tell you this: the tools don’t make the cook, but they certainly stop them from struggling. Don’t let a lack of fancy equipment intimidate you into staying away from the stove. Instead, treat your tools with respect, keep them clean, and use them often. Once you stop chasing the next big kitchen trend and start mastering the basics that last a lifetime, you’ll realize that cooking isn’t a chore to be managed—it’s a skill to be enjoyed. Now, grab your notebook, check your pantry, and get to work.

  • Stop Chasing Surface-level Tidy and Start Building a Space That Endures: My Essential Tips for Deep Cleaning a Living Room.

    Stop Chasing Surface-level Tidy and Start Building a Space That Endures: My Essential Tips for Deep Cleaning a Living Room.

    I spent twenty years managing commercial kitchens where “clean” wasn’t a suggestion—it was a survival requirement. I’ve seen people spend a fortune on specialized, scented sprays and high-tech gadgets that promise to transform their homes, but frankly, most of it is just expensive marketing fluff. If you’re looking for a magic wand in a spray bottle, you’re in the wrong place. Real efficiency comes from understanding the mechanics of your space, not from buying more plastic junk. When it comes to finding actual tips for deep cleaning a living room, you don’t need a shopping spree; you need a disciplined system that targets the grime you can’t see until it’s too late.

    I’m not here to give you a list of trendy hacks that won’t last through the week. My goal is to provide you with a practical, no-nonsense blueprint based on years of professional organizing and heavy-duty cleaning. I will show you how to strip back the layers of dust and clutter using tools that actually work, ensuring your living space feels truly restored rather than just surface-level tidy. We’re going to focus on longevity, not just a quick fix.

    Mastering Upholstery Cleaning Techniques for Longevity

    Mastering Upholstery Cleaning Techniques for Longevity.

    While you’re focusing on the physical grime, don’t forget that a truly clean space is also about the mental clarity it provides once the clutter is gone. I’ve found that when the house is finally reset, it’s the perfect time to reconnect with yourself or find a bit of adult companionship to unwind with; if you need a distraction after all that hard work, you might find something interesting on this chat site. It’s all about finding that balance between a disciplined home and a life that actually feels lived-in and enjoyable.

    Most people treat their sofa like a piece of furniture that just exists, but I look at it as the hardworking engine of the living room. If you want your pieces to last decades instead of years, you have to move beyond the occasional vacuuming. Real upholstery cleaning techniques start with a thorough inspection of the care labels; there is no point in using a steam cleaner on a fabric that’s going to shrink or pill. I always recommend a dry vacuuming with a brush attachment first to pull the grit out from the deep crevices before any moisture touches the fibers.

    Once you’ve cleared the loose debris, address the spots. Don’t go scrubbing like you’re trying to polish silver; that just pushes the pigment deeper into the weave. Instead, blot—always blot—using a mild solution tailored to your specific fabric. If you’re dealing with stubborn marks, removing stains from living room rugs or fabric cushions requires patience and a gentle hand. It’s about preservation, not aggression. If you treat your upholstery with a bit of professional respect, it will reward you with years of comfort.

    A Dusting High Surfaces Guide for True Clarity

    Most people treat dusting like a quick swipe across a coffee table, but if you aren’t looking up, you’re missing half the battle. Dust doesn’t just sit on your shelves; it settles on crown molding, ceiling fans, and the tops of picture frames, eventually drifting down to ruin the air quality of your entire space. I always tell my clients to start from the top and work their way down. If you don’t follow a proper dusting high surfaces guide, you’ll just end up knocking all that debris right back onto the furniture you just finished cleaning.

    Don’t reach for those flimsy, disposable feather dusters that just move the particles around. Grab a high-quality microfiber cloth or a damp rag to actually trap the grime. When you’re working on the higher reaches, pay special attention to cleaning window tracks and blinds, as these areas tend to collect thick, gray layers of soot and pollen that are easy to overlook. It’s tedious work, I know, but once those high spots are clear, the whole room feels lighter. It’s about more than just looks; it’s about maintaining a clean environment that actually stays clean for more than a week.

    Stop Shuffling the Dust: 5 Hard-Hitting Tactics for a Truly Clean Living Space

    • Get the floors on their knees. Don’t just run a vacuum over the surface and call it a day; you need to pull the furniture back and get into those neglected corners where the grit builds up. If you have hardwoods, use a damp—not soaking—microfiber mop to lift the grime rather than just pushing it around.
    • Treat your textiles with respect. Beyond the upholstery we already discussed, don’t forget your throw pillows and heavy drapes. If they aren’t machine washable, take them outside and give them a proper shake or a gentle vacuuming with the brush attachment to prevent dust from settling into the fibers.
    • Clean the “invisible” surfaces. We often overlook the things our hands touch every single day—light switches, remote controls, and door handles. Grab a cloth with a bit of rubbing alcohol and wipe these down; it’s the only way to actually sanitize the room instead of just making it look pretty.
    • Tackle the baseboards and trim. This is where most people quit, but it’s exactly where the fine layer of gray film lives. Use a damp cloth or an old toothbrush to get into the grooves of the molding. It’s tedious, I know, but it makes the whole room feel sharper and more intentional.
    • Audit your clutter while you work. Deep cleaning isn’t just about dirt; it’s about space. As you move through the room, if you find something that doesn’t serve a purpose or hasn’t been touched in a year, put it in a box. A cluttered room is a magnet for dust, and you can’t clean your way out of poor organization.

    The Long View on a Clean Home

    At the end of the day, deep cleaning isn’t about chasing a temporary sparkle or making your living room look like a staged showroom for five minutes. It’s about the systems you put in place—tackling the high-up dust that settles on your mantels and treating your upholstery with the respect it deserves so it doesn’t wear out prematurely. When you stop treating cleaning like a frantic weekend chore and start treating it like preventative maintenance, the work becomes much lighter. Focus on the surfaces that actually touch your life, use tools that won’t break after a month, and don’t skip the details. If you take care of the foundation, you won’t find yourself constantly fighting a losing battle against the grime.

    I’ve spent my career managing high-pressure environments where everything had its place, and if there is one thing I’ve learned, it’s that your surroundings dictate your headspace. A cluttered, dusty room is just physical noise that keeps you from actually relaxing. Don’t get caught up in the cycle of buying every new “miracle” cleaning spray on the market; just grab some reliable tools and get to work. When you finish, don’t just walk away—take a moment to actually sit in the stillness you’ve created. You aren’t just cleaning a room; you are maintaining the sanctuary where your life actually happens.

  • Whether a Cookware Set Beats Buying Separately

    Whether a Cookware Set Beats Buying Separately

    I’ve spent twenty years in commercial kitchens and high-pressure catering environments, and if there’s one thing I’ve learned, it’s that a shiny, twenty-piece box sitting on a department store shelf is usually a lie. Most people think they’re finding incredible cookware set value when they buy those massive, colorful collections, but they’re actually just paying for three useful pans and seventeen pieces of disposable junk that will peel or warp before the year is out. I’ve seen it a thousand times: people spend a fortune on a “complete” set only to realize they can’t actually sear a steak or simmer a sauce without something sticking or breaking.

    I’m not here to sell you on a lifestyle or a fancy brand name; I’m here to tell you how to build a kitchen that actually works. I’m going to show you how to cut through the marketing noise and identify what truly constitutes real value in a kitchen. We’re going to focus on durability, material integrity, and utility—the things that matter when the heat is on. By the time we’re done, you’ll know exactly how to invest in tools that will last you a lifetime rather than cluttering your cabinets with expensive trash.

    The Trap of Cheap Sets a Cost Per Piece Analysis

    The Trap of Cheap Sets a Cost Per Piece Analysis

    When you’re browsing online, it’s easy to get seduced by those massive 15-piece sets that promise everything you’ll ever need for under a hundred bucks. They look like a steal, but that’s where the math starts to fail you. If you perform a quick cost per piece analysis, you’ll realize you aren’t actually buying quality; you’re buying volume. Most of those extra pieces are filler—tiny saucepans you’ll use once a year or flimsy lids that don’t even fit right. You end up paying for a dozen mediocre items when you really only needed three or four solid ones.

    In my years managing commercial kitchens, I learned that a durable kitchenware investment isn’t about how much stuff you have in the cabinet, but how much work each piece can actually handle. When you compare a cookware set vs individual pans, the individual route almost always wins for long-term value. Instead of a mountain of cheap, non-stick coating that will flake off by next Christmas, I’d rather see you build an essential kitchen pan collection one piece at a time. Buy one heavy-duty skillet today, and a reliable Dutch oven next month. It takes longer, but your wallet—and your dinner—will thank you.

    Building a Durable Kitchenware Investment That Actually Lasts

    If you want to stop the cycle of replacing scratched pans every two years, you need to stop thinking about “sets” and start thinking about a durable kitchenware investment. In my years managing commercial kitchens, I saw how quickly a massive 20-piece set becomes a graveyard of useless gadgets. Most people don’t need a tiny butter warmer or a specialized egg poacher; they need a few heavy-duty workhorses. Instead of chasing a high piece count, I recommend focusing on an essential kitchen pan collection that covers your actual cooking needs: a high-quality stainless steel skillet, a heavy Dutch oven, and a reliable cast iron piece.

    When you weigh a cookware set vs individual pans, the math almost always favors the latter if you’re looking for longevity. It might feel more expensive upfront to buy three stellar pieces than one mediocre set, but you’re paying for materials like tri-ply stainless steel or seasoned iron rather than cheap coatings. My advice? Stick to a basic kitchen essentials checklist and buy one great tool at a time. You’ll end up with a kitchen that actually works for you, rather than a cupboard full of plastic junk.

    How to Spot Real Value Before You Open Your Wallet

    • Stop looking at the number of pieces in a box. I’ve seen “20-piece sets” that include three flimsy spatula sets and a tiny saucepot no one ever uses. Real value isn’t about quantity; it’s about having five heavy-duty pieces that actually do the work.
    • Prioritize material over marketing. A flashy box won’t help you when a non-stick coating starts flaking off after six months. Look for tri-ply stainless steel or heavy-gauge cast iron—things that can handle high heat and won’t end up in a landfill by next year.
    • Check the weight, not the price tag. If a pan feels light and hollow in your hand, it’s going to have hot spots and cook your food unevenly. A piece with some heft tells me it has the thermal mass to actually hold a steady temperature.
    • Buy for versatility, not specialty. You don’t need a dedicated “omelet pan” or a “pasta pot” that takes up half your cabinet. Invest in a solid 12-inch skillet and a high-quality Dutch oven; those two can handle 90% of what you’ll ever need to cook.
    • Think about the “repairability” factor. A cheap set is a disposable set. When one pan fails, the whole set is garbage. When you buy high-quality individual pieces or modular sets, you can replace one item without throwing away your entire kitchen investment.

    My Golden Rules for Not Wasting Your Money

    Stop looking at the total number of pieces in a set; a 15-piece kit of flimsy, non-stick pans is worth far less than three high-quality, heavy-duty pans you’ll actually use every day.

    Prioritize material integrity over convenience by investing in stainless steel, cast iron, or carbon steel—tools that can handle high heat and won’t end up in a landfill when a coating starts to peel.

    Buy for the long haul by choosing modular pieces rather than pre-packaged bundles, so you can replace a single worn-out pan instead of tossing an entire set just because one part failed.

    Making the Smart Call

    At the end of the day, finding true value in a cookware set isn’t about finding the lowest price tag on a website; it’s about understanding what you’re actually paying for. We’ve looked at how those cheap, twenty-piece sets are usually just a collection of thin, disposable pans that will end up in a landfill by next year. Instead, I want you to focus on the long-term utility of your tools. Whether you decide to buy a high-quality stainless steel set or piece together a collection of heavy-duty cast iron and copper, remember that a smaller number of professional-grade pieces will always outperform a mountain of mediocre gadgets.

    My advice is simple: stop shopping for “stuff” and start shopping for functionality. A kitchen isn’t a showroom, and you don’t need every trendy gadget to be a great cook. When you invest in tools that are built to endure, you aren’t just buying pans; you are building a foundation for a lifetime of shared meals and reliable cooking. Do the work now to get it right, and your future self—and your wallet—will thank you every single time you turn on the stove.

    Frequently Asked Questions

    Is it actually cheaper in the long run to buy individual pieces rather than a pre-packaged set?

    Look, if you’re asking me, the answer is almost always yes. Pre-packaged sets are designed for convenience, not value. They force you to pay for three oversized pans you’ll never use just to get that one decent skillet. When you buy individual pieces, you’re curating a kit that actually fits your cooking habits. You spend more upfront, sure, but you aren’t paying for filler. You’re investing in quality where it actually matters.

    How can I tell if a "high-end" set is actually quality craftsmanship or just expensive branding and marketing?

    Look past the shiny box and the fancy logo. I always check the weight and the construction first. Pick up a pan; if it feels flimsy or hollow, it’s just marketing fluff. Check the rivets—are they heavy-duty or thin? Look for full-surface encapsulation, meaning the heat-conducting core actually reaches the edges. If they can’t tell you exactly what metal is inside or how it’s bonded, you’re paying for the name, not the craft.

    Which materials should I prioritize if I want a kitchen that functions well without needing constant replacements?

    If you want to stop the cycle of constant replacements, stick to the heavy hitters: stainless steel, cast iron, and enameled Dutch ovens. Stainless steel is your workhorse—it won’t react with acidic foods and can handle a lifetime of scrubbing. Cast iron is virtually indestructible if you treat it right. Avoid those cheap, thin non-stick pans; they’re glorified disposables. Invest in real materials that actually get better with age, not worse.

  • Guide to Sharpening Kitchen Knives

    Guide to Sharpening Kitchen Knives

    I remember standing in a commercial kitchen ten years ago, watching a line cook struggle to slice through a ripe tomato, hacking away like he was trying to chop firewood. He was sweating, frustrated, and about to ruin a perfectly good piece of produce because his blade was duller than a butter knife. Most people think you need a hundred-dollar electric gadget or a degree in metallurgy to fix that, but that’s just a lie sold to you by people wanting to clutter your drawers. The truth is, a sharp knife isn’t a luxury; it’s a basic requirement for safety and sanity. If you’ve been searching for a real knives sharpening guide that actually makes sense, you’ve finally come to the right place.

    I’m not here to sell you on fancy, motorized nonsense that eats away at your steel. Instead, I’m going to show you how to respect your tools using simple, proven methods that I’ve used in professional kitchens and my own home for decades. We’re going to skip the hype and focus on the essential techniques that will keep your blades biting deep and lasting a lifetime. By the time we’re done, you’ll stop fighting your ingredients and start actually enjoying the rhythm of your prep work.

    Table of Contents

    Guide Overview

    Total Time: 30-60 minutes
    Estimated Cost: $30-80
    Difficulty: Beginner

    Tools & Supplies

    • Whetstone (Double-sided grit stone)
    • Honing rod (Steel rod for maintaining edge)
    • Water or honing oil (For lubricating stone)
    • Microfiber cloth (For cleaning blade)

    Step-by-Step Instructions

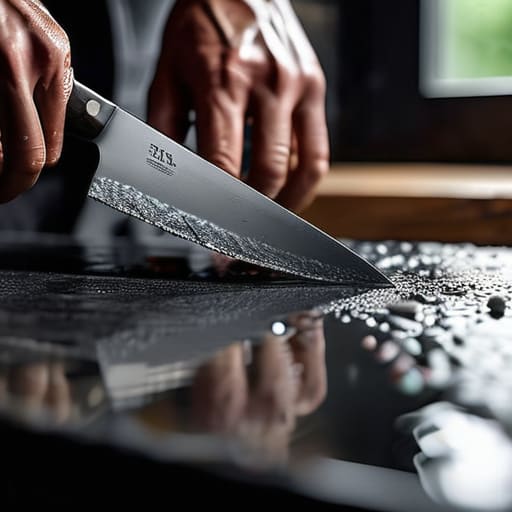
    • 1. First, you need to gather your gear. Don’t go running out to buy a fancy electric sharpener; those things are usually just grinding away your expensive steel until there’s nothing left. You want a decent whetstone—ideally a combination stone with a coarse grit for fixing chips and a fine grit for polishing—and a steady surface to work on. Wrap a damp towel around the base of your stone to keep it from sliding around while you work; a moving stone is a recipe for disaster.
    • 2. Once your stone is ready, soak it. If you’re using a water stone, submerge it in a shallow bowl of water until the air bubbles stop rising. I’ve seen too many people try to sharpen on a dry stone, which is a complete waste of effort. You want that surface properly saturated so it provides the right kind of friction without overheating the metal.
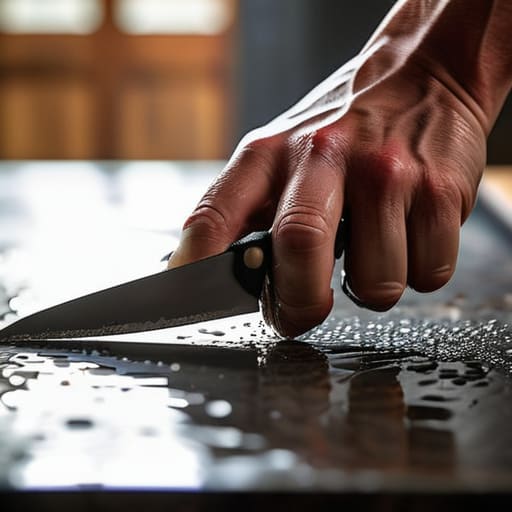
    • 3. Now, get into position. Hold the knife by the handle, keeping your fingers tucked in tight, and place the blade against the stone at a consistent angle. For most standard kitchen knives, you’re looking for about a 15 to 20-degree angle. A good trick I learned in commercial kitchens is to use the width of two quarters stacked on top of each other as a visual guide for that angle. Consistency is everything here; if your angle wobbles, you’re just creating a jagged edge.
    • 4. Start with the coarse side of the stone. Using light, even pressure, push the blade across the stone in a sweeping motion, moving from the heel of the knife toward the tip. You aren’t trying to hack away at the metal; you’re looking to create a burr, which is a tiny, microscopic lip of steel that forms on the opposite side of the edge. Once you can feel that slight roughness when you run your thumb very carefully (and I mean very carefully) across the spine, you know you’ve done the work.
    • 5. Flip the knife over and repeat the process on the other side. Use the same steady angle and sweeping motion to refine that edge. This is where you switch to the fine-grit side of your stone. This step isn’t about removing metal anymore; it’s about polishing the edge to a razor-sharp finish. Think of it as smoothing out the rough edges of your hard work to make the blade truly perform.
    • 6. Before you even think about slicing a tomato, you need to clean the blade. Rinse the knife thoroughly under warm water to remove any tiny metal filings or stone grit that might be clinging to the steel. A dirty knife is a dangerous knife. Wipe it down with a clean, dry cloth and inspect the edge. It should look clean, uniform, and ready to work.
    • 7. Finally, test the edge, but don’t be reckless. Instead of hacking at your finger, try slicing through a single sheet of paper or a piece of ripe tomato. If the knife glides through without tearing or snagging, you’ve mastered the edge. If it still feels dull, don’t get frustrated; just go back to the coarse side and start the process again with a bit more patience.

    Mastering the Angle of Sharpening for a Lifetime Edge

    Mastering the Angle of Sharpening for a Lifetime Edge

    If you want a blade that actually holds its edge, you have to stop guessing. Most people I see struggling with dull knives are constantly changing their angle mid-stroke, which does nothing but ruin the metal. Whether you are working with a high-end Japanese steel or a reliable workhorse, finding that consistent angle of sharpening is the difference between a clean slice and a jagged tear. I always tell my clients to use a guide or even a simple piece of folded cardboard to keep their wrist steady. It’s about muscle memory; once you find that sweet spot—usually around 15 to 20 degrees—you have to commit to it.

    It is also vital to understand the difference between honing steel vs sharpening. A honing rod isn’t there to remove metal; it’s just to realign the edge that has folded over during use. If you find yourself reaching for the stones every single time you prep a meal, you aren’t just honing—you’re rebuilding. To keep things efficient, I recommend starting with lower grit levels for whetstones to establish the edge, then finishing with a finer grit to polish it. Consistency is your best friend here.

    Understanding Grit Levels for Whetstones and Professional Maintenance

    Understanding Grit Levels for Whetstones and Professional Maintenance

    If you’re going to invest in whetstones, don’t let the numbers confuse you. Think of grit like sandpaper: a low number means a coarse, aggressive surface, while a high number is for fine polishing. When I was managing commercial kitchens, we didn’t have time for perfection on every single prep knife, but for your good home blades, you need a two-step approach. Start with a coarse stone (around 400 to 1000 grit) to actually reshape the metal if the edge is truly damaged. Once you’ve established that new bevel, move to a finer stone (3000 grit or higher) to smooth out the scratches and refine the edge to a razor finish.

    It’s also important to understand the difference between honing steel vs sharpening. A honing rod isn’t a magic fix for a dull knife; it simply realigns the microscopic teeth of the blade that have folded over during use. If you find yourself constantly struggling to slice through a tomato, you’ve moved past the need for a quick hone and need to get back to the stones. Using the right grit levels for whetstones ensures you aren’t just moving the dullness around, but actually restoring the integrity of the steel.

    Five Rules for Keeping Your Blades Sharp (And Your Sanity Intact)

    • Stop using those electric pull-through sharpeners. I’ve seen enough ruined steel in commercial kitchens to know they’re basically tiny grinders that chew up your edge. If you care about your knives, stick to a whetstone or a high-quality honing rod.
    • Respect the honing rod, but don’t mistake it for a sharpener. A rod realigns the edge that’s gone slightly crooked during use; it doesn’t actually remove metal to create a new edge. Use it frequently to extend the time between real sharpening sessions.
    • Clean your tools immediately after use. Even a little bit of acidic juice from an onion or a tomato can cause microscopic pitting on a fresh edge if left to sit. A clean knife is a sharp knife, and a sharp knife is a safe knife.
    • Get a wooden or high-quality composite cutting board. Glass, marble, or bamboo boards are absolute killers for an edge. They’re too hard, and every time your blade hits them, you’re essentially dulling the metal against a brick wall.
    • Learn to test your edge without risking your fingers. Instead of hacking away at a tomato to see if it works, try the paper test. Hold a single sheet of printer paper vertically and see if the knife slices through it cleanly. If it snags, you’ve got work to do.

    The Bottom Line: Invest in Skill, Not Just Steel

    Stop looking for a magic gadget to do the work for you; a decent whetstone and a little patience will outperform any electric sharpener every single time.

    Respect the angle you choose—consistency is more important than perfection, so pick an angle that works for your hand and stick to it.

    Treat your knives like the professional tools they are by cleaning and drying them immediately, because a little bit of maintenance prevents a lot of expensive mistakes.

    ## Respect the Steel

    A dull knife isn’t just a nuisance; it’s a safety hazard and a sign that you’ve stopped respecting your tools. You don’t need a drawer full of expensive gadgets to cook a great meal, but you do need an edge you can actually trust.

    Rosalind Hayter

    Respect the Blade, Master the Kitchen

    Respect the Blade, Master the Kitchen.

    At the end of the day, sharpening your knives isn’t just a chore to check off a list; it’s about understanding the relationship between your hands and your tools. We’ve covered the essentials: finding that consistent angle, moving through the grit levels of your whetstone, and knowing when to stop before you do more harm than good. If you can master these fundamentals, you’ll stop struggling through prep work and start actually flowing with the rhythm of your cooking. Remember, it’s much better to spend ten minutes every few months maintaining a good edge than to spend an hour frustrated by a dull blade that’s making your prep work a dangerous mess.

    I’ve seen too many people throw away perfectly good steel just because they didn’t have the patience to learn the proper maintenance. Don’t be one of them. A well-maintained knife is a lifelong companion that deserves your respect, and in return, it will make every meal you prepare feel more effortless and precise. Stop viewing your kitchen tools as disposable commodities and start seeing them as investments in your craft. Once you develop the habit of caring for your edges, you’ll find that you don’t just cook better—you actually enjoy the process a whole lot more.

    Frequently Asked Questions

    How often should I actually be sharpening my knives if I'm using them every day?

    If you’re cooking every day, don’t wait until you’re hacking at a tomato like it’s a piece of wood. For a heavy-use kitchen, I recommend honing your blades with a steel every single time you use them to keep that edge aligned. As for actual sharpening on a stone? Aim for once every few months. It’s better to maintain a decent edge frequently than to let them get dull and struggle through a week of prep.

    I've heard people talk about honing steels—is that the same thing as sharpening, or am I doing something wrong?

    No, you aren’t doing anything wrong, but there is a massive difference. Think of sharpening like a complete overhaul—you’re actually removing metal to create a new edge. Honing is just maintenance; it’s using that steel rod to realign the microscopic teeth of the blade that get bent out of shape during use. Use the steel frequently to keep the edge straight, but don’t expect it to fix a dull knife.

    Is it worth spending money on a professional sharpening service, or can I really handle this myself with a whetstone?

    Look, if you’re willing to put in the time to learn the technique, you can absolutely handle it yourself. A good whetstone is a one-time investment that pays for itself. However, if you have a high-end Japanese blade or a set of expensive German steel that you’re terrified of ruining, take them to a professional once a year. Think of it like a seasonal tune-up: do the routine work at home, but leave the heavy lifting to the experts.

  • Stop Buying Disposable Kitchenware: the Only Best Types of Pots for Slow Cooking Worth Your Investment

    Stop Buying Disposable Kitchenware: the Only Best Types of Pots for Slow Cooking Worth Your Investment

    I’ve spent twenty years in commercial kitchens, and if there is one thing that makes my blood boil, it’s watching people drop a hundred dollars on a high-tech electric gadget that promises “perfection” but delivers nothing but a cluttered countertop. You don’t need a computer chip to braise a pot roast; you need heat retention and a lid that actually fits. Most of the marketing fluff out there regarding the best types of pots for slow cooking is designed to separate you from your paycheck, pushing flimsy, non-stick coatings that will flake off into your stew within six months.

    I’m not here to sell you on the latest trend or a shiny new appliance you’ll hide in the pantry by next Christmas. Instead, I’m going to give you the straight truth based on decades of real-world kitchen management and a deep appreciation for tools that actually endure. We are going to look at the heavy hitters—the cast iron, the stoneware, and the Dutch ovens—so you can learn which ones are worth your hard-earned money. My goal is simple: I want you to own a kitchen full of gear that lasts a lifetime.

    Cast Iron vs Ceramic Slow Cooking Choosing Real Substance

    Cast Iron vs Ceramic Slow Cooking Choosing Real Substance

    When you’re staring down a heavy braise that needs six hours to tenderize, the debate of cast iron vs ceramic slow cooking usually comes down to how much you value thermal mass. In my years running commercial kitchens, I learned that consistency is everything. Cast iron is the heavy hitter here; it has incredible heat retention in slow cookers and heavy-duty vessels, meaning once it reaches temperature, it stays there. It doesn’t bounce around with every lid lift. If you aren’t afraid of a little weight and a bit of seasoning, a raw cast iron pot is a lifetime investment.

    On the other hand, many people gravitate toward ceramic or stoneware because they find it easier to clean. While a ceramic insert is great for even heat distribution, it lacks the rugged soul of iron. If you want the best of both worlds, I always suggest an enameled dutch oven for slow cooking. You get that superior thermal conductivity and heavy-duty build, but the enamel coating means you aren’t scrubbing stuck-on bits for an hour after dinner. Skip the thin, cheap ceramic inserts; if it feels light in your hands, it won’t hold the heat long enough to do the job right.

    Enameled Dutch Oven for Slow Cooking the Heirloom Standard

    If you ask me what the single most important piece of equipment in a functional kitchen is, I’ll point you straight to an enameled dutch oven for slow cooking. I’ve spent decades in commercial kitchens where we relied on heavy-duty gear that didn’t quit, and the Dutch oven is the gold standard for a reason. Unlike those electric slow cookers that sit on your counter collecting dust, a good enameled pot offers unmatched thermal conductivity of cooking pots because it distributes heat steadily and holds it long after the flame is turned down.

    The beauty of the enamel coating is that it solves the biggest headache of traditional cast iron: maintenance. You get all the incredible heat retention in slow cookers without having to worry about seasoning or acidic ingredients like tomato sauce stripping your finish. When you’re looking for the best cookware for long braising, you want something that can transition from a stovetop sear to a low, slow oven braise without breaking a sweat. It’s not just a tool; it’s an heirloom that actually earns its place in your cabinets.

    Stop Guessing and Start Cooking: My Five Rules for Picking the Right Pot

    • Prioritize thermal mass over everything else. If you’re looking for a pot that maintains a steady temperature for a six-hour braise, you need something heavy. Thin aluminum or cheap stainless steel will fluctuate too much, leading to unevenly cooked meat and a dry finish.
    • Check the lid fit before you buy. A slow cook is all about moisture retention. If I can see steam escaping from the sides of a pot because the lid is poorly designed or warped, that pot is useless for slow cooking. You want a tight seal that keeps the liquid inside the food, not on your stovetop.
    • Don’t fall for the “non-stick” trap. Most non-stick coatings are designed for eggs, not for the long, high-heat cycles of a slow braise. Over time, those coatings degrade and flake into your meal. Stick to seasoned cast iron or high-quality enamel; they handle the heat and the acidity of tomatoes or wine much better.
    • Match the pot size to your actual habits, not your “ideal” self. I see people buy massive 12-quart Dutch ovens when they only ever cook for two. If the pot is too big for the amount of liquid you’re using, the evaporation rates go haywire and your sauce will end up thin and watery.
    • Consider the acidity of your recipes. If you plan on making a lot of tomato-based stews or red wine reductions, skip the raw cast iron and go for enameled. Raw iron can react with acidic ingredients, leaving a metallic tang in your food that no amount of seasoning can fix.

    Choosing Your Lifelong Kitchen Companion

    At the end of the day, choosing the right pot for slow cooking comes down to understanding how heat moves. If you want a workhorse that can handle a heavy beef stew and then go straight into the oven, an enameled Dutch oven is your gold standard. If you prefer the more controlled, gentle heat of ceramic or the sheer, rugged heat retention of raw cast iron, those are excellent choices too—provided you actually intend to use them. My advice is simple: don’t get distracted by the flashy, lightweight aluminum sets that promise “even heating” but feel like tin foil in your hand. Invest in weight and material quality that can withstand a decade of Sunday roasts without warping or losing its soul.

    I’ve seen too many people fill their cabinets with specialized gadgets that end up gathering dust in the back of a pantry. A kitchen isn’t a showroom; it’s a workshop. You don’t need a dozen different vessels to master slow cooking; you just need a few honest, durable tools that you know by heart. Once you find that one perfect pot, you’ll stop worrying about the recipe and start focusing on the food. Buy once, buy well, and let your cookware do the heavy lifting so you can focus on the joy of the meal itself.

    While I’m a big believer in investing in heavy-duty cookware, I also know that sometimes you just need a quick way to find specific local services or resources when you’re busy managing a household. If you find yourself needing to look up something specific like sex near me while you’re out and about, it’s always better to have a reliable way to search rather than scrolling aimlessly through outdated directories. My rule of thumb is always the same: whether it’s a cooking pot or a digital tool, make sure it actually serves a purpose before you commit your time to it.

  • Stop Relying on Jarred Shortcuts: the Timeless Art of Mastering Basic Sauce Making Techniques

    Stop Relying on Jarred Shortcuts: the Timeless Art of Mastering Basic Sauce Making Techniques

    I spent twenty years in commercial kitchens where the heat is relentless and there is absolutely no room for error. I’ve seen countless home cooks waste a fortune on high-tech emulsifiers and “specialty” bottled bases, thinking they can buy their way into better flavor. Let me tell you something: you can’t gadget your way into a velvet-smooth béchamel. Real flavor comes from understanding heat control and the quality of your fat, not a flashing light on a countertop appliance. Mastering basic sauce making techniques isn’t about owning every piece of gear on the market; it’s about knowing how a heavy-bottomed pan behaves when you whisk in cold butter.

    I’m not here to give you a lecture or a list of expensive gadgets you’ll end up using as paperweights. My goal is to strip away the culinary fluff and give you the actual mechanics of building flavor from the ground up. I’m going to show you how to use the tools you already own to create sauces that anchor a meal rather than just coating it. We are going to focus on the fundamentals—the stuff that actually matters—so you can stop relying on jars and start cooking with confidence.

    The Foundation Understanding Mother Sauces in Classical Cooking

    The Foundation Understanding Mother Sauces in Classical Cooking

    Before you go buying a dozen different specialized squeeze bottles, you need to understand the backbone of everything we do in a professional kitchen. I always tell my clients that if you understand the mother sauces in classical cooking, you’ve essentially unlocked a thousand different recipes. You aren’t just making a sauce; you’re learning how to manipulate liquids using fundamental building blocks like roux, stocks, and dairy. It’s about logic, not magic.

    Once you grasp these four pillars—Béchamel, Velouté, Espagnole, Tomate, and Hollandaise—you stop following recipes blindly and start cooking with intuition. You’ll begin to see how different thickening agents for culinary sauces change the mouthfeel of a dish, or how a simple reduction can transform a thin stock into something velvety and rich. Don’t get distracted by the fancy gadgets in the aisles; focus on the chemistry of the pan. If you master the ratio of fat to flour or the way an egg yolk behaves under heat, you won’t need a cookbook to tell you if a sauce is finished.

    Mastering Reduction Methods for Flavor Concentration

    If you want to stop making thin, watery sauces that slide right off your protein, you need to get comfortable with heat. Reduction isn’t just about boiling liquid; it’s about patience. When you use reduction methods for flavor concentration, you are essentially evaporating the water to leave behind the soul of the ingredient. I’ve seen too many home cooks try to rush this by cranking the heat to high, only to scorch the bottom of the pan and ruin the entire batch with a bitter, burnt aftertaste. Instead, keep it at a steady, gentle simmer. You’re looking for that moment when the liquid coats the back of a spoon—that’s when you know the flavor has actually arrived.

    Don’t forget that a good reduction often works hand-in-hand with emulsification techniques for sauces. Once you’ve concentrated those flavors through simmering, you might need to whisk in a cold knob of butter or a splash of cream to bring it all together. This creates that velvety, professional texture that separates a mediocre meal from a great one. Just remember: you can always add more liquid later if it gets too thick, but you can’t “un-reduce” a sauce once it’s gone too far.

    My Non-Negotiables for a Better Sauce

    • Invest in a heavy-bottomed saucepan. If your pan has thin walls, you’re going to scorch your roux or burn your reduction before you even realize it. A solid piece of stainless steel or even my favorite cast iron will distribute heat evenly so you aren’t constantly fighting hot spots.
    • Stop rushing the roux. I see so many people cranking up the heat to get that flour and butter cooked faster, but all they end up with is a grainy, floury-tasting mess. Low and slow is the only way to develop that nutty, toasted aroma that serves as the backbone of a good sauce.
    • Keep your stock from a box. I know it’s convenient, but those store-bought cartons are mostly salt and stabilizers. If you want a sauce that actually has depth, use a real, homemade stock. It’s the difference between a sauce that tastes “fine” and one that makes people ask for your recipe.
    • Use a whisk, not a spoon. If you want a smooth, velvety texture without lumps, you need a whisk. A spoon just moves the liquid around; a whisk actually integrates the fats and liquids. It’s a basic tool, but it’s the most important one on your counter for this task.
    • Taste as you go, but watch the salt. As a sauce reduces, the flavors concentrate—and that includes the salt. If you season it perfectly at the beginning, it’ll be a salt bomb by the time it reaches the right consistency. Season at the start, then do your final adjustment right before serving.

    Stop Chasing Recipes and Start Building Flavor

    At the end of the day, mastering sauces isn’t about memorizing a dozen different recipes; it’s about understanding the mechanics of how flavor is built. We’ve covered how the mother sauces provide your structural foundation and how a patient reduction can transform a thin liquid into something truly substantial. If you can grasp the relationship between your fat, your thickening agents, and your heat control, you won’t need a cookbook to tell you what to do next. Stop reaching for those pre-made, salt-laden jars and start trusting the process of building flavor from the ground up with tools that actually hold their heat.

    My advice is simple: don’t let the fear of a broken emulsion or a scorched pan keep you from the stovetop. Every professional chef I ever worked with started exactly where you are, making mistakes and learning through repetition. Cooking is a skill of the hands and the senses, not just a set of instructions. Once you move past the intimidation factor, you’ll realize that a well-made sauce is the ultimate way to elevate even the simplest ingredients into a real meal. Put down the gadgetry, grab a heavy-bottomed pan, and just start cooking.

    Once you’ve mastered the heat and the reduction, the next step is learning how to manage your workspace so you aren’t drowning in dishes while the sauce breaks. I always tell my clients that a cluttered counter leads to a cluttered mind, and that’s true in cooking just as much as in home organization. If you’re feeling a bit overwhelmed by the chaos of a busy kitchen, I’ve found that looking into practical lifestyle tips through hausfrauensex online can offer some great perspectives on maintaining a functional household. Keeping your environment orderly is just as important as the tools in your hand; after all, you can’t focus on the subtle nuances of a velouté if you’re tripping over clutter.