Blog

  • Choosing the Right Nonstick Frying Pan

    Choosing the Right Nonstick Frying Pan

    I’ve spent twenty years in commercial kitchens, and if there is one thing that makes my blood boil, it’s the way the cookware industry tries to sell you “miracle” technology every single season. I’ve seen countless home cooks walk into stores with high hopes, only to come back a month later complaining that their expensive new pan is already flaking or sticking like glue. Most of the advice you’ll find online is just a way to push more plastic junk down your throat, but you don’t need a magic wand; you just need to understand how these coatings actually work. If you’re looking for a real nonstick pan guide that doesn’t involve a sales pitch, you’ve come to the right place.

    I’m not here to tell you which flashy, colorful pan will look best on your Instagram feed. My goal is to give you the straight truth about what is worth your hard-earned money and what is destined for the landfill. I’m going to walk you through the materials, the maintenance, and the hard realities of longevity so you can build a kitchen that actually functions. We are going to focus on tools that last, skipping the gimmicks and getting straight to the gear that will actually serve you for years.

    Table of Contents

    Ptfe vs Ceramic Nonstick Choosing Tools That Endure
    Ptfe vs Ceramic Nonstick Choosing Tools That Endure

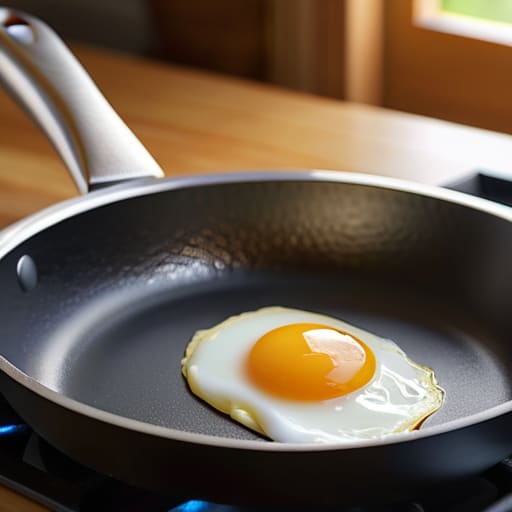
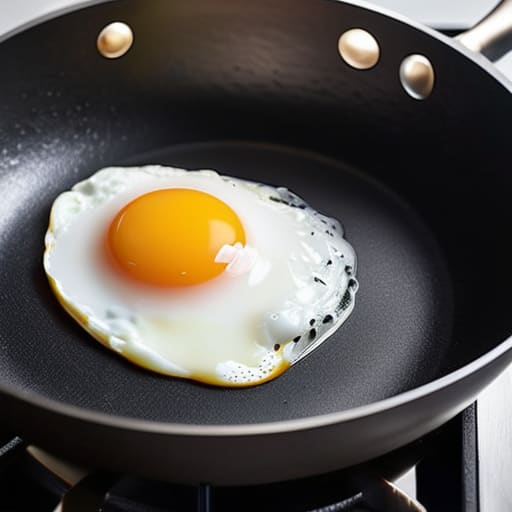
    When you’re standing in the cookware aisle, you’re usually faced with a choice between the old reliable PTFE and the newer, “eco-friendly” ceramic options. I’ve seen both in commercial kitchens, and they behave very differently. PTFE—your standard Teflon—is the heavy hitter when it comes to actual release. If you want an egg to slide around without a single trace of residue, PTFE is still king. However, you have to be disciplined about safe cooking temperatures; if you crank that heat too high, you’re not just ruining the pan, you’re releasing fumes.

    Ceramic is the darling of the modern home cook because it’s marketed as a non-toxic alternative, but let’s be honest: the nonstick pan lifespan on ceramic is often much shorter. It tends to lose its slickness much faster than PTFE once the mineral coating begins to degrade. If you go the ceramic route, you have to be even more careful about preventing scratches on nonstick surfaces by ditching metal utensils entirely. Neither is a “forever” tool like my cast iron, but if you know how you cook, you can pick the one that won’t frustrate you in six months.

    Mastering Safe Cooking Temperatures for Longevity
    Mastering Safe Cooking Temperatures for Longevity.

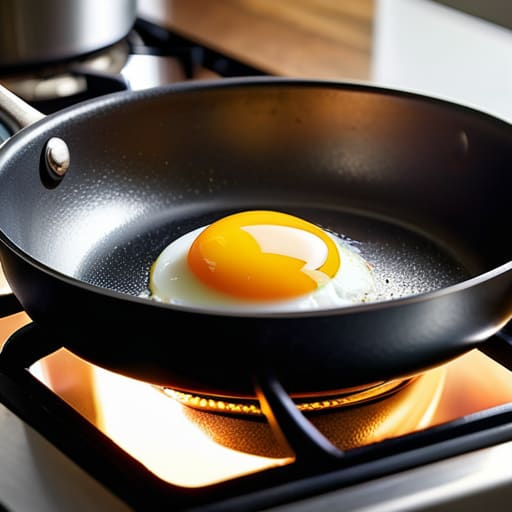
    If you want to maximize your nonstick pan lifespan, you have to stop treating your pans like they can handle a commercial kitchen’s heat. Most people make the mistake of cranking the burner to high, thinking it’ll get the food cooking faster, but that’s the quickest way to ruin the coating. High heat causes the nonstick surface to degrade and can even release fumes. I always tell my clients to stick to medium heat or lower. If you see smoke, you’ve already gone too far.

    Choosing your fats is just as important as the heat level. You need to be mindful of the smoke point when selecting the best oils for nonstick pans. I generally steer clear of extra virgin olive oil for high-heat tasks because it burns off too quickly and can leave a sticky residue that’s a nightmare to scrub off. Stick to something stable like avocado oil or a light grapeseed oil. If you treat your cookware with a bit of respect and keep the temperature steady, you won’t find yourself throwing a “new” pan in the trash after only six months.

    Five Rules for Keeping Your Nonstick Gear Out of the Trash

    • Ditch the metal. I’ve seen too many people ruin a perfectly good pan by using a steel spatula; stick to silicone or wood if you want to avoid scratching that coating to pieces.
    • Stop preheating an empty pan. If you blast a dry nonstick surface over high heat, you’re essentially cooking the coating itself, which ruins the pan and fills your kitchen with fumes.
    • Hand wash only. I know the dishwasher is convenient, but those high-heat cycles and harsh detergents are absolute killers for nonstick longevity. A little warm soapy water is all you need.
    • Avoid the “scouring” temptation. When you see a bit of stuck-on residue, don’t reach for the steel wool. Soak it in warm water first, or use a soft sponge—anything abrasive will strip the surface.
    • Know when to quit. If you notice peeling, deep scratches, or if your eggs are suddenly sticking to the center, stop trying to “save” it. It’s time to retire the pan and get a new one.

    The Bottom Line on Your Nonstick Investment

    Stop buying the cheap, thin pans from big-box stores; they’ll lose their coating before you even finish your first month of heavy use.

    Treat your nonstick like a delicate tool rather than a workhorse—keep the heat low and never, ever use metal utensils if you want it to last.

    Know when to let go; once you see peeling, scratching, or sticking that won’t go away with a good scrub, it’s time to toss it and get a replacement.

    ## The Hard Truth About Nonstick

    “A nonstick pan isn’t a lifetime investment like a cast iron skillet; it’s a tool with an expiration date. Stop looking for the ‘perfect’ pan that lasts forever and start looking for the one that’s built well enough to actually survive your Tuesday night dinner rush.”

    Rosalind Hayter

    Stop Collecting, Start Cooking
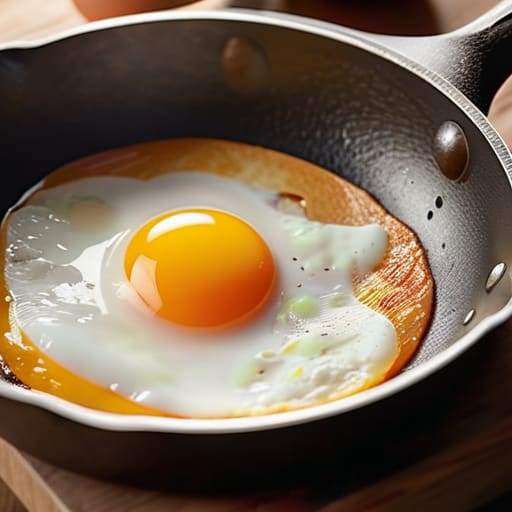
    Stop Collecting, Start Cooking with quality pans.

    At the end of the day, picking the right nonstick pan isn’t about finding the most expensive brand on the shelf; it’s about understanding the materials you’re bringing into your home. Whether you decide on a high-quality PTFE pan for that perfect egg slide or a ceramic option because you want to avoid certain coatings, remember that maintenance is everything. If you respect the temperature limits and stop using metal utensils that gouge the surface, you’ll get years of use out of your investment. Don’t let a single bad purchase convince you that nonstick is a waste of money—just buy smart and treat your tools with respect.

    My time in commercial kitchens taught me that a cluttered, poorly equipped kitchen is a recipe for stress, not good food. You don’t need a drawer full of specialized gadgets to be a great cook; you just need a few reliable pieces that you actually know how to use. A well-chosen pan, paired with disciplined habits, will serve you far better than any trendy kitchen gadget ever could. Stop worrying about what the influencers are using and focus on building a toolkit that works for your specific life. Invest in quality, keep it simple, and get back to the joy of cooking.

    Frequently Asked Questions

    How do I know when it's actually time to toss my nonstick pan instead of trying to save it?

    Look, I’m a big believer in making things last, but there’s a line between maintenance and madness. If you see visible scratches, or if the coating is starting to flake or peel, stop using it immediately. That’s not just a ruined pan; it’s a safety hazard. Also, if eggs are suddenly sticking to the surface despite your best efforts, the coating is shot. Don’t try to “save” it—just toss it and invest in something better.

    Can I use metal utensils if I'm careful, or am I just asking for trouble?

    Look, I’ll be blunt: you’re asking for trouble. Even if you’re “careful,” one slip of the wrist or a heavy-handed stir is all it takes to gouge that coating. Once that surface is scratched, the pan is essentially dead weight. I’ve seen too many people ruin a perfectly good investment in a single afternoon. Stick to silicone or wood. It’s a small trade-off to ensure your gear actually lasts more than a season.

    Is it really worth the extra money to buy a high-end brand, or is any decent nonstick pan good enough?

    Look, I’ve seen it all in commercial kitchens: the cheap pans that lose their coating after three months and the high-end ones that stay slick for years. Is the extra cost worth it? Usually, yes. You aren’t just paying for a brand name; you’re paying for thicker, more even heat distribution and better construction. If you buy the budget stuff, you’ll be replacing it constantly. Save your money by buying one good pan once.
  • Types of Rolling Pins for Different Doughs

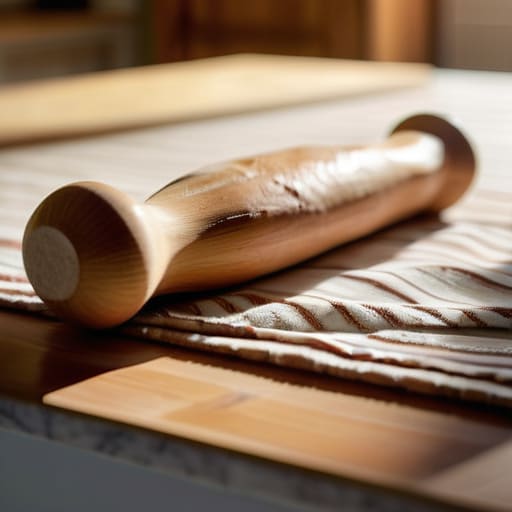
    Types of Rolling Pins for Different Doughs

    I remember standing in the middle of a massive commercial prep kitchen during a holiday rush, watching a junior cook struggle with a cheap, lightweight rolling pin that kept wobbling every time she tried to flatten a batch of pastry dough. It was frustrating to watch—not just because she was struggling, but because she was fighting her tools instead of working with them. Most people think they need some high-tech, silicone-coated gadget or a motorized device to get perfect crusts, but that is just expensive nonsense. A proper rolling pin shouldn’t be a novelty item you pull out once a year; it should be a heavy, reliable extension of your own hands.

    I’m not here to sell you on the latest kitchen trend or convince you that you need a dozen different versions for different types of dough. My goal is to help you cut through the clutter and find the one tool that actually earns its place in your drawer. I’ll be sharing exactly what to look for in terms of weight, material, and grip so you can stop wasting money on plastic junk and start investing in gear that lasts a lifetime.

    Table of Contents

    Marble vs Wooden Rolling Pin the Weight of Quality

    Marble vs Wooden Rolling Pin the Weight of Quality

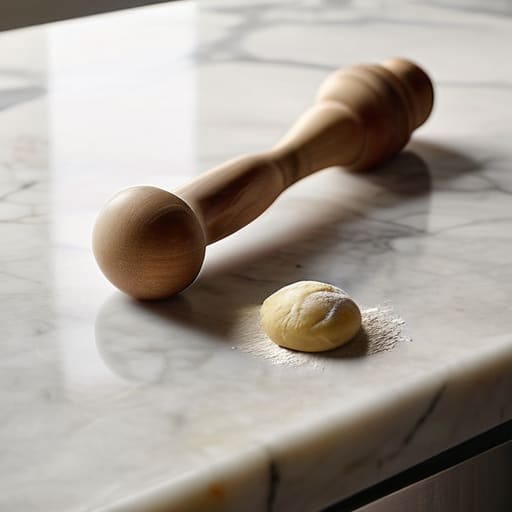
    When you’re standing at your counter deciding between marble vs wooden rolling pin options, you aren’t just picking a color; you’re picking a tool that dictates how you work. I’ve seen too many beginners grab a heavy marble slab thinking the weight will do all the work for them. While marble is excellent for keeping pastry dough cool—which is a lifesaver when you’re working with high-fat butter—it’s cumbersome. If you don’t have a steady hand, that weight can actually make it harder to control your pressure, leading to uneven thickness.

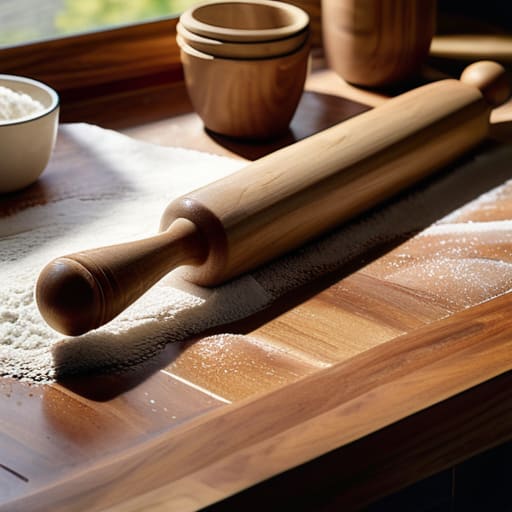
    On the other hand, wood is the reliable workhorse of the professional kitchen. A solid maple or beech pin offers a tactile connection to your dough that stone just can’t match. If you’re looking for the best rolling pins for pie crust, I always suggest a classic tapered design. It gives you much more precision than a thick, heavy cylinder. Wood absorbs a bit of the moisture and provides a natural grip, making it much easier to master non-stick dough rolling techniques without constantly reaching for a dusting of excess flour.

    French Rolling Pin vs Tapered Finding Your Perfect Match

    French Rolling Pin vs Tapered Finding Your Perfect Match

    When you’re looking at the french rolling pin vs tapered debate, you aren’t just choosing a shape; you’re choosing how much control you want over your dough. A traditional tapered pin—the kind with handles on both ends—is a sturdy workhorse. It’s great for beginners because the handles give you a solid grip, making it easier to apply even pressure when you’re working with thicker doughs like biscuit or bread. It feels familiar, almost like an extension of your arms, which is helpful when you’re still learning the rhythm of the kitchen.

    However, if you’ve moved past the basics and want more precision, the French style is where the magic happens. These pins are typically straight cylinders without handles, which might seem intimidating at first, but they offer unparalleled dexterity. Because you’re gripping the wood directly, you can feel exactly how much pressure you’re applying to the pastry. This is one of the best rolling pins for pie crust because it allows for those delicate, paper-thin layers that a bulky handle might crush. If you want to master non-stick dough rolling techniques and achieve professional results, the French style is worth the slight learning curve.

    Five Rules for Choosing and Using a Rolling Pin That Actually Works

    • Skip the plastic and the cheap, lightweight aluminum models; they don’t provide the resistance you need to feel the dough, and they’ll likely end up in a landfill within a year.
    • Always check the grain of your wooden pin before buying to ensure it’s tight and consistent, which prevents the wood from splintering when you’re applying pressure.
    • Learn to use flour—not just a dusting, but a controlled application—to prevent your dough from sticking to the pin, which is the quickest way to ruin a delicate pastry crust.
    • Treat your wooden rolling pin like a piece of heirloom furniture; never, under any circumstances, toss it in the dishwasher, or you’ll be dealing with warped wood and cracks by next week.
    • Match your tool to your task, meaning don’t try to force a heavy, thick American-style pin through a delicate puff pastry when a slim French pin would do the job with half the effort.

    The Bottom Line on Rolling Pins

    Stop buying cheap, lightweight plastic rollers; invest in solid wood or heavy marble that actually has the heft needed to work the dough.

    Choose your shape based on your skill level—tapered pins offer more control for beginners, while French pins are the pro’s choice for precision.

    Prioritize longevity over trends by picking materials that can be cleaned, maintained, and passed down rather than replaced every season.

    The Truth About Your Tools

    I’ve seen enough flimsy, store-bought rollers crack under the slightest pressure to know that a rolling pin isn’t just a gadget; it’s an extension of your hands. If it doesn’t have some weight to it and a surface that respects the dough, you aren’t baking—you’re just fighting your equipment.

    Rosalind Hayter

    Making the Right Call for Your Kitchen

    Making the Right Call for Your Kitchen.

    At the end of the day, choosing a rolling pin isn’t about picking the prettiest item on the shelf; it’s about understanding how you actually cook. If you want the heavy-duty control of marble for delicate pastry work, go for it, but don’t forget that a classic wooden French pin is often the unsung hero for daily dough rolling. Whether you prefer the stability of a tapered design or the traditional feel of a standard American roller, the goal is to find a tool that feels like an extension of your own hands. Stop overthinking the trends and focus on durability and weight—once you have a solid piece of equipment, you can finally stop replacing cheap junk every single season.

    I’ve spent enough time in commercial kitchens to know that the best tools are the ones that eventually become part of your muscle memory. A good rolling pin isn’t just a piece of wood or stone; it’s an investment in your confidence behind the counter. When you stop fighting with flimsy, ineffective gadgets, you actually start enjoying the process of making something from scratch. So, grab a piece that is built to last, trust your instincts, and get back to the actual work of cooking. Your kitchen deserves tools that work as hard as you do.

    Frequently Asked Questions

    How do I actually clean a wooden rolling pin without ruining the grain or causing it to crack?

    Listen, I’ve seen too many beautiful maple pins ruined by someone treating them like a dinner plate. Never, ever soak your wooden rolling pin in the sink; that’s how you get cracks and warping. Instead, wipe it down immediately after use with a slightly damp cloth and a tiny bit of mild soap if you must. Dry it thoroughly with a towel right away, then give it a quick rub with food-grade mineral oil to keep that grain supple.

    Is it worth buying a heavy marble pin if I'm mostly working with delicate pastry dough?

    If you’re working with delicate pastry, skip the marble. Honestly, a heavy stone pin is overkill for flaky crusts or puff pastry; the sheer weight can actually crush your dough and work it too much, making it tough instead of tender. For those lighter tasks, stick to a tapered wooden pin. It gives you the control you need to feel the dough without bruising it. Save the marble for heavy-duty fondant or thick biscuit dough.

    Should I be looking for a rolling pin with handles, or are the tapered versions better for control?

    If you’re looking for pure control, go with the tapered version. Without handles, you’re forced to use your palms to apply even pressure, which actually helps you feel the dough and prevents those annoying uneven spots. Handles are fine for heavy-duty tasks like thick biscuit dough, but they often act as a barrier. For most of what I do—pastry, pizza, or pie crust—the tapered pin gives me much better precision.

  • Instant Read Probes and Response Time

    Instant Read Probes and Response Time

    I spent twenty years in commercial kitchens where “close enough” was a recipe for disaster, and I’ve seen far too many home cooks try to wing it with a knife or a prayer. There is this ridiculous myth that you need a $300 smart-tech gadget with a Bluetooth connection just to tell if a chicken is safe to eat. Honestly, most of those over-engineered contraptions are just expensive distractions that end up sitting in a junk drawer. If you aren’t using a reliable, high-quality probe thermometer, you aren’t cooking; you’re just gambling with your dinner.

    I’m not here to sell you on the latest kitchen gadget craze or show you how to sync a device to your smartphone. My goal is to help you strip away the nonsense and find a tool that actually does its job every single time. I’m going to walk you through exactly what to look for in a probe thermometer so you can stop guessing and start trusting your results. We’re going to focus on durability and accuracy—the only two things that actually matter when you’re standing over a hot stove.

    Why Digital Food Thermometer Accuracy Defines a Real Cook

    Why Digital Food Thermometer Accuracy Defines a Real Cook

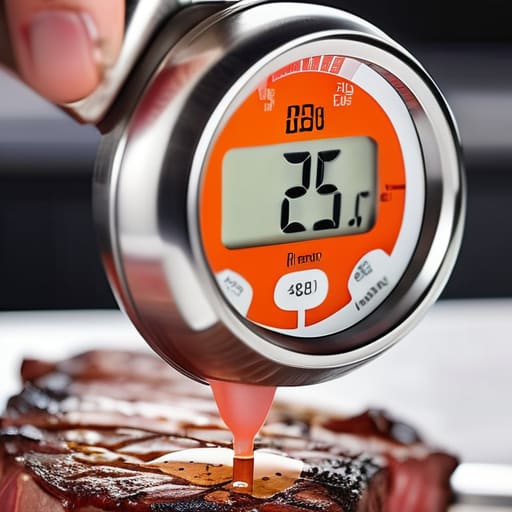
    In my years managing commercial kitchens, I saw more money thrown in the trash than I care to admit—usually in the form of overcooked, dry protein. People think they can eyeball a steak or poke a chicken breast and just “know” when it’s ready. That’s a gamble, and in a professional setting, we don’t gamble with food safety. Digital food thermometer accuracy isn’t just a luxury for foodies; it is the difference between a meal that’s succulent and one that’s essentially leather. When you rely on a high-quality instant read temperature sensor, you aren’t just checking a box; you’re taking control of the chemistry happening in your pan.

    If your tool is off by even five degrees, your entire recipe is compromised. I’ve seen cheap, bargain-bin sensors drift so badly they become useless after a month of heavy use. A real cook knows that consistency is everything. You want a device that gives you a definitive answer the second it hits the meat, allowing you to pull that roast off the heat at the exact moment it hits the target. It’s about precision, not guesswork.

    Choosing Between Thermocouple Probe Types for Lifelong Use

    When you’re looking at different thermocouple probe types, don’t let the technical jargon intimidate you. In my years running commercial kitchens, I learned that the distinction usually comes down to how much you value your time versus your budget. You’ll see thin, delicate wires designed for high-speed readings; these are fantastic for precision, but they can be temperamental if you aren’t careful with them. Then there are the sturdier, thicker probes. While they might take an extra second to stabilize, they are built like tanks and can handle the daily abuse of a busy home kitchen without snapping.

    If you want a tool that survives a decade of Sunday roasts, I always suggest looking for a waterproof temperature probe. There is nothing more frustrating than a high-end device that dies because you couldn’t wipe it down after a messy prep session. Proper kitchen thermometer maintenance starts with choosing a model that can actually handle being washed. Invest in something rugged that won’t fail you right when you’re halfway through a holiday meal.

    Five Rules for Making Your Thermometer Work as Hard as You Do

    • Stop testing the air. When you’re checking a roast or a chicken breast, make sure the tip of the probe is in the thickest part of the meat and not touching bone or fat, otherwise, you’re just reading a lie.
    • Calibrate it once a month. Even the good ones drift over time. Grab a glass of ice water, stick the probe in, and if it doesn’t read exactly 32°F (0°C), you need to adjust it or get a new one.
    • Treat the probe like a surgical instrument. I’ve seen too many people wipe a dirty probe on a stained kitchen towel and then stick it right back into a prime cut of beef. Wash it with warm soapy water every single time.
    • Don’t be a hero with the heat. If you’re using a wireless probe that stays in the oven, read the manual twice. I’ve seen enough expensive gear ruined because someone thought “heat resistant” meant “indestructible.”
    • Keep it in its holster. A probe thermometer isn’t a multi-tool; it’s a precision instrument. Don’t toss it loose in a junk drawer with your whisk and spatula where the tip can get bent or dulled.

    The Bottom Line on Buying a Thermometer

    Stop buying the cheap, plastic versions that lose accuracy after a month; invest in a professional-grade probe that you can actually rely on when the stakes are high.

    Learn the difference between a quick-read instant thermometer and a thermocouple probe so you aren’t caught off guard by how long it takes to get a reading.

    Remember that a thermometer is only as good as your habit—use it every single time to build the muscle memory that keeps your food safe and your dinners consistent.

    The Bottom Line on Precision

    At the end of the day, choosing a probe thermometer isn’t about collecting more kitchen gadgets; it’s about investing in predictability. We’ve talked about why accuracy is non-negotiable, the difference between thermocouple types, and why you should steer clear of the cheap, plastic-heavy models that fail after a month of heavy use. When you pick a tool that is built to last and calibrated to be precise, you stop fighting against your ingredients and start working with them. A good thermometer is the bridge between a meal that is “fine” and a meal that is perfectly executed every single time.

    I’ve spent decades in professional kitchens where timing was everything, and I can tell you that confidence in the kitchen comes from knowing your tools won’t let you down. Don’t let a dry roast or an undercooked chicken ruin a beautiful evening just because you were too afraid to trust your eyes over a reliable reading. Buy the quality gear, learn the temperatures, and trust the science. Once you stop guessing, you’ll find that the stress of cooking starts to melt away, leaving you with nothing to do but enjoy the food you’ve worked so hard to create.

    Frequently Asked Questions

    How often should I actually be calibrating my thermometer to make sure it's still giving me honest numbers?

    Look, I don’t expect you to calibrate every Tuesday, but you can’t just set it and forget it. If you’re a daily cook, check it once a month. If you only use it for holiday roasts, once or twice a year is plenty. My rule of thumb? If a recipe comes out looking or tasting “off,” or if you just bought a new unit, run an ice bath test immediately. Don’t trust a drifting sensor.

    Is it worth spending the extra money on a wired probe for slow-roasting, or is a handheld digital one enough?

    If you’re just checking a steak or a chicken breast, a handheld digital is plenty. But if you’re serious about slow-roasting a brisket or a pork shoulder, spend the extra money on a wired probe. There is nothing more frustrating than having to open the oven door and let all that heat escape just to check a temperature. A wired probe lets you monitor the meat from the counter, keeping the oven steady and your results consistent.

    What are the best ways to clean the probe without ruining the sensor or causing it to rust?

    Treat your probe like a precision instrument, not a piece of scrap metal. After every use, wipe it down with warm, soapy water immediately. If you’ve been dealing with stubborn proteins or grease, a gentle soak in mild detergent is fine, but never, ever toss it in the dishwasher—the high heat and harsh chemicals will wreck the sensor and ruin the calibration. Dry it thoroughly by hand right away to prevent any rust from creeping in.

  • Using a Salt Cellar for Easy Seasoning

    Using a Salt Cellar for Easy Seasoning

    I spent two decades in commercial kitchens where speed wasn’t a luxury—it was the baseline. I’ve watched countless home cooks waste precious seconds fumbling with those clunky, plastic salt grinders that jam the moment a single grain gets stuck in the mechanism. It’s frustrating, it’s inefficient, and frankly, it’s a waste of counter space. If you actually want to season your food with intention, you need to stop relying on gadgets that feel like toys and switch to a proper salt cellar. There is a certain rhythm to cooking that you just can’t find when you’re fighting with a screw-top lid or a broken mill; you need your seasoning right there, accessible, and ready to go.

    I’m not here to sell you on some designer ceramic bowl that looks pretty but holds moisture like a sponge. I’m going to show you how to pick a tool that actually works with your workflow, whether you’re a weekend baker or someone who just wants a functional kitchen. I’ll break down what to look for in terms of material and size so you can invest in something that lasts a lifetime and simplifies your life instead of cluttering it up.

    Table of Contents

    Why Chef Recommended Salt Containers Change Everything

    In my years managing commercial kitchens, I noticed a massive difference between cooks who fight their ingredients and those who flow with them. When you’re in the middle of a rush, you don’t have time to unscrew a cap or hunt for a grinder. That’s why professional-grade chef recommended salt containers are such a game changer. They provide instant access, allowing you to pinch and sprinkle without breaking your rhythm. It’s about removing the friction between your hand and the seasoning.

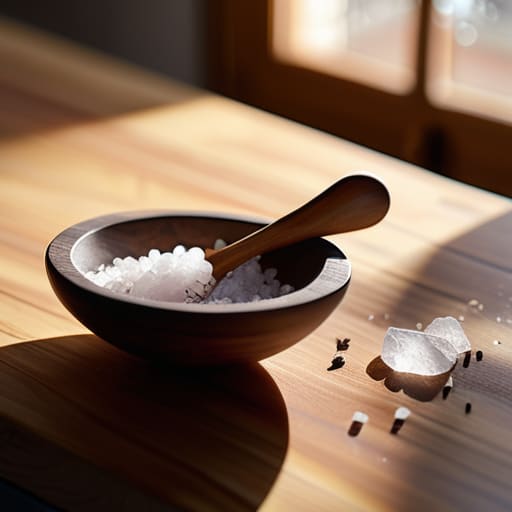
    If you want to upgrade your countertop spice organization, look toward tools that prioritize accessibility. I’ve always been a fan of a sturdy ceramic salt pig because it sits open, letting the salt stay dry while remaining within arm’s reach. It turns a tedious task into something intuitive. When your tools are laid out logically, you stop overthinking the seasoning and start focusing on the heat and the flavor. Investing in these small, functional pieces isn’t about aesthetics—it’s about building better habits in the kitchen.

    Ditch the Shakers for Better Sea Salt Storage Solutions

    Ditch the Shakers for Better Sea Salt Storage Solutions.

    Look, I’ve seen it a thousand times in commercial kitchens: a cook reaching blindly for a plastic shaker mid-service, only to find it clogged or empty. It’s a waste of time and a total disruption to your flow. When you’re seasoning a pan or finishing a piece of fish, you need to be able to grab a pinch of salt without thinking. That’s why I’m such a proponent of better sea salt storage solutions. Moving away from those tiny, finicky grinders or clunky plastic bottles isn’t just about aesthetics; it’s about uninterrupted momentum.

    If you want to upgrade your countertop spice organization, start with something tactile. A ceramic salt pig is my personal favorite because the wide mouth lets you scoop easily with your fingers, and the shape keeps the salt dry and accessible. If you prefer something a bit more contained, a simple wooden salt cellar with lid works wonders for keeping humidity at bay. These aren’t just cute kitchen countertop accessories; they are tools that respect your process. Stop fighting with your ingredients and start letting them work for you.

    Five Rules for Choosing and Using a Salt Cellar

    • Go for size, not style. I’ve seen people buy these beautiful, tiny ceramic bowls that look great on Instagram, but they run out of salt in two days. Pick a cellar that holds enough for a week of heavy seasoning so you aren’t constantly refilling it.
    • Mind the material. If you’re using a salt cellar on a countertop near a window, avoid anything too porous that might trap moisture. I prefer heavy stoneware or wood; they have enough weight to stay put when you’re reaching in quickly during a rush.
    • Keep it within arm’s reach. A salt cellar isn’t a decorative piece for a distant shelf; it’s a tool. It should live exactly where you do your most frequent seasoning—usually right next to the stove—so you don’t have to break your rhythm to find it.
    • Watch out for humidity. If you live in a damp climate, your salt is going to clump into a solid brick if you aren’t careful. I always keep a small, clean spoon inside the cellar to keep things moving and prevent moisture from building up in the corners.
    • Skip the lid if you cook constantly. Lids are fine for long-term storage, but if you’re a heavy cook, a lid just becomes another thing to move out of the way. An open cellar allows the salt to stay dry and accessible, which is how a professional station actually functions.

    The Bottom Line on Salt Storage

    Stop wasting time with grinders or clunky shakers; a salt cellar keeps your seasoning within arm’s reach so you can cook with intuition rather than searching through drawers.

    Invest in quality materials like ceramic, wood, or stone that won’t degrade or harbor moisture, because a kitchen tool is only useful if it actually stays dry and functional.

    Focus on accessibility over aesthetics—the best salt cellar is the one that sits right where you need it, making seasoning a seamless part of your workflow instead of a chore.

    The Philosophy of the Pinch

    “If you’re still wrestling with a plastic shaker every time you need to season a pan, you’re letting the tools dictate your rhythm instead of the other way around. A good salt cellar isn’t just about organization; it’s about getting out of your own way so you can actually feel the food as you cook.”

    Rosalind Hayter

    The Bottom Line on Better Seasoning

    The Bottom Line on Better Seasoning.

    At the end of the day, moving to a salt cellar isn’t about being fancy or following some kitchen trend; it’s about removing friction from your cooking process. We’ve talked about why those clunky plastic grinders fail you and why having your salt within arm’s reach makes a world of difference when you’re mid-sear. By choosing a dedicated cellar, you’re protecting your salt from moisture, keeping it accessible, and finally treating it like the essential ingredient it is. Stop fighting with lids and grinders and just invest in a tool that works as hard as you do.

    I’ve spent enough time in professional kitchens to know that the most efficient workspaces aren’t the ones filled with the most gadgets, but the ones filled with the right tools. A simple, well-made salt cellar is a testament to that philosophy. It’s a small change, but it’s one that respects your time and your ingredients. My advice? Buy something solid, something that feels good in your hand, and let it become a permanent fixture of your kitchen. Build your habits around quality over quantity, and your cooking—and your sanity—will thank you for it.

    Frequently Asked Questions

    Won't leaving my salt out in an open cellar make it clump up in a humid kitchen?

    It’s a fair concern, but here’s the reality: a little humidity won’t ruin your salt, and a good cellar actually helps you manage it. If you’re using fine table salt, yes, it’ll clump. But if you’re using coarse kosher or flaky sea salt, the texture is much more forgiving. If your kitchen is truly a sauna, just opt for a cellar with a heavy lid. It keeps the moisture out while keeping the salt right where you need it.

    Do I really need a dedicated cellar, or can I just use a small ramekin I already have?

    Look, I’m a big believer in using what you have, and a ramekin is a perfectly fine temporary fix. If it keeps your salt dry and within reach, use it. But there’s a difference between “functional” and “optimized.” A real salt cellar is designed with the right depth and lid fit to prevent clumping and keep moisture out. If you find yourself constantly reaching for that ramekin, go ahead and invest in a proper one.

    Which material is better for a cellar—wood, ceramic, or stone—if I want something that actually lasts?

    If you’re looking for longevity, skip the cheap plastic and go with ceramic or stone. Wood is lovely and adds a nice organic touch, but it’s porous; over time, it can absorb moisture or oils and eventually crack or warp. A heavy ceramic crock or a carved stone cellar is virtually indestructible. They hold their temperature well, they’re easy to sanitize, and they won’t degrade no matter how many years of heavy cooking you throw at them.

  • Choosing a Colander That Drains Properly

    Choosing a Colander That Drains Properly

    I spent two decades in commercial kitchens where everything had a purpose, and I can tell you right now: if your kitchen drawer is overflowing with those flimsy, neon-colored plastic strainers, you’re doing it wrong. I’ve lost count of how many times I’ve seen someone try to drain a heavy pot of pasta only to have a cheap, lightweight colander tip over in the sink, splashing boiling water everywhere and wasting a perfectly good meal. It’s not just annoying; it’s dangerous. You don’t need a gadget with a built-in vegetable peeler or a collapsible silicone mess that loses its shape after three uses; you just need something that actually works.

    I’m not here to sell you on the latest kitchen trend or some overpriced designer bowl that looks pretty on a shelf but fails the moment it hits hot water. My goal is to help you cut through the noise and find the one reliable tool that will last you as long as my favorite cast iron skillet. I’m going to show you exactly what to look for in terms of weight, material, and stability so you can stop wasting money on disposable junk and start building a kitchen that actually serves you.

    The Stainless Steel Colander Benefits You Cant Ignore

    The Stainless Steel Colander Benefits You Cant Ignore

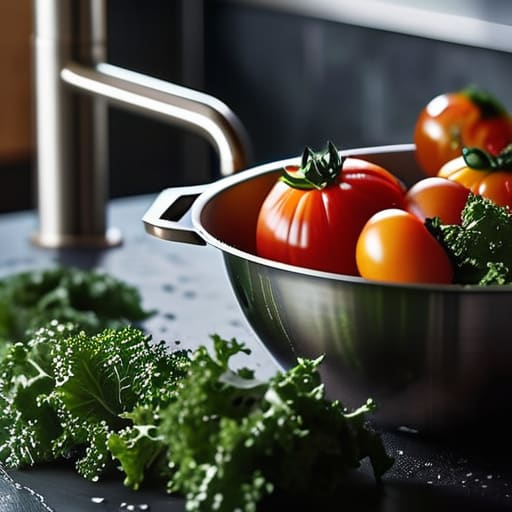
    Look, I’ve seen enough cheap, colorful plastic bowls end up in landfills to last a lifetime. When you’re washing fresh produce or prepping a quick meal, you need something that doesn’t feel like it’s going to snap under the weight of a few potatoes. The real stainless steel colander benefits come down to durability and hygiene. Unlike plastic, which can develop tiny scratches that harbor bacteria over time, a high-quality metal piece is non-porous and practically indestructible. It won’t absorb the smell of last night’s garlic pasta, either.

    Beyond just being tough, stainless steel handles heat like a pro. If you’re draining boiled vegetables straight from a bubbling pot, you don’t want to worry about a flimsy silicone version warping or a plastic one leaching chemicals into your food. I always tell my clients to invest in a heavy-duty model with a sturdy rim. It stays steady on the sink, saving you from that frustrating moment when your strainer tips over and your dinner ends up in the drain. It’s a small decision, but it’s one that makes your kitchen feel like a workspace rather than a playground.

    When you start looking at the different kitchen strainer types available, it’s easy to get overwhelmed by the sheer volume of options at big-box retailers. Most people think one big bowl does it all, but that’s where the inefficiency starts. If you’re draining boiled vegetables or pasta, you need something with structural integrity that won’t tip over when the pot is heavy. For those tasks, a classic, wide-rimmed vessel is your best friend. It stays stable in the sink and handles the heat without warping.

    On the other hand, if your main goal is washing fresh produce, a smaller, fine-mesh sieve is much more practical. I always tell my clients that trying to rinse delicate berries in a massive, chunky colander is a recipe for bruised fruit and wasted time. You want something that allows water to flow through quickly without letting the small stuff slip through the holes. I’ve seen people try to make one tool do everything, but that’s a mistake. Invest in a couple of specific sizes rather than one mediocre “all-in-one” gadget that fails at both jobs.

    My Rules for Choosing and Using a Colander Without the Headache

    • Skip the plastic. I’ve seen too many flimsy, colorful strainers warp under hot pasta water or leach chemicals into your food. Stick to high-grade stainless steel; it’s easier to sanitize, won’t crack, and will still be in your drawer when you retire.
    • Check the rim stability. A good colander needs a sturdy, reinforced rim that actually sits securely on your sink. If it wobbles or tips every time you pour out the water, you’re going to end up with a mess on your floor and a burnt hand.
    • Size matters more than you think. Don’t just buy the biggest one to “be prepared.” A massive colander is a nightmare to store and awkward to maneuver for smaller tasks. Get one that fits your most common cooking volumes—usually a medium-sized one is the workhorse.
    • Look for the drainage speed. If you’re draining heavy potatoes or a large batch of pasta, you need holes that are spaced well enough to let water flow through quickly without letting the food slip through. I always look for a tight, consistent weave or hole pattern.
    • Mind the handles. If you’re draining a heavy pot of boiling vegetables, you need handles that are comfortable and don’t get too hot to touch. Avoid anything with thin, flimsy wire handles that feel like they might snap under the weight of a full pot of water.

    The Bottom Line on Choosing a Colander

    Stop buying plastic; invest in heavy-duty stainless steel that won’t crack, warp, or leach chemicals into your food.

    Size matters more than you think—get one large enough to handle a full pound of pasta without crowding, rather than a collection of tiny, useless strainers.

    Look for stability and ease of cleaning; a colander that wobbles on the sink or has crevices that trap food is just a headache waiting to happen.

    Stop Overthinking Your Setup

    At the end of the day, choosing a colander isn’t about finding the most expensive model on the shelf; it’s about choosing something that won’t fail you when you’re in the middle of a busy dinner service. We’ve covered why you should steer clear of those flimsy, colorful plastic bits that warp under hot water and why a heavy-duty stainless steel option is the only logical choice for a working kitchen. Whether you opt for a classic basket style for your pasta or a fine-mesh strainer for rinsing delicate grains, make sure the build quality matches your needs. Invest in tools that endure, because a kitchen filled with disposable junk only creates more clutter and more frustration.

    My advice is simple: look at your kitchen as a workspace, not a showroom. You don’t need a drawer full of specialized gadgets that only serve one purpose once a year. You need a few reliable, high-quality pieces that you can grab without thinking twice. When you stop chasing every kitchen trend and start focusing on functional longevity, you’ll find that cooking becomes less of a chore and more of a rhythm. Get the right gear, learn the right habits, and let your tools do the heavy lifting so you can focus on what actually matters—the food and the people eating it.

    Frequently Asked Questions

    How do I know if a stainless steel colander is actually high-quality or just cheap metal with a shiny finish?

    Look for the weight. A cheap colander feels like a tin can; a quality one has some heft to it. Check the rim—it should be thick and rolled, not thin and sharp, so it doesn’t bend when you’re pouring heavy pasta. Most importantly, look at the welds. If the handles are just glued or tack-welded on, they’ll snap. You want seamless, sturdy construction that feels like it can handle a lifetime of heavy lifting.

    Is a large, single colander enough, or am I actually going to need smaller mesh sieves for everyday tasks?

    Look, if you’re just draining pasta, one large stainless steel colander is plenty. But if you want to actually cook—not just reheat—you’ll eventually want a fine-mesh sieve. I use mine for rinsing quinoa, dusting powdered sugar, or straining out lemon seeds. Don’t go out and buy a ten-piece set; that’s just more clutter. Start with a solid colander and one small, decent mesh sieve. That’s all the versatility you truly need.

    How do I keep my colander from sliding around the sink while I'm trying to drain heavy pasta?

    There is nothing more frustrating than a colander skittering across the sink while you’re trying to drain a heavy pot of pasta. If you’re using a flimsy plastic one, it’s probably because it lacks weight. Switch to a heavy-duty stainless steel model; the sheer mass helps it stay put. If you’re stuck with what you have, grab a damp kitchen towel, lay it flat in the sink, and set the colander on top. It creates instant friction.

  • Keeping Kitchen Floors Clean With a Broom

    Keeping Kitchen Floors Clean With a Broom

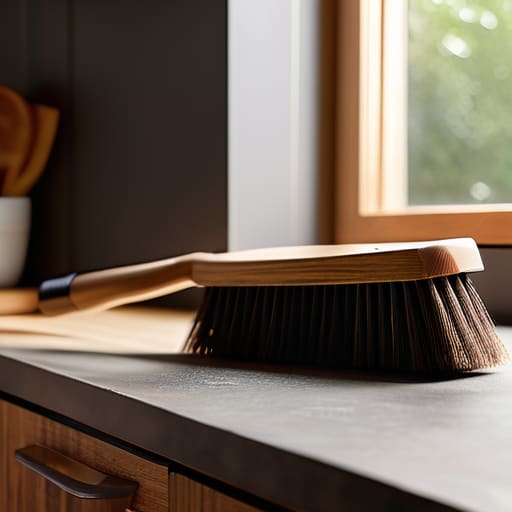
    I spent twenty years in commercial kitchens, and if there is one thing I learned, it’s that you can’t manage a professional workspace with tools that feel like toys. I’ve lost count of how many times I’ve seen someone walk into a kitchen store and get talked into buying some high-tech, motorized cleaning gadget that promises the world but delivers nothing. Honestly, most of that stuff is just a waste of shelf space. When you’re dealing with a spilled bag of flour or a pile of crumbs after a big dinner, you don’t need bells and whistles; you need a broom and dustpan that actually stays upright and picks up the mess in one go without leaving a trail of dust behind.

    I’m not here to sell you on the latest trendy plastic junk that’s going to snap at the handle by next Tuesday. My goal is to help you cut through the marketing noise and identify the sturdy, reliable essentials that earn their place in your pantry. I’ll show you exactly what to look for in terms of bristle density and floor contact so you can invest in tools that last a lifetime instead of replacing cheap versions every single year.

    Table of Contents

    Choosing the Best Broom for Hardwood Floors

    Choosing the Best Broom for Hardwood Floors

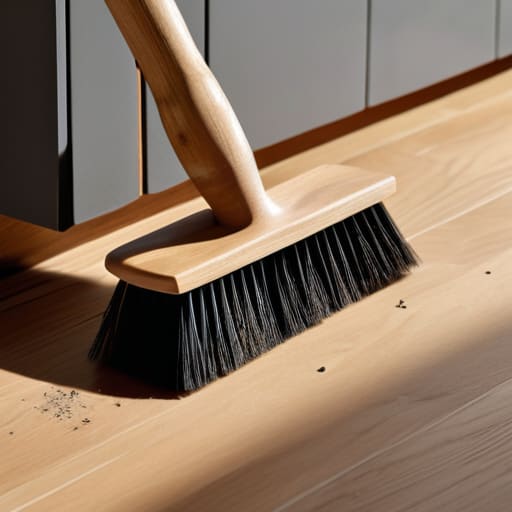
    When you’re dealing with hardwood, you have to be careful. I’ve seen too many people treat their floors like they’re sweeping a concrete garage, and that’s a quick way to ruin a beautiful finish with micro-scratches. You aren’t looking for those stiff, aggressive bristles found in industrial models. Instead, you want something with soft, natural fibers or high-quality synthetic bristles that glide across the surface. Finding the best broom for hardwood floors means prioritizing a tool that picks up fine dust without acting like sandpaper.

    I always tell my clients to look for ergonomic sweeping tools to save their backs. If you’re constantly bending over because the handle is too short, you’re going to end up hating your cleaning routine. A long, sturdy handle is non-negotiable. Pair it with a low-profile dustpan—ideally one with a thin edge—so you aren’t constantly re-sweeping the same pile of crumbs that refuses to go into the pan. It’s about efficiency and protecting your investment, not just moving dirt around.

    Why Microfiber Dustpan Sets Outlast Trendy Plastic

    Why Microfiber Dustpan Sets Outlast Trendy Plastic

    I’ve seen it a thousand times in commercial kitchens: a staff member grabs a cheap, neon-colored plastic set from a big-box store, uses it for three weeks, and then it’s in the landfill because the handle snapped or the pan warped. It’s a waste of money and a waste of space. If you want to stop the cycle of buying disposable junk, look toward microfiber dustpan sets. Unlike those flimsy plastic alternatives that just push dust around, microfiber is designed to actually trap the fine particles rather than letting them swirl back into your air.

    When you are cleaning debris from tile or grout, you need something that actually makes contact with the floor. Most trendy plastic pans have a gap at the edge that leaves a thin line of dust behind, forcing you to sweep the same spot five times. A high-quality microfiber set stays flush against the surface, making your workflow much more efficient. It’s about investing in tools that work as hard as you do, rather than settling for something that looks cute on a store shelf but fails the moment you actually put it to work.

    Five Rules for Buying Cleaning Tools That Won't End Up in a Landfill

    • Look for a broom with a solid wood or heavy-duty metal handle; if it feels light and hollow in your hand, it’s going to snap the moment you apply any real pressure.
    • Avoid those “all-in-one” colorful plastic sets you see in big-box stores; they look cute on the shelf, but the bristles lose their shape within a month and the dustpan won’t sit flush against the floor.
    • Check the broom’s bristle density—you want something thick and tightly packed that can actually move debris, not a sparse, flimsy set that just pushes dust around in circles.
    • If you’re dealing with heavy kitchen messes, prioritize a dustpan with a high-quality rubber lip; if that edge isn’t tight against the floor, you’ll spend more time sweeping the same pile twice than actually cleaning.
    • Store your broom upside down or hang it up; letting the bristles sit flat on a hard floor for weeks is the fastest way to ruin their shape and make them useless for fine sweeping.

    My Golden Rules for Kitchen Floor Maintenance

    Stop buying the cheap, lightweight plastic sets from big-box stores; they snap at the joints the moment you apply any real pressure.

    Match your broom bristles to your floor type—soft enough for hardwood to avoid scratches, but sturdy enough to actually move debris on tile.

    Look for a dustpan with a long handle and a solid lip to save your back and ensure you aren’t just pushing crumbs around the floor.

    ## The Real Cost of Cheap Cleaning Tools

    “I’ve seen enough commercial kitchens to know that a cheap, flimsy dustpan is just a way to move dirt from one corner to another; if you want a kitchen that actually stays clean, invest in a set that doesn’t snap the first time you apply any real pressure.”

    Rosalind Hayter

    Investing in the Basics

    Investing in the basics: durable cleaning tools.

    At the end of the day, a broom and dustpan might seem like the most trivial items in your pantry, but they are the workhorses of your kitchen maintenance. We’ve covered why you need to match your broom bristles to your specific flooring—whether that’s soft enough for delicate hardwood or sturdy enough for tile—and why skipping those cheap, flimsy plastic sets is the only way to avoid a constant cycle of replacement. If you focus on durability over aesthetics and prioritize materials that can actually handle daily debris, you won’t find yourself halfway through a cleanup only to have a handle snap in your hand. It’s about building a kit of tools that actually work instead of just filling up your utility closet with clutter.

    I know it isn’t as glamorous as buying a high-end stand mixer or a designer espresso machine, but there is a quiet dignity in having a kitchen that functions seamlessly. When you stop chasing every trendy gadget and start investing in the fundamental essentials, you reclaim your time and your sanity. A well-chosen broom isn’t just a cleaning tool; it’s part of a disciplined approach to your home. Stop settling for the disposable junk and start building a kitchen that stands the test of time. You deserve a space that supports your life, one sweep at a time.

    Frequently Asked Questions

    How often should I actually be replacing my broom bristles before they become ineffective?

    Look, I’m not one for unnecessary spending, but there’s no point in using a tool that’s just moving dirt around. If your bristles are splaying out like a bad hair day or they’ve lost their stiffness, they aren’t sweeping; they’re just dancing over the debris. Generally, I tell my clients to swap them out every year or two, depending on how heavy your kitchen traffic is. If it feels limp, toss it.

    Is it worth splurging on a heavy-duty industrial broom for a standard residential kitchen?

    Honestly? For a standard kitchen, no. I’ve seen too many people buy those heavy-duty industrial brooms thinking “more weight equals more power,” but they’re a nightmare to maneuver around kitchen island corners or under baseboards. They’re bulky, heavy, and frankly, overkill. Save your money. You’re better off investing in a high-quality, ergonomic residential broom with natural bristles. It’ll handle your daily crumbs without breaking your back or your bank account.

    What's the best way to clean the broom and dustpan so they don't just collect more dirt than they remove?

    If you aren’t cleaning your tools, you’re basically just spreading yesterday’s grit around. Once a week, take your broom outside and give the bristles a good shake or a vigorous tap against a hard surface to knock out the trapped debris. For a deeper clean, rinse the bristles in warm, soapy water—just make sure they dry bristles-down so they don’t lose their shape. Wipe your dustpan clean with a damp cloth; don’t let hair and dust build up in the corners.

  • Different Types of Can Openers for Your Kitchen

    Different Types of Can Openers for Your Kitchen

    I still remember a frantic Saturday night during my catering days, standing in a dim commercial kitchen with a mountain of prep work ahead of me and a cheap, $5 gadget that just wouldn’t cooperate. There is nothing quite as infuriating as a tool that fails right when you’re in the weeds, leaving you to pick at jagged metal edges like you’re working with a dull knife. Most people think they just need a “better brand,” but they’re missing the point entirely. It isn’t about the name on the box; it’s about understanding the actual can opener mechanics that dictate whether a tool glides through a lid or leaves you fighting for your life against a stubborn tin.

    I’m not here to sell you on some high-tech, motorized nonsense that will inevitably end up in a landfill in two years. Instead, I’m going to pull back the curtain on what actually makes a tool work. We are going to look at the leverage, the blade geometry, and the structural integrity you should demand from every piece of gear you buy. My goal is to help you build a kitchen filled with tools that last a lifetime, so you can stop fighting your equipment and get back to the actual joy of cooking.

    Table of Contents

    The Lever Principle in Kitchen Tools You Can Trust

    The Lever Principle in Kitchen Tools You Can Trust

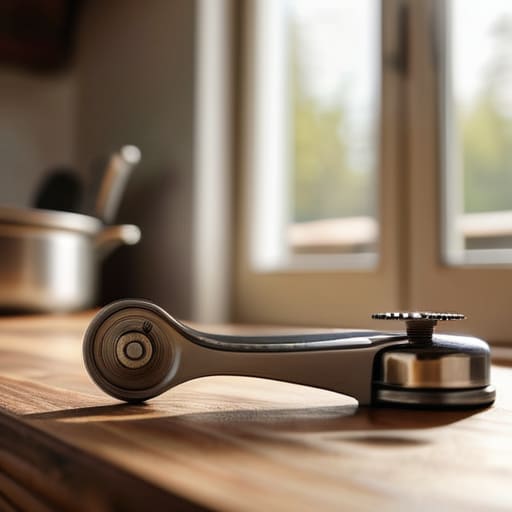
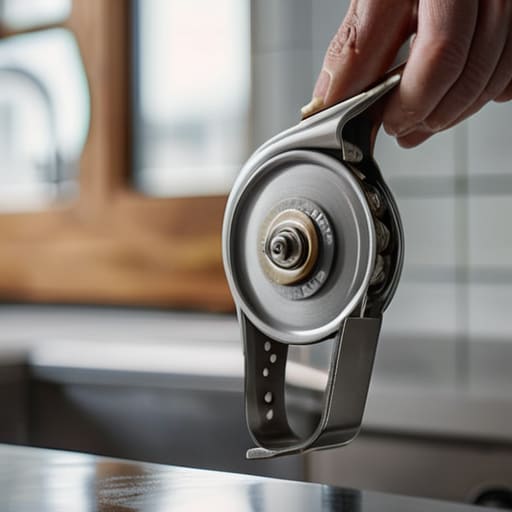
    When I was managing banquet kitchens, I saw way too many cooks struggling with cheap, lightweight openers that required twice the effort for half the result. That’s because they lack a proper application of the lever principle in kitchen tools. A decent opener isn’t just a handle and a blade; it’s a machine designed to multiply your strength. When you use a tool with long, sturdy handles, you’re utilizing mechanical advantage to do the heavy lifting for you. You shouldn’t have to white-knuckle a gadget just to get through a standard tin of tomatoes.

    I always look for a model that features a smooth rotary cutting action rather than one that requires you to “crush” the lid. The best ones use a high-quality cutting wheel mechanism that glides through the metal with minimal resistance. If you feel like you’re fighting the tool, the physics are working against you. I tell my clients to skip the plastic-handled junk and invest in something with enough weight and leverage to make the job feel effortless. Good tools should feel like an extension of your hand, not an obstacle in your way.

    Mastering the Rotary Cutting Action for Clean Results

    Mastering the Rotary Cutting Action for Clean Results

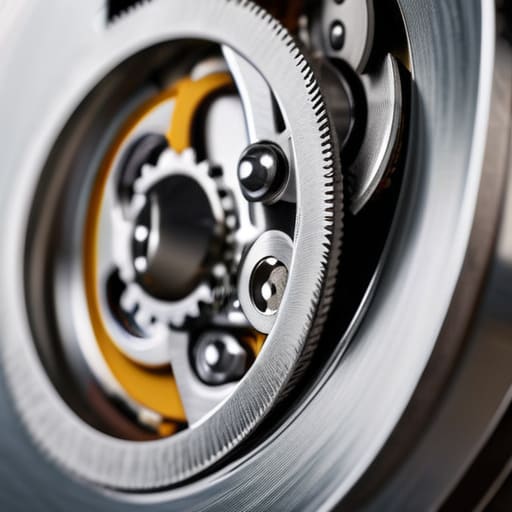
    It isn’t just about the strength you apply; it’s about how that force is translated through the cutting wheel mechanism. When I was managing commercial kitchens, I saw too many cooks struggle with cheap, stamped-metal openers that just tore at the lid, leaving jagged edges that were a nightmare for safety. A proper tool uses a precise rotary cutting action to slice through the tin rather than crushing it. You want a wheel that stays sharp and tracks a smooth, predictable path around the rim.

    The secret to that effortless glide is often found in the gear ratio in manual openers. A well-engineered tool ensures that even a small turn of the handle provides enough torque to drive the blade through the metal without you having to white-knuckle the grip. If you feel like you’re fighting the can, the mechanics are failing you. I always tell my organizing clients: if the rotation feels clunky or uneven, it’s time to toss it. Invest in something that treats the metal with respect, and you’ll save your wrists and your sanity.

    Five Ways to Tell if Your Can Opener is Worth the Counter Space

    • Look for high-carbon steel gears. If the teeth look like they’re made of soft tin, they’ll dull after a dozen cans, and you’ll be left fighting a piece of metal that refuses to bite.
    • Prioritize a smooth-edge cut. A quality mechanical design cuts through the lid rather than tearing it; if you’re getting jagged metal shards falling into your soup, your opener’s alignment is garbage.
    • Check the handle leverage. Give the handles a test squeeze—they should feel sturdy and offer resistance without needing a massive amount of hand strength to engage the gears.
    • Avoid the battery-operated nonsense. Unless you’re running a commercial line with a hundred cans an hour, a manual, gear-driven opener is more reliable, easier to clean, and won’t die on you mid-recipe.
    • Inspect the pivot point. A well-engineered tool has a tight, stable pivot where the arms meet; if there’s too much “wiggle” in the mechanism, you’re going to lose precision and end up with messy edges.

    The Bottom Line on Choosing Your Next Can Opener

    Forget the cheap, lightweight models that bend under pressure; look for weight and mechanical leverage in your hand to ensure the tool does the work, not your wrists.

    Prioritize smooth rotary action over sheer force, as a sharp, well-aligned cutting wheel prevents the jagged, messy edges that lead to wasted food and potential injury.

    Invest in all-metal construction and avoid plastic-heavy designs, because a kitchen tool is only as good as its ability to survive a decade of heavy use.

    ## The Difference Between a Gadget and a Tool

    “If you’re struggling to get through a simple tin of tomatoes, it isn’t your strength failing you—it’s the physics of a poorly designed tool. A real can opener shouldn’t feel like a toy; it should use leverage to do the heavy lifting so your hands don’t have to.”

    Rosalind Hayter

    Stop Settling for Less

    Stop Settling for Less: Reliable Can Opener

    At the end of the day, understanding the mechanics of a can opener isn’t just about trivia; it’s about recognizing the difference between a tool and a toy. We’ve looked at how the lever principle provides the necessary force to puncture metal without straining your wrists, and how a sharp, rotary cutting action prevents that messy, jagged edge that ruins a good meal. When you prioritize a heavy-duty design over a cheap, lightweight imitation, you aren’t just buying a gadget—you are investing in mechanical reliability. You shouldn’t have to fight your equipment just to get to the ingredients you need for dinner.

    My advice is simple: stop cluttering your drawers with plastic junk that breaks the moment things get difficult. Instead, find that one solid, all-metal piece that feels substantial in your hand and treat it like the essential tool it is. A well-made kitchen is built on the foundation of quality over quantity, and that starts with the basics. Buy things that are meant to last, maintain them well, and let them do their job so you can get back to what actually matters: the cooking itself.

    Frequently Asked Questions

    How can I tell if a can opener is made of high-quality steel or if it's just cheap, plated junk that'll rust in a month?

    Don’t just look at the shine; look at the weight. If it feels light and hollow in your hand, it’s likely cheap stamped tin with a thin coating that’ll flake off by next month. Pick up a heavy, solid-feeling model. Check the gears—they should be thick, stainless steel, not flimsy plastic. If the “metal” feels like it might bend under a little pressure, put it back. You want something that feels like a tool, not a toy.

    Is there a real difference in performance between a traditional edge-cutting opener and those newer smooth-edge models?

    Look, there’s a massive difference, and it comes down to how much frustration you’re willing to tolerate. Those smooth-edge models are great for safety because they don’t leave jagged metal on the lid, but they often struggle with thicker tin. Traditional edge-cutters are the workhorses; they slice through the lid like a hot knife through butter. If you want speed and reliability, stick to the traditional ones—just watch your fingers.

    What are the signs that the internal gears are starting to fail before I end up struggling with a stuck lid?

    Listen for a change in the sound. If that smooth, rhythmic whir starts sounding like grinding sand or a heavy, uneven clicking, your gears are stripping. You’ll also notice the resistance; if you find yourself having to force the handle or if it feels “spongy” rather than firm, the teeth aren’t meshing right. Don’t wait until you’re mid-prep with a stuck lid. Once that mechanical feedback changes, it’s time to retire it.

  • When to Use a Serrated Knife

    When to Use a Serrated Knife

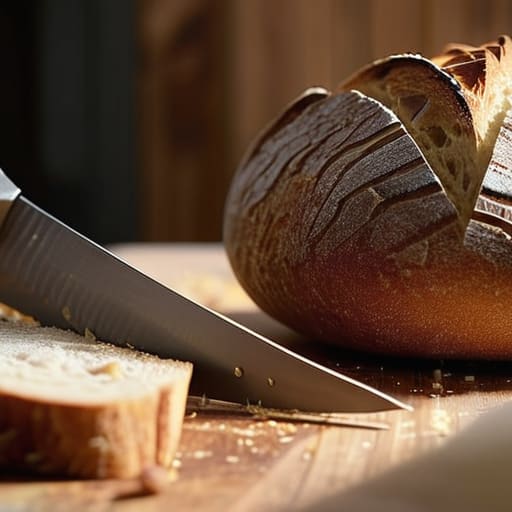
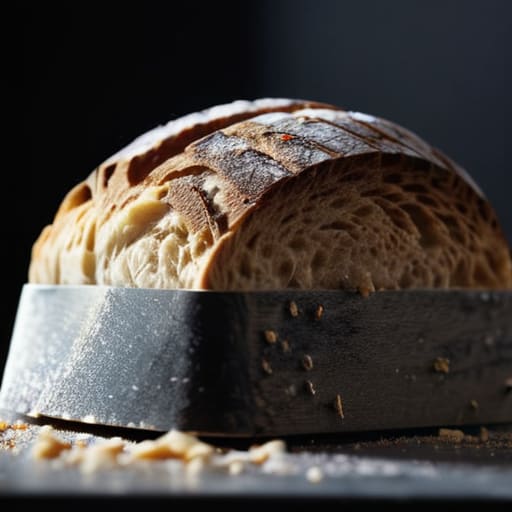
    I still remember a frantic Saturday night during my catering days, trying to slice through a crusty sourdough boule for a hundred guests while my sous chef struggled with a standard chef’s knife. Every time he pressed down, the loaf didn’t slice; it just shattered into a mess of crumbs and crushed dough. It was a total waste of good bread and precious time. That’s when I realized that a standard blade is useless against a hard crust, and if you aren’t using a dedicated serrated knife, you are essentially fighting your food instead of preparing it.

    I’m not here to sell you on some $300 Japanese designer blade that requires a degree in metallurgy just to use. My goal is to help you cut through the marketing fluff and find a tool that actually does its job for the next twenty years. I’m going to show you exactly what to look for in a blade—from teeth depth to handle grip—so you can stop wasting money on flimsy kitchen junk and start building a kit that actually works for you.

    Table of Contents

    Serrated vs Straight Edge Blade Choosing Tools That Last

    Serrated vs Straight Edge Blade Choosing Tools That Last

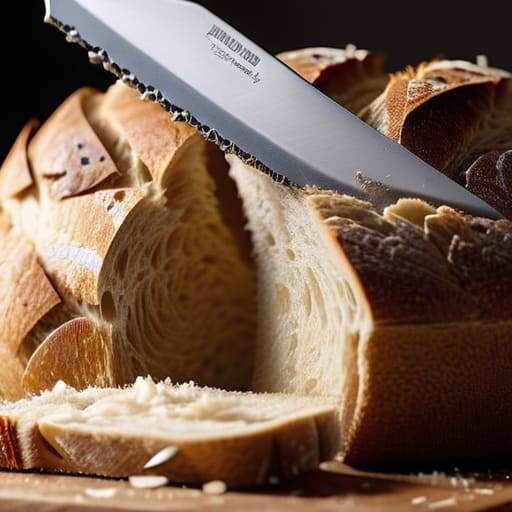
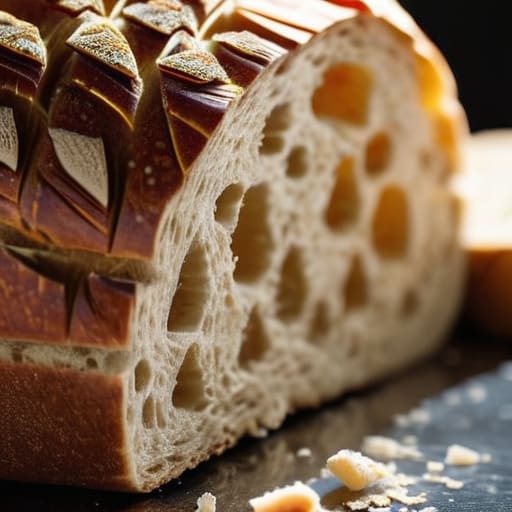
    In my years managing commercial kitchens, I saw far too many cooks try to force a straight blade through a sourdough loaf, only to end up squashing the airy crumb into a dense mess. When you’re weighing the pros and cons of a serrated vs straight edge blade, you have to think about the physics of what you’re cutting. A straight edge is your workhorse for precision—slicing through proteins or dicing onions with clean, surgical movements. But if you try to use that same chef’s knife on a hard crust, you’re just fighting the food.

    A serrated blade works differently; those teeth act like tiny saws that bite into tough surfaces without requiring downward pressure. This makes it the best knife for crusty bread and even certain fruits with thick, stubborn skins. However, don’t make the mistake of thinking a serrated tool is a universal fix. You can’t use it for fine mincing or delicate slicing without tearing the product apart. My advice? Don’t look for one “magic” knife in your professional kitchen knife sets. Instead, respect the knife edge geometry of each tool and use the right one for the specific job at hand.

    The Best Knife for Crusty Bread and Beyond

    The Best Knife for Crusty Bread and Beyond.

    When people ask me what the absolute first thing they should buy for a functional kitchen is, I don’t point them toward a fancy chef’s knife. I point them toward a high-quality serrated blade. If you’ve ever tried to slice through a sourdough boule with a smooth blade, you know the frustration—you end up squashing the airy interior just to get through that hard, protective crust. The best knife for crusty bread works by using those teeth to saw through the tension of the crust without applying downward pressure that ruins the crumb.

    But don’t make the mistake of thinking this tool is only for your weekend baking projects. In my years managing commercial kitchens, I learned that a good serrated blade is a workhorse for more than just loaves. It is remarkably efficient for cutting soft skin vegetables like ripe tomatoes or juicy peaches, where a straight edge tends to slip and bruise the fruit. Instead of smashing the delicate flesh, the teeth bite in and create a clean path. It’s about using the right tool for the specific job, rather than trying to force one blade to do everything.

    Five Rules for Using Your Serrated Blade Without Making a Mess

    • Stop sawing like you’re cutting wood; use a gentle, rhythmic motion and let the teeth do the heavy lifting so you don’t crush the delicate interior of your loaf.
    • Check your blade’s teeth regularly—if they look rounded or smooth rather than sharp and distinct, it’s time to invest in a new one rather than trying to sharpen it yourself.
    • Don’t use your serrated knife for delicate tasks like slicing ripe tomatoes unless you absolutely have to; a sharp straight edge is much kinder to soft skins.
    • Keep a dedicated cutting board for your bread to protect those serrated teeth; uneven surfaces or hard stone boards will dull your blade much faster than wood.
    • Always wipe the blade clean immediately after use, especially if you’ve been cutting anything acidic like citrus, to prevent those tiny grooves from harboring bacteria or pitting.

    The Bottom Line on Serrated Blades

    Stop buying cheap, flimsy serrated knives that bend under pressure; look for a heavy, well-balanced blade that holds its edge through thick crusts.

    Don’t let the “all-purpose” marketing fool you—a serrated knife is a specialist tool meant for bread, tomatoes, and citrus, not your daily vegetable prep.

    Invest in quality over quantity by choosing a single, high-grade serrated knife that will last decades rather than a dozen plastic-handled sets that end up in a landfill.

    The Truth About Your Knife Drawer

    “I’ve seen too many people try to force a smooth chef’s knife through a sourdough crust, only to end up with a smashed loaf and a bruised ego. A good serrated blade isn’t a specialty tool; it’s the workhorse that respects the texture of your food instead of fighting it.”

    Rosalind Hayter

    Don't Overthink the Drawer

    Don't Overthink the Drawer: high-quality knife.

    At the end of the day, you don’t need a twenty-piece knife block cluttering up your counter space to be a competent cook. If you’ve understood the difference between a straight edge and a serrated blade, you already know that a single, high-quality serrated knife can handle everything from a sourdough boule to a ripe tomato without breaking a sweat. Stop hunting for every niche gadget promised by late-night infomercials; instead, focus on finding a blade with proper weight and a sharp, aggressive tooth that won’t let you down when the pressure is on. Invest in the steel, keep it clean, and stop wasting money on the cheap, serrated junk that loses its edge after three loaves of bread.

    A functional kitchen isn’t about having the most expensive tools; it’s about having the right tools that actually serve your daily rhythm. When you stop fighting your ingredients and start working with them, cooking becomes less of a chore and more of a steady, reliable habit. Grab that quality knife, pull up a stool, and get to work. Your kitchen should be a place of efficiency and ease, not a graveyard for unused plastic. Build your kit one solid, lifetime investment at a time, and I promise you’ll never regret it.

    Frequently Asked Questions

    How do I actually sharpen a serrated blade without ruining the teeth?

    Don’t even think about running a serrated blade through a standard pull-through sharpener; you’ll just chew up the teeth. To do this right, you need a ceramic honing rod. You’ll work the rod into the gullets—the little valleys between the teeth—using a gentle, circular motion. It’s tedious work, and I’ll be honest, it’s not as fast as a straight edge, but it’s the only way to maintain that precision without ruining the knife.

    Is it worth buying a specialized bread knife, or can I just use one serrated knife for everything from tomatoes to citrus?

    Look, I’ve seen enough cluttered junk drawers to know you don’t need a dozen specialized blades. If you’re on a budget, one high-quality, medium-sized serrated knife will handle your tomatoes, citrus, and sourdough just fine. However, if you’re baking heavy, crusty artisan loaves daily, a dedicated long-blade bread knife is worth the investment. It prevents crushing the airy interior. Buy for your actual habits, not for a hypothetical collection.

    What should I look for in a handle to make sure it doesn't slip when I'm working through a tough crust?

    When you’re sawing through a sourdough crust, the last thing you need is your hand sliding toward the blade. Forget those thin, overly polished handles that feel like soap when your hands get a bit damp. Look for something with a substantial “heft” and a contoured shape that fits your palm. A matte finish or a subtle textured grip is key—it provides the friction you need without feeling tacky or cheap.

  • Tips for Safe Mandoline Slicer Use

    Tips for Safe Mandoline Slicer Use

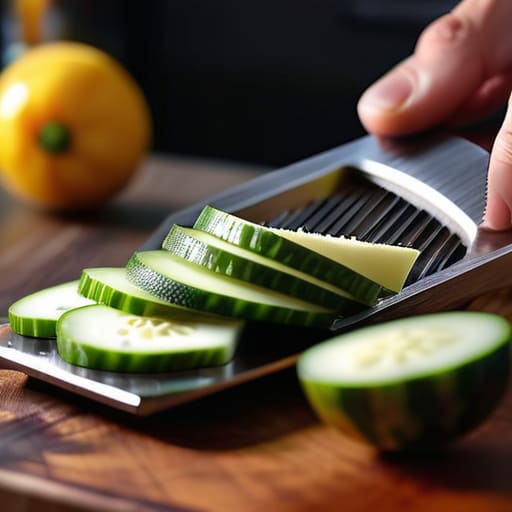
    I still remember a frantic Friday night rush in the catering kitchen back in the late nineties, the air thick with steam and the frantic rhythm of knives hitting boards. I watched a junior prep cook try to hand-slice a mountain of cucumbers for a salad course, his hands shaking and his speed nowhere near where it needed to be. He was struggling because he was trying to do with a chef’s knife what a mandoline slicer was designed to do in a fraction of the time. But then I saw him reach for one of those cheap, flimsy plastic models from a discount department store, and I knew he was in for a bad time—and likely a trip to the emergency room.

    I’m not here to sell you on some high-tech, multi-functional gadget that promises to do everything but ends up cluttering your drawers. My goal is to help you identify a professional-grade tool that actually stays sharp and keeps your fingers intact. I’m going to walk you through exactly what to look for in a heavy-duty mandoline, from blade stability to safety guards, so you can invest in quality rather than wasting money on kitchen junk that won’t last the season.

    Table of Contents

    Precision Over Speed Achieving Perfectly Uniform Vegetable Slices

    Precision Over Speed Achieving Perfectly Uniform Vegetable Slices

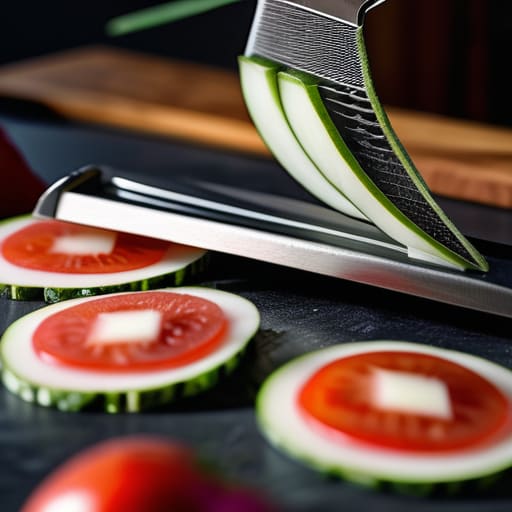
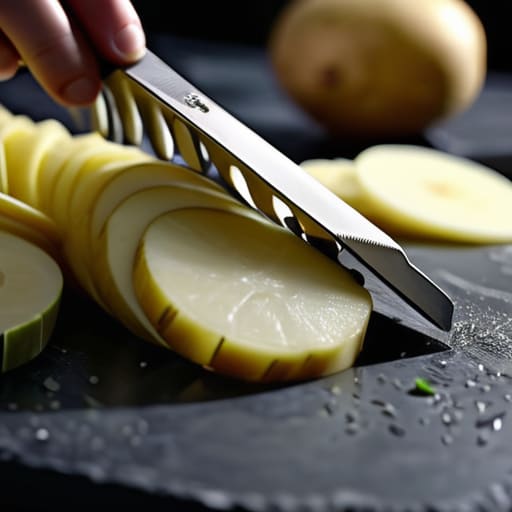
    When I was managing high-volume catering lines, consistency wasn’t just about aesthetics; it was about even cooking. If you throw a handful of unevenly sliced potatoes into a pan, you’ll end up with some mushy bits and some crunchy ones. That’s where a high-quality tool becomes a true food processor alternative. Instead of the blunt, uneven results you get from a knife when you’re in a rush, a professional-grade slicer gives you those perfectly uniform vegetable slices that ensure every piece hits the heat at the exact same time.

    The secret lies in the mechanics. You want a unit with adjustable thickness settings that actually stay locked in place while you work. If the dial slips halfway through a radish, you’ve just wasted half your prep work. I always tell my clients to look for heavy-duty stainless steel blades that can handle the resistance of a dense sweet potato without shuddering. It’s about that tactile control—knowing that every slice, from paper-thin to a hearty quarter-inch, is going to be exactly what you intended.

    The Food Processor Alternative You Actually Need

    The Food Processor Alternative You Actually Need

    I see people reach for their massive, ten-pound food processors the second they need to prep a salad, and frankly, it’s overkill. Those machines are great for heavy lifting, but they are a nightmare to clean and often turn your vegetables into a mushy, uneven mess. If you are looking for a true food processor alternative for daily prep, you need to look toward manual slicing tools that prioritize control. A high-quality manual slicer gives you those razor-thin, uniform vegetable slices that a spinning blade simply can’t replicate without destroying the texture.

    When I’m sketching out kitchen layouts for clients, I always advise them to prioritize tools that do one thing exceptionally well. Instead of a cluttered cabinet full of motorized gadgets, invest in a manual unit with adjustable thickness settings and high-grade stainless steel blades. It’s about efficiency and longevity. You get the precision of a chef without the constant battle of scrubbing plastic attachments in the sink. Just make sure you never, ever skip using the mandoline slicer safety guard—no amount of culinary skill is worth a trip to the emergency room.

    How to Use a Mandoline Without Losing a Finger (or Your Patience)

    • Buy a high-quality hand guard and actually use it. I’ve seen too many home cooks think they’re too skilled to need one, but a slip is a slip, and no amount of kitchen experience makes your skin tougher than a steel blade.
    • Invest in a slicer with replaceable blades. Don’t buy a cheap unit where the whole machine goes in the trash the moment the edge dulls; look for a professional-grade frame that lets you swap out the steel.
    • Keep your vegetables dry before you start slicing. If you’re working with damp cucumbers or washed radishes, the slices will slide around on the surface, which is exactly when accidents happen.
    • Check your blade alignment frequently. If you notice the slices starting to look ragged or uneven, stop immediately. A dull or misaligned blade doesn’t just ruin the food; it forces you to apply more pressure, which is how you lose control.
    • Clean it immediately after every use. Dried starch from potatoes or sugars from onions will turn into a sticky mess that ruins the precision of the next slice and makes the cleaning process a nightmare.

    The Bottom Line on Slicing

    Stop buying cheap, plastic slicers that wobble; invest in a heavy-duty, stainless steel model that stays stable on your counter and actually holds its edge.

    Safety isn’t optional—if the tool doesn’t come with a reliable guard or a way to protect your fingers, leave it on the store shelf.

    A mandoline is a tool for precision, not a shortcut for laziness; use it when uniformity matters for even cooking, but don’t let it replace your basic knife skills.

    A Tool for Precision, Not Just Speed

    “I’ve seen too many people clutter their drawers with cheap, plastic slicers that wobble when you use them; if you aren’t going to invest in a heavy-duty, professional-grade mandoline, you’re better off just using a chef’s knife and a little patience.”

    Rosalind Hayter

    Stop Searching and Start Slicing

    Stop Searching and Start Slicing with mandolines.

    At the end of the day, a mandoline isn’t just another piece of clutter to shove into a drawer; it is a fundamental tool for anyone serious about their prep work. We’ve discussed why you need to prioritize heavy-duty construction over those cheap, colorful plastic versions that snap the first time you try to slice a radish. We’ve also clarified that while a food processor is great for bulk work, it can’t replicate the delicate, paper-thin precision of a manual blade. If you invest in a high-quality, stainless steel model and commit to learning the proper safety techniques, you aren’t just buying a gadget—you are investing in your own efficiency and the quality of every meal you serve.

    My advice is simple: don’t let the fear of a sharp blade keep you from mastering a tool that will serve you for the next twenty years. A kitchen is only as good as the habits you build within it, and learning to respect your equipment is the first step toward professional-level results at home. Stop settling for unevenly cooked vegetables and inconsistent salads. Buy the right tool, keep it sharp, and make it work for you. Once you find your rhythm with a proper mandoline, you’ll wonder how you ever managed without it.

    Frequently Asked Questions

    How do I keep my fingers safe without using those flimsy plastic guards that always slip?

    Look, those flimsy plastic guards are a joke; they slide right off the moment things get slippery. If you want to keep your fingers intact, stop relying on them. Instead, invest in a high-quality stainless steel hand guard or, better yet, a specialized finger shield that actually grips. But honestly? The best way to stay safe is to master your technique and use a firm, steady hand. If the tool feels unstable, put it down.

    Is it worth spending the extra money on a professional-grade stainless steel model over the cheaper ones at big-box stores?

    Look, I’ve seen enough flimsy, $20 plastic slicers end up in the trash to know the answer. If you buy the big-box version, you’re paying for a headache. The blades dull in a month, the frame wobbles, and frankly, they’re dangerous when they slip. Spend the extra money on a professional stainless steel model. It’s an investment in stability and edge retention. Buy it once, keep it for twenty years, and stop wasting money on junk.

    What’s the best way to clean and sharpen the blades so they don't end up rusting in my drawer?

    First, stop letting them sit in a sink of soapy water; that’s how you invite rust. Hand-wash your blade with warm water and a soft sponge immediately after use, then dry it thoroughly with a clean towel. Never, ever put a mandoline in the dishwasher—it’ll ruin the edge and the frame. For sharpening, use a honing rod or a fine-grit whetstone. Keep it sharp, keep it dry, and it’ll last a lifetime.

  • How to Choose a Vegetable Peeler

    How to Choose a Vegetable Peeler

    I spent twenty years in commercial kitchens where speed was everything, and I can tell you one thing for certain: nothing kills your momentum faster than a cheap, flimsy tool that skips across the skin of a carrot. I’ve watched well-meaning home cooks spend a fortune on those “multi-functional” gadgets that claim to do everything from julienne to zester, only to end up with a drawer full of plastic junk that breaks the moment you apply any real pressure. Most of the different vegetable peeler styles you see in big-box stores are designed for aesthetic appeal, not for someone who actually needs to prep a meal without losing their patience.

    I’m not here to sell you on the latest trend or a gadget that requires a specialized manual to operate. My goal is to cut through the marketing noise and show you which tools actually earn their keep on a real countertop. I’m going to break down the most effective vegetable peeler styles based on durability and ergonomics, so you can invest in pieces that will last you a lifetime. We’re going to focus on the heavy-duty essentials that make prep work feel like a breeze rather than a chore.

    Table of Contents

    Stainless Steel Peeler Durability Over Trendy Gadgets

    Stainless Steel Peeler Durability Over Trendy Gadgets

    I’ve seen it a thousand times in commercial kitchens: a drawer full of colorful, plastic-handled gadgets that all perform exactly the same way—until they snap. Most people fall into the trap of buying whatever looks cute on a social media feed, but if you want true stainless steel peeler durability, you have to look past the neon colors. Plastic handles might feel comfortable for the first five minutes, but they eventually crack, harbor bacteria in the seams, and lose their grip when your hands are wet.

    When you’re deciding how to choose a vegetable peeler, look for a single piece of solid metal or a heavy-duty construction that doesn’t rely on cheap injection-molded parts. A professional-grade tool shouldn’t feel like a toy; it should have a bit of weight to it. I always tell my clients that investing in one high-quality metal tool is better for your wallet and your sanity than replacing a cheap one every six months. Buy it once, use it for a decade, and stop contributing to the landfill.

    How to Choose a Vegetable Peeler Built for Life

    How to Choose a Vegetable Peeler Built for Life

    When you’re standing at the counter prepping a mountain of carrots or potatoes, the last thing you need is a tool that cramps your hand or feels like a toy. If you want to know how to choose a vegetable peeler that actually survives a decade of use, start by looking at the weight and the grip. I always tell my clients to avoid anything that feels too light; if it’s hollow plastic, it’s going to flex and snap. You want something with a bit of heft that feels like an extension of your hand.

    You also need to decide on the mechanics based on your specific cooking habits. There is a significant difference between swivel and straight peelers when it comes to how they handle different textures. A swivel peeler is my go-to for speed and versatility with most round vegetables, but if you’re doing precision work or working with long, irregular stalks, a straight blade can offer more control. Look for ergonomic peeler designs that feature non-slip handles—not those cheap rubber coatings that degrade over time, but solid, integrated shapes that won’t peel off in your hand.

    Five Rules for Picking a Peeler That Actually Works

    • Stick to the Y-shape for bulk prep. When I was managing catering lines, we didn’t have time for delicate movements; a Y-peeler gives you more leverage and speed when you’re tackling a five-pound bag of carrots.
    • Avoid the “multi-function” trap. If a peeler claims it can also julienne, devein shrimp, and slice garlic, it’s going to do all of those things poorly. Pick a tool that does one job perfectly.
    • Check the blade’s swivel. A good peeler needs a blade that moves smoothly with the contour of the vegetable. If it feels stiff or catches constantly, it’s going to frustrate you and waste your produce.
    • Prioritize a full-body metal construction. I’ve seen too many people buy those colorful plastic-handled ones that eventually crack or harbor bacteria in the seams. A solid stainless steel handle is easier to sanitize and won’t snap under pressure.
    • Test the grip before you buy. It sounds simple, but if the handle feels slippery or too thin, your hand will cramp up during a long prep session. You want something that feels like an extension of your hand, not a toy.

    The Bottom Line on Peeler Selection

    Prioritize heavy-duty stainless steel over plastic; if it feels light and hollow in your hand, it’s going to break right when you need it most.

    Look for a single-piece construction or a solid build that minimizes moving parts to ensure the blade stays sharp and the handle stays attached.

    Focus on ergonomics that suit your grip, but remember that a tool’s longevity and material quality are far more important than a fancy aesthetic.

    The Tool vs. The Trinket

    I’ve seen enough flimsy, colorful plastic peelers end up in the landfill to know that if a tool feels like a toy in your hand, it’s going to fail you mid-prep. Stop chasing the latest kitchen trend and start looking for weight, grip, and a blade that actually holds an edge; a real peeler should feel like an extension of your hand, not a piece of disposable junk.

    Rosalind Hayter

    Stop Collecting, Start Investing

    Stop Collecting, Start Investing in quality tools.

    At the end of the day, choosing a peeler isn’t about finding the one with the most bells and whistles or the prettiest silicone handle. It’s about recognizing that a peeler is a workhorse, not a novelty. Whether you opt for the precision of a Y-peeler for bulk prep or a swivel style for delicate skins, the priority remains the same: material integrity and ergonomic stability. Skip the cheap, lightweight plastic models that feel hollow in your palm and offer zero control. If you invest in a heavy-duty stainless steel tool that feels substantial, you are making a decision to buy it once and use it for decades, rather than contributing to the endless cycle of kitchen drawer clutter.

    My advice is simple: treat your kitchen tools with the respect they deserve, and they will reward you with years of reliable service. There is a specific kind of satisfaction that comes from using a tool that just works—no slipping, no snapping, and no frustration. A well-chosen peeler won’t make you a Michelin-star chef overnight, but it will make the mundane task of prep work feel less like a chore and more like a seamless part of your rhythm. Focus on the fundamentals, master your technique, and remember that a functional kitchen is built on quality, not quantity.

    Frequently Asked Questions

    Is there a real difference between a swivel peeler and a Y-peeler, or is it just about what looks better in a drawer?

    It’s definitely not just about aesthetics, though some people prefer the look of one over the other. It comes down to ergonomics and what you’re prepping. I usually reach for a Y-peeler when I’m tackling large batches of root vegetables like carrots or potatoes; the stability is unmatched. Swivel peelers are great for more delicate, irregular shapes, but they can feel a bit flimsy. Choose the one that fits your hand best.

    Should I be looking for a peeler with a serrated blade for tougher skins like sweet potatoes, or is a standard blade enough?

    If you’re frequently working with sweet potatoes, butternut squash, or even thick-skinned citrus, a serrated blade is a lifesaver. A standard straight blade is great for cucumbers or carrots, but it can struggle to bite into those tougher, waxy skins, leading to uneven peeling and wasted produce. Honestly, if you want to be prepared for anything, keep a sturdy serrated peeler in your drawer. It’s one of those small investments that actually pays off.

    How do I know if a peeler is actually ergonomic, or is that just marketing speak for a comfortable grip?

    It’s a bit of both, honestly. “Ergonomic” is a buzzword, but in a kitchen, it’s the difference between a quick prep session and a hand cramp. Don’t just look at the shape; look at the weight distribution and the texture. If it’s all smooth plastic, your hand will slip when it gets wet. A truly ergonomic tool should feel like an extension of your hand, not something you’re fighting to hold onto.