
I’ve spent twenty years in commercial kitchens and catering halls, and if there is one thing that can ruin a perfectly good prep session, it’s a lid that won’t bite. There is nothing quite as infuriating as reaching into the pantry for leftovers, only to find a sticky, dried-on mess because your storage container seals failed to do their one job. I’ve seen it all—from expensive, “designer” sets that lose their grip after three washes to those flimsy, cheap plastic bins that seem to warp the moment they touch warm water. Most people think they need to buy a whole new set of containers every six months, but that’s just throwing money down the drain.
I’m not here to sell you on some trendy, gadget-heavy organization system that looks pretty on Instagram but fails in practice. Instead, I’m going to show you how to identify a seal that actually holds tight and how to maintain them so they last a lifetime. We are going to focus on the functional basics—the kind of durability I relied on when I was managing high-volume events. By the end of this, you’ll know exactly what to look for so you can stop wasting money on junk and start building a kitchen that actually works for you.
Prioritizing Food Preservation Airtightness Over Trendy Plastic Gadgets
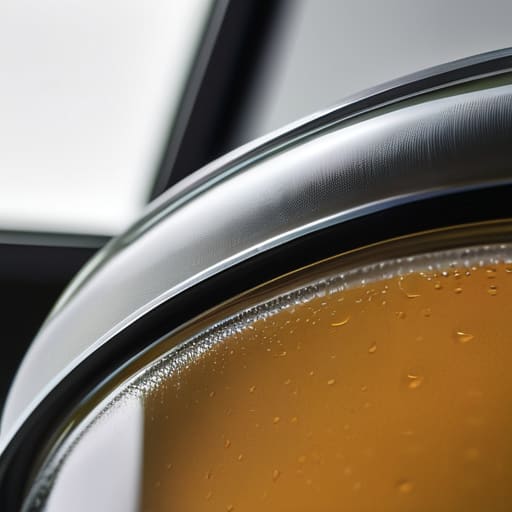
I’ve seen it a thousand times: someone walks into a kitchen store and gets distracted by a flashy, color-coded set of plastic bins that look great on a social media feed but fail the moment they hit a pantry shelf. People spend a fortune on these trendy gadgets, yet they ignore the actual science of food preservation airtightness. If your container doesn’t create a true vacuum or a tight physical barrier, it doesn’t matter how pretty the box is. You’re essentially just storing your groceries in a very expensive, very transparent trash can.
When I’m sketching out a layout or auditing a client’s pantry, I look for one thing: container lid seal integrity. A lid that feels “snug” isn’t necessarily airtight. You need something that actively works to stop air exchange. I always tell people to prioritize the quality of the seal over the aesthetic of the container. Investing in heavy-duty glass or high-grade stainless steel might cost more upfront, but you’re paying for the ability to actually keep your ingredients fresh. Stop buying for the “look” and start buying for the seal.
The Hidden Cost of Compromised Container Lid Seal Integrity
When you ignore a failing seal, you aren’t just dealing with a minor annoyance; you’re essentially throwing money directly into the trash. I’ve seen it a thousand times in commercial kitchens: a slightly loose lid leads to a wilted head of lettuce or, worse, a container of dry grains that have turned into a clumpy mess. This loss of food preservation airtightness is a silent budget killer. You think you’re saving money by buying bulk, but if your container lid seal integrity is compromised, that bulk ends up in the compost bin instead of your pantry.
Beyond the wasted groceries, there’s the issue of hygiene. A seal that doesn’t seat properly allows for preventing moisture ingress to become an impossible task. Once humidity gets inside, you’re inviting mold and bacteria to set up camp. Instead of tossing the whole set when things get funky, I always suggest looking into silicone gasket replacement. It’s a small, inexpensive fix that saves the entire container. Don’t let a cheap piece of rubber dictate how much food you waste every single week.
My Field-Tested Rules for Keeping Your Seals Functional
- Stop the “Stack and Pray” Method: Never force a lid onto a container if the seal feels even slightly misaligned. If you’re fighting the gasket, you’re going to stretch it out or crack it, and once that seal loses its shape, it’s nothing more than an expensive piece of plastic scrap.
- Check Your Silicone Regularly: Every few months, pull the silicone ring out of your containers. I’ve seen too many people let old food particles or moisture get trapped behind the seal, which breeds mold and eventually ruins the airtightness. A quick rinse and a dry wipe keep them performing like new.
- Invest in Glass with Real Gaskets: If you want to stop wasting money, move away from those snap-on plastic lids that lose their tension after a month in the dishwasher. Look for heavy-duty glass containers with thick, replaceable silicone seals. They actually hold a vacuum, and you can replace the ring without throwing the whole set in the bin.
- Avoid the Dishwasher Trap for Lids: I know it’s tempting to toss everything in the machine, but the intense heat can warp the delicate edges of your seals. If you want your containers to stay airtight for years instead of weeks, hand-wash the lids and the gaskets. It takes two minutes, but it saves you a fortune in replacement costs.
- Listen for the “Hiss”: When you’re sealing a container, especially one with a locking mechanism, listen for that slight change in air pressure. If it doesn’t feel like it’s creating a slight resistance, it isn’t sealed. If you can’t hear or feel the seal engaging, your food is already starting to oxidize.
The Bottom Line on Keeping Your Kitchen Functional
Stop buying sets based on how they look in a cabinet; prioritize a heavy-duty, airtight seal that actually keeps moisture out and prevents food waste.
View your storage containers as long-term investments rather than disposable plastic—if the lid doesn’t snap or seal perfectly, it’s not worth the shelf space.
A working kitchen relies on predictable tools, so invest in reliable seals now to avoid the constant frustration of spoiled ingredients and messy spills later.
Making the Right Call for Your Kitchen
At the end of the day, your kitchen is only as efficient as the tools you allow to occupy your space. We’ve talked about why those flimsy, mismatched plastic lids are a drain on your wallet and why prioritizing a truly airtight seal is the only way to stop food waste in its tracks. Don’t let a collection of warped, leaky containers dictate how you manage your groceries. By investing in high-quality seals and durable materials, you aren’t just buying “stuff”—you are investing in a system that actually functions. Stop chasing the latest kitchen trends and start focusing on the structural integrity of your storage.
I know it’s tempting to just grab whatever is cheapest at the big-box store, but I promise you, your future self will thank you for the discipline. A well-organized kitchen isn’t about having a hundred different gadgets; it’s about having a few reliable pieces that do exactly what they are supposed to do every single time you open the pantry. When your containers actually hold tight, you gain more than just fresh produce; you gain a sense of order and control over your home. Build your kitchen on a foundation of quality, and you’ll find that everything else—from meal prep to cleanup—becomes a whole lot easier.
Frequently Asked Questions
How can I tell if a silicone seal is actually degrading before it starts leaking?
Don’t wait for a puddle on your counter to tell you there’s a problem. Grab the seal and give it a stretch; if it feels gummy, tacky, or loses its “snap” when you pull it, it’s shot. Check for tiny discoloration spots or hairline cracks, too. If it feels thin or uneven, it won’t hold a vacuum. In my experience, if it doesn’t feel resilient in your hands, it isn’t protecting your food.
Are glass containers with snap-on lids better than the ones with heavy-duty silicone gaskets?
Look, it’s not about which one looks better on your shelf; it’s about how they hold up under pressure. Snap-on lids are great for quick grab-and-go meals, but if you’re prepping bulk ingredients or storing liquids, give me heavy-duty silicone gaskets every time. They create a much more reliable, airtight seal that won’t fail when you toss the container in a bag. Invest in the silicone; it’s the professional way to ensure nothing goes to waste.
What's the best way to clean mold out of those tiny crevices in the lid without ruining the seal?
Don’t go scrubbing those crevices with a stiff wire brush; you’ll just tear the silicone and ruin the seal for good. Instead, soak the lids in a solution of warm water and white vinegar. For those stubborn spots, use a soft-bristled toothbrush or a dedicated crevice tool. If the mold is deep, a quick dip in a mild diluted bleach solution works, but rinse them thoroughly. Dry them completely before reassembling—moisture is the enemy.
