Category: Reviews

  • Choosing a Cheese Grater for Different Textures

    Choosing a Cheese Grater for Different Textures

    I spent twenty years in commercial kitchens, and if there is one thing that drives me up the wall, it’s watching people pour money into those “multi-function” gadget bins. You know the ones—those flimsy, colorful plastic boxes that claim to slice, shred, and zest, but usually just end up jamming or snapping the moment you apply any real pressure. I’ve seen enough of them end up in the landfill to know that a cheap, glorified cheese grater is nothing more than a temporary convenience that eventually becomes a kitchen headache. You don’t need a specialized machine for every single ingredient; you just need a tool that actually works.

    I’m not here to sell you on the latest kitchen trend or a gadget that takes up half your drawer. My goal is to help you strip away the clutter and find the heavy-duty, stainless steel essentials that will still be working perfectly when you’re long retired. I’m going to show you exactly what to look for in a cheese grater so you can stop wasting money on junk and start investing in tools that last a lifetime.

    Table of Contents

    Box Grater vs Rotary Grater Choosing Lasting Durability
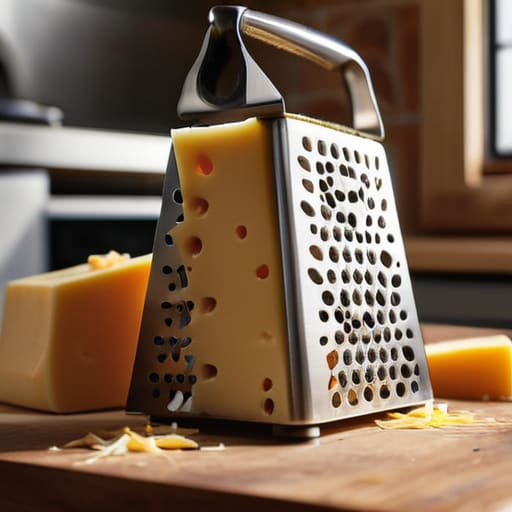
    Box Grater vs Rotary Grater Choosing Lasting Durability

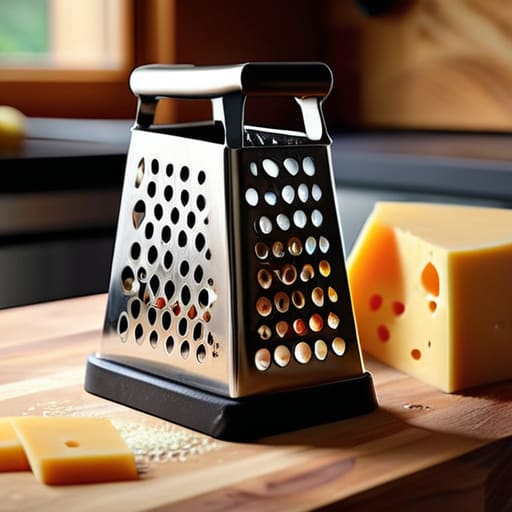
    When you’re deciding between a box grater vs rotary grater, you have to look past the shiny packaging and think about how you actually move in your kitchen. In my years managing catering lines, I learned that speed is nothing without reliability. A classic, heavy-duty box grater is the workhorse of the industry. It’s simple, it doesn’t have moving parts to break, and it handles everything from a block of sharp cheddar to a stubborn carrot. If you buy a stainless steel model with a thick frame, it’ll likely outlive your current appliances.

    Rotary graters, on the other hand, are often marketed as these ergonomic kitchen gadgets that save your wrists, but they come with a catch: complexity. They have more gears, more plastic housing, and more crevices where old cheese gets trapped and turns into a nightmare to clean. While they might be fine for a quick sprinkle of parmesan, they aren’t the foundation of a serious kitchen. If you want tools that stand up to daily use without falling apart, stick to the basics. Don’t let a fancy mechanism trick you into buying something that’s destined for the landfill in two years.

    Why Manual Food Prep Tools Beat Disposable Gadgets
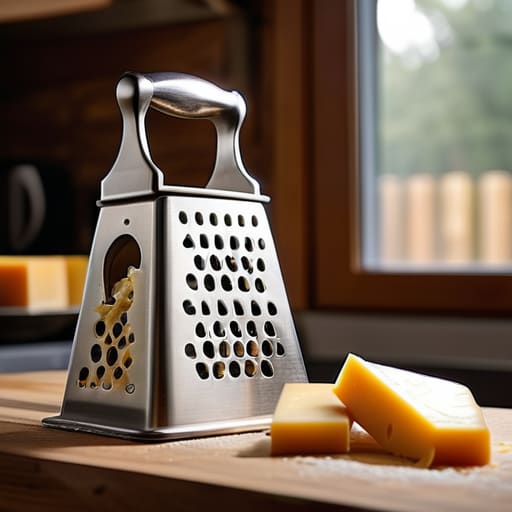
    Why Manual Food Prep Tools Beat Disposable Gadgets

    I’ve spent enough time in commercial kitchens to know that the more moving parts a tool has, the faster it’s going to break. We’ve been conditioned to think that “automatic” means “easier,” but in reality, most of those electric gadgets are just expensive landfill fodder waiting to happen. When you rely on manual food prep tools, you aren’t just saving counter space; you’re investing in something that doesn’t require a power cord or a proprietary replacement part. A simple, well-made tool gives you total control over the texture of your food, something a motorized blade will never replicate.

    If you want to elevate your cooking without the clutter, skip the multi-functional plastic machines and invest in a high-quality zester and microplane. These are the workhorses of a real kitchen. They are easy to clean, easy to store, and they don’t have a motor that will burn out after a year of heavy use. Instead of chasing the latest trend, focus on longevity and tactile feedback. When you use a tool that feels solid in your hand, you’ll find yourself actually enjoying the prep work rather than rushing through it just to get the machine cleaned up.

    Five Rules for Choosing a Grater That Won't End Up in the Trash

    • Look for heavy-gauge stainless steel. If the metal feels thin or flimsy in your hand, it’s going to bend the first time you try to tackle a block of aged parmesan. You want something with weight and substance.
    • Check the sharpness of the teeth, not just the count. I’ve seen plenty of “high-capacity” graters that are actually duller than a butter knife; they just tear at the cheese instead of slicing it, which is a massive waste of product.
    • Prioritize easy cleaning. If a grater has too many awkward nooks and crannies where cheese gets stuck and turns into a nightmare to scrub, it’s not a tool—it’s a chore. I always look for smooth welds and simple designs.
    • Avoid anything with plastic handles that feel hollow. In a professional kitchen, we rely on tools that can withstand heat and heavy use. Plastic handles are often the first point of failure, snapping off right when you’re in the middle of prep.
    • Match the tool to your actual habits. If you find yourself grating cheese every single night for pasta, invest in a high-quality box grater. If you only do it for occasional large batches, a rotary grater might suffice, but don’t buy a specialty gadget just because it looks cute in an ad.

    The Bottom Line on Grating

    Stop buying cheap, thin-gauge metal graters that bend under pressure; invest in heavy-duty stainless steel that won’t warp or snap when you’re halfway through a block of parmesan.

    Choose your tool based on volume—use a rotary grater for large batches to save your wrists, but keep a solid box grater on hand for precision and speed.

    Prioritize easy cleanup and material quality over “specialty” features; if it’s hard to wash or made of flimsy plastic, it’s just going to end up at the back of your junk drawer.

    The Truth About Your Prep Tools

    A cheap, flimsy grater is just a future piece of landfill waiting to happen; if you aren’t buying something with enough weight to feel substantial in your hand and enough steel to stay sharp through a thousand shreds, you’re just throwing money away.

    Rosalind Hayter

    Making the Right Call
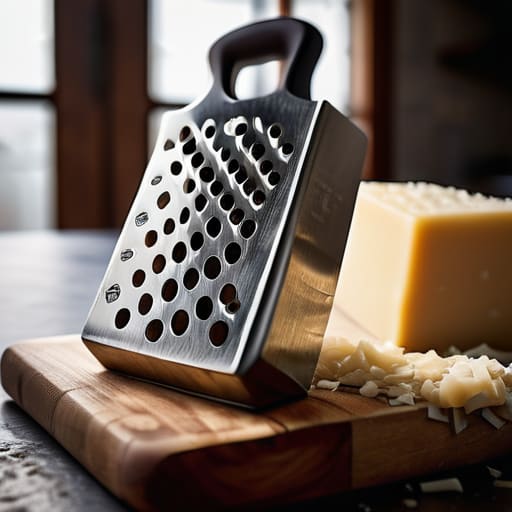
    Making the Right Call with quality graters.

    At the end of the day, choosing a grater isn’t about finding the flashiest tool in the aisle; it’s about deciding which one won’t end up in a landfill by next Christmas. Whether you decide a sturdy, classic box grater is your workhorse or you opt for the precision of a rotary model, make sure it’s built from solid, heavy-duty materials that can handle a real workload. I’ve seen far too many people buy those cheap, thin-walled versions that bend under the slightest pressure, and quite frankly, it’s a waste of your hard-earned money. Stick to the basics, prioritize build quality over bells and whistles, and you’ll have a tool that serves you faithfully for a decade rather than a month.

    My advice? Stop looking for a magic gadget to do the work for you and start investing in the foundations of a functional kitchen. A good grater is a small thing, but it’s a vital part of the ritual of cooking from scratch. When you have tools you can actually trust in your hands, the prep work stops feeling like a chore and starts feeling like part of the process. Build your kitchen around longevity and purpose, and I promise you’ll find that cooking becomes a lot more grounded and a lot less chaotic. Now, go grab that notebook, check your drawer, and let’s get rid of the junk.

    Frequently Asked Questions

    How do I know if a stainless steel grater is actually high-quality or just cheap metal with a fancy finish?

    Look for weight and tension. A high-quality stainless steel grater should feel substantial in your hand, not like a piece of flimsy tin foil. When you press your thumb against the blades, they shouldn’t flex or bend; they need to be rigid. Also, check the welds where the handle meets the body. If it looks messy or uneven, it’s going to snap. If it’s solid, heavy, and seamless, it’s built to last.

    Is it worth the extra space in my drawer to keep a microplane if I already have a standard box grater?

    Look, I get the drawer space struggle—I’ve organized enough cramped kitchens to know. But yes, it’s worth it. A box grater is your workhorse for blocks of cheddar or carrots, but it’s clumsy for delicate tasks. A microplane is a different beast entirely; it’s for the fine stuff like zest, hard parmesan, or ginger. You aren’t just buying another tool; you’re buying precision. Keep the microplane. It does things your box grater simply can’t.

    What’s the best way to clean a grater without risking my fingers or dulling the blades?

    Listen, I’ve seen too many people scrub a grater with a sponge and end up with a nasty nick on their knuckles. Don’t do that. The trick is to clean it while it’s still wet. Use a stiff-bristled dish brush—not a sponge—to scrub the blades. It gets into the crevices without the risk of slicing you open. If you’re dealing with stubborn cheese, soak it in warm, soapy water first. Just avoid the dishwasher; the heat kills the edge.
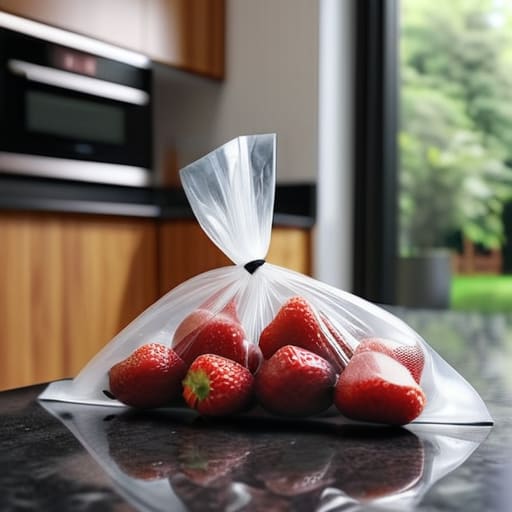
  • Vacuum Sealers for Freezer Storage

    Vacuum Sealers for Freezer Storage

    I spent two decades managing high-volume commercial kitchens, and if there is one thing I learned, it’s that most people treat food preservation like a guessing game. You buy a beautiful cut of steak or a bulk bag of organic greens, only to find them shriveled and gray in the crisper drawer a week later. I see people dropping hundreds of dollars on those flashy, countertop-sized gadgets that promise the world but break the moment you try to seal something thicker than a slice of bread. Honestly, a vacuum sealer shouldn’t be a luxury lifestyle accessory; it should be a workhorse in your kitchen that actually pays for itself by stopping waste in its tracks.

    I’m not here to sell you on some trendy, plastic-heavy gadget that will end up in a landfill by next Christmas. Instead, I’m going to give you the straight truth on what actually works for a real, functional kitchen. I’ll show you how to spot the difference between a cheap toy and a professional-grade tool that will last you a lifetime. We’re going to focus on durability and utility, ensuring that when you finally invest in one, it’s a decision that makes sense for your wallet and your pantry.

    Mastering Shelf Life Extension Without the Waste

    Mastering Shelf Life Extension Without the Waste

    Mastering Shelf Life Extension Without the Waste

    I’ve seen too many people treat a vacuum sealer like a novelty gadget rather than a fundamental tool for meal prep efficiency. In my years running commercial kitchens, we didn’t have the luxury of letting ingredients wilt; we relied on strict protocols to keep everything fresh. When you bring that mindset home, you stop treating food as something disposable. By using proper airtight storage solutions, you aren’t just saving a few dollars on a bag of spinach; you are fundamentally changing how your kitchen operates. It turns your freezer from a “black hole” of mystery frost-burned leftovers into a streamlined pantry of ready-to-go ingredients.

    It’s also about more than just making things last longer; it’s about expanding what you can actually do with your time. Once you master these food preservation techniques, things like sous vide preparation become effortless at home. You can portion out proteins, seal them tight, and know they’ll taste exactly as they did the day you bought them. Stop throwing money in the trash every time you clear out the crisper drawer. Invest the time to seal it right, and you’ll find your kitchen finally starts working for you.

    Reliable Airtight Storage Solutions for Your Pantry

    Once you’ve mastered the art of sealing, you need to think about where those packages actually live. I’ve seen too many people invest in high-end gear only to toss their supplies into a cluttered, humid pantry where nothing stays fresh. If you want to see real meal prep efficiency, you need to treat your pantry like a professional walk-in. I always recommend clear, stackable bins to house your sealed goods. It lets you see exactly what you have at a glance, which stops that mindless habit of buying a third bag of flour when you already have two tucked away in the back.

    Don’t overlook the importance of temperature and light, either. Even with the best airtight storage solutions, heat is the enemy of longevity. Keep your sealed grains, legumes, and dried goods in a cool, dark corner away from the oven or the toaster. I’ve learned through years of catering that organization isn’t just about aesthetics; it’s about protecting your investment. When your pantry is structured, you spend less time digging through plastic bags and more time actually cooking.

    How to Actually Use Your Sealer Without Making a Mess

    • Stop using those cheap, flimsy grocery store bags; invest in high-quality, BPA-free embossed rolls that won’t fail you halfway through a sealing cycle.
    • Always leave enough “headspace” at the top of the bag—if you cram it to the brim, you’ll get food particles in the seal, and a compromised seal is just a slow way to let air back in.
    • Don’t just vacuum seal everything blindly; remember that soft items like berries or bread need a gentle touch or a specialized setting to avoid getting crushed into a pancake.
    • Use the moisture setting if your machine has it, or better yet, freeze your liquids in a container first; trying to vacuum seal soup or sauce is a recipe for a sticky, broken machine.
    • Treat your sealer like any other piece of professional gear—wipe down the sealing bar regularly to prevent buildup, because a dirty machine is a machine that won’t hold a seal.

    My Rules for Buying a Vacuum Sealer

    Don’t get distracted by flashy digital screens or “smart” features; look for a heavy-duty motor and a wide sealing strip that won’t fail when you’re halfway through a bulk prep session.

    Skip the cheap, single-use plastic bags that tear easily and invest in high-quality, reusable vacuum pouches to ensure you aren’t just adding more waste to your pantry.

    Treat your sealer like any other professional tool—keep it clean, store it properly, and use it consistently to actually see the savings in your grocery budget.

    Making the Investment Count

    At the end of the day, a vacuum sealer isn’t just another countertop gadget meant to gather dust next to your unused bread maker. When you choose a machine that actually builds a tight, reliable seal, you are choosing to respect the ingredients you worked so hard to buy. We’ve talked about everything from extending the life of your proteins to keeping your pantry organized and free of pests. It comes down to this: stop treating your groceries like they’re disposable. By investing in quality equipment and learning a few basic preservation habits, you turn your kitchen from a place of constant waste into a highly efficient system that respects both your time and your wallet.

    I know there is a lot of noise out there telling you that you need every single kitchen innovation that hits the market, but please, listen to me: ignore the hype. You don’t need a smart-connected, touchscreen sealer that costs a month’s rent. You need a workhorse—something sturdy, simple, and capable of doing the job day in and day out. When you strip away the plastic junk and the trendy bells and whistles, you’re left with the core of what matters: functional tools that serve a purpose. Build your kitchen with intention, buy things that last, and I promise you’ll spend less time throwing away spoiled food and more time actually enjoying the process of cooking.

    Frequently Asked Questions

    Do I really need a specialized vacuum sealer, or can I just use heavy-duty freezer bags?

    Look, if you’re just tossing a few sandwiches in a bag, freezer bags are fine. But if you’re serious about preventing freezer burn on expensive proteins or prepping meals for the week, you need a dedicated machine. Heavy-duty bags are a temporary fix; a vacuum sealer creates a true, airtight seal that keeps moisture in and oxygen out. Don’t settle for “good enough” if you want your food to actually taste fresh.

    Is it worth investing in a countertop machine, or should I look into a handheld sealer for small batches?

    Look, if you’re just sealing a few bags of chips once a month, a handheld sealer is fine. But if you actually want to meal prep or freeze leftovers properly, get the countertop machine. Those little handhelds struggle with anything thicker than a thin plastic bag, and they’ll frustrate you within a week. If you’re serious about reducing waste, invest in the heavy-duty machine. It’s built to handle the real work.

    How do I know if a sealer is powerful enough to handle liquids like soups or sauces without making a mess?

    If you’re planning on freezing leftovers like chili or a batch of homemade marinara, you need a machine with a “moist” setting or a manual pulse control. Most cheap, entry-level sealers will suck that liquid straight into the motor, which is a nightmare to clean and can kill the machine. Look for a unit that allows you to control the suction strength. If you can’t dial it back, you’re just asking for a mess.

  • Using a Baking Stone for Better Crust Quality

    Using a Baking Stone for Better Crust Quality

    I’ve spent twenty years in commercial kitchens, and if there is one thing that makes my blood boil, it’s watching people pour money into those “smart” electric pizza ovens that promise the world but deliver nothing but a soggy crust. Most people think they need a high-tech gadget to get professional results, but the truth is much simpler and a lot more heavy-duty. You don’t need more electronics; you need a proper baking stone. I’ve seen countless home cooks get frustrated when their dough sticks or fails to rise, all because they’re relying on thin, flimsy pans instead of a piece of thermal mass that actually knows how to hold heat.

    I’m not here to sell you on some trendy, plastic-wrapped kitchen accessory that will end up in a landfill by next Christmas. My goal is to cut through the marketing noise and tell you exactly what to look for in a high-quality stone that will last a lifetime. I’m going to share the practical, no-nonsense truth about heat retention, maintenance, and how to actually use one without making a mess of your oven. If you want to stop wasting money and start baking like a professional, you’re in the right place.

    Table of Contents

    Choosing Between Ceramic vs Cordierite Stone for Longevity

    Choosing Between Ceramic vs Cordierite Stone for Longevity

    When you’re looking at the shelves, you’ll likely see two main contenders: ceramic and cordierite. Now, don’t let the fancy marketing fool you; there’s a massive difference in how these materials handle the heat. Ceramic is fine if you’re just doing light weekend baking, but it’s prone to cracking if you aren’t careful. If you’re looking for something that can actually handle the thermal shock of a hot oven, you want cordierite. It’s much more resilient, which is vital when you’re preheating oven with baking stone to get those high temperatures needed for bread.

    In the debate of ceramic vs cordierite stone, cordierite is the clear winner for anyone who actually cooks. It offers superior heat retention for pizza, ensuring that when the dough hits the surface, it gets that immediate sear. I’ve seen too many people buy cheap ceramic slabs only to have them shatter after six months of heavy use. If you want a tool that survives the rigors of a busy kitchen and helps in achieving crispy crust every single time, invest in the cordierite. It’s the professional’s choice for a reason.

    The Truth About Heat Retention for Pizza Perfection

    The Truth About Heat Retention for Pizza Perfection.

    If you’ve ever pulled a pizza out of the oven only to find a gummy, limp center, you haven’t had a heat problem; you’ve had a tool problem. The real secret to achieving crispy crust isn’t just about the temperature on your oven dial—it’s about how much energy that surface can hold when the cold dough hits it. When you’re preheating your oven with a baking stone, you’re essentially building up a thermal battery. A high-quality stone absorbs that heat and dumps it directly into the bottom of your dough, creating that instant steam release that makes a crust light and airy rather than dense and soggy.

    Now, I often get asked about baking stone vs steel when it comes to raw power. While a piece of baking steel will technically transfer heat faster, a well-chosen stone provides a more consistent, steady soak of heat that’s much more forgiving for home cooks. You want that thermal mass to stay stable so that even if you’re opening the door to grab your toppings, the surface temperature doesn’t plummet. It’s about consistent heat delivery, not just a quick flash of high temp.

    How to Treat Your Stone Like a Professional Tool

    • Stop the thermal shock. I’ve seen too many people pull a stone straight from a cold counter and dump boiling dough on it, only to hear that dreaded crack. Let your stone come to room temperature naturally before you even think about preheating the oven.
    • Forget the soap. Your baking stone is porous, which means if you scrub it with dish soap, you’re basically seasoning your pizza crust with Lavender Breeze. A stiff brush and some hot water are all you need to clear away the crumbs.
    • Patience is a requirement, not an option. You can’t just turn the oven on and toss a pizza in five minutes later. You need to let that stone sit in the heat for at least forty-five minutes to an hour so the core actually gets saturated with warmth.
    • Give it breathing room. Don’t shove your stone into a cramped, cluttered oven where it’s touching the walls or the heating elements. It needs space for the air to circulate properly, or you’ll end up with uneven hot spots.
    • Learn the “no-flour” rule. It’s tempting to toss a handful of flour onto the stone to prevent sticking, but that flour burns, turns into carbon, and creates a bitter taste. Use a pizza peel with a little cornmeal or semolina instead; it’s cleaner and much more effective.

    The Bottom Line on Your Baking Stone

    Don’t get distracted by cheap, thin ceramic options that crack after a few uses; if you want a stone that actually handles the thermal shock of a hot oven, invest in cordierite.

    A heavy-duty stone isn’t just for pizza—it’s about building a reliable heat reservoir that ensures your bread and pastries cook evenly every single time.

    Stop looking for “specialty” gadgets and just focus on quality; a single, well-made stone is a lifetime tool, whereas those flimsy alternatives are just more clutter for your cabinets.

    Stop Chasing Gadgets, Start Investing in Heat

    I’ve seen enough flimsy, single-use kitchen junk to last a lifetime; if you’re going to commit counter space to a baking stone, make sure it’s a heavy-duty piece that actually holds its heat, because a stone that can’t maintain a steady temperature is just an expensive way to cook mediocre bread.

    Rosalind Hayter

    Making the Right Call

    Making the Right Call with baking stones.

    At the end of the day, choosing a baking stone isn’t about finding the flashiest gadget on the market; it’s about understanding how heat moves through your oven. Whether you decide on the classic reliability of ceramic or the superior thermal shock resistance of cordierite, remember that you are investing in consistency. You want a stone that can handle the sudden temperature shifts of a preheated oven without cracking, and one that holds enough heat to give your dough that professional, crispy foundation. Don’t let the marketing hype distract you from the basics: look for density, look for durability, and buy for the long haul.

    I’ve seen too many people clutter their cabinets with single-use pizza pans that end up in a landfill within a year. A high-quality baking stone is different. It’s a tool that grows with you, becoming more reliable the more you use it. Once you master the timing and the temperature, you won’t just be making food; you’ll be perfecting a craft. Stop chasing the latest kitchen trends and start building a toolkit that actually works. Get a good stone, get your habits right, and let the results speak for themselves.

    Frequently Asked Questions

    How do I stop my baking stone from cracking the first time I use it?

    The biggest mistake I see is people treating a baking stone like a piece of regular cookware. You can’t just throw it into a screaming hot oven from a cold start. To prevent cracking, you need to practice thermal shock management. Start with a cold oven, place the stone inside, and let it heat up gradually alongside the appliance. Never, ever put a hot stone in water or on a cold countertop. Patience is what keeps it intact.

    Is it actually worth cleaning a stone, or should I just scrape it and move on?

    Scrape it, don’t soak it. I see people trying to scrub these stones with soap like they’re a dinner plate, and it’s a disaster waiting to happen. Soap gets trapped in the pores and ruins your next batch of crust. Use a bench scraper to lift off the burnt bits, then hit it with some coarse salt or a stiff brush. If it’s truly stubborn, just let it be. A little char adds character; soap adds regret.

    Can I use my baking stone for more than just pizza, like bread or roasted vegetables?

    Absolutely. If you’re only using your stone for pizza, you’re barely scratching the surface of what it can do. I use mine for crusty sourdough loaves and even roasted root vegetables. The heavy thermal mass mimics a professional hearth, giving you that superior heat transfer. Just a tip from someone who’s seen too many ruined pans: avoid using oils or fats directly on the stone. Stick to dry heat, and it’ll serve you well for years.

  • Instant Read Probes and Response Time

    Instant Read Probes and Response Time

    I spent twenty years in commercial kitchens where “close enough” was a recipe for disaster, and I’ve seen far too many home cooks try to wing it with a knife or a prayer. There is this ridiculous myth that you need a $300 smart-tech gadget with a Bluetooth connection just to tell if a chicken is safe to eat. Honestly, most of those over-engineered contraptions are just expensive distractions that end up sitting in a junk drawer. If you aren’t using a reliable, high-quality probe thermometer, you aren’t cooking; you’re just gambling with your dinner.

    I’m not here to sell you on the latest kitchen gadget craze or show you how to sync a device to your smartphone. My goal is to help you strip away the nonsense and find a tool that actually does its job every single time. I’m going to walk you through exactly what to look for in a probe thermometer so you can stop guessing and start trusting your results. We’re going to focus on durability and accuracy—the only two things that actually matter when you’re standing over a hot stove.

    Why Digital Food Thermometer Accuracy Defines a Real Cook

    Why Digital Food Thermometer Accuracy Defines a Real Cook

    In my years managing commercial kitchens, I saw more money thrown in the trash than I care to admit—usually in the form of overcooked, dry protein. People think they can eyeball a steak or poke a chicken breast and just “know” when it’s ready. That’s a gamble, and in a professional setting, we don’t gamble with food safety. Digital food thermometer accuracy isn’t just a luxury for foodies; it is the difference between a meal that’s succulent and one that’s essentially leather. When you rely on a high-quality instant read temperature sensor, you aren’t just checking a box; you’re taking control of the chemistry happening in your pan.

    If your tool is off by even five degrees, your entire recipe is compromised. I’ve seen cheap, bargain-bin sensors drift so badly they become useless after a month of heavy use. A real cook knows that consistency is everything. You want a device that gives you a definitive answer the second it hits the meat, allowing you to pull that roast off the heat at the exact moment it hits the target. It’s about precision, not guesswork.

    Choosing Between Thermocouple Probe Types for Lifelong Use

    When you’re looking at different thermocouple probe types, don’t let the technical jargon intimidate you. In my years running commercial kitchens, I learned that the distinction usually comes down to how much you value your time versus your budget. You’ll see thin, delicate wires designed for high-speed readings; these are fantastic for precision, but they can be temperamental if you aren’t careful with them. Then there are the sturdier, thicker probes. While they might take an extra second to stabilize, they are built like tanks and can handle the daily abuse of a busy home kitchen without snapping.

    If you want a tool that survives a decade of Sunday roasts, I always suggest looking for a waterproof temperature probe. There is nothing more frustrating than a high-end device that dies because you couldn’t wipe it down after a messy prep session. Proper kitchen thermometer maintenance starts with choosing a model that can actually handle being washed. Invest in something rugged that won’t fail you right when you’re halfway through a holiday meal.

    Five Rules for Making Your Thermometer Work as Hard as You Do

    • Stop testing the air. When you’re checking a roast or a chicken breast, make sure the tip of the probe is in the thickest part of the meat and not touching bone or fat, otherwise, you’re just reading a lie.
    • Calibrate it once a month. Even the good ones drift over time. Grab a glass of ice water, stick the probe in, and if it doesn’t read exactly 32°F (0°C), you need to adjust it or get a new one.
    • Treat the probe like a surgical instrument. I’ve seen too many people wipe a dirty probe on a stained kitchen towel and then stick it right back into a prime cut of beef. Wash it with warm soapy water every single time.
    • Don’t be a hero with the heat. If you’re using a wireless probe that stays in the oven, read the manual twice. I’ve seen enough expensive gear ruined because someone thought “heat resistant” meant “indestructible.”
    • Keep it in its holster. A probe thermometer isn’t a multi-tool; it’s a precision instrument. Don’t toss it loose in a junk drawer with your whisk and spatula where the tip can get bent or dulled.

    The Bottom Line on Buying a Thermometer

    Stop buying the cheap, plastic versions that lose accuracy after a month; invest in a professional-grade probe that you can actually rely on when the stakes are high.

    Learn the difference between a quick-read instant thermometer and a thermocouple probe so you aren’t caught off guard by how long it takes to get a reading.

    Remember that a thermometer is only as good as your habit—use it every single time to build the muscle memory that keeps your food safe and your dinners consistent.

    The Bottom Line on Precision

    At the end of the day, choosing a probe thermometer isn’t about collecting more kitchen gadgets; it’s about investing in predictability. We’ve talked about why accuracy is non-negotiable, the difference between thermocouple types, and why you should steer clear of the cheap, plastic-heavy models that fail after a month of heavy use. When you pick a tool that is built to last and calibrated to be precise, you stop fighting against your ingredients and start working with them. A good thermometer is the bridge between a meal that is “fine” and a meal that is perfectly executed every single time.

    I’ve spent decades in professional kitchens where timing was everything, and I can tell you that confidence in the kitchen comes from knowing your tools won’t let you down. Don’t let a dry roast or an undercooked chicken ruin a beautiful evening just because you were too afraid to trust your eyes over a reliable reading. Buy the quality gear, learn the temperatures, and trust the science. Once you stop guessing, you’ll find that the stress of cooking starts to melt away, leaving you with nothing to do but enjoy the food you’ve worked so hard to create.

    Frequently Asked Questions

    How often should I actually be calibrating my thermometer to make sure it's still giving me honest numbers?

    Look, I don’t expect you to calibrate every Tuesday, but you can’t just set it and forget it. If you’re a daily cook, check it once a month. If you only use it for holiday roasts, once or twice a year is plenty. My rule of thumb? If a recipe comes out looking or tasting “off,” or if you just bought a new unit, run an ice bath test immediately. Don’t trust a drifting sensor.

    Is it worth spending the extra money on a wired probe for slow-roasting, or is a handheld digital one enough?

    If you’re just checking a steak or a chicken breast, a handheld digital is plenty. But if you’re serious about slow-roasting a brisket or a pork shoulder, spend the extra money on a wired probe. There is nothing more frustrating than having to open the oven door and let all that heat escape just to check a temperature. A wired probe lets you monitor the meat from the counter, keeping the oven steady and your results consistent.

    What are the best ways to clean the probe without ruining the sensor or causing it to rust?

    Treat your probe like a precision instrument, not a piece of scrap metal. After every use, wipe it down with warm, soapy water immediately. If you’ve been dealing with stubborn proteins or grease, a gentle soak in mild detergent is fine, but never, ever toss it in the dishwasher—the high heat and harsh chemicals will wreck the sensor and ruin the calibration. Dry it thoroughly by hand right away to prevent any rust from creeping in.

  • Tips for Safe Mandoline Slicer Use

    Tips for Safe Mandoline Slicer Use

    I still remember a frantic Friday night rush in the catering kitchen back in the late nineties, the air thick with steam and the frantic rhythm of knives hitting boards. I watched a junior prep cook try to hand-slice a mountain of cucumbers for a salad course, his hands shaking and his speed nowhere near where it needed to be. He was struggling because he was trying to do with a chef’s knife what a mandoline slicer was designed to do in a fraction of the time. But then I saw him reach for one of those cheap, flimsy plastic models from a discount department store, and I knew he was in for a bad time—and likely a trip to the emergency room.

    I’m not here to sell you on some high-tech, multi-functional gadget that promises to do everything but ends up cluttering your drawers. My goal is to help you identify a professional-grade tool that actually stays sharp and keeps your fingers intact. I’m going to walk you through exactly what to look for in a heavy-duty mandoline, from blade stability to safety guards, so you can invest in quality rather than wasting money on kitchen junk that won’t last the season.

    Table of Contents

    Precision Over Speed Achieving Perfectly Uniform Vegetable Slices

    Precision Over Speed Achieving Perfectly Uniform Vegetable Slices

    When I was managing high-volume catering lines, consistency wasn’t just about aesthetics; it was about even cooking. If you throw a handful of unevenly sliced potatoes into a pan, you’ll end up with some mushy bits and some crunchy ones. That’s where a high-quality tool becomes a true food processor alternative. Instead of the blunt, uneven results you get from a knife when you’re in a rush, a professional-grade slicer gives you those perfectly uniform vegetable slices that ensure every piece hits the heat at the exact same time.

    The secret lies in the mechanics. You want a unit with adjustable thickness settings that actually stay locked in place while you work. If the dial slips halfway through a radish, you’ve just wasted half your prep work. I always tell my clients to look for heavy-duty stainless steel blades that can handle the resistance of a dense sweet potato without shuddering. It’s about that tactile control—knowing that every slice, from paper-thin to a hearty quarter-inch, is going to be exactly what you intended.

    The Food Processor Alternative You Actually Need

    The Food Processor Alternative You Actually Need

    I see people reach for their massive, ten-pound food processors the second they need to prep a salad, and frankly, it’s overkill. Those machines are great for heavy lifting, but they are a nightmare to clean and often turn your vegetables into a mushy, uneven mess. If you are looking for a true food processor alternative for daily prep, you need to look toward manual slicing tools that prioritize control. A high-quality manual slicer gives you those razor-thin, uniform vegetable slices that a spinning blade simply can’t replicate without destroying the texture.

    When I’m sketching out kitchen layouts for clients, I always advise them to prioritize tools that do one thing exceptionally well. Instead of a cluttered cabinet full of motorized gadgets, invest in a manual unit with adjustable thickness settings and high-grade stainless steel blades. It’s about efficiency and longevity. You get the precision of a chef without the constant battle of scrubbing plastic attachments in the sink. Just make sure you never, ever skip using the mandoline slicer safety guard—no amount of culinary skill is worth a trip to the emergency room.

    How to Use a Mandoline Without Losing a Finger (or Your Patience)

    • Buy a high-quality hand guard and actually use it. I’ve seen too many home cooks think they’re too skilled to need one, but a slip is a slip, and no amount of kitchen experience makes your skin tougher than a steel blade.
    • Invest in a slicer with replaceable blades. Don’t buy a cheap unit where the whole machine goes in the trash the moment the edge dulls; look for a professional-grade frame that lets you swap out the steel.
    • Keep your vegetables dry before you start slicing. If you’re working with damp cucumbers or washed radishes, the slices will slide around on the surface, which is exactly when accidents happen.
    • Check your blade alignment frequently. If you notice the slices starting to look ragged or uneven, stop immediately. A dull or misaligned blade doesn’t just ruin the food; it forces you to apply more pressure, which is how you lose control.
    • Clean it immediately after every use. Dried starch from potatoes or sugars from onions will turn into a sticky mess that ruins the precision of the next slice and makes the cleaning process a nightmare.

    The Bottom Line on Slicing

    Stop buying cheap, plastic slicers that wobble; invest in a heavy-duty, stainless steel model that stays stable on your counter and actually holds its edge.

    Safety isn’t optional—if the tool doesn’t come with a reliable guard or a way to protect your fingers, leave it on the store shelf.

    A mandoline is a tool for precision, not a shortcut for laziness; use it when uniformity matters for even cooking, but don’t let it replace your basic knife skills.

    A Tool for Precision, Not Just Speed

    “I’ve seen too many people clutter their drawers with cheap, plastic slicers that wobble when you use them; if you aren’t going to invest in a heavy-duty, professional-grade mandoline, you’re better off just using a chef’s knife and a little patience.”

    Rosalind Hayter

    Stop Searching and Start Slicing

    Stop Searching and Start Slicing with mandolines.

    At the end of the day, a mandoline isn’t just another piece of clutter to shove into a drawer; it is a fundamental tool for anyone serious about their prep work. We’ve discussed why you need to prioritize heavy-duty construction over those cheap, colorful plastic versions that snap the first time you try to slice a radish. We’ve also clarified that while a food processor is great for bulk work, it can’t replicate the delicate, paper-thin precision of a manual blade. If you invest in a high-quality, stainless steel model and commit to learning the proper safety techniques, you aren’t just buying a gadget—you are investing in your own efficiency and the quality of every meal you serve.

    My advice is simple: don’t let the fear of a sharp blade keep you from mastering a tool that will serve you for the next twenty years. A kitchen is only as good as the habits you build within it, and learning to respect your equipment is the first step toward professional-level results at home. Stop settling for unevenly cooked vegetables and inconsistent salads. Buy the right tool, keep it sharp, and make it work for you. Once you find your rhythm with a proper mandoline, you’ll wonder how you ever managed without it.

    Frequently Asked Questions

    How do I keep my fingers safe without using those flimsy plastic guards that always slip?

    Look, those flimsy plastic guards are a joke; they slide right off the moment things get slippery. If you want to keep your fingers intact, stop relying on them. Instead, invest in a high-quality stainless steel hand guard or, better yet, a specialized finger shield that actually grips. But honestly? The best way to stay safe is to master your technique and use a firm, steady hand. If the tool feels unstable, put it down.

    Is it worth spending the extra money on a professional-grade stainless steel model over the cheaper ones at big-box stores?

    Look, I’ve seen enough flimsy, $20 plastic slicers end up in the trash to know the answer. If you buy the big-box version, you’re paying for a headache. The blades dull in a month, the frame wobbles, and frankly, they’re dangerous when they slip. Spend the extra money on a professional stainless steel model. It’s an investment in stability and edge retention. Buy it once, keep it for twenty years, and stop wasting money on junk.

    What’s the best way to clean and sharpen the blades so they don't end up rusting in my drawer?

    First, stop letting them sit in a sink of soapy water; that’s how you invite rust. Hand-wash your blade with warm water and a soft sponge immediately after use, then dry it thoroughly with a clean towel. Never, ever put a mandoline in the dishwasher—it’ll ruin the edge and the frame. For sharpening, use a honing rod or a fine-grit whetstone. Keep it sharp, keep it dry, and it’ll last a lifetime.

  • Why Your Oven Runs Hotter Than the Dial Says

    Why Your Oven Runs Hotter Than the Dial Says

    I remember a Saturday night back when I was managing a high-volume catering kitchen, trying to pull forty trays of roasted vegetables out for a wedding. I had the dials set perfectly, but the pans came out looking like they’d been sitting in a lukewarm bath rather than a searing oven. That’s when I realized that trusting your appliance’s built-in display is a fool’s errand; oven temperature accuracy is rarely something you can take on faith. You can buy the most expensive, stainless steel professional range on the market, but if that heating element is lying to you, your expensive ingredients are just going to waste.

    I’m not here to sell you some high-tech, Wi-Fi-enabled gadget that promises to revolutionize your life. Instead, I’m going to show you how to stop playing guessing games with your dinner. I’ll walk you through the simple, low-cost ways to verify your heat and ensure your kitchen actually works the way it’s supposed to. We’re going to cut through the marketing fluff and get back to the basics of reliable cooking, because a kitchen is only as good as the tools you can actually trust.

    Mastering Oven Thermometer Usage for Real Results

    Mastering Oven Thermometer Usage for Real Results

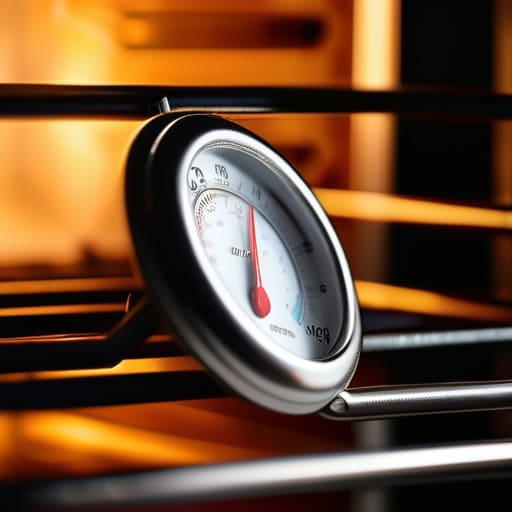
    If you’re still relying solely on the little dial on your stove, you’re playing a guessing game you’re destined to lose. I’ve seen too many expensive cuts of meat ruined because a recipe called for 375°F, but the oven was actually hovering at 350°F. To fix this, you need a standalone analog thermometer. Proper oven thermometer usage isn’t about being obsessive; it’s about being precise. Place it right in the center of the rack to get a true reading of the ambient heat. If you notice the temperature swings wildly every time the heating element kicks in, you’re dealing with poor thermal distribution in ovens, and no amount of recipe tweaking will save your soufflé.

    Once you have your thermometer, don’t just look at the number and walk away. Use it to start identifying oven hot spots by moving the device to different corners of the cavity. If the back left is consistently ten degrees hotter than the front, you’ll know exactly when it’s time to rotate your pans halfway through. This is how you achieve true baking temperature consistency without the frustration.

    Solving the Mystery of Convection Oven Temperature Variance

    If you’ve ever pulled a tray of cookies out only to find the edges are charred while the centers are still raw dough, you’ve run head-first into convection oven temperature variance. In my years managing catering kitchens, I learned that a convection fan isn’t just a luxury; it’s a powerful tool that changes how heat moves. Because that fan forces hot air to circulate, it often makes the oven feel hotter than the dial suggests. If you aren’t adjusting your settings, you’re essentially fighting your own equipment.

    The real headache, though, is dealing with uneven thermal distribution in ovens. Even with a fan, you’ll often find certain corners are significantly hotter than others. To fix this, I recommend a simple test: place several small, identical items—like metal ramekins or even just a few pieces of parchment—across different parts of the rack. This is the most practical way of identifying oven hot spots without wasting expensive ingredients. Once you know where those rogue heat zones are, you can rotate your pans halfway through the timer. It’s a small habit, but it’s the difference between a professional finish and a kitchen disaster.

    Stop Guessing: 5 Ways to Get Your Oven Under Control

    • Buy a standalone oven thermometer. Don’t trust the little dial on your stove; most of them are off by twenty degrees or more. I keep a heavy-duty stainless steel one right on the center rack so I can see the truth before I even put a pan in.
    • Give your oven time to stabilize. If you’re opening the door every five minutes to peek, you’re killing your heat. Set the temp, close the door, and walk away for at least fifteen minutes before you even think about sliding a tray in.
    • Watch your oven load. If you crowd the racks with heavy stoneware or too many pans, you’re blocking the airflow. A kitchen should be organized, and that includes leaving enough breathing room for the heat to actually circulate.
    • Check your seals. If you notice the heat escaping or your oven taking forever to preheat, your door gasket is likely shot. A leaky seal is just a way to throw money and energy out of your kitchen window.
    • Stop over-relying on “Auto” settings. Most modern ovens are programmed for efficiency, not precision. If you’re doing something delicate like a soufflé or a slow-roasted brisket, you need to manage the heat manually rather than letting a computer chip make the decisions for you.

    The Bottom Line: Don't Trust Your Dial

    Stop treating your oven’s built-in temperature dial as gospel; buy a cheap, reliable standalone thermometer and trust that instead.

    If you’re using convection, remember that the moving air works faster, so you need to adjust your heat downward to prevent scorched exteriors and raw centers.

    Investing in a few minutes of calibration time now will save you a fortune in wasted ingredients and ruined dinners later.

    Stop Guessing and Start Cooking

    At the end of the day, your oven is only as good as your ability to trust it. We’ve covered how a cheap standalone thermometer is your best friend, how to account for those tricky convection fans, and why you need to stop treating your oven dial like an absolute truth. It’s not about being precious or overly technical; it’s about eliminating the variables that turn a perfect sourdough or a juicy roast into a frustrating lesson in wasted ingredients. Once you stop fighting your equipment and start calibrating your environment, you reclaim control over your kitchen.

    I’ve spent decades in professional kitchens where precision was the difference between a successful service and a total meltdown, and I promise you, it applies to your home kitchen too. Don’t let a faulty heating element or a misunderstood setting rob you of the joy of a good meal. Invest in a few reliable tools, build the habit of checking your temps, and let the gear do the heavy lifting. A kitchen that works is one where you aren’t constantly second-guessing yourself. Get your temperature right, trust your process, and then get back to the actual cooking.

    Frequently Asked Questions

    If my oven is consistently off by more than 25 degrees, is it time to scrap the whole thing or can I just keep adjusting my recipes?

    Look, I’m all for making do with what you have, but a 25-degree swing is more than a “quirk”—it’s a liability. If you’re constantly fighting your oven just to get a basic loaf of bread right, you aren’t cooking; you’re troubleshooting. If a simple thermometer calibration doesn’t fix it, the heating element or the sensor is shot. Don’t waste more money on ruined ingredients. It’s time to start looking for a replacement.

    Does the position of the thermometer inside the oven actually matter, or can I just toss it on the middle rack and call it a day?

    Don’t just toss it in there and hope for the best. If you want a reading you can actually trust, placement is everything. I always recommend the center of the oven, away from the heating elements and the walls. If you stick it too close to the back or the bottom, you’re just measuring the heat of the element, not the ambient temperature of the air. Put it in the middle, and you’ll get the truth.

    Will using a heavy baking stone or a cast iron skillet help stabilize the temperature fluctuations I'm seeing?

    Yes, absolutely. Think of a heavy stone or a cast iron skillet as a thermal battery. When you open the door, that burst of heat escapes instantly, causing the air temperature to plummet. A heavy mass sitting on the rack holds onto that heat and pushes back against the drop. It won’t fix a broken thermostat, but it’ll definitely smooth out those erratic spikes and keep your oven from feeling like a rollercoaster.

  • How Induction Cooktops Work for Home Cooking

    How Induction Cooktops Work for Home Cooking

    I spent twenty years in commercial kitchens where heat was a weapon, and I’ve seen enough “revolutionary” kitchen gadgets end up in a landfill to last a lifetime. Most people will try to sell you on the idea that an induction cooktop is some high-tech luxury you need to justify a massive renovation, but they’re missing the point entirely. It isn’t about the bells and whistles or having a shiny glass surface to show off to your neighbors; it’s about precision and control. I’ve watched home cooks struggle with finicky gas flames that lick the sides of the pan or electric coils that take forever to recover, and frankly, it’s a waste of good ingredients and even better time.

    I’m not here to sell you on a trend or push some overpriced, smart-connected nonsense that will be obsolete in three years. My goal is to give you the straight truth about whether an induction cooktop is actually worth your hard-earned money based on real-world durability and daily function. I’ll walk you through what you actually need to know—from cookware compatibility to the learning curve—so you can build a kitchen that actually works for you.

    Table of Contents

    Magnetic Induction Technology Explained for the Serious Cook

    Magnetic Induction Technology Explained for the Serious Cook.

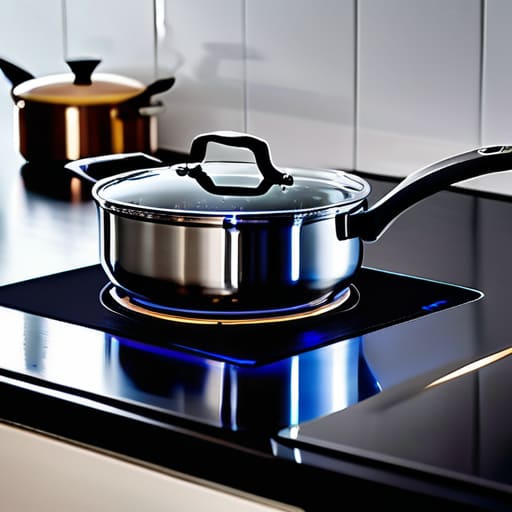
    Look, I’m not here to give you a physics lecture, but if you’re going to invest in this tech, you should at least understand why it works differently than the old coils you grew up with. Unlike a standard electric stovetop that uses a heating element to transfer heat to the pot, magnetic induction technology explained simply is all about direct energy transfer. An electromagnetic field is created under the glass, which excites the molecules in your pan, turning the cookware itself into the heat source. This means you aren’t heating up the air or the glass surface excessively; you are heating the food.

    This distinction is why the speed is so jarring at first. Because the energy goes straight into the metal, you get almost instant temperature changes. However, there is a catch: you need induction compatible cookware to make this work. If a magnet doesn’t snap firmly to the bottom of your pan, it isn’t going to cook. I always tell my clients to keep a small magnet in their junk drawer just to test their old sets before they commit to a full kitchen overhaul.

    Induction vs Electric Stovetop Choosing Quality Over Trends

    When you’re deciding between an induction vs electric stovetop, don’t let the flashy showroom displays fool you. Traditional electric coils are essentially glorified space heaters; they take forever to heat up and even longer to cool down, which wastes both time and power. I’ve seen too many home cooks struggle with uneven heat because they’re fighting against a burner that won’t cooperate. Induction, on the other hand, puts the energy directly into your pan. It’s one of those energy efficient cooking methods that actually makes sense for a busy household, giving you instant control the moment you turn the dial.

    The real catch is that you can’t just grab any old pan from the back of the cupboard. You need induction compatible cookware—specifically something magnetic. If a magnet doesn’t stick to the bottom of your skillet, it isn’t going to work. Now, I know that sounds like an extra expense, but I view it as a forced upgrade. Instead of buying cheap, thin aluminum sets that warp after six months, this is your cue to invest in heavy-duty stainless steel or cast iron. It’s about building a kitchen that lasts.

    Five Rules for Making the Switch Without Losing Your Mind

    • Test your cookware with a magnet before you buy. I’ve seen too many people get excited about a new cooktop only to realize their favorite heirloom copper pots won’t work. If a magnet doesn’t snap firmly to the bottom of your pan, it isn’t going to heat up. Save yourself the trip back to the store and check your inventory first.
    • Stop overcomplicating your heat settings. Unlike gas, where you’re chasing a flame, induction is about precision. You don’t need to “crank it up” to get a boil; it happens almost instantly. Learn the specific power levels for your pans so you aren’t constantly adjusting—once you find the sweet spot for a simmer, stick to it.
    • Invest in heavy-bottomed pans. Because induction relies on magnetic fields, thin or warped pans are your worst enemy. They won’t distribute heat evenly, and you’ll end up with hot spots that ruin a delicate sauce. Look for high-quality, flat-bottomed stainless steel or cast iron that can handle the directness of the technology.
    • Keep the surface clear and clean. One of the best things about induction is that the glass stays relatively cool, which means spills don’t bake onto the surface like they do on traditional electric coils. However, don’t get lazy. A quick wipe after cooking prevents any buildup from affecting the magnetic connection between the pan and the burner.
    • Don’t fear the “instant” factor. It takes a little getting used to how quickly the temperature shifts when you turn the dial. I always tell my clients to practice with simple tasks—like boiling water or melting butter—before you try to execute a complex reduction. You need to build the muscle memory for how fast this technology responds to your touch.

    The Bottom Line on Making the Switch

    Don’t get distracted by flashy touchscreens; prioritize a cooktop with consistent heat distribution and responsive controls that won’t fail you in three years.

    Check your cookware before you buy—if a magnet doesn’t stick to the bottom of your favorite pan, it’s not going to work on induction.

    View an induction cooktop as a long-term investment in your kitchen’s efficiency, not just another appliance to replace every time a new trend rolls around.

    ## The Real Value of Control

    “I’ve spent enough years in commercial kitchens to know that a cook is only as good as their control over the heat. An induction cooktop isn’t some high-tech luxury; it’s the most honest tool you can put in your kitchen because it actually does exactly what you tell it to do, the second you tell it to.”

    Rosalind Hayter

    Making the Right Call for Your Kitchen

    Making the Right Call for Your Kitchen.

    At the end of the day, choosing an induction cooktop isn’t about following a kitchen trend or buying the flashiest appliance on the showroom floor. It’s about recognizing that the efficiency of magnetic technology and the sheer precision of temperature control are tools that actually serve the cook. We’ve looked at how induction outperforms traditional electric setups and why the upfront investment is worth it when you consider the longevity of the hardware. Don’t get distracted by cheap, flimsy models that will end up in a landfill in three years; focus on finding a reliable unit that offers the consistent heat you need to master everything from a delicate simmer to a hard sear.

    I’ve spent enough time in commercial kitchens to know that your equipment should be the silent partner in your culinary process, not a source of frustration. A good cooktop shouldn’t demand your constant attention just to keep a sauce from breaking; it should simply do what it’s told so you can focus on the ingredients. When you stop chasing every new gadget and start investing in quality essentials, you aren’t just upgrading your kitchen—you’re upgrading your entire cooking experience. Buy it once, buy it right, and let your tools work as hard as you do.

    Frequently Asked Questions

    Do I really need to throw out all my existing cookware, or can I use what I already have?

    Don’t go out and buy a whole new set just yet. That’s exactly the kind of wasteful spending I want to prevent. The “magnet test” is your best friend here: grab a fridge magnet and run it along the bottom of your pans. If it sticks firmly, you’re good to go. If it slides off, that pan won’t work. Save your money for high-quality cast iron or stainless steel that actually lasts.

    Won't my kitchen be too loud with all that electromagnetic humming?

    Look, I get it. I’ve heard the rumors about kitchens sounding like a science lab. Honestly? You’ll hear a faint hum or a little buzz, especially when you’re cranking the heat or using high-powered settings. It’s just the magnetic field doing its job. It’s not a dealbreaker, and it certainly isn’t a constant roar. Once you start cooking, you’ll barely notice it. Don’t let a little noise scare you away from better performance.

    Is the initial cost of a high-quality induction unit actually worth it compared to a standard electric stove?

    Look, I get it. The upfront price tag on a high-end induction unit can make you flinch, especially when a standard electric stove is sitting there looking much cheaper. But don’t fall into the trap of buying cheap just to save a few bucks today. You’re paying for precision, speed, and durability. In my experience, you’ll make that money back in energy savings and by not replacing a finicky, uneven burner every five years. Buy it once, buy it right.

  • Testing Whether Your Kitchen Scale Is Accurate

    Testing Whether Your Kitchen Scale Is Accurate

    I spent twenty years in commercial kitchens where a single ounce could be the difference between a perfect batch of pastry and a complete waste of expensive ingredients. I’ve seen too many home cooks get frustrated, thinking they’re doing something wrong, when in reality, they’re just fighting against a piece of cheap, $10 plastic that drifts every time you tap it. Most people think they need a high-tech, digital gadget with a dozen unnecessary features, but they’re missing the point entirely. If you aren’t prioritizing kitchen scale accuracy, you aren’t actually following a recipe; you’re just guessing and hoping for the best.

    I’m not here to sell you on the latest trendy kitchen gadget or some over-engineered machine that requires a Wi-Fi connection just to weigh flour. My goal is to cut through the marketing fluff and show you how to identify a tool that actually holds its calibration over years of heavy use. I’ll share exactly what I look for when I’m sourcing gear for a functional kitchen, so you can stop wasting money on junk and start investing in tools that actually work.

    Avoid Costly Baking Measurement Errors With Precision

    Avoid Costly Baking Measurement Errors With Precision

    If you’ve ever pulled a tray of cookies out of the oven only to find they’re either rock-hard or spreading into a single, greasy sheet, don’t blame the recipe. Blame your measurements. Most people rely on those scooped measuring cups, but that’s a recipe for disaster. Flour is finicky; depending on how tightly you pack it, you could be off by as much as twenty percent. This is where baking measurement errors start to pile up, and they get expensive when you’re wasting high-quality butter and vanilla just to fix a failed batch.

    To get it right every single time, you need to lean on weight measurement consistency. I always tell my clients to stop thinking in volume and start thinking in grams. When you use a tool with high digital scale precision, you remove the guesswork entirely. It doesn’t matter if your flour is sifted or packed; the weight remains the same. If you want to ensure your gear is up to the task, a quick way of knowing how to test scale precision is to weigh something you already know—like a nickel or a standard tablespoon of water—to see if the readout actually holds up.

    Mastering Weight Measurement Consistency for Lasting Results

    If you’ve ever pulled a tray of cookies out of the oven only to find they’re either rock hard or spread like pancakes, you’ve felt the frustration of inconsistent measurements. In a professional kitchen, we don’t rely on “eyeballing” a cup of flour; we rely on weight measurement consistency. When you switch from volume to mass, you remove the variables of how tightly packed your flour is or how much air is in your sugar. It’s the difference between a recipe that works every single time and one that feels like a gamble.

    To get there, you need to understand scale sensitivity levels. A scale that can only detect increments of ten grams is useless for delicate pastry work. You want something that can register a single gram without jumping around like it’s nervous. I always tell my clients that if you’re serious about your craft, you need to know how to test scale precision before you commit to a big batch of dough. Grab a nickel or a known weight and see if your scale actually holds steady. If it fluctuates, put it back on the shelf.

    Five Ways to Make Sure Your Scale Isn't Lying to You

    • Check your level. If you’re working on a countertop that’s even slightly tilted or uneven, your readings are going to be off before you even start. Find a flat, stable surface and stick to it.
    • Stop the “drift.” Cheap scales often suffer from sensor drift where the number keeps climbing or dropping even when nothing is touching it. If the display won’t settle on a steady zero, it’s time to toss it.
    • Mind your battery life. A low battery is the number one cause of erratic readings. Don’t wait until you’re mid-recipe to realize your scale is struggling; swap in fresh batteries at the first sign of a flickering display.
    • Give it a calibration test. You don’t need a lab for this—just use a heavy, known object like a standard 1lb weight or even a sealed bag of flour. If the scale says it’s 14 ounces instead of 16, you know you can’t trust it for precision baking.
    • Watch the “tare” trap. It’s easy to get lazy and just hit the tare button repeatedly, but if you’re using a heavy bowl on a scale that isn’t rated for high capacity, you’re pushing the sensors to their limit. Zero it out properly and keep your movements steady.

    The Bottom Line on Buying Better

    Stop wasting money on cheap, plastic digital scales that drift after a month; invest in a heavy-duty stainless steel model that stays accurate year after year.

    Precision isn’t just for professional pastry chefs—if you want your home recipes to turn out exactly like the cookbook says, you have to stop eyeballing measurements and start weighing them.

    A reliable scale is a foundational tool, not a luxury gadget, and it’s the simplest way to cut down on wasted ingredients and failed meals.

    The Bottom Line on Precision

    At the end of the day, investing in a high-quality, accurate kitchen scale isn’t about being a perfectionist; it’s about respect for your ingredients and your time. We’ve talked about how those tiny measurement errors can ruin a delicate pastry or throw off a seasoned recipe, and how much money you actually save when you stop wasting flour and sugar on failed batches. When you stop relying on guesswork and start trusting a reliable, professional-grade tool, you remove the frustration from the process. You aren’t just buying a piece of hardware; you are eliminating the variables that stand between you and a successful meal.

    My advice is simple: stop settling for the cheap, plastic gadgets that lose their calibration after a month of heavy use. If you want a kitchen that actually works for you, you need to build it on a foundation of quality over quantity. It might feel like an extra expense upfront, but a solid scale is one of those rare items that will sit on your counter for decades, working just as well in twenty years as it does today. Build better habits, buy things that actually last, and let the precision of your tools give you the confidence to cook without hesitation.

    Frequently Asked Questions

    Is it actually worth spending more on a digital scale, or will a cheap one do the job just fine?

    Look, I’ve seen enough ruined batches of pastry to know that “cheap enough” is a trap. If you’re just weighing a bag of potatoes for a stew, a budget scale is fine. But if you’re baking, those cheap sensors drift after a few months, and suddenly your measurements are off by grams. Buy a solid digital scale once. It’s a small investment that prevents the much larger cost of wasted ingredients and frustration.

    How often should I be recalibrating my scale to make sure my measurements aren't drifting?

    If you’re using a decent digital scale, you shouldn’t need to recalibrate it every single day, but don’t let it slide either. I tell my clients to check it once a month, or whenever it feels “off.” A quick trick? Use a single nickel—they weigh exactly five grams. If your scale doesn’t hit that mark precisely, it’s time to recalibrate. If it keeps drifting despite your best efforts, the sensor is likely shot.

    Can I use the same scale for heavy cast iron pans and tiny amounts of spices without losing accuracy?

    Short answer: Not with a standard kitchen scale. If you try to weigh a single gram of cumin on a scale designed for five-pound bags of flour, you’re just guessing. Those cheap scales lose their “sense of touch” at the low end. If you’re serious about precision, get a dedicated jeweler’s scale or a high-end digital scale with a fine-tuned sensor. Don’t let a heavy pan ruin your spice ratios.

  • How to Use a Meat Mallet for Tenderizing

    How to Use a Meat Mallet for Tenderizing

    I still remember the chaos of a Saturday night rush in a commercial kitchen, the air thick with the scent of searing protein and the rhythmic, heavy thud-thud-thud of prep work. I once watched a young line cook try to tenderize a chicken breast with the back of a chef’s knife, and let me tell you, it was a disaster waiting to happen. He was struggling with uneven thickness and a mess of shredded meat, all because he didn’t have the right tool for the job. You don’t need a fancy, motorized tenderizer or some high-tech gadget that takes up half your drawer; you just need a solid, heavy-duty meat mallet that actually has some weight behind it.

    I’m not here to sell you on the latest kitchen trend or some overpriced, lightweight plastic nonsense that will snap the first time you hit a piece of flank steak. Instead, I’m going to give you the straight truth on what to look for so you can buy once and buy well. We’re going to talk about weight, grip, and why the material matters, ensuring you walk away with a tool that works as hard as you do.

    Table of Contents

    Stainless Steel vs Plastic Mallet Why Material Matters

    Stainless Steel vs Plastic Mallet Why Material Matters

    I’ve seen it a thousand times in commercial kitchens: a cook reaches for a flimsy, neon-colored plastic tool, only to have it crack right in the middle of a rush. When you’re looking at stainless steel vs plastic mallet options, the choice is actually quite simple. Plastic is fine for a one-off picnic, but it’s a disposable item that eventually warps or snaps. If you want a tool that survives a lifetime of heavy use, you go with steel. A solid stainless steel head provides the necessary weight to do the work for you, meaning you aren’t putting all the strain on your wrists.

    Beyond just durability, material affects your hygiene and efficiency. Plastic is porous; it develops microscopic scratches over time that trap bacteria and odors from raw protein. Stainless steel is non-porous and easy to sanitize, which is a non-negotiable for proper culinary meat preparation techniques. When you’re flattening chicken breasts for a large batch of schnitzel, you need a surface that stays clean and a weight that delivers a consistent strike every single time. Don’t settle for something that feels like a toy.

    Understanding Meat Tenderizer Hammer Types for Your Kitchen

    Understanding Meat Tenderizer Hammer Types for Your Kitchen

    When you’re looking at the different meat tenderizer hammer types available, don’t let the flashy displays at big-box stores confuse you. In my years managing catering lines, I learned that the “best” tool depends entirely on the task at hand. You have your classic heavy-duty mallets designed for sheer force, and then you have the more precision-oriented tools. If you are working with a thick piece of flank steak, you want something with weight that can break down those tough connective tissues without you having to break a sweat.

    On the other hand, if your goal is more about uniform thickness—like flattening chicken breasts for a quick pan-sear—a lighter, flatter surface is your best friend. You might also run into the Jaccard tenderizer vs traditional mallet debate. While those needle-style tenderizers are great for injecting flavor or breaking up fibers without much bruising, they can be a pain to clean. For most home cooks, a solid, multi-sided mallet offers the most versatility. It handles both the heavy-duty pounding and the delicate shaping, making it a far more efficient investment for a functional kitchen.

    Five Rules for Using Your Mallet Without Making a Mess

    • Stop pounding directly on the cutting board. If you want to save your countertops and your sanity, place a piece of heavy-duty plastic wrap or a clean kitchen towel over the meat first. It keeps the juices contained and prevents those tiny bits of protein from flying across the kitchen.
    • Don’t go overboard with the force. I’ve seen people treat a mallet like they’re driving a nail into a fence post. You aren’t trying to pulverize the meat; you’re just breaking up the tough connective tissue. Use controlled, rhythmic taps rather than swinging for the fences.
    • Use the right side for the right job. Most decent mallets have a flat side and a spiked side. Use the flat side for even thickness and the spiked side for tougher cuts like flank steak. If you use the spikes on a delicate chicken breast, you’ll turn it into mush.
    • Check your grip before you swing. A mallet that feels slippery in your hand is a recipe for a bruised thumb or a ruined dinner. Make sure the handle is dry and fits your palm comfortably. If you’re using a cheap one with a flimsy handle, toss it and get something with a bit of weight.
    • Clean it immediately. If you let meat juices and proteins dry on those metal spikes, you’re going to be scrubbing for an hour, or worse, they’ll rust. Rinse it under hot water right after you’re done to keep those crevices clear and hygienic.

    The Bottom Line on Choosing Your Mallet

    Skip the cheap plastic models; they crack under pressure and won’t survive a real kitchen. Stick to heavy-duty stainless steel that can handle years of use.

    Match the tool to the task by choosing between a flat surface for even thickness and a textured side for breaking down tough connective tissue.

    Focus on weight and grip rather than flashy features—a mallet that feels balanced in your hand is the only way to ensure precision without tiring yourself out.

    The Truth About Tenderizing

    “I’ve seen too many people buy those flimsy, colorful plastic mallets that crack the first time they hit a piece of frozen flank steak. If you’re going to spend time prepping a meal, don’t fight your tools; get a heavy-duty mallet that actually has the weight to do the work so you can get back to the cooking.”

    Rosalind Hayter

    The Bottom Line on Tenderizing

    The Bottom Line on Tenderizing meat tools.

    At the end of the day, choosing a meat mallet isn’t about finding the prettiest tool in the drawer; it’s about finding the one that won’t snap in half the first time you hit a thick cut of pork. We’ve covered why you should steer clear of those flimsy plastic versions and why understanding the difference between a flat surface and a spiked texture is the key to consistent results. Whether you opt for a heavy-duty stainless steel model or a classic mallet with a bit of heft, remember that the goal is efficiency. Don’t overcomplicate it. Pick a tool that matches how you actually cook, and make sure it’s built to handle the heavy lifting without needing a replacement next season.

    I’ve spent enough time in commercial kitchens to know that the best cooks aren’t the ones with the most expensive gadgets, but the ones who respect their equipment. A good mallet is a quiet workhorse—it sits in your utility drawer for years, waiting to turn a tough, expensive cut of meat into something truly delicious. Stop settling for mediocre textures because you were using the wrong tool. Invest in something substantial, master your technique, and let the quality of your gear do the heavy lifting for you. Your steaks will thank you.

    Frequently Asked Questions

    Is it actually worth the extra money to get a heavy stainless steel mallet over a cheaper one?

    Look, I’ve seen enough cheap, hollow plastic mallets snap in the middle of a rush to know they aren’t worth the drawer space. If you’re buying a plastic one, you’re just buying a future piece of trash. A heavy-duty stainless steel mallet has the heft you need to actually tenderize without breaking a sweat. It’s an upfront investment, sure, but it’ll last you decades instead of months. Buy it once, buy it right.

    How do I clean a mallet properly so I'm not just spreading bacteria around my kitchen?

    Don’t just rinse it under the tap and call it a day. If you’re using a metal mallet, a quick scrub with hot, soapy water and a stiff brush is usually enough. But if you’re using wood, skip the dishwasher—it’ll crack and ruin it. Hand wash it, dry it immediately, and occasionally rub it with food-grade mineral oil. If it’s plastic and getting pitted or stained, stop trying to save it; toss it and buy a real tool.

    Can I use a meat mallet for things other than tenderizing steaks, like crushing garlic or herbs?

    Look, I’m all for versatility, but let’s not get carried away. You can use a mallet to crush garlic or slightly bruise herbs, but honestly? It’s a messy way to do it. You’ll end up with garlic skins flying across the counter and bruised, unappealing herbs. If you want to save space, fine—use it for a quick crush in a pinch. But for anything delicate, stick to a mortar and pestle or a chef’s knife.

  • When to Use a Manual Whisk

    When to Use a Manual Whisk

    I spent twenty years in high-pressure commercial kitchens, and if there is one thing I learned, it’s that most kitchen gadget aisles are designed to separate you from your hard-earned money. You’ll see these ridiculous, battery-operated contraptions that promise to do all the work for you, but they usually end up being nothing more than expensive plastic clutter that dies in a junk drawer after three months. When you’re trying to emulsify a delicate vinaigrette or whip up a proper custard, you don’t need a gadget with a motor that smells like burning ozone; you need a reliable, heavy-duty handheld whisk that actually has some weight to it.

    I’m not here to sell you on the latest culinary trend or some over-engineered piece of tech. My goal is to help you cut through the noise and find the one tool that will actually survive a decade of daily use. I’m going to show you exactly what to look for in terms of wire gauge, handle grip, and balance so you can stop wasting money on junk. We’re going to focus on tools that work, because a well-built whisk is a fundamental part of a kitchen that actually serves you.

    Table of Contents

    Balloon Whisk vs French Whisk Choosing Lasting Quality

    Balloon Whisk vs French Whisk Choosing Lasting Quality

    When you’re standing at your counter deciding between a balloon whisk vs French whisk, don’t let the marketing fool you into thinking you need both. In my years managing catering crews, I learned that most people just need one tool that does the job right. A classic balloon whisk is your workhorse; those wide, rounded loops are designed for maximum volume. If you are looking for the best whisk for meringue or any heavy cream, the balloon shape is non-negotiable because it pulls in the most air.

    On the other hand, the French whisk is slimmer and more elongated. It’s a specialized tool meant for precision—think emulsifying a delicate vinaigrette or getting into the tight corners of a saucepan where a bulky balloon might struggle. While it’s excellent for certain manual whisking techniques, it won’t give you that same airy lift for batters. My advice? Stick to a high-quality, heavy-gauge stainless steel balloon whisk for your daily needs. It’s a foundation piece that won’t bend under pressure, saving you from the cycle of replacing cheap, flimsy metal every few months.

    Mastering Manual Whisking Techniques for Better Results

    Mastering Manual Whisking Techniques for Better Results

    Once you’ve picked out a tool that actually feels substantial in your hand, you have to learn how to use it properly. I see so many people just scrubbing the tool back and forth in a straight line, which is a waste of energy and won’t get you the results you want. If you want to master manual whisking techniques, you need to move your wrist in a figure-eight motion. This creates more turbulence in the liquid, allowing for much better aeration than that repetitive, robotic sawing motion. It’s about working with the physics of the tool, not fighting against it.

    When you are working on something delicate, like a stiff meringue, your technique dictates the final texture. If you are using the best whisk for meringue, you want to incorporate air rapidly without overworking the proteins until they become grainy. I always tell my clients to watch the volume of the mixture rather than the clock. Also, don’t forget that your physical comfort matters; using ergonomic kitchen tools with a well-balanced handle will prevent your forearm from cramping during those long sessions of emulsifying a hollandaise or whipping heavy cream.

    Five Ways to Stop Fighting Your Equipment and Start Cooking

    • Check the construction before you buy. If the wires are just glued into the handle, toss it back on the shelf. I want to see stainless steel wires that are securely welded into a solid, ergonomic handle; anything less will eventually wiggle loose and end up in your sauce.
    • Size matters more than you think. Don’t try to whip a dozen egg whites in a tiny bistro whisk, and don’t try to stir a small bowl of vinaigrette with a massive balloon whisk. Match the diameter of the whisk to the vessel you’re actually using to avoid splashing and wasted effort.
    • Stop neglecting the cleaning process. I see so many people let dried egg or flour crust up in the tight spaces where the wires meet the handle. Rinse it under hot water immediately after use, or better yet, give it a quick scrub in the sink right away so you aren’t fighting stubborn residue later.
    • Pay attention to the weight in your hand. A whisk should feel like an extension of your arm, not a heavy, unbalanced burden. If it feels clunky or awkward when you hold it, your wrist is going to pay the price during a long prep session.
    • Invest in a heavy-duty gauge. Thin, flimsy wires bend the moment they hit a thick custard or a heavy batter. Look for a whisk with substantial wire thickness—it might cost a few extra dollars upfront, but it won’t deform the first time you try to do any real work.

    The Bottom Line on Your Next Whisk

    Stop buying cheap, lightweight whisks that bend under pressure; look for heavy-duty stainless steel with a solid, ergonomic handle that won’t snap when you’re halfway through a thick custard.

    Match your tool to the task—use a balloon whisk for aeration and volume, but keep a slim French whisk on hand for getting into the tight corners of pans and emulsifying sauces.

    A good whisk is a lifetime investment, not a disposable gadget, so prioritize build quality over flashy colors or “smart” features that add nothing to your actual cooking.

    The Truth About Your Utensil Drawer

    I’ve seen too many people clutter their drawers with cheap, spring-loaded gadgets that lose their tension after a month of use. If you want a whisk that actually works, skip the novelty items and buy one piece of solid stainless steel that feels substantial in your hand; it’s the difference between fighting your ingredients and actually mastering them.

    Rosalind Hayter

    Don't Settle for Less Than Durable

    Don't Settle for Less Than Durable whisks.

    At the end of the day, choosing the right whisk comes down to understanding how you actually cook. Whether you decide on a sturdy balloon whisk for aerating heavy creams or a slim French whisk for getting into the tight corners of a saucepan, the goal remains the same: efficiency and longevity. I’ve seen far too many people buy those cheap, thin-wired sets that bend the moment they hit a thick batter, and frankly, it’s a waste of your hard-earned money. Focus on the weight of the handle and the strength of the welds where the wires meet the frame. If you invest in a tool built with professional-grade materials, you won’t find yourself digging through a junk drawer for a replacement in six months.

    A well-organized kitchen is built on the foundation of reliable tools and consistent habits. A whisk might seem like a small, simple thing, but it is the bridge between a lumpy sauce and a silky-smooth masterpiece. Don’t let the allure of expensive electric gadgets distract you from the fundamental skill of manual control. When you master the rhythm of your hands and the quality of your gear, you aren’t just making food; you are building a legacy of competence in your own home. Buy it once, use it well, and make it work for you.

    Frequently Asked Questions

    How do I know if the wire loops are actually stainless steel or just cheap plating that's going to rust after three washes?

    Don’t let a shiny finish fool you; that’s often where the deception starts. The quickest way to tell is the weight and the magnet test. Real, high-quality stainless steel—specifically 18/10—has a substantial, balanced heft. Grab a magnet: if it sticks strongly to the wires, it’s likely a cheaper grade prone to pitting. If it’s truly solid stainless, the magnet should barely react. If it feels light as a feather, put it back.

    Is it worth spending the extra money on a whisk with a silicone-coated handle, or is a plain metal one better for long-term durability?

    Go with the plain metal. I’ve seen too many silicone handles peel, crack, or get gummy after a few years of heavy use and dishwasher cycles. They feel nice at first, but they aren’t built for the long haul. A solid stainless steel handle is hygienic, indestructible, and won’t fail you when you’re halfway through a thick roux. If you’re worried about grip, just find a high-quality metal whisk with a well-balanced weight.

    When should I actually bother using a whisk instead of just using a spoon or a fork to mix my ingredients?

    Look, if you’re just stirring a pot of soup or moving some grains around, a spoon is perfectly fine. Don’t overcomplicate it. But the moment you need to incorporate air or break up lumps, put the spoon down. If you’re making a vinaigrette, a custard, or whipping cream, a whisk is non-negotiable. A spoon just moves mass; a whisk actually changes the texture. Do it right the first time so you aren’t fighting clumps later.