Category: Kitchen

  • Benefits of Using a Dutch Oven

    Benefits of Using a Dutch Oven

    I’ve spent two decades in commercial kitchens, and if there is one thing that makes my blood boil, it’s watching people drop two hundred dollars on a designer-colored dutch oven just because it looks pretty on a social media feed. You don’t need a pastel-pink pot to make a decent stew, and you certainly don’t need a collection of five different versions of the same heavy pot. Most of those high-end brands are just marketing fluff wrapped around decent iron, and I am tired of seeing home cooks fall for the hype when they could be investing that money into better ingredients instead.

    I’m not here to sell you on a lifestyle or a specific brand name. My goal is to cut through the noise and help you identify a dutch oven that actually holds heat, distributes it evenly, and—most importantly—will still be sitting on your stovetop thirty years from now. I’ll tell you exactly what to look for in terms of weight and lid fit, and I’ll show you how to avoid the flimsy junk that ends up in a landfill after six months. Let’s get your kitchen sorted with tools that actually work.

    Table of Contents

    Cast Iron vs Enameled Choosing Your Last Durable Kitchen Essential
    Cast Iron vs Enameled Choosing Your Last Durable Kitchen Essential

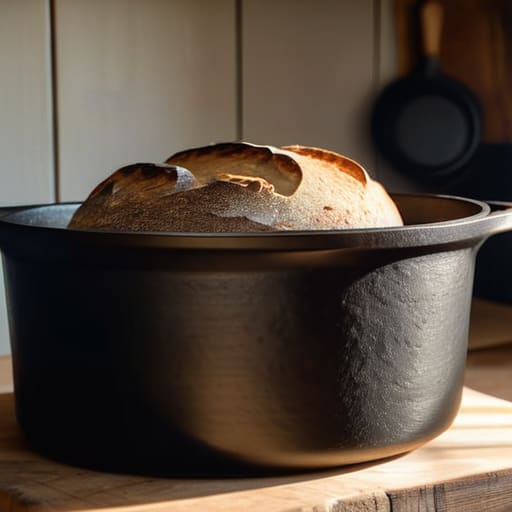
    When you’re standing in the cookware aisle, you’re essentially deciding between two different philosophies of cooking. Raw cast iron is the workhorse of the professional kitchen; it’s rugged, incredibly responsive to high heat, and offers unmatched heat retention in cookware. If you don’t mind the occasional maintenance, a plain iron pot is a lifelong companion. You’ll need to learn the art of seasoning cast iron dutch oven surfaces to keep them non-stick, but once that layer is built up, there is nothing quite like it for searing meat or baking bread.

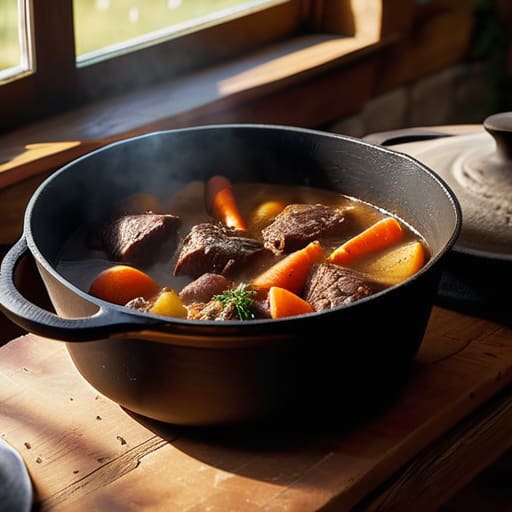
    On the other hand, enameled versions are the polished cousins of the group. They come pre-coated with a glass-like finish, which means you can skip the oiling and go straight to acidic recipes like tomato-based sauces or braises without worrying about damaging the metal. While you lose that deep, seasoned patina, you gain convenience and easy cleanup. If you want the best dutch oven for stews that you can take straight from the stovetop to a beautiful table presentation without a second thought, the enameled route is your winner. Choose based on your patience, not the marketing.

    The Magic of Heat Retention in Cookware
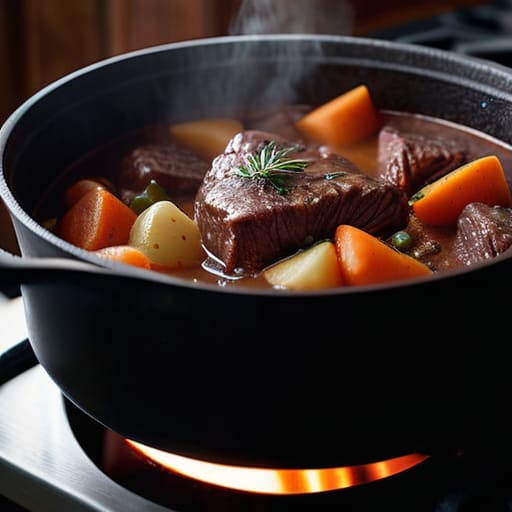
    The Magic of Heat Retention in Cookware.

    If you’ve ever tried to simmer a thick beef stew in a thin, cheap stainless steel pot, you know the frustration of a sauce that keeps breaking or burning because the temperature fluctuates every time you move the lid. That is where the real science of heat retention in cookware comes into play. A heavy-duty vessel acts like a thermal battery; once it gets up to temperature, it stays there. This steady, unwavering heat is exactly what you need for those long, slow braises where patience is the main ingredient.

    When you are deciding between cast iron vs enameled dutch oven options, remember that the goal is thermal stability. A thick-walled pot won’t just cook your food; it will hold onto that energy, ensuring that even when you drop in a cold piece of meat, the temperature doesn’t plummet. This consistency is the secret to achieving that “fall-off-the-bone” texture without having to constantly babysit the stove. It’s not about fancy technology; it’s about mass and physics working together to do the hard labor for you.

    Five Rules for Making Your Dutch Oven Work for You

    • Stop babying your cast iron. If you’re using an enameled model, you can use mild soap, but if you’ve gone with raw cast iron, a little scrub and a light coating of oil is all it needs to stay seasoned and non-stick.
    • Don’t crowd the pot. I see people trying to sear a pound of meat all at once, which just ends up steaming the food in its own juices. Work in batches so you actually get that crust you’re looking for.
    • Respect the heat. You don’t need your burner on high to get a Dutch oven screaming hot; these things hold heat like a brick. Start medium, let it stabilize, and you’ll avoid the dreaded scorched bottom.
    • Use it for more than just stews. I use mine for braising short ribs, baking crusty sourdough, and even deep-frying. If you’re only pulling it out once a month for a chili, you aren’t getting your money’s worth.
    • Check the lid fit before you buy. A heavy, tight-fitting lid is the whole point of a Dutch oven—it traps the moisture and creates that mini-oven environment. If the lid wobbles like a loose tooth, put it back on the shelf.

    The Bottom Line on Your Next Dutch Oven

    Don’t get distracted by flashy colors or non-stick coatings that peel off in six months; choose between raw cast iron for high-heat searing or enameled for easy cleanup, but make sure it’s heavy enough to hold its heat.

    Stop buying “specialty” pots for every single dish and invest in one high-quality, large-capacity Dutch oven that can handle everything from a slow-braised short rib to a batch of homemade sourdough.

    View your cookware as a lifelong investment rather than a disposable gadget; if you buy a piece that is built to last, you’ll save yourself a fortune in replacements over the next few decades.

    The Truth About Your Cookware

    I’ve seen enough commercial kitchens to know that a fancy gadget is just a distraction; if you want a pot that actually earns its place on your stove, get a heavy Dutch oven that can handle a decade of Sunday roasts without flinching.

    Rosalind Hayter

    Making the Right Investment
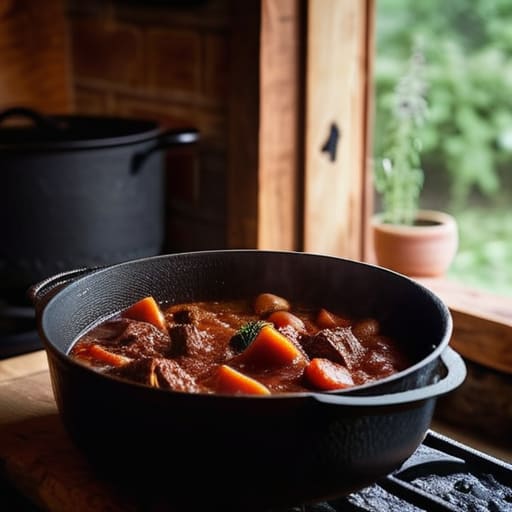
    Making the Right Investment in Dutch ovens.

    At the end of the day, choosing a Dutch oven isn’t about picking the prettiest color on a showroom shelf; it’s about understanding how you actually cook. Whether you decide to go with the rugged, lifelong reliability of raw cast iron or the easy-to-clean convenience of an enameled model, you are looking for thermal mass and durability. You want a piece of equipment that can handle a heavy sear, hold steady heat for a slow braise, and survive being passed down to the next generation. Don’t let the marketing fluff trick you into buying a lightweight, thin-walled imitation that will warp the moment you turn up the flame. Buy for the long haul, because a real Dutch oven is a workhorse, not a countertop decoration.

    My advice is simple: stop chasing the latest kitchen trends and start building a foundation of tools that actually perform. A well-chosen Dutch oven will eventually become the most familiar object in your kitchen, seasoned by years of Sunday roasts and late-night stews. It’s more than just a pot; it’s a commitment to slowing down and doing things right. When you invest in quality, you aren’t just buying cookware—you’re buying the ability to cook better meals without the constant frustration of subpar gear. Get the right one, treat it with respect, and let it work for you for decades to come.

    Frequently Asked Questions

    Is it actually worth the extra money to go with an enameled model, or can I just stick to raw cast iron?

    Look, if you’re only making heavy stews and braises, raw cast iron is your best friend—it’s cheaper and indestructible. But if you want one pot that handles everything from a delicate tomato sauce to a sourdough loaf without worrying about acidic ingredients stripping your seasoning, pay the premium for enamel. It’s more maintenance-free and easier to clean. If you can afford the jump, enamel gives you more versatility for a single investment.

    How do I know if a Dutch oven is heavy enough to actually hold heat, or if it's just one of those thin, cheap imitations?

    Here’s the litmus test: pick it up. If it feels surprisingly light, like you’re lifting a hollowed-out tin, put it back on the shelf. A real Dutch oven should have some serious heft; that weight is what tells you the walls are thick enough to hold steady heat. If it feels flimsy in your hands, it’ll be flimsy on your stove, and your braises will never turn out right.

    Do I really need to spend time seasoning a new pot, or is that just something people do to make things more complicated than they need to be?

    Look, I get it. You want to cook, not perform a chemistry experiment. But if you bought raw cast iron, skipping the seasoning is a mistake you’ll pay for in ruined meals and rust. It’s not about making things complicated; it’s about building a non-stick surface that actually lasts. If you went with enameled, you can skip the hassle entirely. But for raw iron? Do the work once so the pot works for you forever.
  • Why Silicone Spatulas Are Essential for Baking

    Why Silicone Spatulas Are Essential for Baking

    I’ve spent two decades in commercial kitchens, and if there is one thing that drives me up the wall, it’s watching people throw money away on those cheap, multi-colored sets of kitchen gadgets that look cute in a social media ad but fall apart after three washes. You don’t need a drawer full of flimsy, mismatched tools; you need one high-quality silicone spatula that can actually handle the heat of a real kitchen without melting or shedding bits of plastic into your sauce. I’ve seen too many “trendy” kitchen trends leave people with nothing but a cluttered drawer and a broken tool when they actually need to get down to business.

    I’m not here to sell you on some overpriced, designer brand that promises the moon. Instead, I’m going to tell you exactly what to look for so you can buy it once and buy it right. I’ll break down the difference between professional-grade heat resistance and the junk you find at big-box retailers, ensuring you invest in gear that becomes a permanent fixture in your kitchen. Let’s cut through the marketing fluff and get your kitchen working for you.

    Table of Contents

    Why Food Grade Silicone Properties Outlast Cheap Rubber Alternatives

    Why Food Grade Silicone Properties Outlast Cheap Rubber Alternatives

    I’ve seen enough commercial kitchens to know that cheap rubber is a recipe for frustration. When you’re working with high heat, rubber tools tend to warp, lose their shape, or worse, start to degrade and leave a weird smell in your food. This is where the food grade silicone properties really make the difference. Unlike rubber, silicone is chemically stable; it doesn’t leach anything into your batter and it holds its structural integrity even when things get hot.

    When comparing silicone vs rubber spatulas, it really comes down to durability and hygiene. Rubber is porous, meaning it picks up oils and scents that are nearly impossible to scrub out. Silicone, on the other hand, is non-porous and incredibly resilient. If you want the best spatula for scraping bowls clean without worrying about microscopic residue, you need a material that can handle being tossed in the dishwasher without becoming brittle. Investing in high-quality silicone isn’t just about the immediate performance; it’s about buying a tool that won’t end up in a landfill after six months of heavy use.

    Investing in High Temperature Kitchen Tools That Wont Melt Away

    Investing in High Temperature Kitchen Tools That Wont Melt Away

    I’ve seen it a thousand times in commercial kitchens: a cook gets a little too ambitious with a hot pan, and suddenly their cheap tool is a melted, gooey mess stuck to the side of the skillet. When you’re working with high heat, there is no room for compromise. Most budget options use low-grade materials that warp or even leach chemicals when they hit a certain temperature. If you want high temperature kitchen tools that actually hold their shape, you have to look for tools rated for heat resistance well above 450°F.

    When I’m choosing gear, I look for seamless construction. You don’t want a tool where the head is glued to the handle; that’s just a breeding ground for bacteria. A quality tool should be a single, solid piece. This makes them the absolute best spatula for scraping bowls and pans without worrying about the head snapping off mid-stir. Plus, if you’re like me and value efficiency, you want something that doubles as reliable, dishwasher safe baking utensils. If it can’t survive a heavy-duty cycle and a hot burner, it doesn’t belong in my kitchen.

    How to Pick a Spatula That Actually Earns Its Place in Your Drawer

    • Check for a solid core. I’ve seen too many people buy spatulas that are just a thin layer of silicone over a flimsy wire; they bend the second you try to scrape a heavy sauce, and that’s how you end up frustrated and throwing them in the bin.
    • Look for seamless construction. If there’s a visible seam where the silicone meets the handle, food particles are going to get trapped in there, and no amount of scrubbing will get them out—get a single-piece design to keep things hygienic.
    • Test the “flex factor.” A good spatula needs enough give to scrape every last drop out of a bowl, but enough backbone to fold a heavy batter without collapsing like a wet noodle.
    • Avoid the “gadget” trap of extra colors and patterns. Stick to neutral, high-quality colors that don’t stain easily, because once that cheap silicone picks up the pigment from a turmeric sauce, it’s essentially ruined.
    • Prioritize heat resistance over everything else. Before you buy, check the temperature rating on the packaging; if it isn’t rated for at least 450°F, don’t bother bringing it into a professional-grade kitchen.

    The Bottom Line on Choosing Your Spatula

    Stop buying the cheap, flimsy rubber versions that warp the first time they hit a hot pan; look for high-heat food-grade silicone that actually holds its shape.

    Don’t get distracted by fancy sets with twenty different colors; you only need one or two solid, heavy-duty spatulas that can handle everything from folding batter to scraping a pan clean.

    View your tools as a long-term investment rather than a disposable expense—a quality silicone spatula should be the last one you ever have to buy.

    The Cost of Cutting Corners

    I’ve seen enough melted plastic ruins in professional kitchens to know that a cheap spatula isn’t a way to save money—it’s just a way to guarantee you’ll be buying another one in three months. If it can’t handle the heat of a real pan, it doesn’t belong in your drawer.

    Rosalind Hayter

    The Bottom Line on Your Spatula

    The Bottom Line on Your Spatula.

    At the end of the day, choosing a silicone spatula isn’t about following a kitchen trend; it’s about recognizing the difference between a disposable tool and a reliable workhorse. We’ve covered why food-grade silicone is the only way to go if you want something that won’t leach chemicals or degrade under heat, and why investing in high-temperature resistance saves you from the frustration of a melted mess in your favorite pan. When you stop buying those flimsy, cheap rubber alternatives that end up in the landfill every six months, you aren’t just cleaning out your junk drawer—you are building a professional-grade foundation for your home cooking.

    I’ve spent enough years in commercial kitchens to know that the best cooks aren’t the ones with the most expensive gadgets, but the ones who respect their tools. A good spatula might seem like a small thing, but it’s the bridge between your ingredients and your finished meal. Don’t let a mediocre tool get in the way of a great recipe. Buy the quality version once, treat it with respect, and let it serve you for years to come. Your kitchen should be a place of efficiency and joy, not a graveyard for broken plastic.

    Frequently Asked Questions

    How can I tell if a spatula is actually food-grade silicone or just cheap, dyed plastic?

    Don’t be fooled by a bright color; that’s usually just cheap dye masking low-grade plastic. First, check the weight. Real silicone has a substantial, dense feel, whereas cheap imitations feel hollow or flimsy. Next, give it a “pinch test.” High-quality silicone is flexible but snaps back to its original shape instantly. If it feels greasy, smells like chemicals, or leaves a weird residue on your hands, put it back on the shelf.

    Are these silicone tools safe to throw in the dishwasher, or will they eventually warp and degrade?

    You can toss them in the dishwasher, but don’t just throw them in haphazardly. High-quality, food-grade silicone is heat-resistant and won’t melt or warp like those cheap rubber alternatives I’m always seeing. However, the real danger isn’t the silicone itself—it’s the cheap plastic handles or internal cores. If you’ve invested in a solid, one-piece tool, the dishwasher is fine. If it’s a cheap hybrid, the heat will eventually ruin the connection.

    Do I really need a solid silicone spatula, or is a one-piece design better than one with a wooden handle?

    Look, if you want a tool that actually lasts, go with the one-piece design. I’ve seen too many wooden-handled spatulas where the head eventually wiggles loose or, worse, food particles get trapped in the seam where the wood meets the silicone. That’s a breeding ground for bacteria you don’t want in your kitchen. A solid, seamless silicone spatula is easier to clean, more hygienic, and won’t fall apart on you in six months.

  • Choosing the Right Chef Knife for Your Kitchen

    Choosing the Right Chef Knife for Your Kitchen

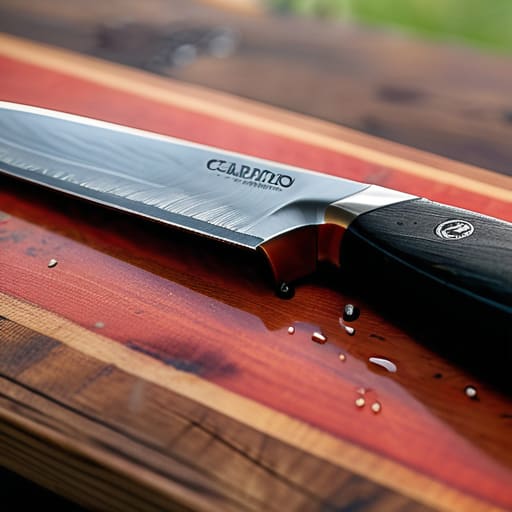
    I still remember the chaos of a Saturday night service in my old catering days—the heat, the shouting, and the rhythmic thwack-thwack-thwack of prep work. In those high-pressure kitchens, you learned very quickly that a dull, cheap blade wasn’t just an inconvenience; it was a safety hazard and a total waste of time. I’ve seen too many home cooks walk into a specialty store and get talked into spending five hundred dollars on a flashy, laser-etched chef knife that looks great in a display case but feels like a heavy, unbalanced brick in your hand. You don’t need a status symbol; you need a tool that actually works.

    I’m not here to sell you on the latest titanium-coated gimmick or some overpriced Japanese steel that requires a degree in metallurgy just to maintain. My goal is to cut through the marketing fluff and help you find a single, reliable chef knife that will become a permanent fixture in your kitchen for the next twenty years. I’m going to show you exactly what to look for in terms of balance, weight, and edge retention so you can stop fighting your ingredients and start actually enjoying the process of cooking.

    Table of Contents

    The Truth About Professional Culinary Blades vs Trendy Junk

    The Truth About Professional Culinary Blades vs Trendy Junk.

    I’ve spent enough years in commercial kitchens to know that a shiny, overpriced box set from a big-box retailer is usually nothing more than a way to drain your bank account. Most of those “starter sets” are made of cheap, soft metal that loses its edge before you’ve even finished chopping your first onion. You aren’t buying a tool; you’re buying a way to frustrate yourself every single evening.

    If you want to do this right, you need to look toward professional culinary blades that are built for endurance, not aesthetics. There is a massive difference between a mass-produced blade and something forged with intent. You’ll often find yourself choosing between carbon steel vs stainless steel; while stainless is easier for most home cooks because it won’t rust if you leave it in the sink for five minutes, carbon steel offers a level of edge retention that is hard to beat. Just remember, a real tool requires respect. If you buy something high-quality, you have to be willing to put in the work to keep it sharp.

    Carbon Steel vs Stainless Steel Finding Your Forever Metal

    Carbon Steel vs Stainless Steel Finding Your Forever Metal

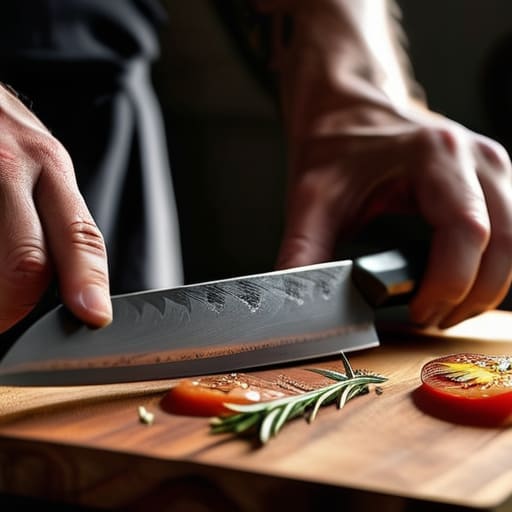
    When you’re standing at your cutting board, the choice between carbon steel and stainless steel isn’t just about aesthetics; it’s about how much work you’re willing to put into your tools. I’ve seen plenty of people jump into carbon steel because they want that razor-sharp edge that holds up during heavy prep work. It’s a fantastic material for precision slicing techniques, but it isn’t “set it and forget it.” If you leave a carbon blade in the sink or even let a drop of moisture sit on it, you’re going to see patina or rust before your next meal.

    On the flip side, stainless steel is the reliable workhorse for the busy home cook. It’s much more forgiving and doesn’t require constant vigilance to prevent corrosion. If you want a tool that can handle a bit of neglect without losing its integrity, stainless is your best bet. In the debate of carbon steel vs stainless steel, there is no objective winner—only what fits your lifestyle. If you have the patience for regular knife maintenance tips and a bit of oiling, carbon steel is unmatched. If you want something low-maintenance, stick with high-quality stainless.

    Five Rules for Keeping Your Blade in Fighting Shape

    • Stop using your chef knife like a can opener or a screwdriver. I’ve seen way too many decent blades with chipped tips because someone thought they could force it through a stubborn lid. A knife is a precision tool, not a multi-tool; use it only for slicing, dicing, and chopping.
    • Hand wash only. I don’t care what the box says—put that knife in the dishwasher and you’re asking for trouble. The high heat and harsh detergents will dull the edge and eventually ruin the handle. Wash it with warm soapy water, dry it immediately with a towel, and put it away.
    • Get a wooden cutting board. If you’re chopping on glass, marble, or even some of those cheap plastic mats, you’re essentially grinding your edge into dust every single time you slice. A thick, stable wood board provides the right amount of “give” to protect your steel.
    • Learn the difference between honing and sharpening. A honing rod isn’t actually fixing a dull edge; it’s just realigning the microscopic teeth of the blade that get bent during use. If the knife is actually blunt, you need a whetstone or a professional service, not just a quick swipe on a rod.
    • Store it properly. Leaving a knife loose in a junk drawer is a recipe for a dull blade and a sliced finger. Use a magnetic strip or a dedicated knife block to keep the edges protected and out of harm’s way. Your knives should be easy to grab and easy to keep sharp.

    The Bottom Line for Your Knife Drawer

    Stop chasing the latest gadget or a cheap set of twenty knives; one high-quality, well-balanced chef knife is worth more than a drawer full of dull, disposable metal.

    Choose your steel based on your lifestyle—go with stainless if you want low maintenance, or embrace the character and edge of carbon steel if you don’t mind a little extra care.

    A knife is only as good as the hand holding it, so prioritize how the tool actually feels in your grip over how pretty it looks in a social media ad.

    The One Tool That Matters

    A chef knife isn’t some status symbol to display on your magnetic strip; it’s a tool you should use until the blade is thin and the handle is worn smooth by your own hands. If it doesn’t feel like an extension of your arm, you’ve bought a gadget, not a piece of equipment.

    Rosalind Hayter

    Investing in Your Hands

    Investing in Your Hands: Quality chef knives.

    At the end of the day, choosing a chef knife isn’t about collecting a set of shiny objects to show off in a drawer. It’s about understanding the trade-offs between the low-maintenance reliability of stainless steel and the razor-sharp, temperamental soul of carbon steel. We’ve covered why you need to steer clear of those cheap, serrated garbage blades and why the metal you choose will dictate how you actually experience your prep work. Whether you go for a heavy-duty Western blade or a precise Japanese style, remember that the goal is function over fashion. If it doesn’t feel right in your hand after five minutes of chopping, it isn’t the right tool for your kitchen.

    I’ve seen too many people spend hundreds on “designer” kits only to end up frustrated because they didn’t respect the tool. A great knife is a lifelong companion, not a disposable gadget. Treat it with respect—keep it sharp, keep it dry, and never toss it in the dishwasher—and it will serve you through decades of family dinners and quiet Sunday meals. Stop looking for the “perfect” knife in a catalog and start looking for the one that makes you actually want to stand at the cutting board. Build your kitchen on quality foundations, and the cooking will follow naturally.

    Frequently Asked Questions

    How often do I actually need to sharpen this thing, and can I do it myself without ruining the edge?

    Listen, you don’t need to be a blacksmith, but you can’t be lazy either. If you’re cooking nightly, expect to hone the edge with a steel every few uses and do a real sharpening session every few months. Don’t panic about ruining it—just skip those electric grinders that shave metal away like a lawnmower. Grab a simple whetstone. It takes a little patience to learn the angle, but once you do, you’re set for life.

    Is it worth spending a fortune on a Japanese blade, or should I stick to something more heavy-duty like a German knife?

    Look, don’t get caught up in the “prestige” of a price tag. If you’re someone who hacks through butternut squash and heavy root vegetables, a delicate Japanese blade will just chip on you—and that’s a heartbreak you don’t need. Stick to a sturdy German knife for your heavy lifting. Save the Japanese steel for precision work, like fine slicing, but only if you’re prepared to treat it with the respect it demands.

    How do I know if a knife is actually well-balanced for my hand, or if it's just a pretty piece of metal?

    Hold the knife by the bolster—that’s where the blade meets the handle. If the weight feels like it’s all in the tip or dragging in the handle, put it back. A well-balanced knife should feel like a natural extension of your arm, not a heavy tool you’re fighting to control. I always do a quick “pinch test” on the blade; if the center of gravity feels steady right under your fingers, you’ve found a winner.