I’ve lost count of how many times I’ve walked into a kitchen and seen a $300, high-tech food dehydrator sitting in a cupboard, gathering dust and looking like a piece of sci-fi movie prop. Most of these gadgets are designed by marketing teams to look sleek on a countertop, but they lack the actual muscle required to do the job consistently. You don’t need a machine with a touchscreen and Bluetooth connectivity to preserve your summer harvest; you need a reliable workhorse that moves air efficiently and won’t quit on you halfway through a batch of apple rings.
I’m not here to sell you on the latest kitchen trend or convince you that you need a digital interface to dry out some herbs. My goal is to help you cut through the noise and find a food dehydrator that actually earns its keep in your pantry. I’ll be sharing exactly what to look for in terms of airflow and build quality, so you can invest in a tool that lasts a lifetime rather than adding to the mountain of plastic junk we’re all tired of managing.
Prioritize Dehydrator Airflow Efficiency Over Trendy Plastic Trays
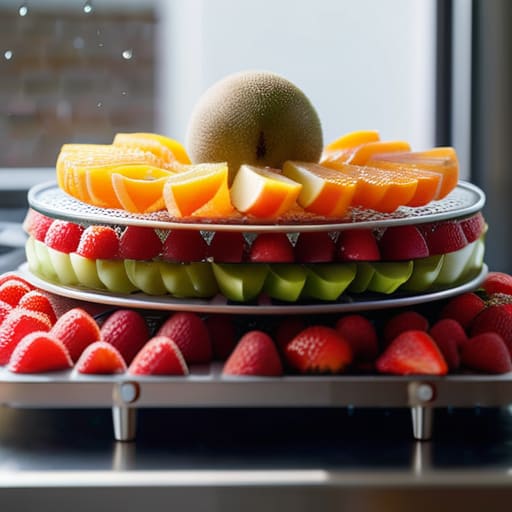
When you’re browsing the aisles of a big-box store, it is incredibly easy to get distracted by sleek, lightweight plastic models that look great in a catalog. Don’t fall for it. In my years managing commercial kitchens, I learned that aesthetics don’t cook the food—physics does. Most of those cheap, trendy units rely on weak fans that create “dead zones” in the machine. You’ll end up with some trays that are perfectly crisp and others that are still damp and prone to mold. You need to look specifically for dehydrator airflow efficiency; you want a unit that moves air consistently around every single tray, regardless of where it sits in the stack.
If the air isn’t moving evenly, you’re essentially gambling with the shelf life of dehydrated food. I’ve seen too many people ruin a whole batch of summer peaches because they bought a budget model that couldn’t maintain a steady stream of heat. When you’re dehydrating fruits and vegetables, consistency is your best friend. A machine with a powerful, rear-mounted fan ensures that every slice gets the same treatment, saving you time and preventing wasted produce. Invest in the airflow, not the plastic casing.
Mastering Food Preservation Techniques for a Lifetime of Use
Once you’ve invested in a decent machine, the real work begins with your process. I’ve seen too many people get discouraged because their batches came out rubbery or, worse, moldy. The secret isn’t in a fancy setting; it’s in understanding food preservation techniques like moisture control and consistent heat. If you’re dehydrating fruits and vegetables, you have to be meticulous about slicing them to a uniform thickness. If one slice is thick and the next is paper-thin, you’ll end up with a tray of inconsistent textures that won’t store properly.
Don’t forget that different items require different environments. For instance, when you’re working with delicate seasonings, finding the best temperature for herb drying is non-negotiable—too much heat and you’ll scorch the essential oils, leaving you with nothing but brown dust. If you take the time to master these small details, the shelf life of dehydrated food increases dramatically. You aren’t just making snacks; you’re building a pantry of high-quality ingredients that will serve you for months.
Five Rules for Not Wasting Your Time (or Your Food)
- Stop buying the cheap, lightweight models with thin plastic trays; if the air can’t circulate evenly around every slice, you’re just wasting electricity and ruining your produce.
- Invest in a unit with a digital timer and temperature control, because guessing when your jerky is done is a fast track to food poisoning or wasted batches.
- Don’t crowd the trays—I’ve seen people try to pack them tight to “save time,” but all that does is create moisture pockets that lead to mold.
- Learn to prep your ingredients with consistency; if your apple slices aren’t uniform in thickness, they won’t dry at the same rate, and you’ll end up with a bag of half-dried mush.
- Treat your dehydrator like a professional tool by cleaning the trays immediately after use, because dried fruit residue is a nightmare to scrub once it hardens.
The Bottom Line on Building a Better Dehydrator Habit
Stop chasing the lowest price tag; invest in a machine with consistent airflow and durable trays so you aren’t replacing a piece of plastic junk every two years.
Focus on the process, not just the appliance—learning how to properly prep and dry your food is what actually prevents waste and saves you money.
Keep your setup simple and functional, prioritizing tools that integrate into your daily routine rather than gadgets that just take up counter space.
Making the Right Investment
At the end of the day, choosing a food dehydrator isn’t about finding the cheapest unit on a clearance rack; it’s about finding a machine that respects your time and your ingredients. I’ve seen too many people buy those flimsy, lightweight plastic models only to realize they spend more time troubleshooting uneven drying than actually preserving food. Remember, you need to prioritize consistent airflow and build a setup that supports your specific workflow. If you invest in a machine with sturdy construction and reliable temperature control, you aren’t just buying an appliance—you are buying back the value of every piece of seasonal produce you buy.
Don’t let the fear of a complicated new process keep you from starting. Once you get into the rhythm of it, dehydrating becomes a quiet, meditative part of your kitchen life that connects you to the seasons. It’s about building a pantry that actually sustains you and reducing the sheer amount of waste we see in modern households. Stop looking for the “magic” gadget and start focusing on the habit of preservation. Get the right tool, learn the technique, and you’ll find that a well-stocked, home-dried pantry is one of the most rewarding investments you can ever make for your home.
Frequently Asked Questions
Is it actually worth spending more on a stainless steel model, or can I get away with a basic countertop version?
Look, I’ve seen enough cheap plastic units crack or warp after a single season of heavy use to know the truth. If you’re just drying a handful of herbs once a month, a basic countertop model is fine. But if you actually plan on preserving seasonal produce or making jerky, buy the stainless steel. It’s easier to clean, won’t leach chemicals into your food, and—most importantly—it’s built to last a lifetime.
How much electricity am I really going to see on my utility bill if I run this for a full weekend?
Look, I get it. You don’t want a “surprise” on your monthly statement. If you run a standard dehydrator for a full 48-hour weekend, you’re likely looking at roughly 2 to 4 kilowatt-hours. At average US rates, that’s pennies—probably less than fifty cents. It’s a minor cost compared to the money you’ll save by not tossing out wilted produce. Just make sure yours isn’t an ancient, inefficient model.
What’s the best way to clean and store the trays so they don't end up smelling like old herbs for the next six months?
Don’t just rinse them and call it a day. After a heavy session with garlic or rosemary, give those trays a scrub with warm water and a dash of mild dish soap. If the scent is really clinging, a quick soak in a diluted vinegar solution will strip that lingering aroma right off. Once they’re bone-dry, stack them in a sealed container or a dedicated bin. Never store them loose in a cabinet where they’ll just soak up whatever else is nearby.
