I still remember the chaos of a Friday night service in my old catering days—the frantic pace, the steam, and the absolute disaster of a prep station where someone had dumped a bin of mismatched, flimsy plastic gadgets. I watched a junior cook struggle for ten minutes with a dull, cheap tool, trying to navigate a mountain of root vegetables because they thought having a massive peeler variety was the key to efficiency. It wasn’t. In fact, all that clutter just got in the way. Most people think they need a specialized gadget for every single vegetable in their crisper drawer, but that’s just a fast track to a cluttered junk drawer and wasted money.
I’m not here to sell you on the latest gadget-of-the-month or convince you that you need a different blade for every skin thickness. My goal is to help you cut through the marketing noise and identify the only three tools that actually matter for a functional kitchen. I’m going to show you how to build a toolkit based on durability and performance, not trends. We’re going to find the heavy-duty, stainless steel essentials that will last you a lifetime and keep your prep work moving smoothly.
Table of Contents
The Y Shaped Peeler vs Straight Peeler Debate
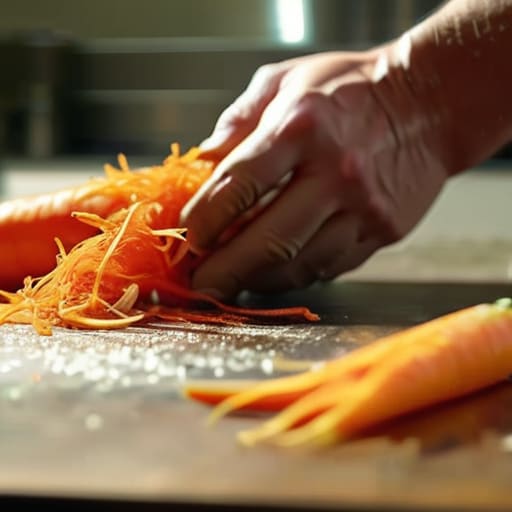
I’ve seen it a thousand times in commercial kitchens: a cook reaches for a tool, and if it isn’t the right shape for the job, the whole rhythm of the prep station falls apart. When it comes to the y-shaped peeler vs straight peeler debate, there is no universal winner, only the right tool for the specific task at hand. The Y-peeler is my go-to for high-volume work. Because of that perpendicular design, you can use your whole arm to pull the blade, which is much easier on the wrist when you’re tackling a mountain of carrots or potatoes. It’s built for speed and efficiency.
On the other hand, the straight peeler is a different beast entirely. It offers much more control and precision, which is why you’ll see it used in more delicate professional chef peeling techniques. If you are working on something small or oddly shaped—think ginger or even using a citrus zester and peeler tool for garnishes—the straight model allows you to maneuver around curves without gouging the flesh. My advice? Don’t get caught in a one-or-the-other mindset. Buy one of each, but make sure they are heavy-duty stainless steel so they don’t end up in a landfill by next year.
Stainless Steel Peeler Durability You Can Trust
When I was managing commercial kitchens, I saw more money wasted on cheap, colorful plastic peelers than I care to admit. They look fine on the shelf, but after three months of heavy use, the blades go dull or the handles snap. If you want to invest in the best kitchen gadgets for vegetable prep, you need to look at the weight and the construction. A solid stainless steel handle isn’t just about aesthetics; it provides the balance you need for control. When you’re working through a five-pound bag of carrots, you don’t want a tool that flexes or feels flimsy in your hand.
I always tell my clients to prioritize stainless steel peeler durability over flashy features. You don’t need a dozen different specialized tools cluttering your drawer. A high-quality, all-metal peeler can handle everything from delicate skinning to heavy-duty prep without breaking a sweat. Skip the gadgets that promise to do everything and instead find one piece of hardware that is built to be passed down to the next generation. If it feels light and hollow, put it back on the shelf.
My Rules for Building a Peeler Drawer That Actually Works
- Stop buying sets. Most of those “complete kitchen tool kits” include five different peelers that all do the exact same thing. You don’t need a collection; you need one reliable Y-peeler for your daily veggies and one sharp straight peeler for more delicate work.
- Look for a built-in swivel blade. If you’re looking at a peeler and the blade doesn’t feel like it can handle a slight angle change, put it back. A good peeler needs to adjust to the curve of a potato or a carrot without you having to fight it.
- Prioritize weight and grip. I’ve seen too many people buy those lightweight, all-plastic models because they look “modern.” In a busy kitchen, those slip right out of your hand when they’re damp. Go for something with a bit of heft and a non-slip handle.
- Check the blade width. If you’re doing a lot of prep work—say, prepping large batches of potatoes for a dinner party—a wider blade is your best friend. It covers more surface area in fewer strokes, which saves you time and keeps your hands from getting tired.
- Invest in a specialized julienne peeler only if you actually use it. Those serrated blades are great for making quick garnishes or salads, but they’re useless for standard peeling. Don’t let a “fancy” tool take up space in your drawer unless it’s part of your weekly routine.
The Bottom Line on Peeler Longevity
Stop buying cheap, plastic-handled peelers that snap or lose their edge after three months; invest in a heavy-duty stainless steel model that will last you a decade.
Choose your shape based on your actual workflow—grab a Y-peeler for speed and efficiency with large vegetables, or a straight peeler if you need more precision for small, awkward tasks.
Focus on ergonomics and build quality over trendy gadgets; a tool is only as good as how it feels in your hand when you’re prepping a week’s worth of vegetables.
Less Is More in the Utility Drawer
I’ve seen enough commercial kitchens to know that a drawer full of specialty peelers is just a graveyard for wasted money; you don’t need a different tool for every vegetable, you just need one reliable, heavy-duty peeler that doesn’t skip when you’re working through a bag of potatoes.
Rosalind Hayter
Don't Overcomplicate Your Prep
At the end of the day, you don’t need a specialized gadget for every single vegetable in your crisper drawer. Whether you decide that the ergonomic grip of a Y-peeler suits your hand better or you prefer the classic control of a straight blade, the most important factor is the build quality. Stick to stainless steel, avoid the flimsy plastic handles that snap after three months of heavy use, and remember that a single, reliable tool is worth more than a dozen mediocre ones. Once you have a solid piece in your hand, you can stop worrying about the gear and start focusing on the food.
I’ve seen too many home cooks get overwhelmed by the sheer volume of kitchenware available on the market today. My advice is simple: build your kitchen around utility, not trends. A well-chosen peeler isn’t just a tool; it’s a small part of a workflow that should feel effortless and intuitive. When you invest in pieces that are meant to last, you aren’t just saving money in the long run—you are respecting your craft. Grab a good tool, find your rhythm, and get to work.
Frequently Asked Questions
Should I invest in a specialized peeler for things like ginger or small herbs, or is one good all-purpose tool enough?
Look, I’ve seen too many cluttered junk drawers filled with “specialty” gadgets that end up in the landfill within a year. For 95% of what you’ll do, one high-quality, heavy-duty all-purpose peeler is plenty. If you’re really struggling with knobby ginger, a simple spoon works just as well—it’s what we used in commercial kitchens for decades. Don’t buy more clutter; just make sure the one tool you own is worth the weight.
Is there a real difference in performance between a swivel blade and a fixed blade when I'm prepping large batches?
When you’re prepping a massive pile of carrots or potatoes, the swivel blade is your best friend. It adapts to the curves of the vegetable, which saves your wrist a lot of unnecessary strain during long stretches of work. A fixed blade feels stable, sure, but it’s much more rigid. If you’re moving through large batches, that little bit of flexibility in a swivel blade keeps you fast and, more importantly, keeps you from getting fatigued.
How can I tell if a peeler's blade is high-quality stainless steel versus the cheap stuff that dulls after three uses?
Look, you can’t tell just by glancing at the shine, because even the cheap stuff looks bright in the store. Here’s the real test: weight and tension. A quality blade has a bit of heft to it and won’t flex like a piece of tin when you apply pressure. If it feels light and hollow, put it back. Also, check the edge—it should feel smooth, not serrated or jagged, even before you first use it.
